![]()
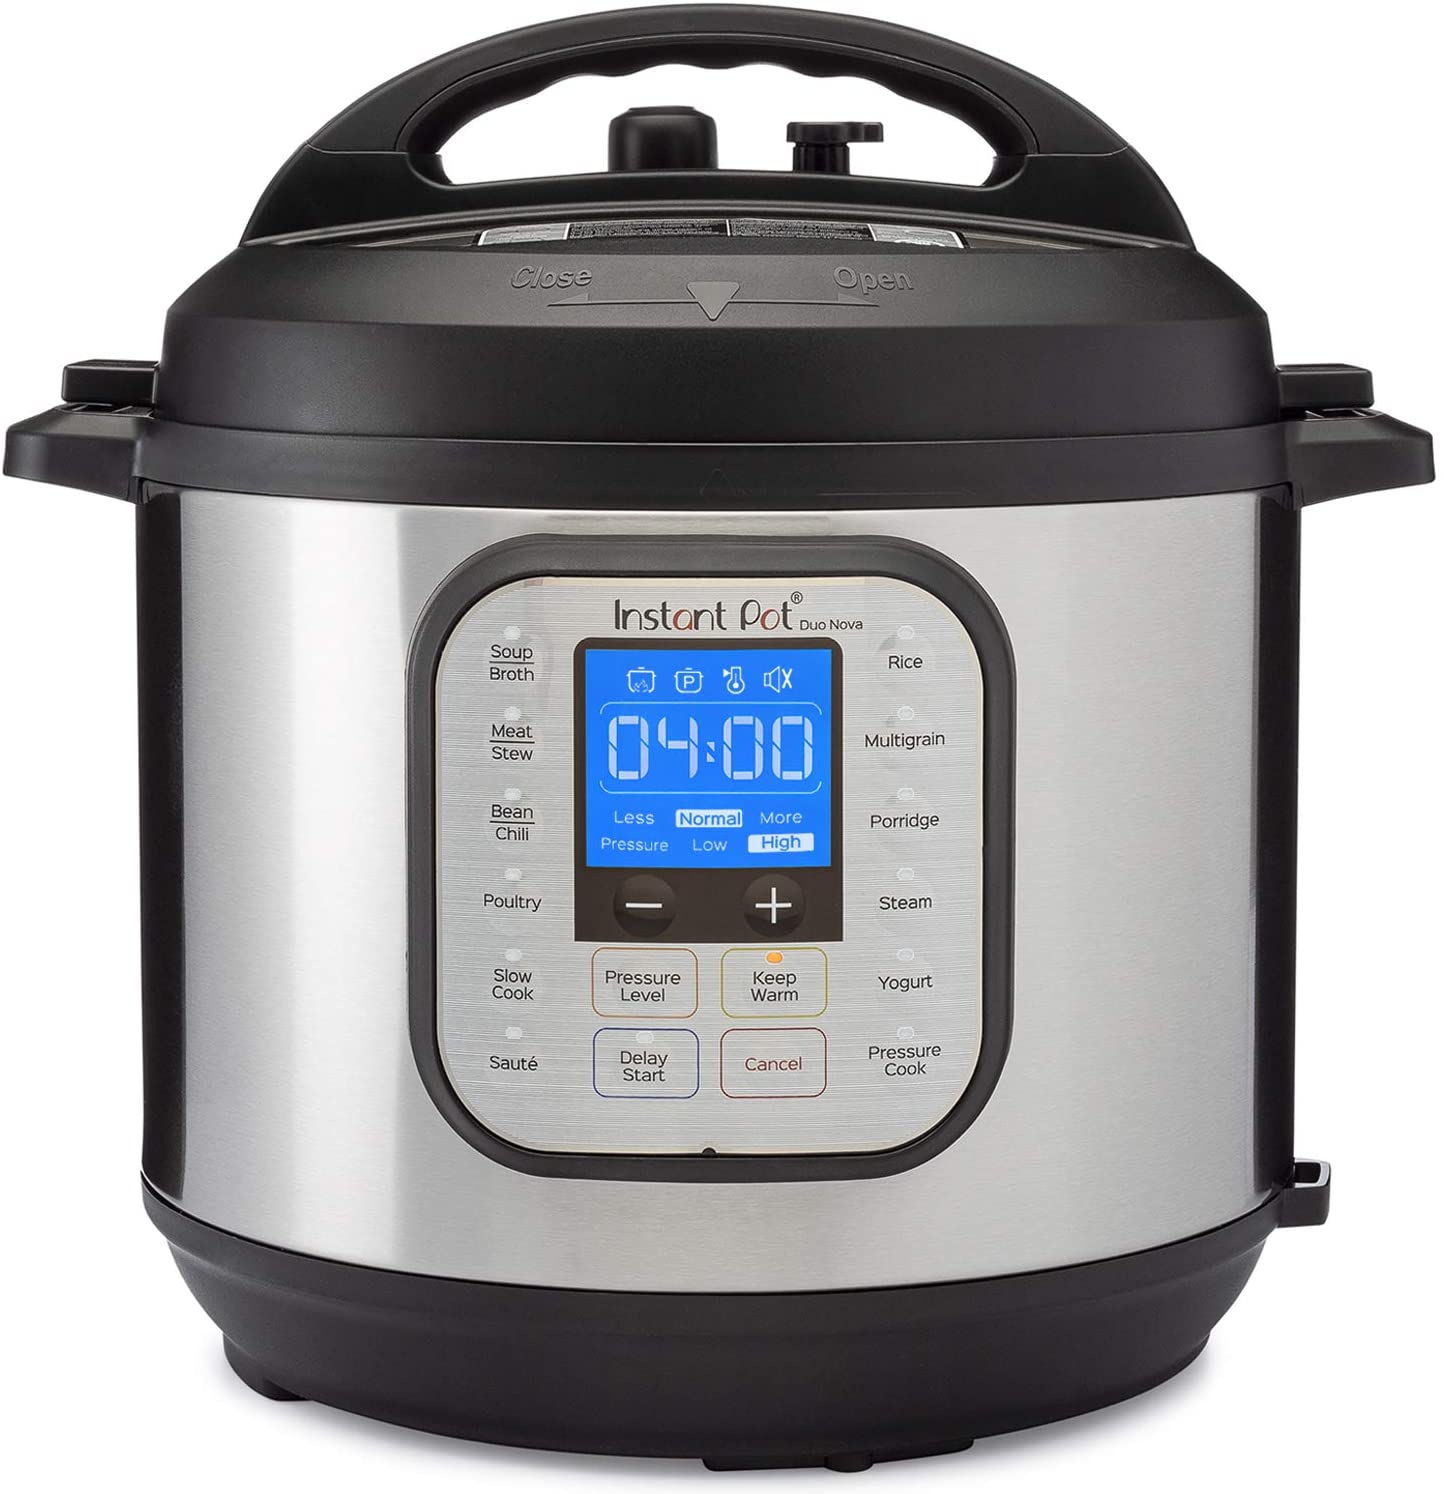
DUOTM NOVA Multi-Use Pressure Cooker

 https://instantpot.com/portfolio_entries/duo-nova/Getting Started GuideFull Manual, How-to Videos, and Recipes available online at instantpot.comRegister your product today at instantpot.com/support/register

Welcome to the world of Instant cooking.
Hello! Thank you for welcoming us into your kitchen.Having families ourselves, we developed the Instant Pot® DuoTM Nova to allow busy families and professionals alike to cook healthy, delicious meals more easily and in less time.We have partnered with chefs, authors, and bloggers to compile a collection of recipes that we hope you enjoy!
 Robert J. WangFounder & Chief Innovation Officer
Download the Instant Pot App
- 1000+ Recipes
- New User Tips
- Getting Started Videos

Initial Setup
- Remove all packaging material from in and around the cooker, and verify that all parts are accounted for.
- Place the cooker on a stable, level surface, away from external heat sources.
- Read all Important Safeguards in the included Safety, Maintenance & Warranty booklet before use. Failure to do so may result in property damage and/or personal injury.
- Follow Care & Cleaning instructions in the included Safety, Maintenance & Warranty booklet to wash the cooker before first use.
- Do not remove safety warning stickers from the lid, serial number from the bottom, or rating label from the back of cooker base
![]() Never use the cooker on a stovetop. Do not place the appliance on or in close proximity to a hot gas or electric burner, or a heated oven. Heat from an external source will damage the appliance.
Never use the cooker on a stovetop. Do not place the appliance on or in close proximity to a hot gas or electric burner, or a heated oven. Heat from an external source will damage the appliance.
Cooker Parts Overview
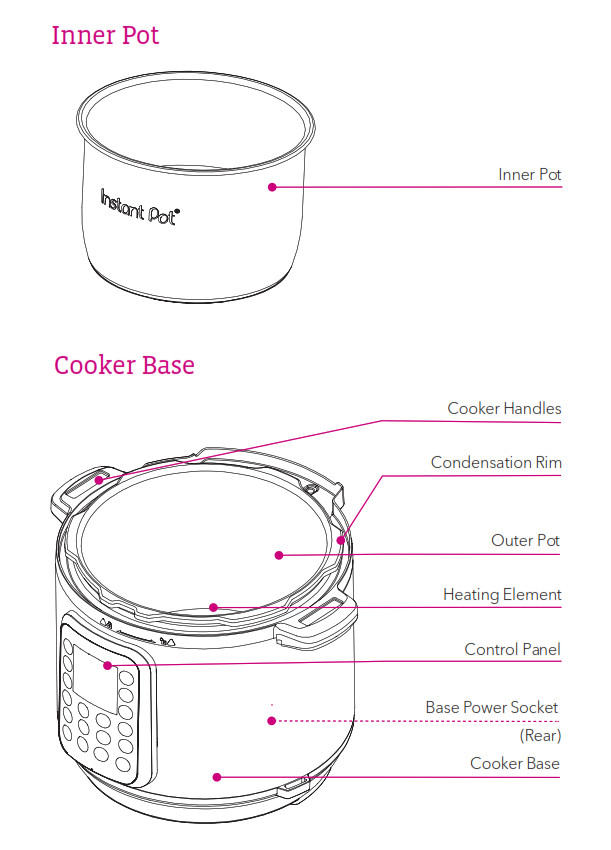
Images are for reference only. Refer to actual product.
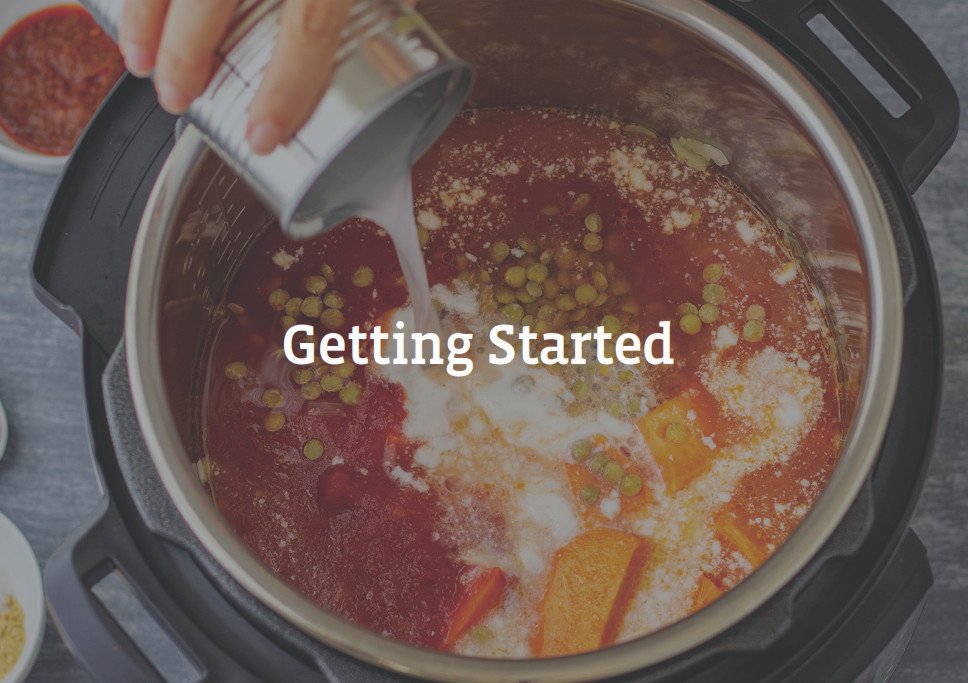
Getting Started
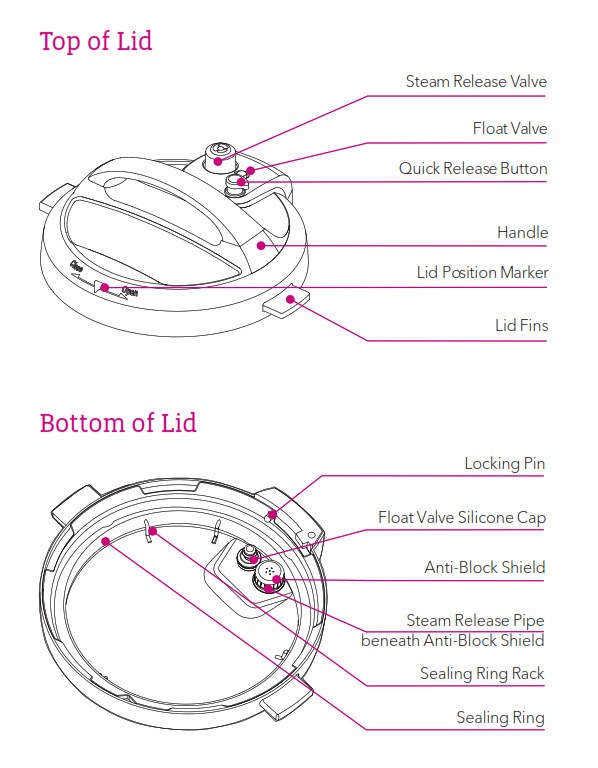
Open & Close Lid
When cooker is plugged in, it will play a jingle when lid is opened and closed.

Open: Grip handle and turn lid counter-clockwise until ![]() on lid is aligned with
on lid is aligned with ![]()
![]() indicator on the rim of cooker base. Lift lid up and off of cooker base.Note: Always check lid for damage prior to cooking.
indicator on the rim of cooker base. Lift lid up and off of cooker base.Note: Always check lid for damage prior to cooking.
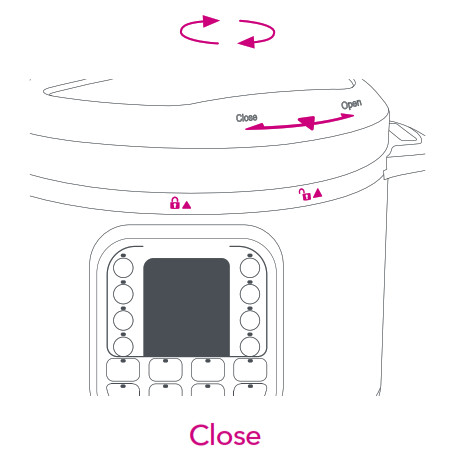
Close: Grip handles and align the ![]() on lid with
on lid with ![]()
![]() indicator on rim of cooker base. Lower lid into track then turn lid clockwise until
indicator on rim of cooker base. Lower lid into track then turn lid clockwise until ![]() on the lid lines up with
on the lid lines up with![]()
![]() indicator on base.
indicator on base.
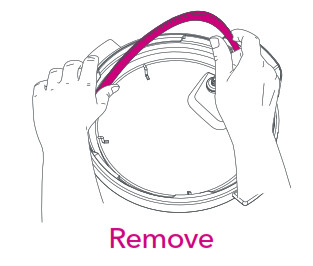
Check Sealing Ring & Sealing Ring Rack
Remove: Pull sealing ring out from behind sealing ring rack.
Inspect sealing ring rack. It should be centered in the lid and an even height all the way around.
Sealing ring must be installed before use and cleaned after each use.
Install: Place sealing ring over sealing ring rack and press into place. Ensure entire sealing ring is snug behind sealing ring rack.

After closing the lid, the sealing ring creates an airtight seal between lid and cooker base. The sealing ring is an integral part of product safety.
Note: An extra sealing ring is included with your cooker. Use one for sweet dishes and one for savory.
Only one sealing ring should be installed when using your cooker.Replace your sealing ring every 12-18 months or when deformation or damage is noticed.

![]()
Always check for cuts or deformations in the sealing ring prior to cooking. Only use authorized Instant Pot CAUTION® sealing rings. Failure to follow these instructions may cause food to discharge, which may lead to personal injury or property damage
![]()
Sealing rings may stretch over time. Do not use a stretched or damaged sealing ring. If puckering occurs, replace sealing ring.
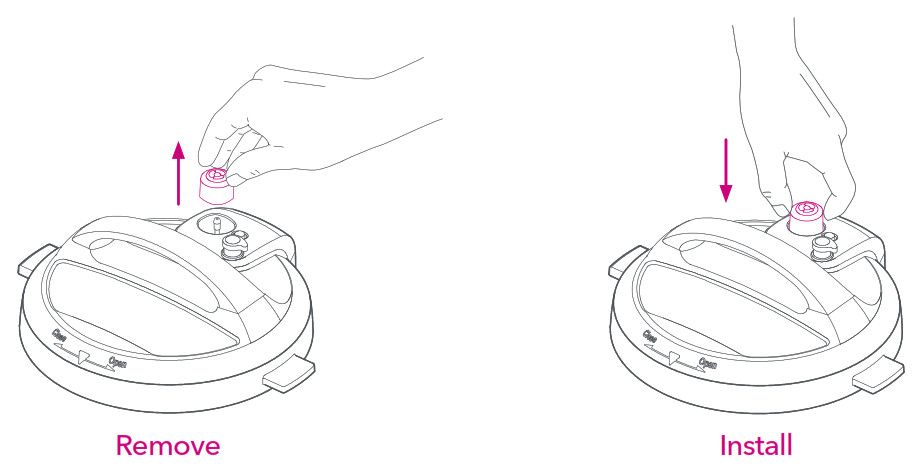
Remove & Install Float Valve
The float valve has 2 positions. It pops up to indicate when the cooker is pressurized, and lowers into the lid when the cooker is depressurized.
 Remove: Place one finger on the flat top of float valve. Turn lid over. Detach silicone cap from bottom side of float valve. Remove float valve from top of lid. Do not discard float valve or silicone cap.
 The float valve and silicone cap must be installed before use to seal in pressurized steam. Clean after each use.
Install: Drop float valve into float valve hole on top of lid. Place one finger on the flat top of the float valve. Turn lid over. Attach silicone cap to the bottom of the float valve.
![]()
While float valve is up, the contents of the cooker are pressurized. Do not attempt to remove lid. Refer to the “Venting Methods” section in this Guide for information on releasing pressure.
Remove & Install Anti-Block Shield
Remove: Grip lid and press firmly against side of anti-block shield (pressing towards side of lid and up) until it pops off the prongs underneath.
Anti-block shield must be installed before use and cleaned frequently. installed before use and cleaned after each use.
Install: Place anti-block shield over prongs and press down until it snaps into position.
Anti-block shield prevents food particles from coming up through the steam release pipe, assisting with pressure regulation.
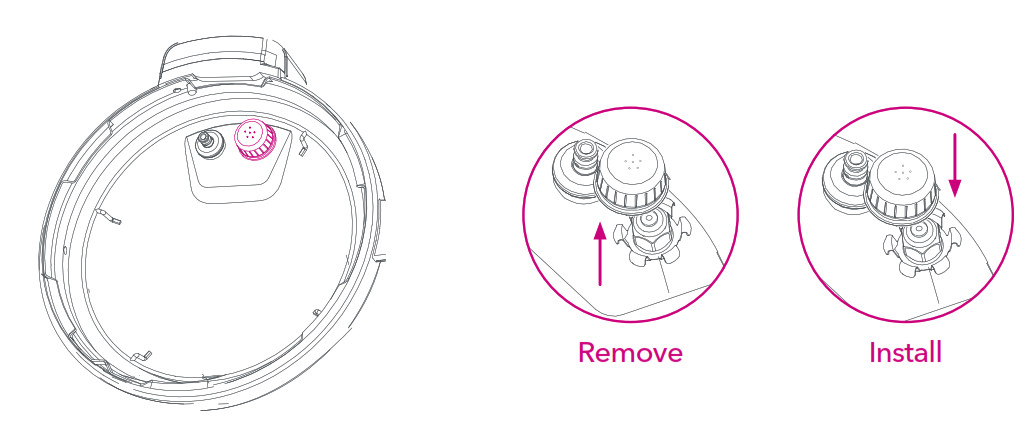
Remove & Install Steam Release Assembly
Remove: Pull steam release valve up and off steam release pipe.
Steam release valve must be installed before use, and cleaned frequently. installed before use and cleaned after each use.
Install: Place steam release valve on steam release pipe and press down.Fits loosely when installed properly, but will remain in place when the lid is turned over.
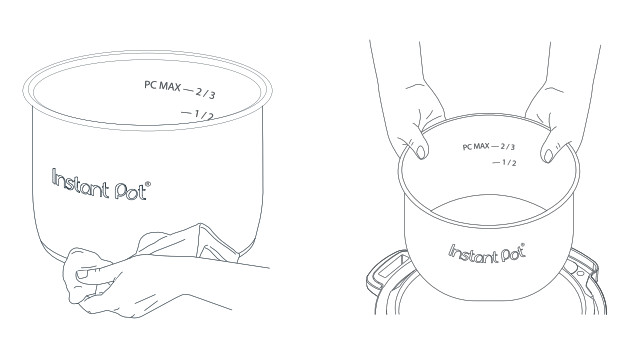
Remove & Clean Inner Pot
Remove inner pot from cooker base and wash with hot water and dish soap before first use. Wipe outer surfaces of inner pot and heating element to ensure they are dry and free of food debris. Failure to do so may damage the cooker.
Place inner pot into cooker base before cooking. Food must be placed only in the inner pot, not cooker base.
The inner pot is an integral part of product safety. Always use an authorized Instant Pot® inner pot made for this model when cooking. Failure to do so may cause personal injury or property damage.
![]()
To avoid risk of personal injury and/or property damage, do not pour food or liquid into cooker base.
![]()
Do not fill the inner pot higher than the PC MAX — 2/3 line (Pressure Cooking Maximum), as indicated on the inner pot.
Exercise extreme caution when cooking and venting food such as applesauce, cranberries, pearl barley, oatmeal, split peas, noodles, etc., as these foods may foam, froth, or spatter, and may clog the steam release pipe and/or steam release valve. Do not fill the inner pot higher than the — 1/2 line when cooking these foods.
*Note: Always check inner pot for dents or deformations prior to cooking.
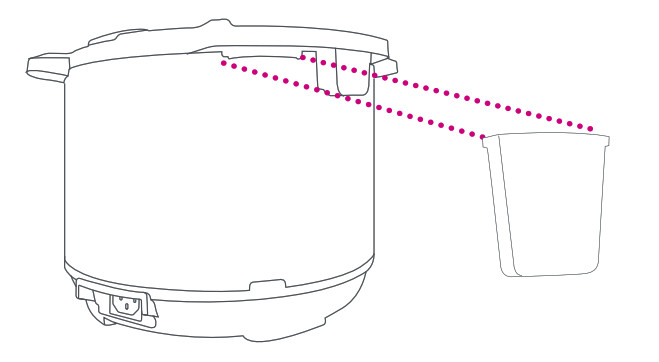
Install Condensation Collector
Install: On back of cooker base, align grooves on condensation collector over tabs and push condensation collector into place.
The condensation collector accumulates excess water and should be installed before cooking. Clean after use.
Remove: Pull condensation collector away from cooker base. Do not pull down on condensation collector.

Venting Methods
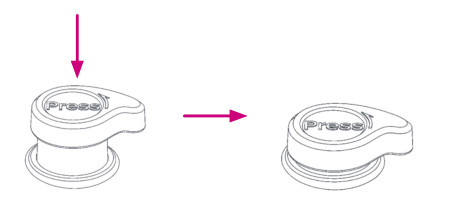
When closing the lid, the quick release button will automatically reset to the popped up “Seal” position.
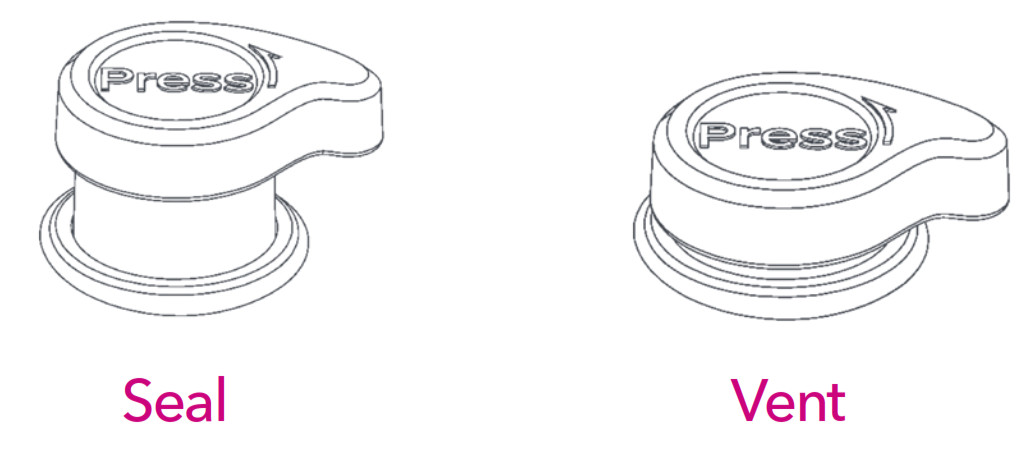
Natural Release (NR)Leave the steam release in the “Seal” position (up). The cooker dissipates heat so pressure releases naturally over time.This method must be used when cooking food such as soups, stews, or chilis, as well as food that expands, such as beans and grains.Note: Depressurization time will vary based upon the volume of food and liquid. May take 10-40 minutes, or longer.
Quick Release (QR)Vent: Press the quick-release button down until it clicks.When depressed, a continuous stream of steam will be released through the steam release valve until the float valve drops into the lid.
Note: It will be loud!
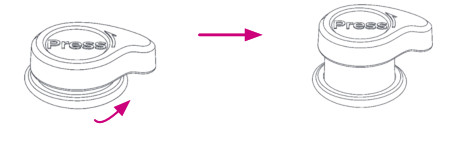
If spatter occurs, flick the quick-release button to reset it to the “Seal” position, and try again after a few minutes. If spatter continues, use NR to vent the remaining pressure.Seal: Flick the quick-release button to reset it to the popped up “Seal” position.
![]() Float valve will drop when cooker has depressurized.Do not attempt to open the lid while the float valve is still popped up.
Float valve will drop when cooker has depressurized.Do not attempt to open the lid while the float valve is still popped up.

Initial Test Run (Water Test)
- Add 3 cups (24 oz / 750 mL) water to inner pot.
- Insert inner pot into cooker base.
- 3 & 6 Quart: Secure power cord to base connection socket.Ensure the connection is tight.Connect the power cord to a 120V power source.The display indicates “OFF”.
- Align
 on lid with on cooker base.Lower lid into track, then turn lid clockwise until jingle sounds.Steam release automatically resets to “Seal” position when thelid is closed.
 - Select Smart Program: Pressure Cook.
- Use + / – keys to adjust cook time to “00:05” minutes.Note: The Instant Pot will save any customization made to cook time.After 10 seconds, display indicates “On” and cooker begins Pre-heating.
- Float valve rises when cooker has pressurized.Once pressurized, Cooking begins and display changes from “On” to cook time countdown.
- When the Smart Program completes, cooker begins Keep Warm or display indicates “End”.
- Press quick release button down until it clicks into “Vent” position.Pressurized steam will release through top of steam release valve.Float valve will drop when pressure has been fully released.
- To open, turn the lid counter-clockwise until a jingle sounds.
- Discard water and dry inner pot.
- Start cooking!
For details on Smart Programs and operation instructions, view the full manual at instantpot.com

More Controls
Cancel – Press to stop a Smart Program at any time. Cooker returns to Standby and displays “OFF”.
Delay Start – Postpone cooking up to 24 hours. Select a Smart Program and if desired, adjust the cook time, then press Delay Start to turn the setting on. Use the + / – keys to adjust the number of hours before cooking will begin.
Keep Warm – Setting is on by by default on all Smart Programs except Sauté and Yogurt.. Once Smart Program is selected, press Keep Warm to turn the setting off.
Sound On/Off – When in Standby, press and hold “+” key until display indicates “S On”. When in Standby, press and hold “–” key until display indicates “SOFF”.Note: Error code alerts cannot be silenced.
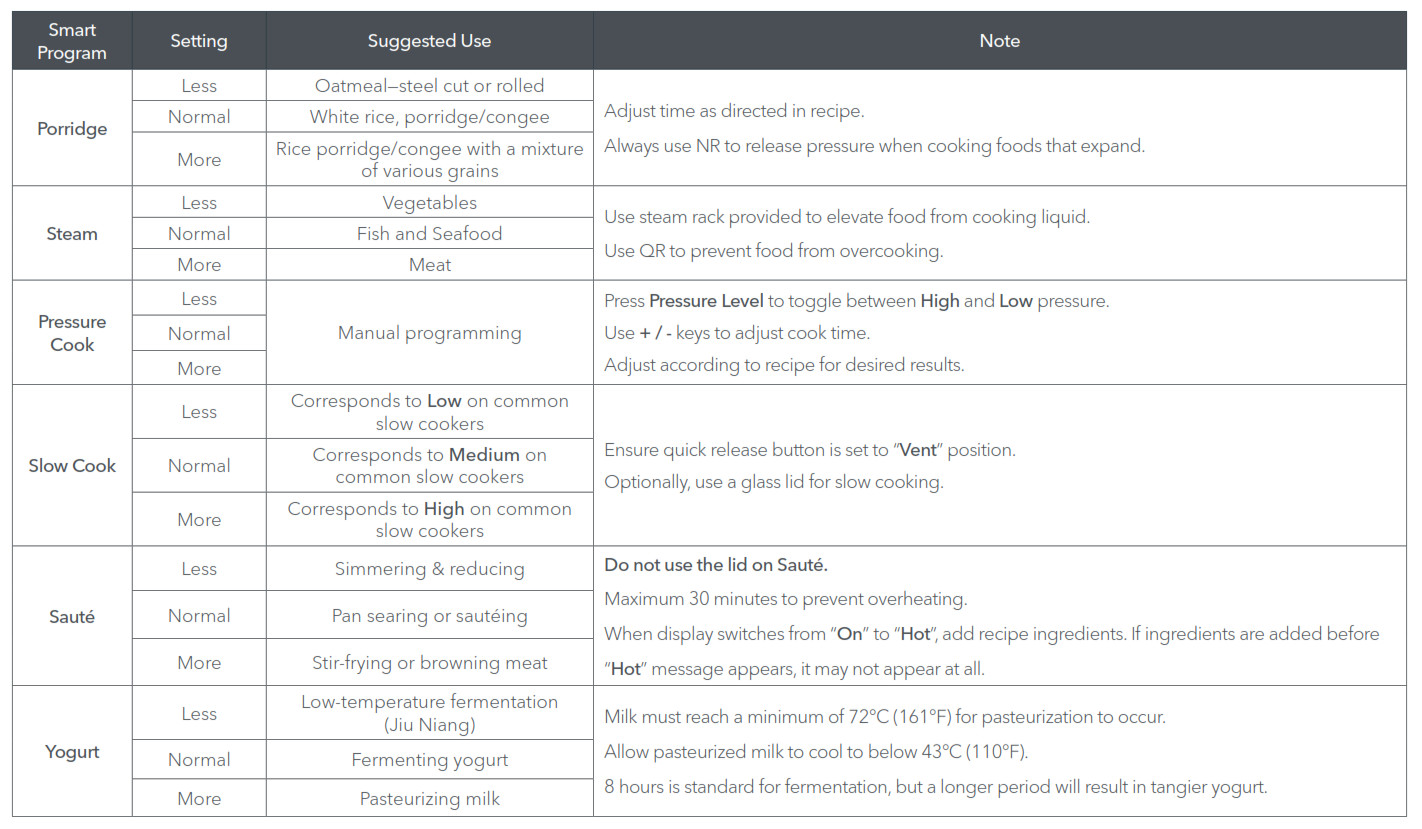
Smart Programs

*Not available on 3 Quart size. Use Pressure Cook instead.

![]()
Register your product today at: instantpot.com/support/register
Instant Brands Inc.11 – 300 Earl Grey Dr., Suite 383Ottawa, OntarioK2T 1C1Canada
1-800-828-7280instantpot.com/#Chatinstantpot.comstore.instantpot.com
DUO NOVA Multi-Use Pressure Cooker User Manual – DUO NOVA Multi-Use Pressure Cooker User Manual –
For See Instantpot Maker Recipe: https://appliance.recipes/category/instant-pot
[xyz-ips snippet=”download-snippet”]