![]()
Intel® RAID Controller RS25DB080Quick Start User’s Guide
This guide contains step-by-step instructions for installing the Intel® RAID Controller RS25DB080 and information on using the BIOS setup utility to configure a single logical drive array and install the driver into the operating system.
For more advanced RAID configurations, or to install with other operating systems, please refer to the Hardware User’s Guide.These guides and other supporting documents (including a list of supported server boards) are also located on the web at: http://support.intel.com/support/motherboards/server.
If you are not familiar with ESD (Electrostatic Discharge) procedures used during system integration, see your Hardware Guide for complete ESD procedures. For more details on Intel® RAID controllers, see:www.intel.com/go/serverbuilder.
Read all cautions and warnings first before starting your RAID Controller integration
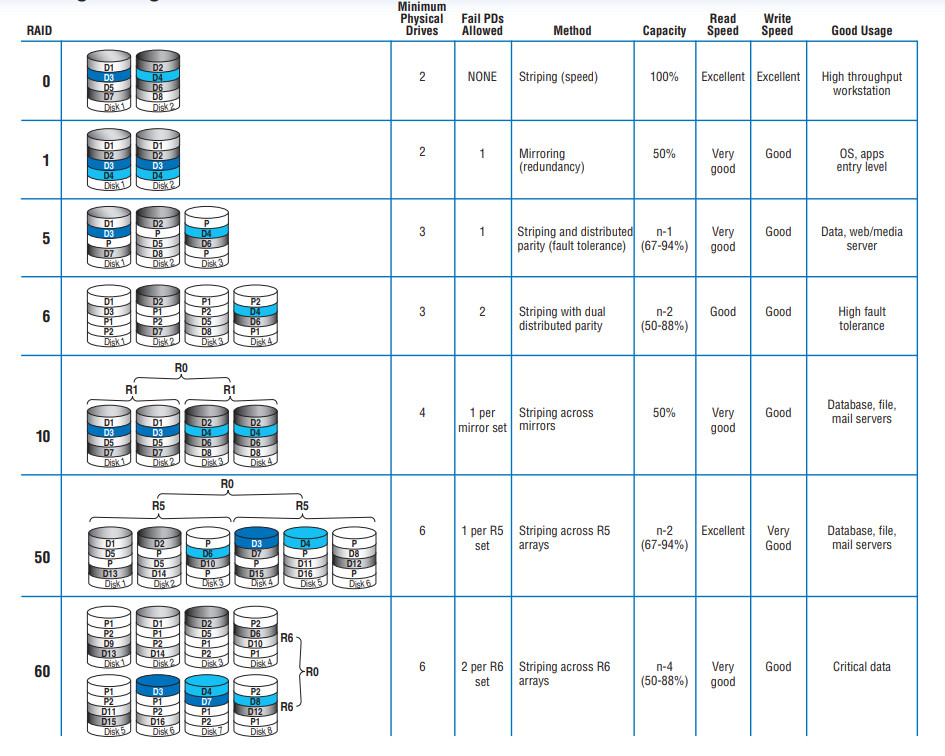
Choosing the Right RAID Level
![]() Read all caution and safety statements in this document before performing any of the instructions. Also see the Intel®Server Board and Server Chassis Safety Information document at:Warning
Read all caution and safety statements in this document before performing any of the instructions. Also see the Intel®Server Board and Server Chassis Safety Information document at:Warning
http://support.intel.com/support/motherboards/server/sb/cs-010770.htm for complete safety information.Warning![]() Installation and service of this product should only beperformed by qualified service personnel to avoid risk of injury from electrical shock or energy hazardCaution
Installation and service of this product should only beperformed by qualified service personnel to avoid risk of injury from electrical shock or energy hazardCaution![]() Observe normal ESD[Electrostatic Discharge]procedures during system integration to avoid possible damage to server board and/or other components.
Observe normal ESD[Electrostatic Discharge]procedures during system integration to avoid possible damage to server board and/or other components.
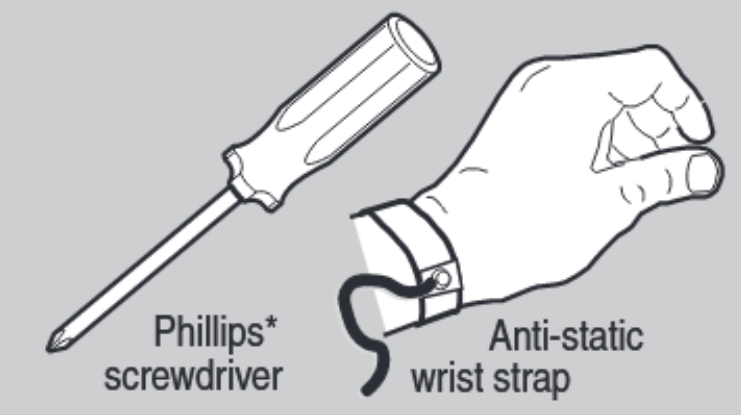
Tools Required
Intel is a registered trademark of Intel Corporation or its subsidiaries in the United States and other countries.*Other names and brands may be claimed as the property of others. Copyright © 2011, Intel Corporation. All rights reserved.
Intel is a registered trademark of Intel Corporation or its subsidiaries in the United States and other countries.*Other names and brands may be claimed as the property of others. Copyright © 2011, Intel Corporation. All rights reserved.
What you will need to begin
- SAS 2.0 or SATA III hard disk drives (backward compatible to support SAS 1.0 or SATA II hard disk drives)
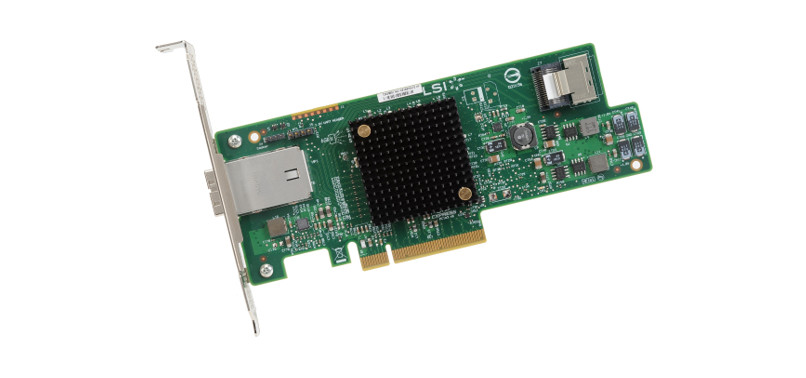
- Intel® RAID Controller RS25DB080
- Server board with a x8 or x16 PCI Express* slot (this controller is designed to meet the x8 PCI Express* Generation 2 specification and is backward compatible with generation 1 slots)
- Intel® RAID Controller RS25DB080 Resource CD
- Operating system installation media: Microsoft Windows Server 2003*, Microsoft Windows Server 2008*, Microsoft Windows 7*, Microsoft Windows Vista*, Red Hat* Enterprise Linux, or SUSE* Linux Enterprise Server, VMware* ESX Server 4, and Citrix* Xen.
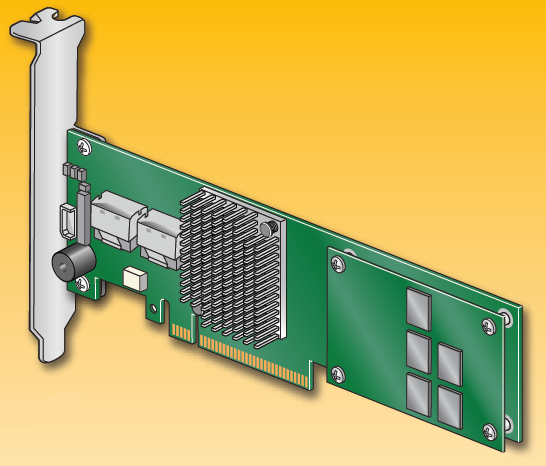
1 Check the Bracket Height
A Determine whether the full-height bracket will fit in the server’s PCI back plate.B Your RAID controller ships with the full-height bracket. If the low-profile bracket is required, unscrew the two fasteners holding the green board to the silver bracket.
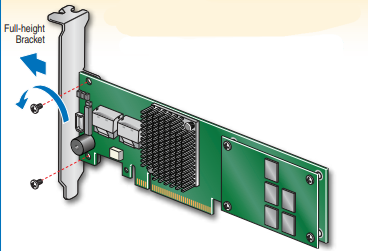
C Remove the bracket.D Line up the low-profile bracket with the board, making sure the two holes align.
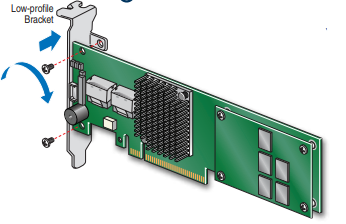
E Replace and tighten the two screws.
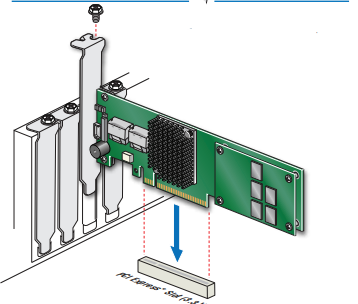
2 Install the RAID Controller
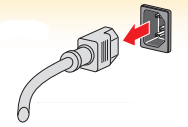
A Power down the system and disconnect the power cord.B Remove the system cover and any other pieces to access the PCI Express* slot.
C Firmly press the RAID Controller into an available x8 or x16 PCI Express* Slot.D Secure the RAID Controller bracket to the system back panel.
Building Value with Intel
Server Products, Programs and Support
Get the high-value server solutions you need by taking advantage of the outstanding value Intel provides to system integrators:
- High-quality server building blocks
- Extensive breadth of server building blocks
- Solutions and tools to enable e-Business
- Worldwide 24×7 technical support (AT&T Country Code + 866-655-6565)1
- World-class service, including a three-year limited warranty and Advanced Warranty Replacement1
For more information on Intel’s added-value server offerings, visit the Intel® ServerBuilder website at: www.intel.com/go/serverbuilder
Intel® ServerBuilder is your one-stop shop for information about all of Intel’s Server Building Blocks such as:
- Product information, including product briefs and technical product specifications
- Sales tools, such as videos and presentations
- Training information, such as the Intel® Online Learning Center
- Support Information and much more
1Available only to Intel® Channel Program Members, part of Intel® e-Business Network.
3 Connect the RAID Controller
A Connect the wide end of the provided cable to the left silver connector (ports 0-3).B Push the cable into the silver connector until it makes a slight click.C If using more than four drives, connect the wide end of the second provided cable to the right silver connector (ports 4-7).D Connect the other ends of the cables to SATA drives or to the ports on a SATA or SAS backplane.
Notes: Both non-expander backplanes (one cable per drive) and expander backplanes (one or two total cables) are supported. Drive power cables (not shown) are required.
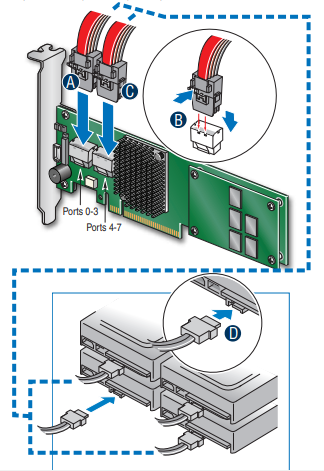
Rear view of four SATA drives connected to ports 0-3 on the Intel® RAID Controller RS25DB080
Go to Step 4 on Side 2
Audible Alarm Information
For information about the audible alarm and how to silence or disable it, see the reverse side of this document.
Intel® RAID Controller RS25DB080 Reference Diagram
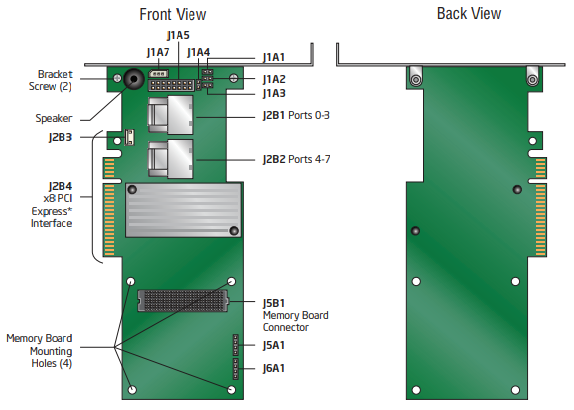
For more information on the jumpers referenced in this diagram, refer to user guide located on the web at:http://support.intel.com/support/motherboards/server.
References
[xyz-ips snippet=”download-snippet”]