Intelligent Dog Training Collar T721

Reinforce Learning Behaviors
If your dog knows the command but responds inconsistently or acts slower than your requirement, a training collar can sharpen his skill.
For example, you have taught your dog to come when called, but over time he responds slower. You can communicate with him via the remote trainer, so that he immediately responds to your call.
- Set the collar to initial stimulation level and test it.
- Fit the collar on your dog’s neck along with his regular collar.
- Let him roam around the training area. Then give the command and simultaneously press the stimulation button.
- The instant your dog moves toward you, stop stimulation and praise him.
- If he stops before he reaches you or turns away repeat the command and continue the stimulation. Again, stop at the instant he runs to you and reward him by praising him or feeding him a treat. Repeat this for 3 or 4 times.
Tips
- If he doesn’t get it for the first few times, don’t give up and do not increase the stimulation. Try to work on this a couple of times per day.
- During the training period never give the command if you are not able to enforce it. Your dog has to make the mental connection between the vibration/ beep to his behavior (may take a week or more for some dogs).
Altogether, both methods of stopping unwanted behavior and reinforcing learning behaviors can be applied to nearly every training scenario.
Training collars are used to train the dogs and not for punishment. Use properly and with care and the collar can be a safe and effective tool to train, build communication and strengthen your bond with your best friend.
Main Features
- Intelligent 2 in 1 Remote Dog Training Collar & Automatic Bark Control Collar, One-Click Switching, convenient operation.
- Maximum remote range up to 1100 yards in the open area without any interference
- With power button on remote, anti-misoperation setting.
- 4 training modes: Tone only/Vibration only/Beep & Vibration together/Light; 1-100 Adjustable Intensity Levels for Vibration.
- IPX6 Waterproof Receiver Collar and IPX5 Waterproof Transmitter.
- Receiver collar with 650mAh ultra-large capacity lithium battery.
- Meet customer’s personalized customization needs.
- Train up to 3 dogs with one remote transmitter (separately purchase additional receiver).
- Rechargeable receiver and transmitter.
Packing List:
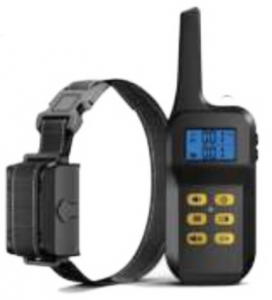
1 x Handheld Transmitter1 x Receiver1 x Nylon Collar Strap1 x Wrist Strap1 x USB Charging Cable1 x User Manual
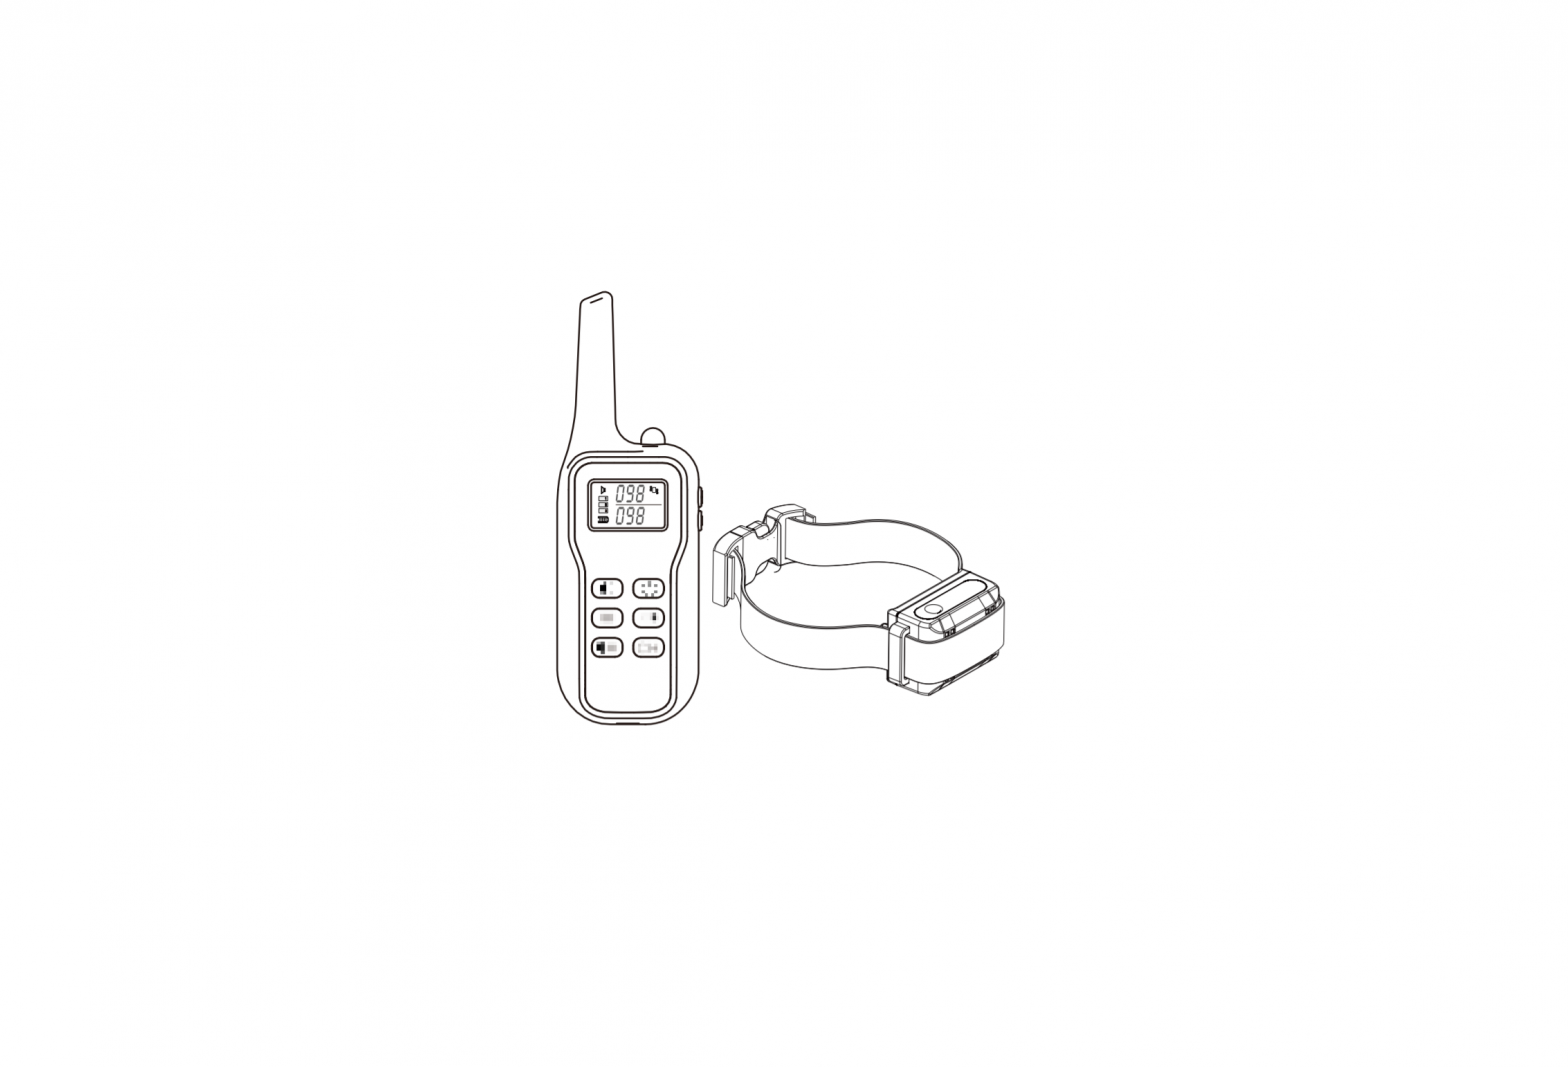
Key Definition

- Power button: 1.Press to turn the transmitter on and off; 2.Press to turn the mode of automatic anti bark collar on and off.
- Tone button: Press the tone button and the receiver beeps once.
- Tone level is not adjustable.
- Tone & Vibration Button: Press the button, the receiver beeps once and emits a vibration at same time
- Vibration Button: Press the vibration button and the receiver emits a vibration once.
- The +/- button: Adjust the levels of vibration from 1-100 .
- Channel button: Press to select a dog channel (dog1/dog2/dog3).
- LED light button.
- Press to turn receiver on and off, contact signal to the remote transmitter.
- Flashlight: It has different shows when charging and work, the following will introduce it.

How to Use
Note: Please charge before using the product!
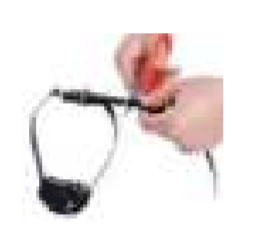
- Charge the remote transmitter:(1) Connect the charger cable to the charging port.(2) Plug the charger into a standard outlet.(3) The icon of the battery will flash during charging and the solid when charging is complete.
- To turn the Transmitter on and off(1) Press power button to turn on /off the Transmitter. The backlight on/off.(2) The backlight will stay for about 30 seconds. if no operation then backlight off.
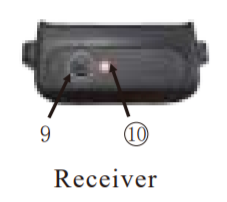
- Charge the collar receiver:(1) Open the rubber cover, connect the receiver to a charger into a standard socket.(2) The LED flash light on the receiver turns red when charging.(3) Once the receiver is fully charged, the red LED flash light will turn offautomaticallyWarm NoticeWhen the receiver is turned on, press the power button twice quickly to feedback the power:Receiver beeps 5 times, representing 100% (80-100%)Receiver beeps 4 times, representing 80% (60-80%)Receiver beeps 3 times, representing 60% (40-60%)Receiver beeps twice, representing 40% (20-40%)Receiver beeps once, representing 20% (1-20%)
- To turn the Receiver Collar onPress the power button once, the receiver will has a short “beep” sound, now the receiver is turned on. And the red LED light will flash one time every 8 seconds.
- To turn the Receiver Collar off.Press the On/Off Button once, the receiver will has a “beep” sound and no red LED light flash any more.Warm Notice1. Charge the remote transmitter and receiver at least 2 hours for the first charging.2. The collar cannot receive any signals while it is charging.3. The receiver will tum off automatically when battery energy is low after l O seconds “beep” sound.4. This product is rechargeable. In order to keep it continuous use, please charge it once a monthly if it is not used.
- How to pair the Transmitter and Receiver(1) Turn on the remote and select one of the dog channel by pressing the CH button.(2) Adjust the levels by pressing”+” or”-” button (ensure the level is above 1).(3) Turn on the receiver, the receiver will have a short “beep” sound, and the red LED light will flash one time every 8 seconds.(4) Hold power button of receiver for 2 seconds again, the indicator light will be fast flashing for 10 seconds, press the function button( /vibration/ tone, any one of them) within 10 seconds. Then when you press function button, the receiver will emit corresponding sound and vibration. Confirm the pairing is successful.(5) If you have multiple receivers, simply choose a different channel and pair as per the same instruction.
The remote and receiver(s) should now be paired. Pairing is necessary to control the receiver.You should then test each of the functions before attaching the collar to your pet.

Test the Training Collar Set (After Paired Successfully)
- Test the Vibration functionPress the vibration button (make sure the level above 01) and if pairing was successful the receiver should vibrate.
- Test the Tone functionPress the tone button and if pairing was successful the receiver should make a beeping sound
- Test the Light functionPress the light button and the white LED on the transmitter should tum on.Warm Notice1. Please keep in mind the dog channel you choose, Please do not change to another one or the remote control will be invalid.2. You need to pair remote transmitter and receiver before use. Please follow the manual when you use it at the first time.3. The remote will fall into sleep mode after 30 seconds of no interaction. You can reactivate it by pressing any button.4. When the transmitter turned off, it will not produce any functions when press its buttons except for the LED light.

Description on the modes between Remote Dog Training and Automatic Anti Bark:
I. This model could also be used as Automatic Anti Bark Collar. Turn on the remote, press and hold the remote power button for 3 seconds, if the receiver beeps twice, it means the anti bark collar function is off now. Press and hold the remote power button for 3 seconds, if the receiver beeps once, the anti bark collar function is on now.II. The automatic anti bark function has been set as the factory default setting before the shipment, therefore, there is no need to adjust individually. Could be wore on the neck of dogs directly when turn on the power.III. Following is how the automatic anti bark mode works:(1) When the dog barks, the anti-barking device will produce a 2 -second warning sound.(2) When the second bark occurs within 30 seconds, the device will produce a 3-second warning sound.(3) When the third time bark within 30 seconds, the anti-barking device will play a warning sound for 5 seconds along with a weak vibration punishment to the dog, to remind the dog of remembering not barking when hearing the warning sound.(4) This kind of training will repeat for 7 times. The 1-2 times are warning sound only, If the dog keep barking, it will trigger the 3-7 times sound + vibration mode. The strength of the vibration increases step by step, to correct the dogs behavior.IV. Automatic Protection Mode:(1) No matter how many times the barking device activates, it will be reset automatically and return to the initial standby state when the dog stops barking for 30 seconds.(2) In order to protect the dog, the indicator light will enter into the fast flashing state when the device keeps working for 7 times, and the barking device will stop working for 1 minute and enter into the initial standby state.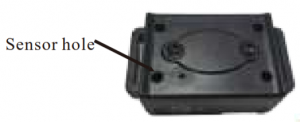
How to Wear Receiver Collar Correctly
- Correct wearing position helps healthy and effective pet training. Receiver shall be placed on bottom of your pet’s neck.
- The space between Receiver Collar and Pet’s Neck shall be maintained to a finger distance, can’t be too loose, otherwise vibration effectiveness shall be badly influenced.
- Too long Receiver Collar can be trimmed, or be handled with other methods.


OPERATION
Know the intensity of each modeKnowing the intensity of each mode will be helpful to control the stimulation.
Setting the Initial Training LevelTo set the initial training level you must first determine the lowest stimulation that will clearly get your dog’s attention by the following steps:
- Set stimulation at zero.
- Fit the collar properly on your dog’s neck and start the training.
- If he does not focus on you, begin the stimulation and progressively increase the levels until he responds to the beep/vibration. If your dog yelps or jumps, this indicates that the level is too high.
Every dog is individual and unique. Some are more sensitive than others and some learn more slowly or quickly. Be sure to test out each level on each individual dog.
Stopping Unwanted Behaviors
For this type of training, you need to set the collar at a predetermined stimulation level as outlined above.
- Let your dog roam in the area where he might misbehave, for example eating from the rubbish.
- Get yourself out of his sight or at a discreet distance and wait.
- When the dog misbehaves, press the button. This will cause your dog to associate the signal with his misbehavior. If he doesn’t respond, you can increase the level.
Tips:Timing is crucial. Catching the unwanted behavior and sending the signal at the precise moment can drastically shorten training time.
How to Train a Dog?
Notice Before Training
- Avoid ‘Collar-Wise’It is important that your dog is aware that the correction is coming from the collar.He will not misbehave when he wears the collar, but does as he pleases when the collar is off. This is what we call collar-wise.Tips:Before training let your dog wear the collar for about 5-7 days (no more than 8 hours per day) so that he can be accustomed to the weight of the collar and believe it is just another normal collar.
- Timing is crucialThe more precise the timing is, the quicker your dog will make the association and change his behavior.
- Praise your dogIt will be helpful if you praise your dog as soon as it responds to the collar. Reward is with a pat, by saying good dog or with a special treat.
- Don’t let your dog know the secretDon’t let your dog know that it is you causing the unpleasant sensation around his neck. Rather, let your dog associate the sensation with bad behavior.
Frequently Asked Questions (FAQ)
Q: How old my pet can use Pet Training systems?A: DO NOT use on puppies younger then 6 months.
Q: Once my pet is trained and has been obeying my commands, is it still necessary for my pet to continue to wear the Receiver Collar?A: You may need to reinforce your pet’s memory with the Receiver Collar from time to time.
Q: Can I use Pet Training systems with more than one pet?A: Yes, you can simply add one or two Receiver Collars to the system to control two or three pets, because three dog channels are available with the Remote Transmitter
Q: What is the effective distance of your Pet Training systems?A: The effective distance could be as far as 1100 Yards between Remote Transmitter and Receiver Collar without obstacles in between. However in reality, a list of factors, including but not limited to signal station, magnetic field, obstacle, battery volume, other wireless devices nearby, landform, vegetative cover, etc, will influence transmission of signals from Remote Transmitter and the actual effective distance of Remote Transmitter.
Q: How will I know when to charge the !batteries of the Pet Training systems?A: For Remote Transmitter: the symbol will show up on the left down side of LCD screen. For Receiver Collar: if you hear 10 Seconds beep sound, you have to get it charged.
Q: How long can I leave Receiver Collar on my dog?A:The Receiver Collar is not designed to be worn constantly. We recommend the Collar not be worn for more than 12 hours out of every 24-hour period. In case of longer time, you are advised to examine your pet regularly.
Q: How long should I process my training session for my pet?A: Training sessions should be kept positive and short, it is better for about I 0 15 minutes long each time.
Q: What are the proper levels of Vibration for my pets?A: Try to find the best suitable levels of Vibration for your pet starting from the lowest level. Excessive levels of stimulation shall cause strong response from your pet.
Q: Any other better training methods?A: You can prepare some dog food for training incentive to achieve better training outcomes. Each time after you restrain your pet’s misbehavior, you can tell your pet what is supposed to do and what is not supposed to do. And after a number of repetitions your pet understand what you like and what you don’t like.
Q: How long will it take to get my pet trained well?A: It takes time to eliminate a misbehavior or teach an obedience command. Please be patient. Over quick training may not lead to ideal outcomes.
Q: The pet training systems does not work, or my pet does not respond after correct installation of the pet training systems, how should I solve this problem?
A:
- Make sure both Remote Transmitter and Receiver Collar have enough power to operate.
- Check to see if Receiver Collar is turned on.
- Check “CH ” button on Remote Transmitter to ensure Dog Channels are correctly configured.
- Try re-pairing Remote Transmitter and Receiver Collar.
- Take off Receiver Collar and test all of the functions work properly.
- Make sure Receiver Collar is properly worn and the collar can’t be too loose.
- Trim your pet’s fur where the screw caps (contact points) touch the neck and/or change to the longer contact points.
FCC Compliance
This device complies with part 15 of the FCC Rules. Operation is subject to the following two conditions: (1) This device may not harmful interference, and (2) this device must accept any interference received, including interference that may cause undesired operation.
Note: This equipment has been tested and found to comply with the limits for a Class B digital device, pursuant to part 15 of the FCC Rules. These limits are designed to provide reasonable protection against harmful interference in a residential installation.This equipment generates uses and can radiate radio frequency energy and, if not installed and used in accordance with the instructions, may cause harmful interference to radio communications. However, there is no guarantee that interference will not occur in a particular installation. If this equipment does cause harmful interference to radio or television reception, which can be determined by turning the equipment off and on, the user is encouraged to try to correct the interference by one or more of the following measures:-Reorient or relocate the receiving antenna.-Increase the separation between the equipment and receiver.– Connect the equipment into an outlet on a circuit different from that to which the receiver is connected.Consult the dealer or an experienced radio/TV technician for help
[xyz-ips snippet=”download-snippet”]