intempo Mini Lifestyle Action Camera
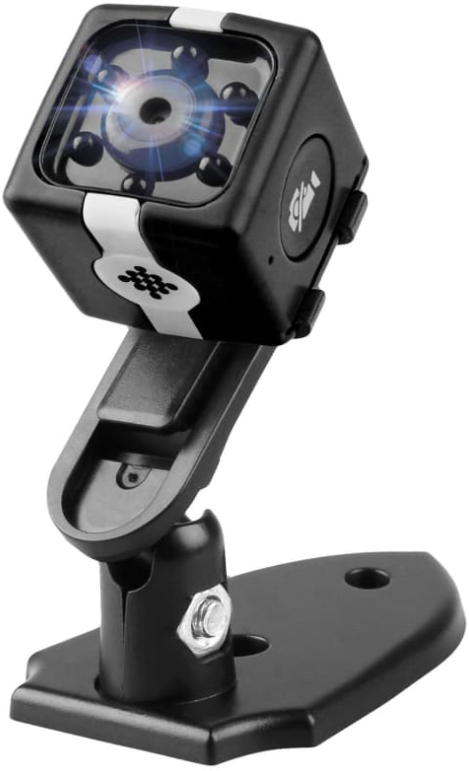
Description of Parts


- Mini Lifestyle Action Camera
- On/Off Button (ON/OFF)
- Camera
- LED Indicator Light
- Micro USB Port
- Micro SD Card Slot
- Micro USB Cable
Micro SD Card Installation
The camera can support micro SD cards up to 32 GB.
- STEP 1: To install the micro SD card (not included), shut down the camera.
- STEP 2: Insert the micro SD card into the micro SD card slot with the metal strip facing the front of the camera.
- STEP 3: To remove the micro SD card, gently push it into the micro SD card slot.
Note: Make sure that the micro SD card (not included) is correctly inserted to prevent it from being accidentally released during use. Warning: Do not insert or remove the micro SD card whilst the camera is turned on, as this could cause damage to the micro SD card and the files stored on it.
Using the Mini Lifestyle Action Camera
Basic Functionality
- STEP 1: Turn on the camera by pressing and holding ‘ON/OFF’ until the LED indicator light flashes 3 times. Video recording will start automatically.
- STEP 2: Pause a video recording by pressing ‘ON/ OFF’. The LED indicator light should remain blue.
- STEP 3: Press ‘ON/OFF’ once to resume recording.
- STEP 4: Capture a photo by pressing ‘ON/OFF’ twice; the LED indicator light will flash.
- STEP 5: Turn off the camera by pressing and holding ‘ON/OFF’.
Please read all of the instructions carefully and retain for future reference.
Safety Instructions
When using electrical products, basic safety precautions should always be followed.Children aged from 8 years and people with reduced physical, sensory or mental capabilities or lack of experience and knowledge can use this product, only if they have been given supervision or instruction concerning use of the product in a safe way and understand the hazards involved. Children should be supervised to ensure that they do not play with the product.Unless they are older than 8 and supervised, children should not perform cleaning or user maintenance. This product is not a toy.This product contains no user serviceable parts. If the USB, plug or any part of the product is malfunctioning or if it has been dropped or damaged, recycle the product. Improper repairs may place the user at risk of harm.Keep the product and USB cable out of the reach of children.Keep the product and USB cable away from heat or sharp edges that could cause damage.Keep the product away from heat sources, direct sunlight, humidity, water and any other liquid. Do not use the product in highhumid environments.The product is not waterproof, please avoidNote: To check that the camera has shut down correctly, press ‘ON/OFF’ once. If there is no response, the camera is shut down correctly.
Using the Mini Lifestyle Action Camera as a Webcam
Connect one end of the USB cable (included) into the micro USB port on the camera and connect the other end to a USB port on a PC. The camera can now be used as a webcam.Transferring Media to a ComputerTo upload photos and videos, the media must first be transferred to a PC.
- STEP 1: Connect the USB charging cable to the micro USB port on the camera and a compatible USB port on a PC.
- STEP 2: The PC will display the ‘AutoPlay’ menu. Select ‘Open folder to view files’.
- STEP 3: Open ‘USB drive’. All media files will be in this folder.
- STEP 4: Select the required media files and transfer them to a folder on the PC.
- STEP 5: Go into ‘My Computer’, right click on ‘MICROSD’ and then click eject from the drop-down menu.
- STEP 6: Carefully disconnect both ends of the micro USB cable and store it safely for future use.
Note: Do not disconnect the USB charging cable during loading, as this could cause damage to the camera and the media files stored on the micro SD card exposure of the product to water or rain.Do not operate the product if it has been exposed to water, moisture or any other liquid, to prevent against electric shock, explosion and/or injury to yourself and damage to the product.Do not leave the product in a location near heat sources, in a place subject to direct sunlight, excessive dust, moisture, rain or mechanical shock, or in a car with its windows closed.Do not use the product for anything other than its intended use.Do not use any accessories other than those supplied.Do not put objects into any of the openings.This product is intended for domestic use only. It should not be used for commercial purposes.
Battery Safety
If batteries become exhausted, the product should be recycled.In the event of any batteries leaking, do not allow any liquid to come into contact with the skin or eyes.If contact has been made, wash the affected area with copious amounts of water and seek medical advice.Secondary batteries need to be charged before use. After extended periods of storage, it may be necessary to charge and discharge the batteries several times to obtain maximum performance. Do not leave batteries on charge for prolonged periods of time.
Troubleshooting
|
Problem |
Solution |
| The camera will not turn on. | Check that the camera is fully charged. |
| The camera will not take photos or record videos. | Check that a compatible micro SD card is inserted correctly and formatted before first use. |
| Photos and videos cannot be deleted. | Check if the files are protected; unlock and try again. |
Specifications
| Video Format | AVI |
| Photo Format | M-JPEG |
| Video Resolution | 1280*720 |
| Picture Resolution | 1280*960 |
| Image Format | JPG |
| Image Ratio | 16:9 |
| Operating System Compatibility | Windows ME/2000/ XP /2003NISTA; MacOS; Linux |
| Battery Capacity | 160mAh |
| Operating Hours | Up to 120 Minutes |
| Charging Time | 2-3 Hours |
Do not use any charger other than that specifically provided for use with the product.Do not store above 60 °C. Avoid storing in direct sunlight.Do not crush, puncture, dismantle or otherwise damage batteries.Do not dispose of exhausted batteries in household waste.Do not dispose of batteries in a fire as they may explode.To dispose of any batteries, take them to a local recycling station. Contact the local government offices for further details.This product is fitted with a 160 mAh Li-ion rechargeable battery (non-removable).
Care and Maintenance
Wipe the camera with a soft, damp, lint-free cloth and allow to dry thoroughly.Do not:Immerse the camera in water or any other liquid. Expose the camera to liquid, moisture or humidity. Use any abrasive cleaning solvents to clean the camera, as this can cause damage.Expose the camera to sharp objects, which may cause damage.Expose the camera to extremely high or low temperatures as this will shorten the life of electronic devices, destroy the battery or distort certain plastic parts.
| Charging Voltage | DC-5V |
| Interface Type | Micro USB |
| Storage Support | MicroSD (Up To 32GB) |
| Battery Type | Li-Pol Battery |
- Product Code: EE5452
- Power Supply: 5V ===
- Video Output: 50/60 Hz
- HD Video Resolution: 720 Pixels
Drop the camera, as the internal circuit may become damaged.Attempt to disassemble the camera, as this may cause damage to the product.Dispose of the camera in a fire, as it will result in an explosion.
Instructions for Use
Charging the Battery
The camera is fitted with a 160 mAh Li-ion battery. It is recommended that the battery is fully charged before first use; this will take approx. 2-3 hours.
- Turn off the action camera and remove the micro SD card (not included).
- Connect the USB charging cable to the micro USB port and a compatible USB port.
- Whilst charging, the LED indicator light will flash red. When fully charged the LED indicator light will remain a solid red.
- Carefully disconnect both ends of the USB charging cable and store it safely for future use.
Warning: Do not attempt to charge the camera with any cable other than the one provided. Do not leave the camera unattended whilst charging.
Note: When the battery is low and the micro SD card is full, the LED indicator light will flash for 5 seconds and the camera will automatically shut down into safe mode. This will save the active recording and shut the camera down.
![]()
[xyz-ips snippet=”download-snippet”]