Intesis ST Cloud Solution User Manual
Important User InformationDisclaimer
The information in this document is for informational purposes only. Please inform HMS Industrial Networks of any inaccuracies or omissions found in this document.
HMS Industrial Networks disclaims any responsibility or liability for any errors that may appear in this document. HMS Industrial Networks reserves the right to modify its products in line with its policy of continuous product development. The information in this document shall therefore not be construed as a commitment on the part of HMS Industrial Networks and is subject to change without notice. HMS Industrial Networks makes no commitment to update or keep current the information in this document.
The data, examples and illustrations found in this document are included for illustrative purposes and are only intended to help improve understanding of the functionality and handling of the product. In view of the wide range of possible applications of the product, and because of the many variables and requirements associated with any particular implementation, HMS Industrial Networks cannot assume responsibility or liability for actual use based on the data, examples or illustrations included in this document nor for any damages incurred during installation of the product. Those responsible for the use of the product must acquire sufficient knowledge in order to ensure that the product is used correctly in their specific application and that the application meets all performance and safety requirements including any applicable laws, regulations, codes and standards. Further, HMS Industrial Networks will under no circumstances assume liability or responsibility for any problems that may arise as a result from the use of undocumented features or functional side effects found outside the documented scope of the product. The effects caused by any direct or indirect use of such aspects of the product are undefined and may include e.g. compatibility issues and stability issues.
1. Description
1.1 Introduction
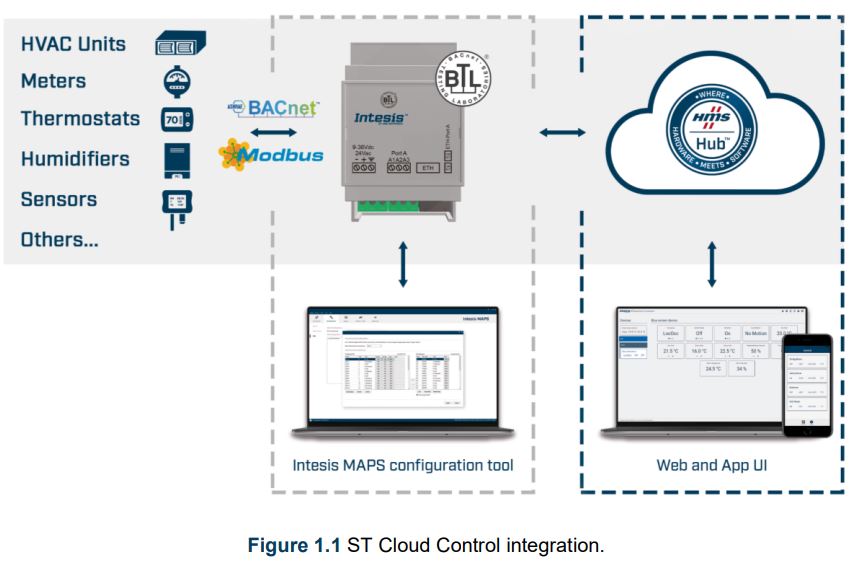
ST Cloud Control is a cloud based solution which enables easy monitoring and control of any BACnet or Modbus devices from an app and a computer web interface. It allows you to integrate thermostats, sensors, climate systems, lights, humidifiers and much more devices in the same dashboard for an intuitive and centralized management.
The management dashboard can be customized for fast and easy monitoring of the important information, while different access permissions are allowed for device sharing with other users.
Execute multiple actions in different devices from a single control point thanks to the scenes. These scenes can be timed, so they are executed automatically at the pre-set time and days of the week. The timed scenes are printed in the calendar for general automated functioning review.
1.2 About this document
This document describes how to use the ST Cloud Control app interface. It contains a step by step guide explaining how to get an user account, how to use all different functions available.
1.3 What is needed
In order to use ST Cloud Control system is needed at least, the following:
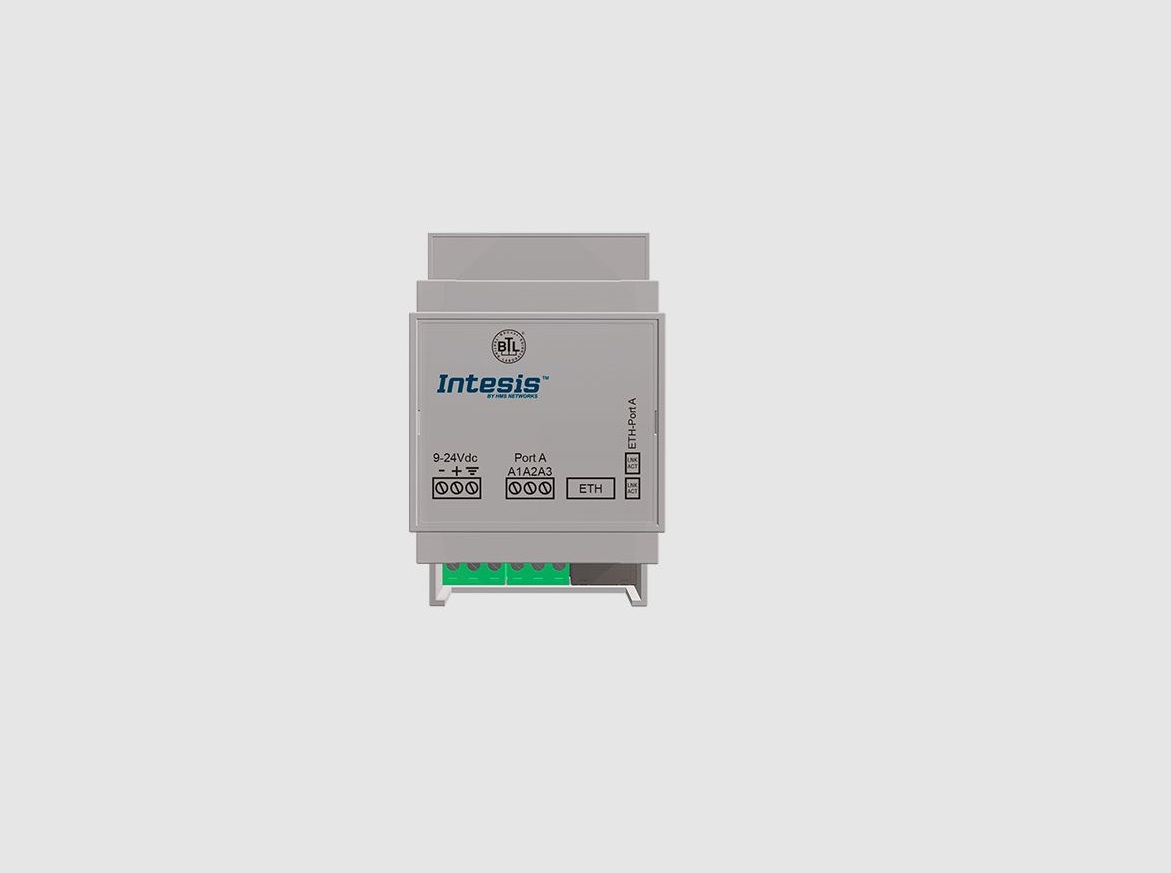
- ST Cloud Control device.Before starting to use the ST Cloud Control system, it is needed to acquire, install and configure an ST Cloud Control gateway1.
- Internet access.The gateways connect to internet using an ethernet connection, so make sure an ethernet cable with internet connection reaches the device location.
- Intesis MAPSA PC running windows with Intesis MAPS installed is required to configure the gateway.
- Device with internet accessA device with internet access is needed (Desktop/laptop computer, Smartphone or Tablet). Make sure the smartphone or tablet used is Android or iOS compatible. Also, confirm your device supports at least one of the following web browsers () if you want to control the AC Cloud Control system using the web-based dashboard.

2. Quick Start Guide
Down below is a step by step guide to guide you through the process to start using the ST Cloud Control system.
- Gateway ConfigurationThe gateway is configured using the MAPS application. For further information please refer to Gateway User Manual. It can be found in our website, on the technical documentation tab.
- Gateway installationThe gateway Installation Sheet is printed and included in the box with the gateway. It can also be found in our website, on the technical documentation tab.
- User registrationIn order to get access to the ST Cloud Control device and its functionalities, a user account is needed. For detailed user creation information, go to Section 3.
- Gateway registrationOnce the device is installed, it must be registered using a user account. Further information regarding of device registration can be found in Web User Manual. It can be found in our website, on the technical documentation tab.
3. Users
To access the system an ST Cloud Control user account is needed. Each user is identified by the email address.
3.1 User Registration
To create a new account, follow the instructions bellow. Go to ST Cloud Control app login screen and tap on Create account ().
Fill the form with proper personal data (email, password and country are mandatory) and accept terms and conditions ().
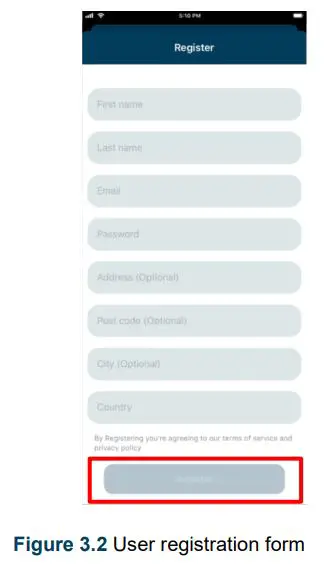
![]() Note: The password must be 6 characters long, must include an uppercase character, one lowercase character, one number and a symbol.
Note: The password must be 6 characters long, must include an uppercase character, one lowercase character, one number and a symbol.
The personal information entered in this form can be modified afterwards. More information regarding this matter can be found in
Once all data is entered read the terms and conditions, click on Register button only if Terms and Conditions are accepted. A validation e-mail will be sent to the entered e-mail account ().
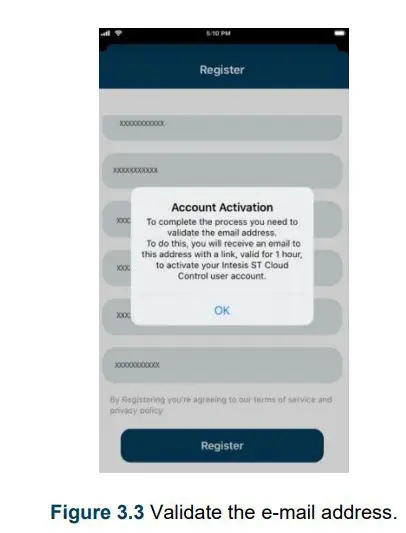
Check the inbox and follow the instructions in the validation e-mail to finish the registering process.
![]() Note: If no e-mail notification is received, make sure that the e-mail address entered is correct and/or check that the e-mail notification is not in the Junk or Trash folder of the e-mail account.
Note: If no e-mail notification is received, make sure that the e-mail address entered is correct and/or check that the e-mail notification is not in the Junk or Trash folder of the e-mail account.
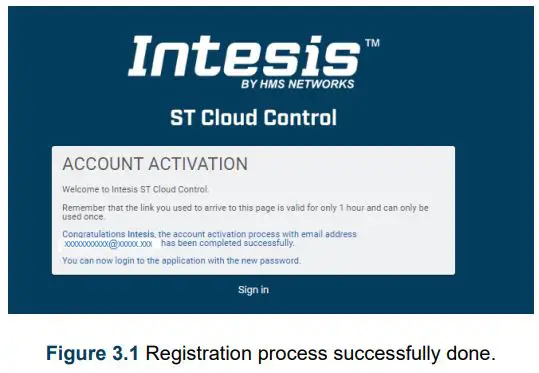
The link sent to the e-mail will validate your e-mail account, and therefore activate it. Once the email is validated click on Sign in (). It will prompt you to the login screen.
 3.2 Login
 3.2 Login
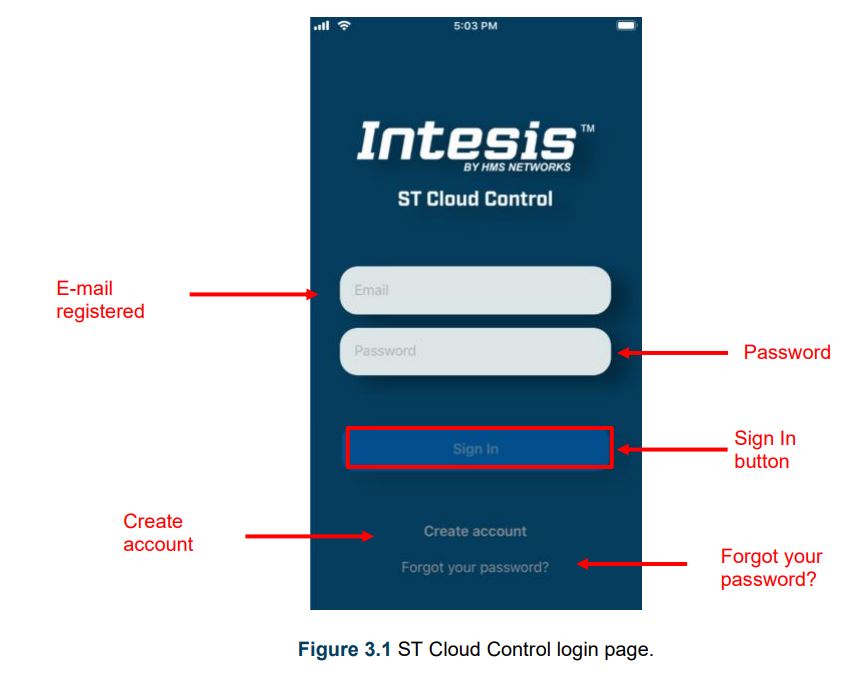
A valid user account is needed to login to the ST Cloud Control. To do it, open ST Cloud Control app ().
- Type the restarted e-mail and password on the corresponding fields (See ).
- Once this data is entered, click on Sign in button ().
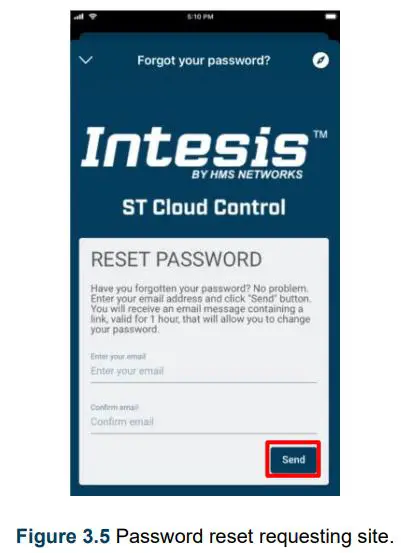
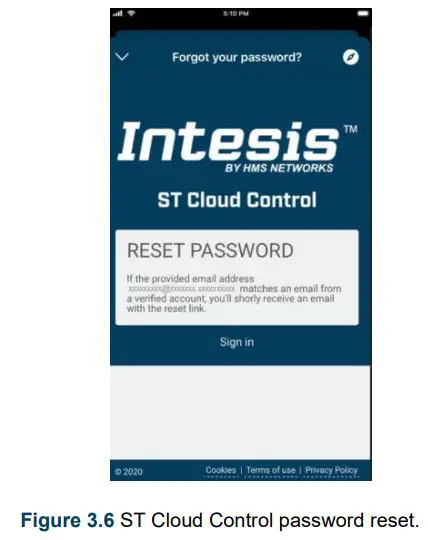
3.3 Password Reset
If the user has forgotten the password, it can be reset following these steps. Tap on Forgot your Password? (). Enter the e-mail address twice (See ) and click on Send.
If the entered email corresponds with an existing user, an e-mail will be sent to the user for password reset. ().
 Check the email inbox and follow the instructions for password reset
![]() Note: If no e-mail notification is received, make sure that the e-mail address entered is correct and/or check that the e-mail notification is not in the Junk or Trash folder of the email account.
Note: If no e-mail notification is received, make sure that the e-mail address entered is correct and/or check that the e-mail notification is not in the Junk or Trash folder of the email account.
The link sent to the e-mail will lead you to a site where the new password can be set (). When the new password is entered and confirmed, tap on change password to continue.
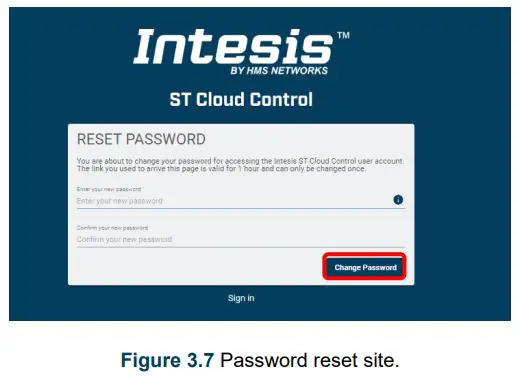
![]() Note: The password must be 6 characters long, must include an uppercase character, one lowercase character, one number and a symbol.
Note: The password must be 6 characters long, must include an uppercase character, one lowercase character, one number and a symbol.
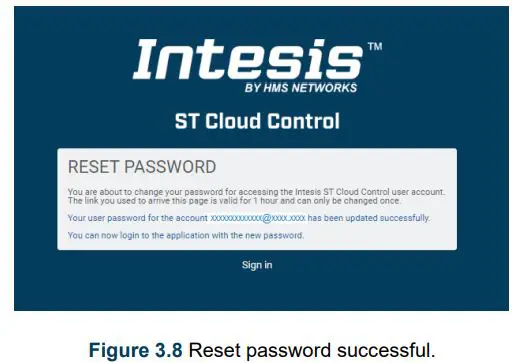
Once the password is changed (). Go to the app and login further information can be found in .
4. Control Dashboard
In the control dashboard the user will have access to all devices and the corresponding widgets.
Once logged in, tap on the Dashboard button ![]() to access to devices view (See .
to access to devices view (See .
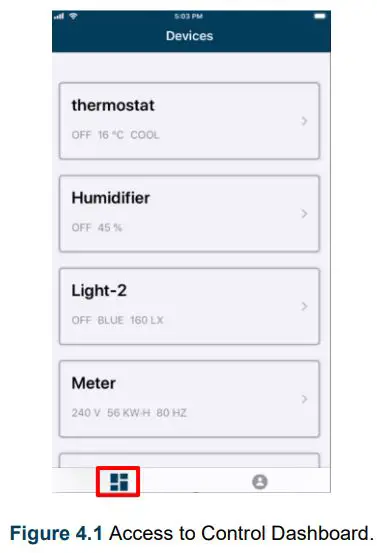
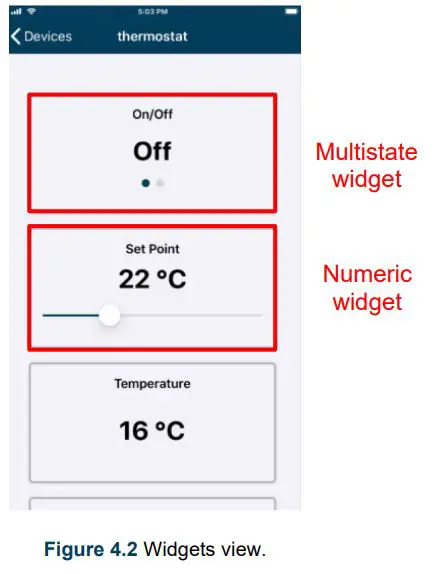
The devices are managed through the corresponding widgets (). Clicking on a device it will be selected and the configured widgets will be shown ().
The widgets can be for monitoring device status, so only the value can be seen, and no action can be taken. Some other widgets may be for monitoring and controlling, so the value can be seen, and it can be changed by the user.
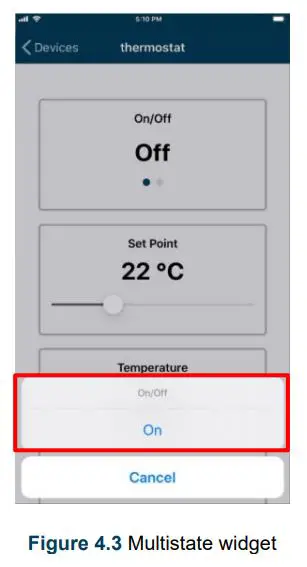
- Multistate: This widget contains a list of specific states, an example of it would be the mode of a thermostat. The values are showed in a list when tapping on the widget for the user to select the desired one. Following with the previous example, the options listed on a thermostat could be, heat, cool, fan, etc. ().
- Numeric: This widget contains a number as a value, for example the set point of a thermostat. To control it click on “” or “+” icons. It can also be done by tapping on the widget, then a pop-up will raise (). So, the value can be changed sliding the button of the bar.
5. Profile
The Account settings can be consulted or modified at any time.
Once logged in, click on Profile button ![]() to access to profile site ().
to access to profile site ().
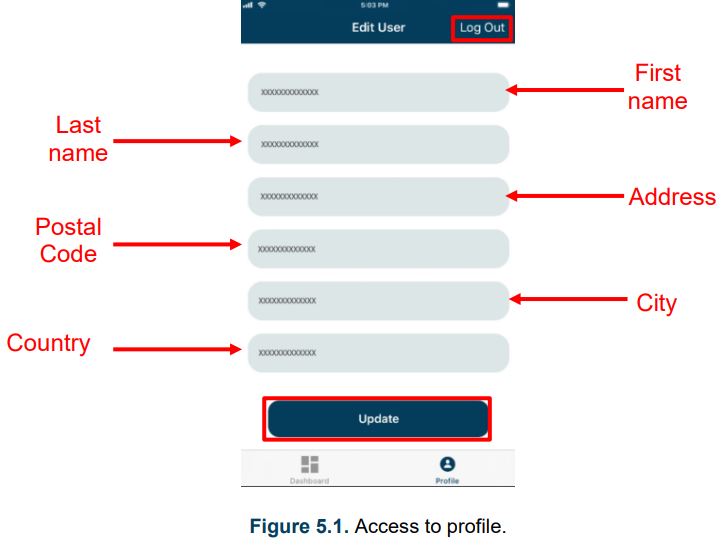
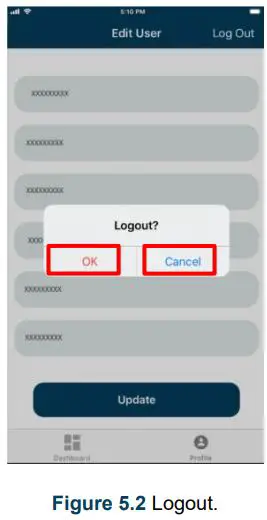
To change the personal information type on the corresponding field (). To continue tap on update.To Logout click on logout (). A pop-up window will be shown asking to logout (). Tap on OK or Cancel.
© HMS Industrial Networks S.L.U – All rights reserved This information is subject to change without notice
References
[xyz-ips snippet=”download-snippet”]