
INVENTUM TK010 Built-In Oven Pyrolysis
Introduction
HOW TO USE THIS DOCUMENT
1. Read this document completely. Make sure that you know and understand all the instructions.2. Obey the safety instructions to prevent injury and/or damage to the appliance and its surroundings.3. Do the procedures completely and in the given sequence.4. Keep this document in a safe area for future use. This document is a part of the appliance.
Safety
- Read the instructions before operating the appliance and keep the instructions for future use.
- The appliance is only intended for domestic use within a home. Do not use corrosive chemicals or vapors in this appliance. This appliance is specifically designed to heat. It is not designed for industrial or laboratory use.
- Do not place any object between the door of the appliance. Do not allow soil or cleaner residue to accumulate on the sealing surfaces.
- If the door or the door seal is damaged, the appliance must not be operated until it has been repaired by a competent person.
- Do not heat liquids and other foods in sealed containers because the container can explode.
- Only a competent person is allowed to carry out any service or repairs that involve removing the cover.
- Keep the appliance out of reach of children. Children do not understand the danger of handling electrical appliances.
- This appliance cannot be used by children from 0 to 8 years. This appliance can be used by children aged from 8 years and above if they are continuously supervised. The appliance can also be used by people with reduced physical, sensory or mental capabilities or lack of experience or knowledge, if they have been given supervision or instruction concerning use of the appliance in a safe way and understand the hazards involved. Keep the appliance and its cord out of reach of children aged less than 8 years.
- Cleaning and maintenance cannot be done by children.
- Children must not play with the appliance.
- Only use materials that are suitable for use in ovens.
- The appliance must be cleaned regularly and any food deposits must be removed.
- When you see smoke, switch off and unplug the appliance. Keep the door closed in order to stifle any flames.
- Do not place items on the door of the appliance.
- Install the appliance only in accordance with the installation instructions.
- Always carry out regular checks of the appliance and the mains cable to make sure that no damage is evident. Should there be any signs that the appliance or the mains cable is damaged in the slightest degree, the entire appliance should be returned to the Customer Service Department. For your own safety, only use the accessories and spare parts from the manufacturer which are suitable for the appliance.
- Only use and store the appliance indoors.
- Do not use the appliance near water, in a wet basement/garage or near a swimming pool.
- Avoid touching hot surfaces, especially the inside of the appliance.
- Do not cover any vents of the appliance.
- Do not bend the mains cable and keep it away from the heated surface.
- Failure to keep the appliance clean could lead to deterioration of the surface that could adversely affect the life of the appliance and possible result in a hazardous situation.
- The appliance is not intended to be operated by means of an external timer or separate remote-control system.
- The appliance can only be used when it is built in kitchen furniture.
- Never leave the appliance unattended when in use.
- For your own safety, only use the accessories and spare parts from the manufacturer that are suitable for the appliance.
- Never unplug the appliance from the mains socket by pulling the mains cable.
- Always make sure that your hands are dry before handling the mains cable, mains plug or switch.
- Should you decide not to use the appliance anymore, make it inoperative by cutting the mains cable after removing the mains plug from the mains socket. Make all potentially dangerous parts of the appliance harmless, particularly for children who might be tempted to play with it.
- Never immerse any part of the main body, lid, mains cable and mains plug in water or any other liquid to protect against electrical hazards.
- If the appliance is used for other purposes than intended, or if it is not handled in accordance with the instruction manual, the full responsibility for any consequences will rest with the user. Any damages to the appliance or other things are not covered by the warranty.
- Never use a pressure cleaner or steam cleaner to clean the appliance.
- Legislation requires that all electrical and electronic equipment must be collected for reuse and recycling. Electrical and electronic equipment marked with the symbol indicating separate collection of such equipment must be returned to a municipal waste collection point.
- Do not cover the bottom of the appliance with aluminium foil. The aluminium foil stops the heat and causes poor results and damage to the enamel.
- The appliance has a fan that continues after operation.
- Only a qualified installer is allowed to install the appliance.• In case of incorrect installation or connection, the warranty becomes invalid.
- If the mains cable is damaged, it may only be replaced by the manufacturer, its service organisation or similarly qualified persons, in order to prevent hazardous situations.
- The electrical connection must meet national and local regulations.
- The mains socket and mains plug must always be within reach.
- The appliance may not be connected to the mains supply via a power strip or extension cable. If this is not observed, the safety of the appliance cannot be guaranteed.
- The appliance must be earthed.
- Only connect the appliance to alternate current, to an earthed mains socket. Make sure that the voltage in your home corresponds with the voltage printed on the type plate of the appliance.
- Make sure that the appliance is switched off before you replace a lamp.
Description
INTENDED USEThe appliance is intended to be used for preparing food.Do not use the appliance for any other purpose than described in this document.BUILT-IN OVEN
- Insert levels
- Door
- Door handle
- Control panel
- Baking tray
- Grill rack
- Temperature sensor
| Item | Function |
| Insert levels | Refer to section ‘Using the insert levels’. |
| Door | To open the appliance. |
| Door handle | To open and close the door. |
| Control panel | Refer to section ‘Control panel’. |
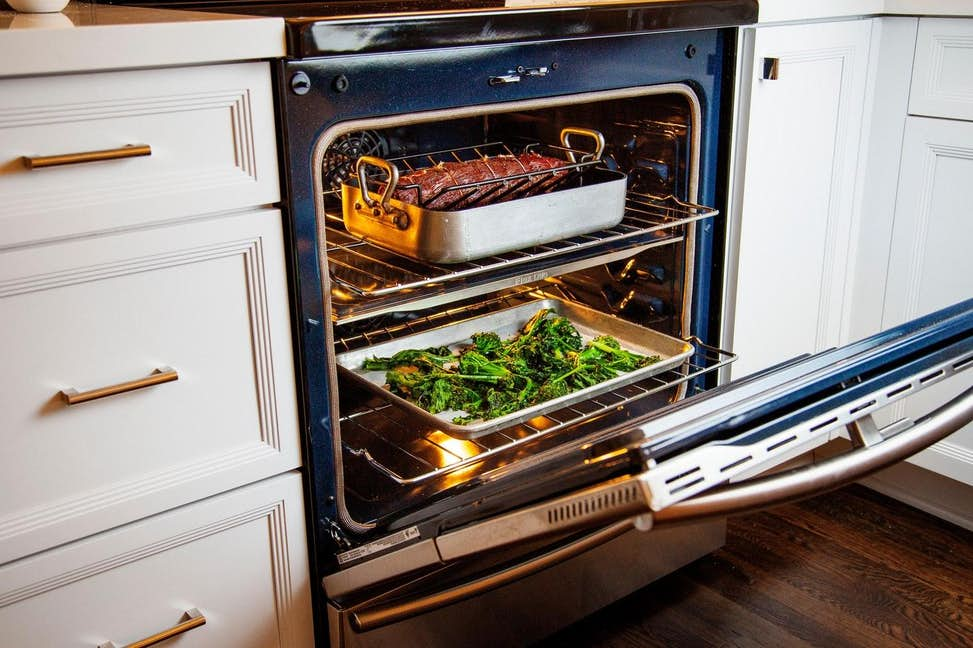
| Baking tray | To cook food.
Use the baking tray for cake rolls and roasting. Note: The appliance is supplied with two baking trays with different depths. |
| Grill rack | To cook food.
Use the grill rack for grilling meat and for toasting bread. |
| Temperature sensor | To measure the core temperature of a dish during cooking. |
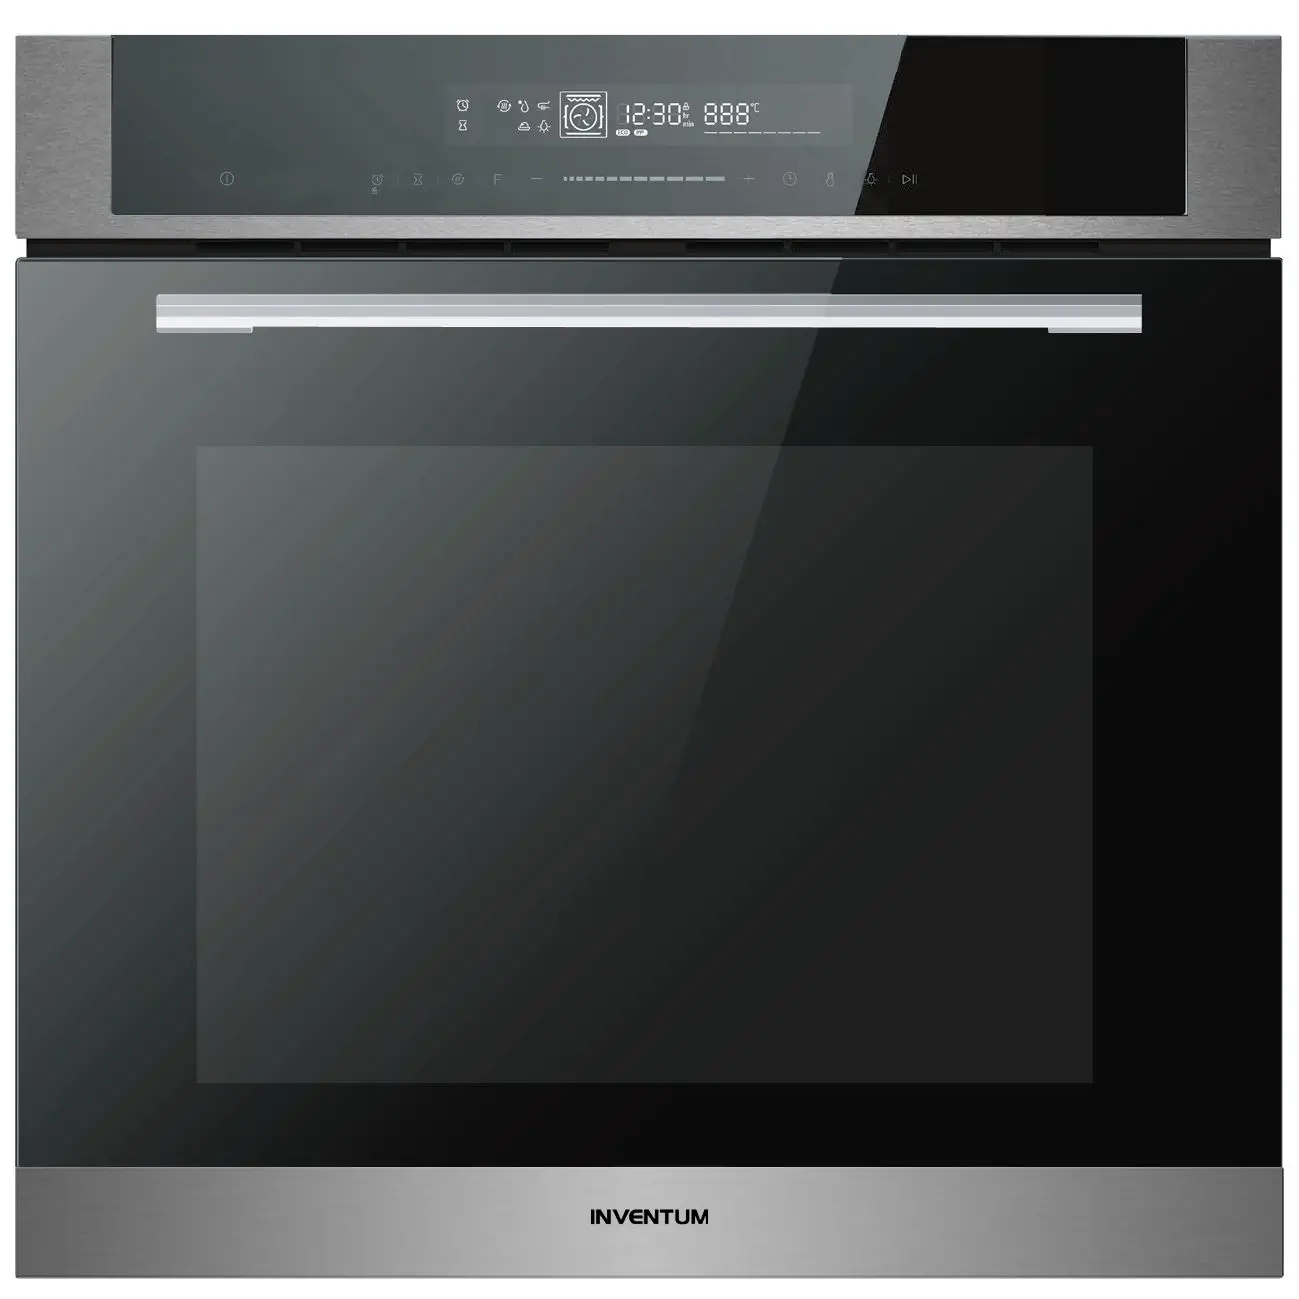
CONTROL PANEL
- A Function indicator
- B Oven indicator
- C Clock
- D Temperature indicator
- E Start/pause button
- F Lamp button
- G Temperature button
- H Clock button
- I Up button
- J Slider
- K Down button
- L Function button
- M Quick-preheat button
- N Delayed-start button
- O Timer/child-lock button
- P Cancel button
| Item | Function |
| Function indicator | To show the selected function (timer, quick preheat, defrost, temperature sensor, delayed start, dough proving, light). |
| Oven indicator | To show the available and selected oven functions. Refer to section ‘Oven modes’. |
| Clock | • To show the remaining time during operation.
• To show the current time when the appliance is off. |
| Temperature indicator | To show the selected temperature. |
| Start/pause button | To start or pause the appliance. |
| Lamp button | To activate/deactivate the lamp inside the appliance. |
| Temperature button | To select the temperature. |
| Clock button | To set the clock. |
| Up button | To adjust the settings. |
| Slider | To adjust the settings.
Touch and hold the slider to the left to decrease the setting. Touch and hold the slider to the right to increase the setting. |
| Down button | To adjust the settings. |
| Function button | To select a function. |
| Quick-preheat button | To select the quick-preheat function. |
| Delayed-start button | To select the delayed-start function. |
| Timer/child-lock button | To use the timer or to activate/deactivate the child lock. |
| Cancel button | To cancel a function or program. |
Note: You can use both the up/down button or the slider to adjust the settings of the appliance. All three buttons have the same function.
Installation
SAFETY INSTRUCTIONS FOR INSTALLATION
- Safety during use can only be guaranteed if installation was done correctly and according to the instructions. The installer is liable for damage caused by incorrect installation.
- The electrical installation must be carried out by a qualified electrician. The electrician must comply to national and local regulations.
- The appliance has protection class I and may only be used in combination with an earthed connection.
- The appliance must be connected to a permanent installation in which provisions for switching off are integrated, in accordance with the installation instructions.
- Make sure that the mains cable does not get jammed during installation or is running along sharp edges. The mains cable must be placed in such a way that no contact is made with hot parts of the appliance.
- The connection point, mains socket and/or mains plug must always be accessible.
- The kitchen furniture in which the appliance is installed must be heat resistant to at least 90°C. This also applies to the doors or front of the furniture.
- Make sure that the kitchen furniture in which the appliance is installed is firmly attached, for example by fastening the furniture to adjacent elements.
- In case of incorrect installation or connection the warranty becomes invalid.
- Changes to the appliance, including replacing the mains cable, must be carried out by a certified installer.
- Make sure that there is sufficient ventilation and fresh air around the appliance.
UNPACKING
- Remove the packaging.Caution:Make sure that you remove the sticker from the door.
- Examine the appliance for damage.
- Make sure that the voltage is the same as on the type plate.
PREPARING FOR INSTALLATION(Figure 3)(*) The minimum dimension for B1 is 585 mm and the maximum dimension is 595 mm.Note: Make sure that the kitchen furniture is prepared according to the dimensions of the appliance.
INSTALLING THE APPLIANCEPreliminary requirements
Make sure that the kitchen furniture is prepared according to the correct dimensions.
Warning:Two persons are required to install the appliance.Caution:Make sure that the mains cable does not get jammed during installation or is placed on top of the appliance.Caution:Do not cover the opening between the kitchen furniture and the top of the appliance. The opening is required for ventilation.Note:It is possible to connect the appliance to the mains supply before positioning the appliance.
Procedure
- Put the appliance (A) in the center of the kitchen furniture.Caution:Make sure that there is a minimum space of 2 mm between the appliance and the walls of the kitchen furniture.
- Open the door (E) of the appliance.
- Place the appliance in the kitchen furniture.
- Install the plugs (B).
- Fasten the appliance to the kitchen furniture. Use the screws (D).
- Install the covers (C).
- Close the door.
- Connect the appliance. Refer to section ‘Connecting the appliance’.
CONNECTING THE APPLIANCE
1. Make sure that the voltage in your home corresponds with the voltage of the appliance.2. Make sure that the electrical system in your home is supplied with a 16 Amp fuse.3. Use the supplied mains cable to connect the appliance to the mains socket. After connecting, the clock shows ’00:00′ and you will hear a sound signal.
REPLACING THE MAINS CABLEIf necessary, you can replace the supplied mains cable with a longer or different mains cable.
Warning:Replacing the mains cable must be carried out by a qualified person.Note:Make sure that the new mains cable has a minimum core cross section of 1.5 mm2 and a length of 1 m. If you use a mains cable that is too short, you cannot connect the appliance and position it in the kitchen furniture before connecting the appliance to the mains socket.
1. Find the terminal box at the rear of the appliance.2. Carefully push the pins (B) to open the cover (A). Use a screwdriver.3. Remove the screws (C).4. Place the new mains cable (D) in the terminal box.5. Connect the wires according to the wiring diagram.6. Install the screws.7. Close the cover.
Operation
PREPARING FOR OPERATION
1. Remove the accessories from the appliance.2. Clean the appliance and the accessories. Use warm water and a mild cleaning agent.3. Rinse the appliance and the accessories thoroughly with water.4. Dry the appliance and the accessories.5. Use the oven for 60 minutes with a temperature of 250°C to remove any production residues, such as oil and to prevent bad smells. Refer to section ‘Using the oven function’.Warning: Make sure that the room is properly ventilated.6. Let the appliance cool down.7. Clean the appliance again. Use warm water and a mild cleaning agent.8. Rinse the appliance thoroughly with water.9. Dry the appliance.10. Install the guide racks. Refer to section ‘Installing the guide racks’.
INSTALLING THE GUIDE RACKS
1. Identify the guide racks for the left side (A) and the right side (B).2. Push the guide rack (C) in the opening at the rear of the appliance.3. Push the guide rack in the opening at the front of the appliance.
SETTING THE CLOCK
1. Touch the clock button. The clock display shows ‘00:00’ and the value for hours flashes.2. Touch the up/down button or the slider to adjust the hours.Note: The value must be between 0 and 23.3. Touch the clock button again. The value for minutes on the clock display flashes.4. Touch the up/down button or the slider to adjust the minutes.Note: The value must be between 0 and 59.5. Touch the clock button to save the settings. The ‘:’ in the clock display flashes.6. Repeat the procedure to adjust the time.
SETTING THE KITCHEN TIMERThe kitchen timer can be used independently from the cooking timer.
- Touch the timer/child-lock button. ‘00:00’ flashes on the clock display.
- Touch the up/down button or the slider to adjust the hours.Note: The value must be between 0 and 23.
- Touch the timer/child-lock button again. The value for minutes on the clock display flashes.
- Touch the up/down button or the slider to adjust the minutes.Note: The value must be between 0 and 59.
- Touch the timer/child-lock button to save the settings. The ‘:’ in the clock display flashes and the timer counts down.When the kitchen timer finishes, you will hear a sound signal 10 times and the clock display shows the current time. The appliance does not automatically switch off and the program or function continues.
SETTING THE COOKING TIME
1. Touch the clock button. ‘00:00’ flashes on the clock display.2. Touch the up/down button or the slider to set the cooking time.When the cooking time finishes, you will hear a sound signal 5 times and the display shows ‘End’.
USING THE DELAYED-START FUNCTIONYou can use the delayed-start function to make sure that your dish is ready at a preset time. The appliance will automatically start.
Note: Make sure that the clock is set before you use the delayed-start function. Refer to section ‘Setting the clock’.Note: You cannot use the kitchen timer when the delayed-start function is active.
- Touch the delayed-start button. The indicator for the delayed-start function on the display is on and the value for hours flashes.
- Touch the up/down button or the slider to adjust the hours.Note: The value must be between 0 and 23.
- Touch the delayed-start button again. The values for minutes on the display flashes.
- Touch the up/down button or the slider to adjust the minutes.Note: The value must be between 0 and 59.
- Touch the delayed-start button to save the settings.
- Touch the function button to select a desired function.
- Touch the up/down button or the slider to select the temperature.
- Touch the clock button and then touch the up/down button or the slider to set the time.
- Touch the start/pause button to finish. The indicator for the delayed-start function on the display flashes. When the delayed-start time finishes, you will hear a sound signal and the appliance starts.
USING THE INSERT LEVELSThe appliance has 5 insert levels to ensure that you can partly remove the grill rack or baking tray without tilting. As a result, you can safely remove the dish from the appliance and the grill rack or baking tray will not accidentally fall from the appliance.
Caution: For safety reasons, the baking tray should be placed in one of the insert levels. Do not place the baking tray on the bottom of the appliance.
- Use the guide racks to correctly place the grill rack (A) or baking tray (B) in the appliance.
- Make sure that the accessories are fully placed in the appliance and that they do not make contact with the door.
USING THE OVEN FUNCTIONFor an overview of the available oven modes, refer to section ‘Oven modes’.
1. Touch the function button. The oven indicator shows the conventional mode.2. Touch the function button again to select the desired oven mode. The oven indicator shows the selected mode.3. Touch the up/down button or the slider to select the temperature.4. Set the cooking time. Refer to section ‘Setting the cooking time’.5. Touch the start/pause button to start the appliance.
Note: If you open the door of the appliance during cooking, you must touch the start/pause button to continue the cooking.
USING THE QUICK-PREHEAT FUNCTIONYou can use the quick-preheat function to quickly preheat the appliance to a set temperature.
Note: The quick-preheat function cannot be used for dough proving (oven mode).
- Touch the function button to select the desired oven mode.Note: If the mode does not support the quick-preheat function you will hear a sound signal.
- Touch the quick-preheat button. The indicator for the quick-preheat function on the display is on. When the appliance is preheated, a sound signal sounds and the indicator for the quick-preheat function goes off. You can now place your dish in the appliance.
USING THE TEMPERATURE SENSORWhen using the temperature sensor, you can measure the core temperature of a meat or fish dish.
Note: For an overview of the core temperature for a number of dishes, refer to section ‘Core temperatures’.
- Remove the cap (A).
- Connect the temperature sensor (B) to the appliance.The display shows the indicator for the temperature sensor function and the clock shows the temperature setting of the sensor.
- Place the temperature sensor into the dish.Note: Do not place the temperature sensor near a bone or a hole in the dish.
- Touch the up/down button or the slider to select the desired core temperature of the dish.
- Touch the function button to select the desired oven mode.
- Touch the up/down button or the slider to adjust the temperature of the oven.
- Touch the start/pause button to start the appliance.When the dish reaches the core temperature, you will hear sound signal 5 times and the program finishes.Note: During cooking, you can touch the temperature button to change the temperature of the sensor or the core temperature of the dish.
CHANGING THE TEMPERATURE DURING COOKINGYou can change the temperature at any time.
- Touch the temperature button.
- Touch the up/down button or the slider to adjust the temperature. The temperature indicator shows the selected temperature.
CHANGING THE COOKING TIME DURING COOKINGYou can change the cooking time at any time.
- Touch the clock button.
- Touch the up/down button or the slider to adjust the time.
PAUSING THE APPLIANCE
- Push the start/pause button to pause the appliance.
- Push the start/pause button again to start the appliance again.
ACTIVATING AND DEACTIVATING THE CHILD LOCKWhen the child lock is activated, you cannot operate the touch buttons.Activating the child lock
- Touch and hold the timer/child-lock button for 3 seconds to activate the child lock. You will hear a long sound signal and the clock display shows a lock.
Deactivating the child lock
- Touch and hold the timer/child-lock button for 3 seconds to deactivate the child lock. You will hear a long sound signal and the clock display no longer shows a lock.
Cleaning and maintenance
CLEANING THE APPLIANCE
Warning:Make sure that the appliance is switched off and cooled down before cleaning.Caution:Do not use a pressure cleaner or steam cleaner to clean the appliance.Caution:Do not use abrasive cleaning agents or sharp scrapers.Note:You can remove the guide racks and the door to easily clean the appliance. Refer to sections ‘Removing the guide racks’ and ‘Removing the door’.
- Clean the inside of the appliance after every use. Use a damp cloth.
- In case of heavy dirt, clean the inside of the appliance with warm water and a mild cleaning agent. Thoroughly rinse and dry the inside after cleaning.Note: Leave the door open slightly to make sure that the appliance dries completely.
- If necessary, use the pyrolysis function. Refer to section ‘Using the pyrolysis function’.
- Clean the accessories. Use warm water and a mild cleaning agent. Dry the accessories after cleaning.
- Clean the outside of the appliance. Use a damp cloth or sponge.
- In case of heavy dirt, clean the outside of the appliance with a mild detergent.Note: The cover of the door can become discolored or the glass inside the door can be dirty. You can remove the cover for thorough cleaning. Refer to section ‘Removing the cover of the door’.
- If necessary, clean the cover of the door and the glass inside the door. Use warm water and a mild cleaning agent. Dry the cover after cleaning.
REMOVING THE GUIDE RACKS
1. Pull the guide rack (A) from the opening at the front of the appliance.2. Pull the guide rack from the opening at the rear of the appliance.3. Remove the guide racks.4. After cleaning, install the guide racks again. Refer to section ‘Installing the guide racks’.
USING THE PYROLYSIS FUNCTIONYou can use the pyrolysis function to clean the inside of the appliance. The appliance heats up to a high temperature so that food residues burn.
Warning:The inside and the outside of the appliance become very hot during pyrolysis. Never try to open the door and do not touch the outside of the appliance. Keep children, disabled people and incapable older people away from the appliance. Remove flammable items from the door handle (for example a tea towel).Warning:Make sure that the room is properly ventilated. During pyrolysis, vapors are released that can cause irritation.Note:The temperature or time cannot be adjusted with the pyrolysis function.
Preparing for pyrolysis
- Remove the accessories from the appliance.
- Remove the majority of food residue manually.Warning: Food residue can cause a risk of fire during pyrolysis.
- Clean the inside of the door and the seal. Use warm water and a mild cleaning agent.Caution: Do not remove the seal or use an abrasive sponge for cleaning.
Starting the pyrolysis function
Note: During pyrolysis, the door of the appliance is automatically locked and the lamp is off.
- Make sure that the appliance is prepared for pyrolysis.
- Make sure that the appliance is switched on.
- Touch the function button to select the pyrolysis function. The oven indicator shows the pyrolysis mode.
- Touch the start/pause button to start the pyrolysis function.When the pyrolysis finishes, you will hear a continuous sound signal. Push the start/pause button to stop the sound signal.
Pausing the pyrolysis function1. Touch the start/pause button one time to pause the function.Note: You can open the door when the appliance is cooled down.
Extra information
| Oven mode | Description | Temperature range | |
|
|
Conventional | The upper and lower heating elements are both used for perfect baking results, such as cake and puff pastry. | 30-250°C |
| Hot air | Used for baking at several levels, for example baking trays with cookies. The heat comes from the heating elements at the rear of the appliance. | 50-250°C | |
| Hot air, eco | Used for baking at several levels while saving energy. The heat comes from the heating elements at the rear of the appliance. | 140-240°C | |
|
|
Conventional + fan | Used for baking at several levels, for example baking trays with cookies. The fan distributes the heat from the heating elements evenly throughout the appliance. | 50-250°C |
| Single grill | Used for grilling small portions and for browning food. Place the dish in the middle of the appliance. | 150-250°C | |
|
|
Double grill + fan | Used for grilling a layer of food or to gratin dishes. | 50-250°C |
| Double grill | Used for grilling large portions of meat. | 150-250°C | |
| Pizza | Used for pizzas and dishes that require heat from below. The heat comes from lower and rear heating elements. | 50-250°C | |
|
|
Heat from below | Used for extra browning of pizza bottoms, quiches and pies. The heat comes from the lower heating element. | 30-220°C |
| Defrost | Used for slowly defrosting food. | – | |
| Dough proving | Used for proving yeast dough and sourdough. | 30-45°C |
| Oven mode | Description | Temperature range | |
| Pyrolysis | A self-cleaning mode in which the appliance heats up to a high temperature so that food residues burn. | – | |
| Temperature sensor | Used for baking meat. The temperature sensor measures the core temperature of the dish. | 40-99°C |
CORE TEMPERATURES
| Dish | Core temperature (°C) – rare | Core temperature (°C) – medium | Core temperature (°C) – well done | |
| Beef | Steak | 50 | 55 | 65 |
| Tenderloin | 48 | 52 | 56 | |
| Pork | Roulade | – | 63 | 70 |
| Veal | Roast | 75 | 80 | 85 |
| Veal shin | 85 | 88 | 90 | |
| Poultry | Chicken | 80 | 83 | 86 |
| Duck filet | 60 | 65 | 70 | |
| Lamb | Leg of lamb, roast | 65 | 70 | 75 |
| Game | Saddle of hare / venison | 50 | 55 | 65 |
| Leg of hare / hare | 70 | 75 | 80 | |
| Fish | Salmon | 50 | 55 | 65 |
| Trout | 50 | 55 | 65 | |
| Tuna | 45 | 50 | 55 |
Troubleshooting
GENERAL TROUBLESHOOTING PROCEDURE
1. Try to find a solution for the problem with the help of the troubleshooting table.2. If you cannot find a solution for the problem, contact the Inventum-servicedienst
TROUBLESHOOTING TABLE
| Problem | Possible cause | Possible solution |
| The appliance does not start. | There is no power supply. | Do a check on the fuse, if necessary replace the fuse. |
| The mains cable is not connected. | Make sure that the mains cable is correctly connected to the mains socket. | |
| The power is interrupted. | Do a check if the power in the kitchen is working. |
| Problem | Possible cause | Possible solution |
| The appliance does not start and the clock display shows a lock. | The child lock is activated. | Deactivate the child lock. Refer to section ‘Activating and deactivating the child lock’. |
| The display shows ‘00:00’. | The power was interrupted. | Set the clock. Refer to section |
| A function or setting cannot be selected. | The temperature or the setting is not available for the selected function. | Make sure that you select a setting that is available for the selected function. |
| The lamp or side the side lamp does not work. | The lamp is broken. | Replace the lamp. Refer to section ‘Replacing the lamp’ or ‘Replacing the side lamp’. |
Product fiche
TECHNICAL SPECIFICATIONS
| Item | Specification |
| Model | TK010 |
| Voltage | 220-240 Volt ~50Hz-60Hz |
| Power | 3200 Watt |
| Energy class | A+ |
| Energy consumption, cavity (conventional) | 1,06 kWh |
| Energy consumption, cavity (hot air) | 0,69 kWh |
| Capacity | 72 liter |
| External dimensions (without door handle) | 595 x 566 x 596 mm |
| Net weight | 40 kg |
General terms and conditions of service and warranty
We do not need to remind you of the importance of service. After all, we develop our products to a standard so that you can enjoy them for many years, without any concerns. If, nevertheless, there is a problem, we believe you are entitled to a solution straight away. Hence our products come with an exchange service, on top of the rights and claims you are entitled to by law. By exchanging a product or part, we save you time, effort and costs.2-year full manufacturer’s warranty
- Customers enjoy a 2-year full manufacturer’s warranty on all Inventum products. Within this period, a faulty product or part will always be exchanged for a new model, free of charge. In order to claim under the 2-year full manufacturer’s warranty, you can either return the product to the shop you bought it from or contact the Inventum costumer service department via the form at ‘https://www.inventum.eu/service-aanvraag‘.
- The 2-year warranty period starts from the date the product is bought.
- In order to claim under the warranty, you must produce a copy of the original receipt.
- The warranty applies only to normal domestic use of Inventum products within the Netherlands.
5-year Inventum warranty
- Inventum offers a 5-year warranty on most large domestic appliances and a selection of small domestic appliances. This 5-year Inventum warranty consists of a 2-year full manufacturer’s warranty, extended by a further 3-year warranty. The only thing you need to do to qualify for the 3-year extended warranty is to register the product within 45 days of purchase. You can read more about registering the product in the following paragraph.
- In accordance with the 5-year Inventum warranty provisions, a faulty product or part will always be exchanged for a new model during the first 2 years under the warranty. During the 3rd to 5th year under the warranty, you will only pay the costs of exchange. The current costs of exchange are listed at ‘https://www.inventum.eu/omruilkosten‘.
- In order to claim under the 5-year Inventum warranty, you can either return the product to the shop you bought it from or contact the Inventum costumer service department via the form at ‘https://www.inventum.eu/service-aanvraag‘.
- The 5-year warranty period starts from the date the product is bought.
- In order to claim under the warranty, you must produce a copy of the original receipt.
- The warranty applies only to normal domestic use of Inventum products within the Netherlands.
Product registration
- The 3-year extended warranty is easy to obtain, free of charge, by registering the product within 45 days of purchase, via the website ‘https://www.inventum.eu/garantie-registratie‘. If you did not register the product within 45 days of purchase, you can still do so up to 2 years after the purchase date. However, there will be a charge. The one-off registration charge is € 89 for each separate product. Registration is possible only for products that are subject to the 5-year Inventum warranty. Whether the product qualifies for the 5-year Inventum warranty is stated in the product user manual and in the product information sheet, on Inventum’s website.
- The warranty period always starts from the date the product is bought. If the product is registered for the extended warranty at a later date, the warranty period still starts from the original date of purchase.
- The 3-year extended warranty can only be applied for if you are in the possession of a copy of the original receipt and the Inventum 5-year warranty certificate.
Large domestic appliances
- 1. Breakdowns or faults in large domestic appliances (separate and built-in white goods) can be registered via the form at ‘https://www.inventum.eu/service-aanvraag‘, by calling the Inventum costumer service department or in the store where you bought the device. The telephone number of the costumer service department can be found at ‘https://www.inventum.eu‘.
- In the event of breakdowns or faults in large domestic appliances, Inventum will have the option to have a service engineer inspect the faulty device onsite at the customer in the Netherlands and to carry out repairs, there and then. The Inventum customer service department can also decide to have the device exchanged.3. If you suffer a breakdown or fault in a large domestic appliance during the first 2 years from the date of purchase, Inventum will not charge any costs for the exchange, call-out or for parts and labour.
- If you registered the product as described before at ‘https://www.inventum.eu/garantie-registratie‘ and you subsequently report a breakdown of a large domestic appliance in the 3rd to 5th year of the date of purchase, the5- year Inventum warranty applies and the device will be repaired or exchanged, free of charge. In the event of a repair or exchange of the device, you only pay the costs of exchange. The current costs of exchange are listed at ‘https://www.inventum.eu/omruilkosten‘. If you did not register the product, the 3-year extended warranty does not apply.
- When reporting a breakdown or fault, a service engineer will contact the customer within 1 working day in order to make an appointment. When the report is made in a weekend or during a public holiday, this will be the next working day.
- If you report a breakdown or fault via the form at ‘https://www.inventum.eu/service-aanvraag‘, you will be kept informed of the progress via mobile messages and e-mail.
- The warranty period starts from the date the product is bought.
- In order to claim under the warranty, you must produce a copy of the original receipt and the Inventum 5-year warranty certificate.
- The warranty applies only to normal domestic use of Inventum products within the Netherlands.
Breakdowns or faults outside the warranty period
- Breakdowns or faults in small or large domestic appliances outside the warranty period, can be reported to the costumer services department via the form at ‘https://www.inventum.eu/service-aanvraag‘ or by calling the costumer services department.
- The costumer services department may ask you to send the product for inspection or repair. The costs of dispatch will be at your expense.
- The inspection to establish whether repair is possible involves a charge. You need to grant your permission for this, in advance.
- In the event of a large domestic appliance, Inventum, at your request, can send out a service engineer. In that case, you will be charged the call-out costs, as well as parts and labour.
- In the event of an instruction to repair, the repair costs must be paid in advance. In the event of a repair by a service engineer, the costs of the repair must be settled with the engineer onsite, preferably by means of PIN payment.
Warranty exclusions
- The following is excluded from the aforesaid warranties:• normal wear and tear;• improper use or misuse;• insufficient maintenance;• failure to comply with the operating and maintenance instructions;• unprofessional installation or repairs by third parties or the customer himself;• non-original parts used by the customer;• use for commercial or business purposes;• removal of the serial number and/or rating label.
- In addition, the warranty does not apply to normal consumer goods, such as:• dough hooks, baking tins, (carbon) filters, etc.;• batteries, bulbs, carbon filters, fat filters, etc.;• external connection cables;• glass accessories and glass parts such as oven doors;• and similar items.
- Transport damage not caused by Inventum is also excluded. Therefore, inspect your new device before starting to use it. If you detect any damage, you must report this to the store where you purchased the product within 5 working days, or to the Inventum customer service department via the form at ‘https://www.inventum.eu/service-aanvraag’. If transport damage is not reported within this period, Inventum does not accept any liability in this respect.
- The following are excluded from warranty and/or replacement: faults, loss of and damage to the device as a result of an event that is normally insured under the home contents insurance.
Important to know
 report this ad
1. The replacement or repair of a faulty product, or a part thereof, does not lead to an extension of the original warranty period.2. Parts that have been replaced, packaging material and exchanged devices are taken back by the service engineer and become the property of Inventum.3. If a complaint is unfounded, all costs arising from it will be at the customer’s expense.4. Following expiry of the warranty period, all costs of repair or replacement, including administration costs, dispatch and call-out charges, will be charged to the customer.5. Inventum cannot be held liable for damage as a result of devices built in incorrectly.6. Inventum cannot be held liable for damage caused by external events, unless this liability arises from mandatory statutory provisions.7. These warranty and service provisions are governed by Dutch law. Disputes will be settled exclusively by the competent Dutch court.
References
[xyz-ips snippet=”download-snippet”]