
User’s Guide
- Getting the Most out of Your Zip Drive
- Operating Your Zip Drive
- Zip Tips
- Iomega Tools Software
- Special Information for Windows NT®Windows® 95, and Windows /DOS
Welcome to Zip Drive!
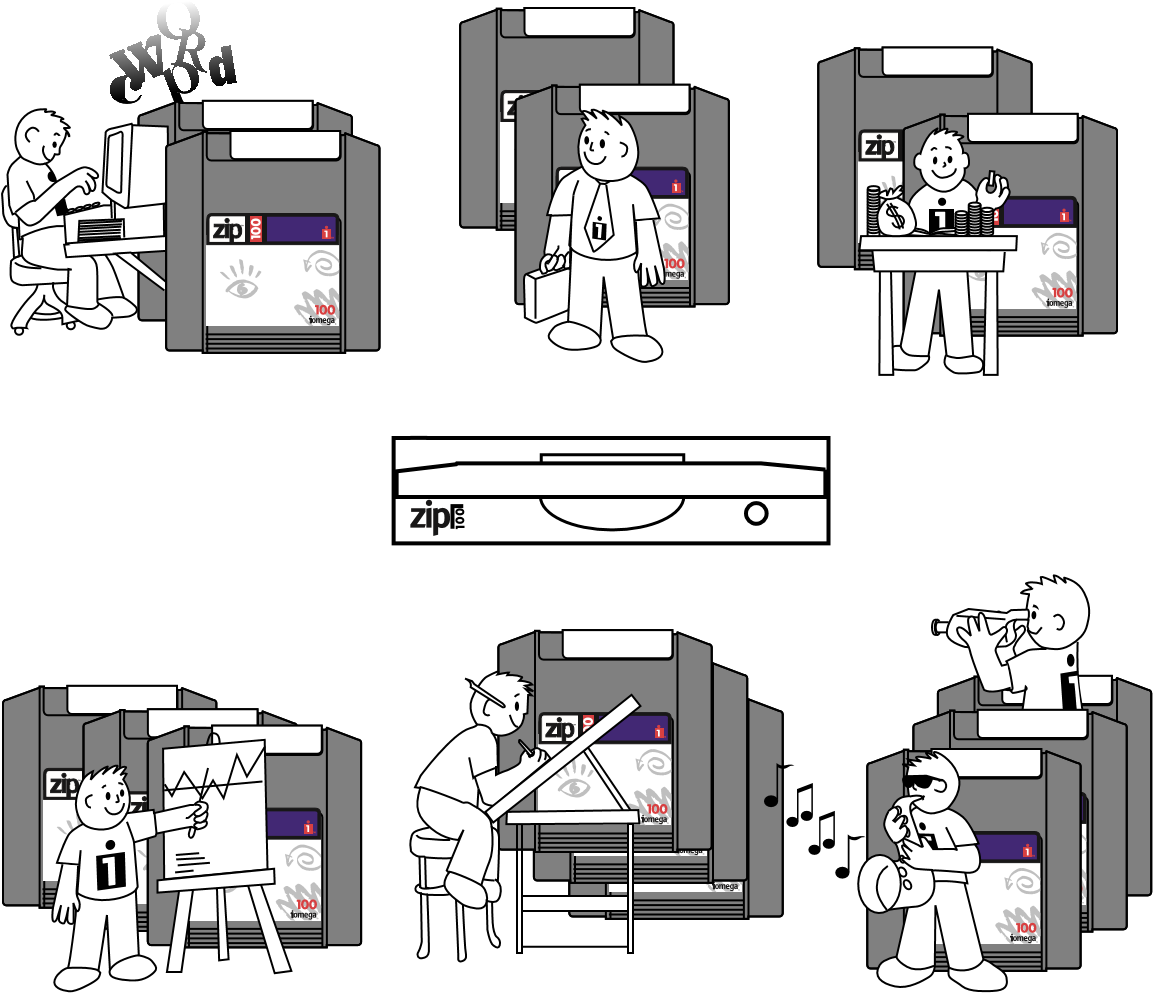
Getting the Most Out of Your Zip Drive!
Your Zip drive gives you high capacity, high-performance storage. It’s like having a hard disk upgrade, mobile storage, and a backup drive all in one easy solution. With your Zip drive you can:
Expand your computer storage – 100MB at a time … Move your work to different locations and computers (if they also have Zip drives) … Back up your hard disk or any other disk drive on your system quickly and easily … Create a multimedia library … Store large scanned or downloaded files …
Organize large amounts of information … Take work home or on the road … Design and demo multimedia presentations … Use one disk per account, project, or client … Protect sensitive information … Archive old files and e-mail messages … Share large files with co-workers, clients, friends, and service bureaus … Keep financial and business records safe and secure … Give your kids disks for school work and other stuff … Save absolutely anything you don’t want to throw away … Collect stuff from online services without filling up your hard drive … Store and run all your games …
Here’s how to get the most from your Zip drive …
![]() Extend Your Hard Disk ( hard disk upgrade alternative )
Extend Your Hard Disk ( hard disk upgrade alternative )
Are you constantly running out of hard disk space? Your Zip drive and disks give you increased storage and easy access to all your information with hard-disk-like performance.
![]() Move Information
Move Information
Do you need to move large amounts of information between different work locations? Between home and work? To and from clients? Your Zip disks offer complete mobility and can be moved and used anywhere you have another Zip drive. Zip disks fit in a shirt pocket and can be easily shipped anywhere.
![]() Back-Up Your Hard Drive
Back-Up Your Hard Drive
Your Zip drive makes backups fast and simple. You don’t need special backup software – just copy critical files to a Zip disk. Copying is fast, and you end up with an exact duplicate of your original files. If you need to restore a file, simply copy it back to your hard drive, or just access it directly from the Zip drive.
![]() Create a Multimedia Library – Images, Sounds, and Video
Create a Multimedia Library – Images, Sounds, and Video
Because of their high capacity, removability, and random access, Zip disks are ideal for storage-hungry image, sound, and video files. Clips can come from a variety of sources, including scanners, CD-ROMs, and video input devices. You can create and store multimedia presentations and demonstrations, including video, that you can replay directly from the Zip disk.
![]() Archive Your Important Records
Archive Your Important Records
Do you need to keep files for a number of years? Archive your valuable files on a Zip disk and store them in a safe place. Whenever you need them, you can access them quickly.
![]() Get Organized
Get Organized
If you work on many different projects or with many different clients, try segmenting your work onto different disks. You can organize your information by project, client, date, or whatever. Zip disks give you the capacity to get all associated files onto a single disk. Then, switching between projects and customers is as simple as inserting another Zip disk.
![]() Secure Sensitive Files
Secure Sensitive Files
To keep sensitive or confidential information safe, store it on a Zip disk and use your Zip Tools software to assign a password that must be used in order to read from or write to the disk. You can protect sensitive information such as personnel files, company directories, product plans and designs, tax records, budgets, and computerized checkbooks.
Operating Your Zip Drive
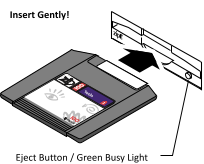
Use your Zip drive just like any other drive on your system. To access the Zip drive, insert a disk and select the Zip disk icon or drive letter. Store and copy files to and from the Zip drive using the same methods you use for other drives on your system. Disk Eject Button / Green Busy Light ( Flashes when drive is transferring data or when inserting or ejecting a disk)
Inserting and Removing Zip Disks
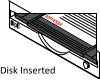
Always turn on power to the computer before inserting a Zip disk.When you insert a Zip disk, the drive busy light will flash momentarily and go out. (If the light continues to blink slowly, push the disk eject button to eject the Zip disk, then reinsert it.)
When you remove the Zip disk from the drive, store it in the protective case. It is not necessary to remove the Zip disk from the drive when you shut down your computer; however, if you desire to remove the Zip disk, do so before turning off power to your computer.
CAUTION Never force a disk into or out of the Zip drive.
Handling Zip Disks
Always store Zip disks in their protective cases when they are not inserted in your Zip drive.
Drive Sleep
The Zip drive has an automatic sleep mode designed to reduce power consumption and prolong the life of Zip disks. Sleep mode automatically spins down a disk after 15 minutes of inactivity, and the disk automatically spins up again when accessed. You can change the sleep mode time using your Iomega Tools software.
Disk Eject in Case of Power Loss
The computer must be powered on for normal disk ejection from the Zip drive. If you must remove a Zip disk from the drive during a power failure, access the rear of the Zip drive and push a straightened paper clip into the emergency eject hole which is located just above the power connector (see illustration below).
CAUTION Disconnect power from the computer before using the emergency disk eject hole. Do not try to forcibly remove a Zip disk from the drive. If the disk does not eject immediately, repeat the emergency disk eject procedure as described above.
 Zip Tips

- Always turn on power to your computer before inserting a Zip disk.
- Never force a Zip disk into or out of the drive.
- Never use ordinary 3.5″ diskettes or floppy head-cleaning disks in your Zip drive. They will damage your drive.
- It is a good idea to return the Zip disk to its case when not in use.
- Avoid exposing Zip disks to direct sunlight, high temperature, moisture, and magnetic fields.
WARNING Do not use ordinary 3.5 inch floppy head cleaning diskettes or data diskettes. They will damage your Zip drive.
Iomega Tools Software
The 100MB Zip “tools” disk contains a complete package of software tools designed to help you take advantage of all the features of your Zip drive. If Iomega Tools are not already set up on your computer, you need to install them using the instructions in the “Special Information” section for your operating system. For information on using the software, refer to the help files installed on your hard disk in the Iomega Tools folder or program group.M IMPORTANT: The 100MB “tools” disk included with your Zip drive contains files needed for installing or reinstalling your Tools software. Avoid deleting the installation files for your system.
Read/Write Protecting Zip DisksYour Tools software includes a special read/write protect feature that lets you:
- Write Protect a Zip disk through software instead of with a mechanical write-protect switch.
- Write Protect a Zip disk and assign a password that must be used to remove the write-protect.
- Read Protect a Zip disk so that it cannot be read from, or written to, unless the user enters the password you assign.
For information on using read/write protect, refer to the Tools help file.
Special Information for Windows NT Users
How to Install or Reinstall Iomega Software
M IMPORTANT! You must have administrator privileges for your local computer in order to install software drivers under Windows NT. You must also have administrator privileges for your computer to run the ToolsNT utilities.
To install your Iomega software, insert the 100MB “tools” disk that came with your system into the Zip drive, and insert the Iomega Install diskette for Windows NT into the computer’s floppy drive. You may need to run SetupNT.exe twice from the Install diskette – once to install the Iomega Zip IDE/ATAPI driver, the second time to install ToolsNT software.
Reinstalling Windows NT: If you reinstall Windows NT, you must also reinstall the Iomega ATAPI driver and ToolsNT software. If you do not reinstall the Iomega software, disks will not format correctly in your Zip drive and/or the Zip drive will appear as a floppy drive (b:).
Installing Iomega Software under Windows NT 4.0:
- Run a:\setupnt.exe from the Windows NT Install diskette.
- If the SetupNT program is unable to locate the “tools” disk, make sure it is fully inserted and click “OK.” If SetupNT is still unable to locate the “tools” disk, click “OK” again and SetupNT will automatically open the “SCSI Adapters” Control Panel so that you can install the Iomega Zip IDE/ATAPI driver.** Continue to step 2.**NOTE: Windows NT installs drives or adapters that use the IDE interface as SCSI adapters.
- If the necessary driver is already present on the system, SetupNT will be able to locate the “tools” disk and install ToolsNT software. After Windows NT reboots, the Zip ATAPI drive will be ready to use.
- Select the “Drivers” tab and click the “Add” button.
- When the list of Iomega adapters appears, double-click the Iomega Zip IDE/ATAPI driver.
- Choose “Current” in the Windows NT dialog box. Windows NT will then add the Zip ATAPI driver to the list of installed drivers found on your system.
- At the next Windows NT dialog box, select “Yes” to reboot the system. Remove the Install diskette from the floppy drive while Windows NT reboots.
- After Windows NT reboots, run SetupNT again from the Install diskette to install the ToolsNT software package.
IMPORTANT! If the SetupNT program still cannot locate the “tools” disk, refer to the NTReadme.txt file on the Install diskette for instructions on manually installing the driver.
Installing Iomega Software under Windows NT 3.51:
- Run a:\setupnt.exe from the Windows NT Install diskette.
- If the SetupNT program is unable to locate the “tools” disk, make sure it is fully inserted and click “OK.” If SetupNT is still unable to locate the “tools” disk, click “OK” again and SetupNT will automatically run the “Windows NT Setup” program so that you can install the Iomega Zip IDE/ATAPI driver. Continue to step 2.
- If the necessary driver is already present on the system, SetupNT will be able to locate the “tools” disk and install ToolsNT software. After Windows NT reboots, the Zip ATAPI drive will be ready to use.
- From the Windows NT Setup window, choose the Options pulldown menu and select “Add/Remove SCSI adapters.”NOTE: Windows NT installs drives or adapters that use the IDE interface as SCSI adapters.
- When the list of adapters appears, click “Add,” then click “OK” in the message box.
- Click the down arrow next to the window for “Select SCSI Adapter Option” to open the adapter list.
- Scroll down the list of adapters and select the Iomega Zip IDE/ ATAPI driver.
- Click the “Install” button.
- Choose “Current” in the Windows NT dialog box. Windows NT will then add the necessary driver to the list of installed adapters found by the operating system.
- Click the button for “Close” and exit Windows NT Setup.
- Click “OK” and reboot the system. Remove the Install diskette from the floppy drive while Windows NT reboots.
- After Windows NT reboots, run SetupNT again from the Install diskette to install the ToolsNT software package.
IMPORTANT! If the SetupNT program still cannot locate the “tools” disk, refer to the NTReadme.txt file on the Install diskette for instructions on manually installing the driver.
Microsoft Disk Copy Utilities
When copying disks in the Zip drive, do not use Microsoft DISKCOPY.EXE or the CopyDisk utility that is available when you right mouse click on the Zip drive icon. These utilities only work correctly with floppy drives.
Zip ATAPI Disk Eject
If a disk does not eject from the Zip ATAPI drive, one of the following suggestions should solve the problem:
- Close any windows listing the disk contents (such as My Computer or Windows Explorer).
- The Iomega Zip ATAPI driver may not have loaded correctly. Try reinstalling the driver following the instructions on page 6 or page 7.
If the disk still does not eject immediately, it may be due to the way Windows NT handles disk caching. Eventually, NT will allow the disk to eject.
BIOS/CMOS Support
Your computer should ship with BIOS support for the Zip ATAPI drive disabled in the CMOS Setup. If your system includes autodetection, it should be turned off for the Zip ATAPI drive.
Special Information for Windows 95 Users
How to Install or Reinstall Iomega SoftwareTo install Iomega software, you need both the 100MB “tools” disk that came with your system and the Iomega Install diskette for Windows 95. You may need to run Setup.exe twice from the Install diskette – once to install drivers for the Zip ATAPI drive, the second time to install Tools 95 software.
Reinstalling Windows 95: If you reinstall Windows 95, you must also reinstall Iomega Tools 95 software. If you do not reinstall the Iomega software, your system will not have the drivers needed for you to use the Zip ATAPI drive.
- Insert the 100MB “tools” disk into the Zip drive.
- Insert the Iomega “Install” diskette for Windows 95 into the computer’s floppy drive.
- Click the Start button on the Windows 95 Desktop and choose Run.
- Type a:\Setup in the command line dialog box (or use browse to select Setup.exe from the Install floppy diskette).
- Click OK to start the Setup program.
- Changing Drive Letters under Windows 95If Setup restarts the system before completing the Tools installation, rerun the Setup program after Windows 95 restarts.
- Follow the on-screen instructions to install the Tools 95 software package.
Changing Drive Letters under Windows 95To assign a specific drive letter to the Zip ATAPI drive under Windows 95, use the following procedure:
- Right mouse click on the icon for My Computer and select “Properties.”
- Click on the “Device Manager” tab.
- Click the plus sign ( + ) next to “Disk drives,” then click on the icon for the Zip ATAPI drive to select it.
- Click on the “Properties” button located at the lower left of the Device Manager window.
- Click on the “Settings” tab.
- The Settings windows will tell you the current drive letter for the Zip ATAPI drive. To set a specific drive letter for the Zip drive, select the desired drive letter in the dialog box for “Start drive letter.” Note that the same drive letter should appear in the dialog box for “End drive letter.”
NOTE: If “Reserved drive letters” is grayed out, it is probably because your Zip drive is being detected in BIOS. Run your computer’s CMOS setup and disable BIOS support for the Zip drive, then follow the instructions for changing the Zip drive letter.
Microsoft Disk Copy Utilities
When copying disks in the Zip drive, do not use Microsoft DISKCOPY.EXE or the CopyDisk utility that is available when you right mouse click on the Zip drive icon. These utilities only work correctly with floppy drives.
Installing Applications to the Zip DriveCertain applications and games will install only to a fixed disk. In order to install these programs to the Zip drive, first right mouse click on the Zip drive icon in either My Computer or Windows Explorer and select “Make Nonremovable.” This enables the software to install by making the Zip drive appear as a hard drive to the system. After the software installation is complete, again right mouse click on the Zip drive icon and select “Make Removable” to restore disk removability.
Installing Third Party SoftwareSome software install programs must have a disk present in every drive connected to the system (including the Zip ATAPI drive) in order to run properly. If a disk is not inserted in the Zip ATAPI drive during such an installation, you will see a “System Error” blue screen reading the Zip drive letter. Simply insert a disk in the Zip drive to continue the installation.
BIOS/CMOS SupportYour computer should ship with BIOS support for the Zip ATAPI drive disabled in the CMOS Setup. If your system includes autodetection, it should be turned off for the Zip ATAPI drive.
Windows 95 DOS Mode
Operation of the Zip ATAPI drive under Windows 95 DOS mode is not fully supported at this time. Until full support is available, you must perform a clean reboot when switching to or from DOS mode in order for the Zip drive to operate properly.
To switch to DOS mode: (1) Restart the computer and press F8 at the prompt “Starting Windows 95.” (2) When the menu appears, select “Command Prompt Only.” (3) After the system boots into DOS mode, insert a Zip disk in the Zip ATAPI drive. (4) Run GUEST.EXE from the Zip “Install” floppy diskette or from the “Tools_95” folder on drive C.
This procedure will provide access to any Iomega drives on the system. To return to the Windows 95 graphical interface, restart the computer. Do not type “WIN” at the DOS prompt after running GUEST.EXE as this will cause drive letter ghosting.
Special Information for Windows/DOS Users
How to Install or Reinstall Iomega Tools SoftwareTo install Iomega software, you need both the 100MB “tools” disk that came with your system and the Iomega Install diskette for Windows/DOS. Start the Setup program as described below and follow the screen instructions.
Windows 3.1 Users:
- Start Windows.
- Insert the 100MB Tools disk that came with your system into the Zip drive.
- Insert the Windows/DOS “Install” diskette into the computer’s floppy drive.
- In the Windows Program Manager, select the File menu and choose Run.
- In the Command Line box, type a:setup if the Windows/DOS Install floppy is in drive a: (or b:setup if it is in drive b:).
- Click OK or press the Enter key to start the Setup program.
DOS Users (Windows not installed):
- Insert the 100MB Tools disk that came with your system into the Zip drive.
- Insert the Windows/DOS “Install” diskette into the computer’s floppy drive.
- At the DOS prompt, type a:guest if the Install diskette is in drive a: (or b:guest if it is in drive b:).
- Press Enter and note the drive letter Guest assigns to your Zip drive.
- At the DOS prompt type: d:\dosstuff\install (use the Zip drive letter in place of d:), then press Enter.
- After the software intallation is complete, reboot the computer.
Saving Files to the Tools Disk: If you attempt to save files to the Zip “tools” disk and find that the disk is write-protected, go to the DOS prompt and type d:\dosstuff\reclaim (use the Zip drive letter in place of d:), then press Enter.
If you need Help, refer to the electronic manual (MANUAL.EXE) located on the Install diskette.
Using Copy Machine under WindowsWhen using Copy Machine in Windows 3.11 or Windows for Workgroups, turn off 32-bit disk and/or file access. (This option is available when changing virtual memory options under 386 Enhanced in the Windows Control Panel). If 32-bit access is not turned off, your hard drive will not appear for selection in the Copy Machine window.
Microsoft BackupMicrosoft Backup does not support removable disk drives other than floppy drives. Copy Machine can be used to backup files on the hard disk to the Zip drive, or you can use Windows drag-and-drop to copy files.
Microsoft DISKCOPYWhen copying disks in the Zip drive, do not use Microsoft DISKCOPY.EXE. This utility only works correctly with floppy drives.
Windows Format UtilityDo not use the format utility available in the Windows File Manager to format Zip disks. Open the Tools program available in the Iomega Tools group and use the Iomega format utility (either short or long format).Installing Applications to the Zip DriveCertain applications and games will install only to a fixed disk. To install these programs to the Zip drive, use the Iomega Tools “Make Nonremovable” or “Lock” utility to make the Zip drive appear as a hard drive to the system. After the software installation is complete, use “Make Removable” or “Unlock” to restore disk removability.
Installing Third-Party SoftwareSome software install programs must have a disk present in every drive connected to the system (including the Zip ATAPI drive) in order to run properly. If a disk is not inserted in the Zip ATAPI drive during such an installation, you will see a “System Error” blue screen reading the Zip drive letter. Simply insert a disk in the Zip drive to continue the installation.
BIOS/CMOS SupportYour computer should ship with BIOS support for the Zip ATAPI drive disabled in the CMOS Setup. If your system includes autodetection, it should be turned off for the Zip ATAPI drive.
Iomega’s Automated Help SystemsInternet Home Page:………………………………….http://www.iomega.comAmerica Online™ ……………………………………….Keyword: IomegaAutomated FAX Help (U.S. & Canada only) ..1-801-778-5763Automated E-Mail ……………………………………..[email protected]
( Please type “Zip” in the subject header when sending your E-Mail )Iomega Bulletin Board ………………………………..1-801-778-58888 ,N,1; 9600 baud and above; ANSI (24 hrs – Download only )Repair and Return Information ……………………1-801-779-6100( No technical support information is available at this number. )
European Support NumbersRefer to the electronic manual included with your Zip software package for a complete list of European support numbers.
![]() © 1997 Iomega Corporation. Iomega and the Iomega logo are registered trademarks of, and Zip and the graphic swirl, hand and eye are trademarks of, Iomega Corporation. Windows and Windows NT are registered trademarks of Microsoft Corporation. All other product and brand names are the property of their respective companies.
© 1997 Iomega Corporation. Iomega and the Iomega logo are registered trademarks of, and Zip and the graphic swirl, hand and eye are trademarks of, Iomega Corporation. Windows and Windows NT are registered trademarks of Microsoft Corporation. All other product and brand names are the property of their respective companies.
EN330001
iomega zip atapi User’s Guide – iomega zip atapi User’s Guide –
[xyz-ips snippet=”download-snippet”]