
iottie Auto Sense Dash and Windshield Mount
Getting Started
For optimal mounting and charging, please follow the detailed instructions within this manual when using the Auto Sense Wireless Charging Mount. iOttie is not liable for possible damages due to product misuse.
Critical Information
Mounting at a perpendicular angle to the mount works best with the proximity sensor.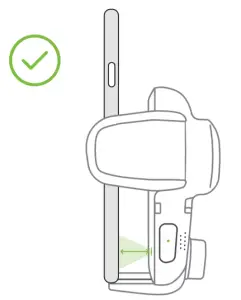 If mounting at an angle, phone will need to be very close to sensor for arms to open.
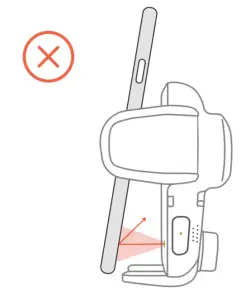
- Smartphone casesReflective Smartphone cases work best. Dark colored or textured cases do not reflect light well, making it difficult for the Proximity Sensor to detect phone. If using a dark colored or textured case, the phone will have to be very close to mount for arms to open automatically.
- CompatibilityBefore using product, make sure your device is Qi Wireless compatible. Compatible devices include iPhone X, iPhone Xs, iPhone XR, Samsung Galaxy S10, S10+, Note9+, and Google Pixel 3.
- Qi Wireless Charging in VehicleUse the included iOttie Car Charger and Micro USB Cable. If you do use a third party car charger, use a Qualcomm Quick Charge 2.0 or equivalent adapter to receive a wireless charge (with compatible devices).
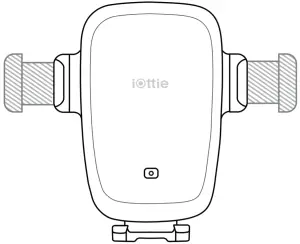
At a Glance
Installation
- Assembling the Mount

- Selecting a LocationChoose an installation method: Dashboard/Flat Surface (A) or Windshield (B).
Option ADashboard or Flat Surface Installation
Choose an area on a flat surface on the vehicle’s dashboard and wipe any dust or debris from the surface. Prior to mounting product, we recommend surface and product be above 40°F.
- Peel off the film on the pad & stick on the desired installation location. Wait 15-30 minutes for adhesive to adhere before moving on to next step.
- Peel off the protective film on the Suction Cup and press mount firmly onto the dashboard pad.
- Push Locking Lever down to secure mount.


Option BWindshield Installation or Curved Glass Installation
Choose a location on the windshield and wipe any dust or debrisfrom the surface.
- Peel off the protective film on the Suction Cup and press firmly onto the windshield.
- Push Locking Lever down to engage suction.


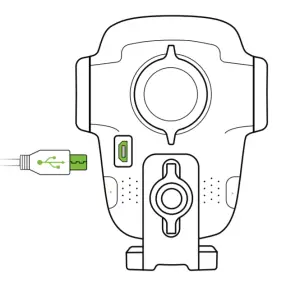
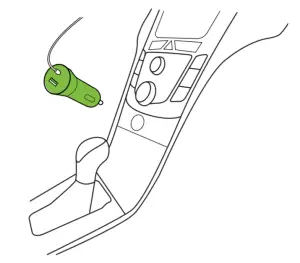
Connecting Power
- Plug the micro-USB cable into the USB port on the back of the Mounting Head.
- Insert Car Charger into your vehicle’s power port.
Using the Auto Sense Mechanism
Once it is unplugged or car is turned off, the Auto Sense’s internal battery keeps a charge for up to one hour.
Mounting and Charging
- Side arms on mount automatically open via silent step motor for one second when phone is detected in front of Proximity Sensor on mount.
- Once phone is placed in mount, arms will automatically close after one second. Qi wireless charging will start immediately.Releasing Device
- Buttons under the light on both sides of device can also open and close the arms. One or both buttons can be pressed.
 Releasing Device
- The Auto Sense is powered via a micro-USB cable and coil cell battery. There is no on/off switch on the device. Once it is plugged in, the device will remain on unless the vehicle shuts off power when in parking mode.
Adjusting the Mount
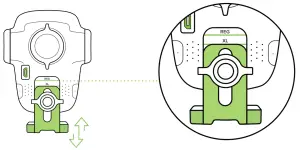
- Foot KnobOut of box, the foot knob is set to regular sized phones. Foot will need to be adjusted for plus sized phones or cases with thicker bottoms.
- Move the knob down until laser etching is aligned appropriately as shown in line drawing.
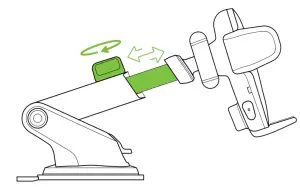
- Telescopic KnobLocated on top of Telescopic Arm, loosen to extend the arm, and tighten to secure distance.
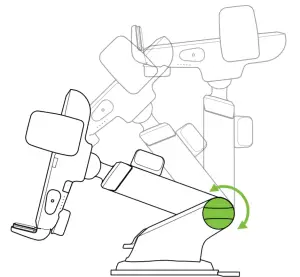
- Pivot KnobLocated on the side of the Mount Base, turning allows you to pivot telescopic arm. Tighten to secure position.
Qi Alignment Guide
The Qi Receiver Coil is usually located in the center area of the phone. Check with your phone’s manufacturer for Qi coil location. Below are some examples for commonly used phones.
![]() For larger/plus phones or larger cases, knob on mount will need to be adjusted as indicated by laser etching on back for proper alignment with Qi coils.
For larger/plus phones or larger cases, knob on mount will need to be adjusted as indicated by laser etching on back for proper alignment with Qi coils.
![]() The Qi coil on the mount is located at the top, above the iOttie logo.Please follow the guide below to line up your phone with the device for an optimal wireless charging.
The Qi coil on the mount is located at the top, above the iOttie logo.Please follow the guide below to line up your phone with the device for an optimal wireless charging.


Wireless Charger Specifications
| INPUT | DC 9.0V-1.67A DC 5.0V-2.0A |
| CHARGING PORT | MICRO USB |
| LENGTH | 2.96″ |
| WIDTH | 2.75″ |
| HEIGHT | 3.74″ (Foot not extended) |
| WEIGHT | 4.16oz |
Car Charger Specifications
| MODEL NUMBER | CHY-CC-U2CQ3C |
| INPUT | DC 12V~24V |
| OUTPUT | DC 5V – 3A DC 9V – 2A DC 12V – 1.5A |
| MICRO USB CABLE LENGTH | 120MM |
Charging Indicator
| Solid Green Light | Smartphone charging. |
| Blinking Red Light | Smartphone not charging.Foreign object detected or overheating of mount or smartphone. |
![]() If you love your iOttie product, let us know by leaving a review online, or connect with us on our social platforms.
If you love your iOttie product, let us know by leaving a review online, or connect with us on our social platforms.
www.iottie.com [email protected]

References
[xyz-ips snippet=”download-snippet”]