Quick Start Guide
Thank you for purchasing your istorage cloudAshur cloud encryption module (cloudAshur).This document will guide you through the steps to set up and start using your new cloudAshur.
Basic steps
The basic steps required to set up and start using your cloudAshur are:
- Configure an Admin PIN for the cloudAshur.
- Register the cloudAshur for use.
- Connect a cloud or local folder to the cloudAshur client app. These folders will be used to store encrypted files.
- Start encrypting files on your computer or in the cloud.
These steps are described in order below.
Before starting:
- Make sure that your cloudAshur is fully charged. You may need to insert the cloudAshur into a powered USB port for 20- 30 minutes to charge.
- Switch your computer on and log in. Please note: your computer must have a USB port to use the cloudAshur.
- Download and install the cloudAshur Client App onto your computer. You can download the cloudAshur Client App for Windows or macOS from the following link:https://istorage-uk.com/software-and-updates
- If you want to encrypt data on a cloud storage account, make sure that the relevant cloud storage desktop app is installed on your local computer. For help in finding the relevant cloud storage desktop app, go to: https://istorage-uk.com/desktop-apps
- If you want to encrypt data on a network drive, make sure that the network drive is mapped and ready to access.
Configure an Admin PIN
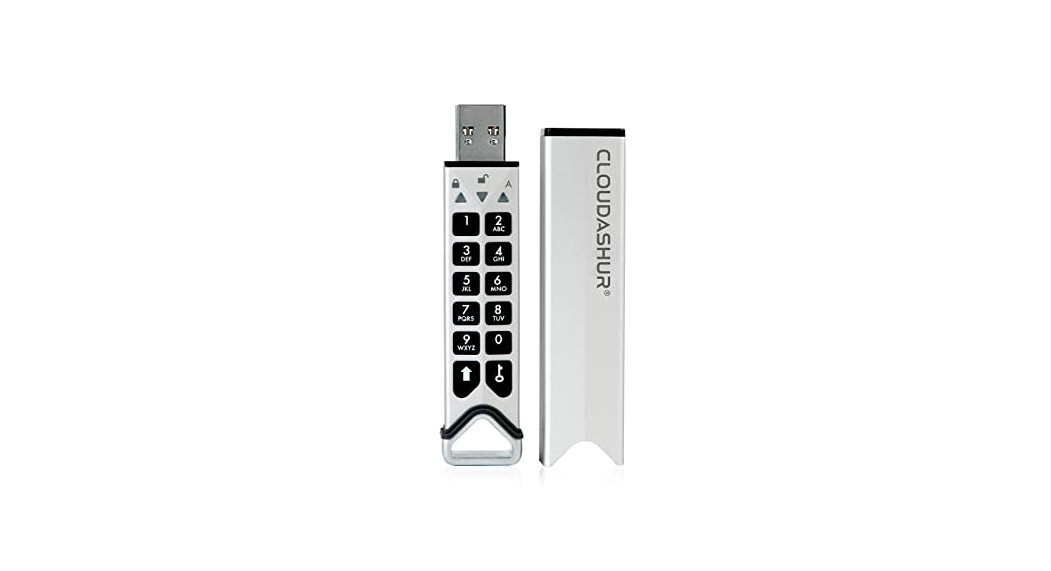
The Admin PIN is a 7-15 digit PIN number that is used to unlock your cloudAshur.Your cloudAshur ships with the following default Admin PIN: 11223344.Take the following steps to configure a new Admin PIN on your cloudAshur:
- Press
and hold for one second.The LED indicators flash and the lock indicator (RED LED) is lit.
- Press
 once.The unlock indicator (GREEN LED) and admin indicator (BLUE LED) simultaneously start blinking.
 - Use the keypad to enter the default Admin PIN (11223344) and press once.The GREEN and BLUE LEDs will start blinking rapidly.If the correct PIN is entered, the BLUE LED will stop blinking and the GREEN LED will start blinking to indicate that the cloudAshur is unlocked.Please note: Once unlocked, the cloudAshur will automatically lock if no action is taken for approximately 30 seconds. The RED LED is lit to indicate that the cloudAshur has locked.
- Press 3 times in quick succession.The BLUE LED is lit to indicate that the cloudAshur is in admin mode.
- Press and 2 together and hold.The GREEN LED will start blinking while BLUE LED remains lit.
- Use the keypad to enter a new 7-15 digit PIN.Press once when complete.The LEDs will switch to a single GREEN LED to blink and return to a blinking GREEN LED and a lit BLUE LED.
- Use the keypad to re-enter the new Admin PIN. Press once when complete.The LEDs will switch to a rapidly blinking BLUE LED, then the BLUE LED is re-lit to indicate that the Admin PIN has been successfully changed.
- Press
and hold for one second to exit admin mode.The BLUE LED will switch off to indicate that you have exited admin mode. The RED LED is lit to indicate that the cloudAshur is locked. The RED LED will fade out to return your cloudAshur to an idle state.
Please note: To unlock and access your data, your cloudAshur must first be in the idle state (all LEDs off) before an Admin PIN can be entered. Next, go to registration on page 6.
Registration
- Press
and hold for one second.The LED indicators flash and the lock indicator (RED LED) is lit.
- Press once.The unlock indicator (GREEN LED) and admin indicator (BLUE LED) simultaneously start blinking.
- Use the keypad to enter the Admin PIN and press once.The GREEN and BLUE LEDs will start blinking rapidly.If the correct PIN is entered, the BLUE LED will stop blinking and the GREEN LED will start blinking to indicate that the cloudAshur is unlocked.Please note: Once unlocked, the cloudAshur will automatically lock if no action is taken for approximately 30 seconds. The RED LED is lit to indicate that the cloudAshur has locked.
- Insert the unlocked cloudAshur into the USB port on your computer.The GREEN LED will stop blinking and remain lit to indicate that the cloudAshur is unlocked and connected to your computer.
- Open the cloudAshur Client App on your computer and click Registration (macOS – Sign-Up):
- Choose the registration type:» Create New User Account: Select this option if you are a new user and want to register your first cloudAshur. Go to Step 7.» Use Existing User Account: Select this option if you are a cloudAshur user and want to register the new cloudAshur to your existing account. Go to Step 11.
- Enter your personal details into the Create New User Account form:» Enter a Username.» Enter your First name and Last name.» Enter and confirm your Email Address.» Enter and confirm a Password for your new account. The password must be 8-64 characters in length.» Enter your Phone number.
- Check that there is a Device number.If the device number is not displayed, make sure that your cloudAshur is unlocked and connected to your computer, then click.
- Select the appropriate Remote Management Console option:» If your cloudAshur is to be managed by the cloudAshur Remote Management Console and you have received your Licence Key and PIN number, check the checkbox and enter your RMC registration PIN and License Key.» If your cloudAshur is not managed by the cloudAshur Remote Management Console, leave the checkbox unchecked.
- Click Register to complete the registration process. A confirmation message will pop up if registration is successful. Click Okay to continue.» If you are registering your cloudAshur as an unmanaged device, please follow the instructions are shown in the verification dialog box on your computer to confirm your email address:» If you are registering an unmanaged cloudAshur on macOS, please click Allow in the notification dialog box on your computer to enable notifications:The cloudAshur is now registered. Do not complete steps 11 to 14.Leave the cloudAshur plugged into your computer and go to cloudAshur Client app setup on page 14.
- Continued from step 6.Enter your personal details into the Use Existing User Account form:» Enter the Email address for your existing cloudAshur account.
- Check that there is a Device number. If the device number is not displayed, make sure that your cloudAshur is unlocked and connected to your computer, then click.
- Select the appropriate Remote Management Console option:» If your cloudAshur is to be managed by the cloudAshur Remote Management Console and you have received your Licence Key and PIN number, check the checkbox and enter your RMC registration PIN and License Key.» If your cloudAshur is not managed by the cloudAshur Remote Management Console, leave the checkbox unchecked.
- Click Register to complete the registration process.A confirmation message will pop up if registration is successful. Click Okay to continue.» If you are registering your cloudAshur as an unmanaged device, please follow the instructions shown in the verification dialog box on your computer to confirm your email address:» If you are registering an unmanaged cloudAshur on macOS, please click Allow in the notification dialog box on your computer to enable notifications: The cloudAshur is now registered. Leave the cloudAshur plugged into your computer and go to cloudAshur app setup on page 14.

 » Create New User Account: Select this option if you are a new user and want to register your first cloudAshur. Go to Step 7.» Use Existing User Account: Select this option if you are a cloudAshur user and want to register the new cloudAshur to your existing account. Go to Step 11.
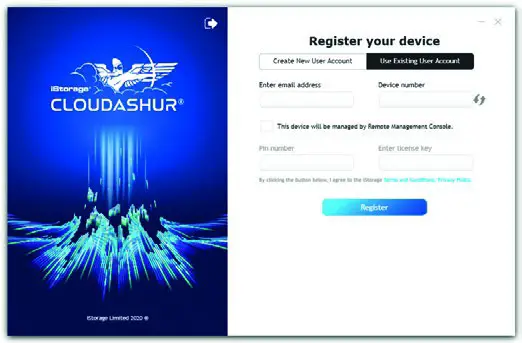 » Enter a Username.» Enter your First name and Last name.» Enter and confirm your Email Address.» Enter and confirm a Password for your new account. The password must be 8-64 characters in length.» Enter your Phone number.
 » If your cloudAshur is to be managed by the cloudAshur Remote Management Console and you have received your Licence Key and PIN number, check the checkbox and enter your RMC registration PIN and License Key.» If your cloudAshur is not managed by the cloudAshur Remote Management Console, leave the checkbox unchecked.
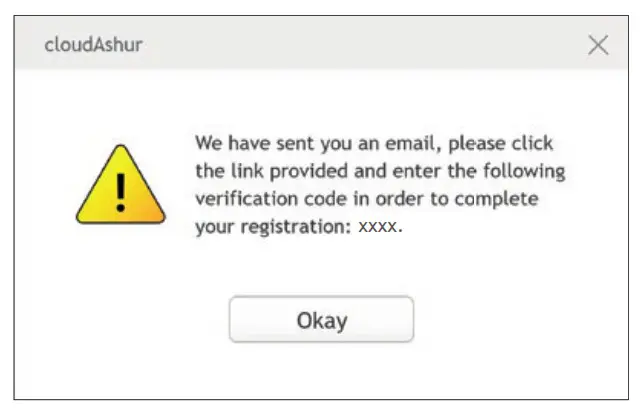 » If you are registering an unmanaged cloudAshur on macOS, please click Allow in the notification dialog box on your computer to enable notifications:
 The cloudAshur is now registered. Do not complete steps 11 to 14.Leave the cloudAshur plugged into your computer and go to cloudAshur Client app setup on page 14.
 The cloudAshur is now registered. Leave the cloudAshur plugged into your computer and go to cloudAshur app setup on page 14.
CloudAshur Client App setup
- After registering your cloudAshur, click the exit icon to leave the registration page:The Sign-in page is displayed on the cloudAshur Client App on your computer:
- Enter your Username and Password.
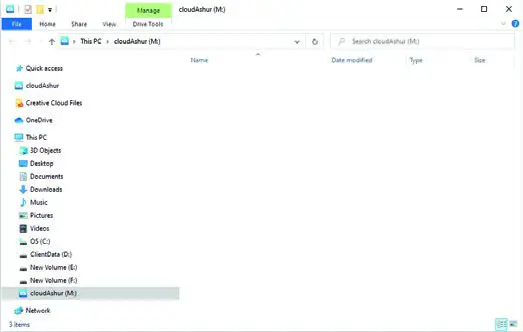
- Click Login.The cloudAshur virtual drive is displayed in Windows File Explorer (macOS – Finder).You have now logged in to your cloudAshur Client App.
- Click the cloudAshur icon in your Windows system tray (macOS – menu bar):The cloudAshur system administrator is displayed. The default view is the Folders page.
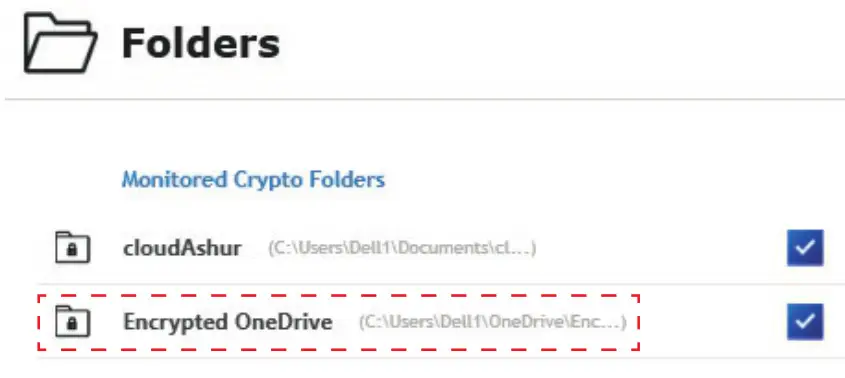
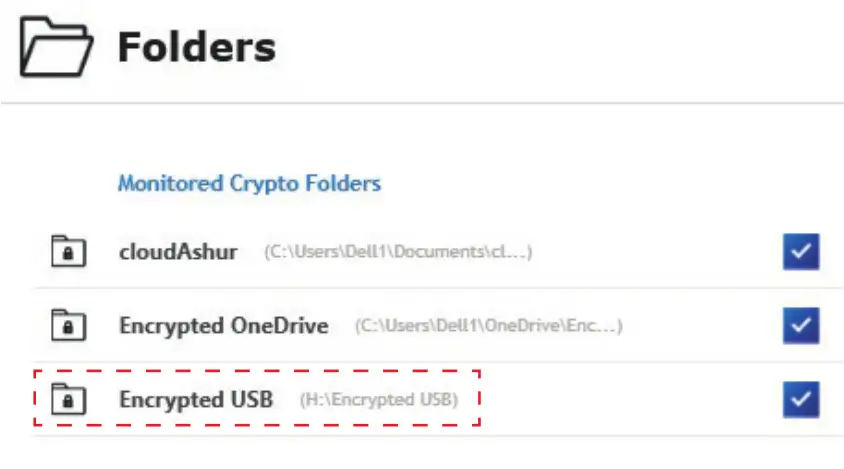
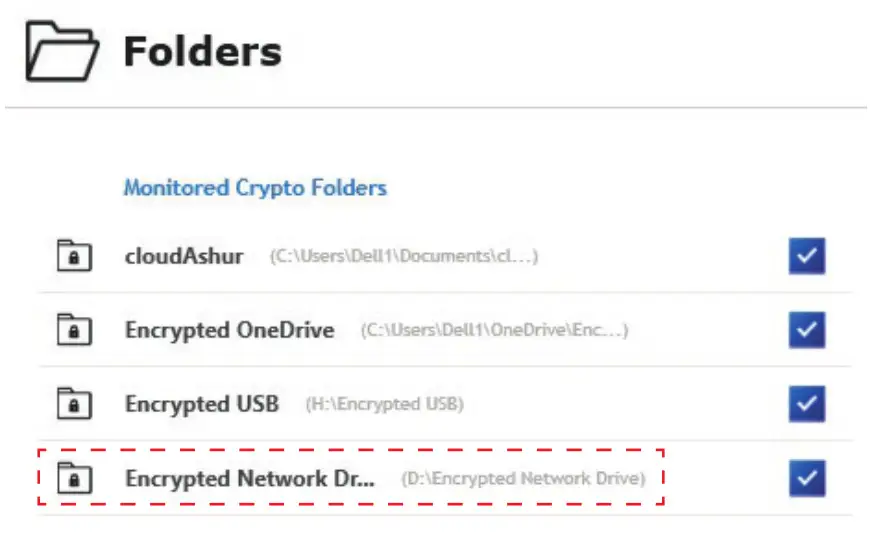
- Browse and select or make a new cloud or local folder that you want to use to store encrypted data. The folder is added to your list of Monitored Crypto Folders.Please Note: Files are only encrypted when they are added to this folder as described in Encrypting your data. Any files that are already in this folder are not encrypted.

 You have now logged in to your cloudAshur Client App.
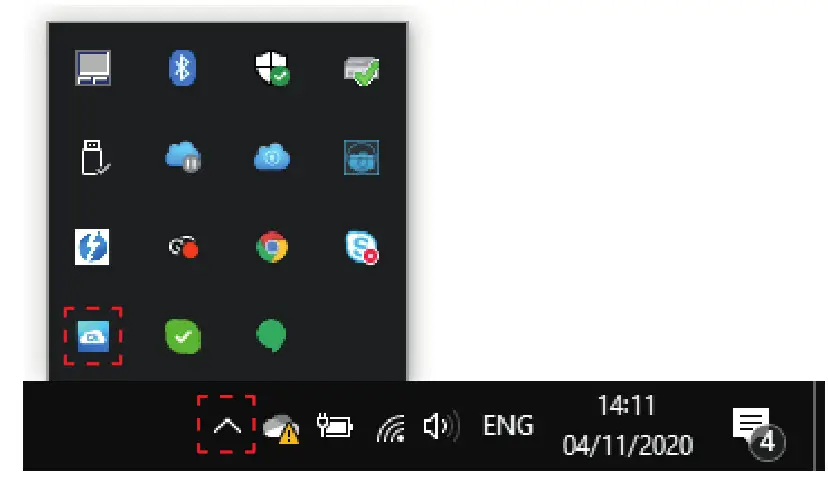 The cloudAshur system administrator is displayed. The default view is the Folders page.
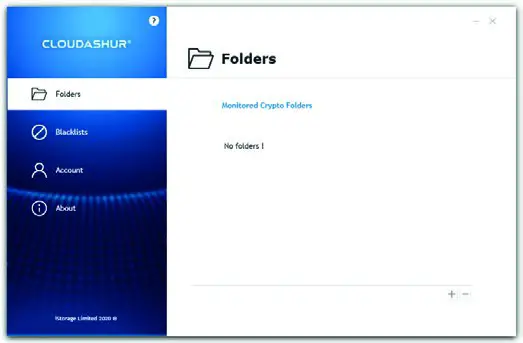
Connecting folders on a cloud storage account
Follow the steps as described in cloudAshur Client App setup and select the appropriate folder on your cloud storage account.
Connecting folders on an external storage device
Plug your external storage device into a USB port. Then follow the steps as described in cloudAshur Client App setup and select the appropriate folder on your external storage device.
Connecting folders on a local server/network drive
Follow the steps as described in cloudAshur Client App setup and select the appropriate folder on your local server/network drive.
Encrypting your data
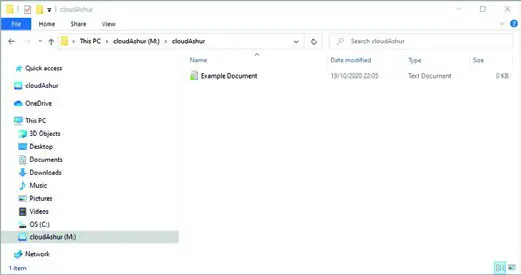
- Within your cloudAshur virtual drive, browse to the folder you want to store encrypted data in and open it.
- Drag and drop or copy and paste any files that you want to encrypt to the folder in your cloudAshur virtual drive.Encrypted files are marked with a RED padlock symbol when viewed outside of the cloudAshur virtual drive.Encrypted files are marked with a GREEN unlocked padlock when you are signed in and view the file in the cloudAshur virtual drive: You must be signed in to your cloudAshur to access encrypted files.
Sending encrypted files via email or a file transfer serviceWhen you attach the file to an email or want to send it via a file transfer service, navigate to the original (real) folder outside of the cloudAshur virtual drive.
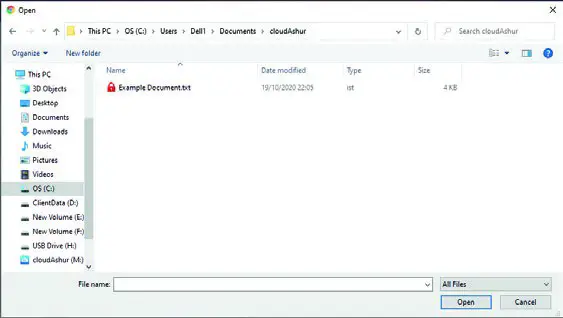
The file is marked with a RED padlock to indicate that it is encrypted and locked.Select the locked encrypted file when you attach it to an email or select it for file transfer.Please note: the recipient of the file will need a cloned cloudAshur to decrypt the encrypted file.
For the complete cloudAshur user manual, scan the QR code or go to:

https://istorage-uk.com/product-documentation/
 report this ad
Should you have any questions or installation issues, please contact iStorage Support at [email protected] or +44 (0) 20 8991 6265.To benefit from free lifetime support, please registeryour iStorage product here: https://istorage-uk.com/product-registration-form/
References
[xyz-ips snippet=”download-snippet”]