2.4GHzWireless Stereo Headphoneswith Cradle
SAFETY WARNINGS
- WARNING: Where the mains plug or appliance coupler is used as the disconnect device, such disconnect device shall remain readily operable.
- Risk of electric shock. Grounding continuity must be maintained.
- Lithium batteries, like all rechargeable batteries, are recyclable and should be recycled or disposed of according to state and local guidelines. They should never be disposed of in normal household waste, and they should never be incinerated, as they might explode. Contact your local government for disposal or recycling practices in your area.
- Only use the included power supply or an RCM/MEPS the power supply of the same power output
- To avoid hearing damage, make sure that the volume on your music player is turned down before connecting your headphones. After placing headphones in/on your ears, gradually turn up the volume until you reach a comfortable listening level.
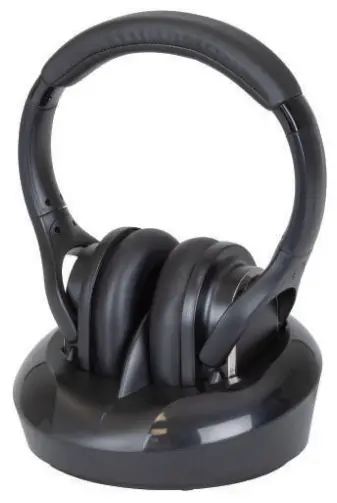
OVERVIEW
Headphones

Base

Control Functions

- PowerPress and hold to power ON and OFF.
- PairPress to pair to the headset base (see pg. 12 for pairing procedure).
 Volume Press up or down to adjust the volume level.
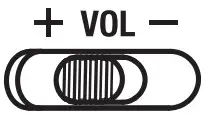 Volume Press up or down to adjust the volume level.
LED Indicator Lights
- HeadphoneFunctions Flashing Blue – Wi-Fi connecting Solid Red – Battery charging
- Base FunctionsSolid Red – Charging headphones Solid Blue – Media source connected Flashing Blue – Media source not connected
SETUP
Base PowerConnect the DC Power Input on the base to a standard power outlet using a DC Power Adapter (included).The base must be connected to a power source and powered ON to transmit audio to the headphones.

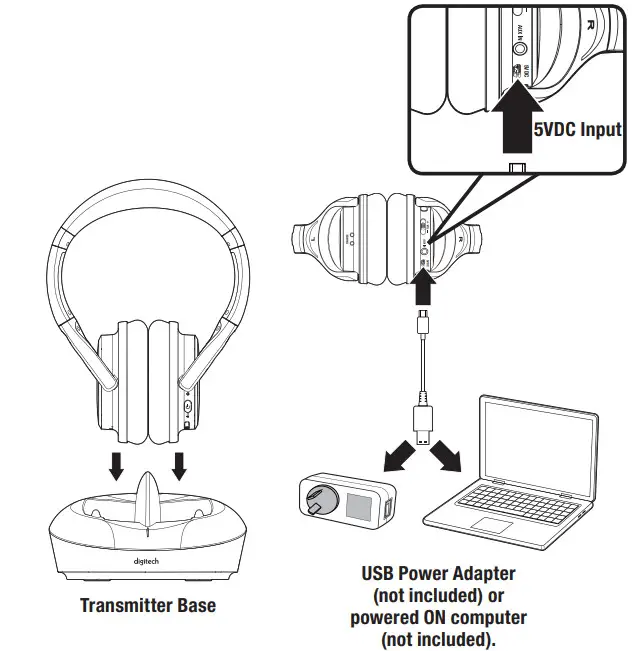
Headphone ChargingThere are two ways to charge the headphones.
- Place the headphone on the base so that the charging contacts are aligned.
- Use a Micro-USB to USB cable (included) to connect the 5VDC Input (Micro- USB) on the headphones to the USB port on a powered-on computer or USB power adapter (not included).A fully charged battery will provide up to 10 hours of playtime. Battery life will improve at lower volume levels and decrease at higher volume levels.
| Headphone & BaseIndicator Light | Battery Status |
| Red light ON | Charging battery |
| Light OFF | Charging battery |
CONNECTING AUDIO
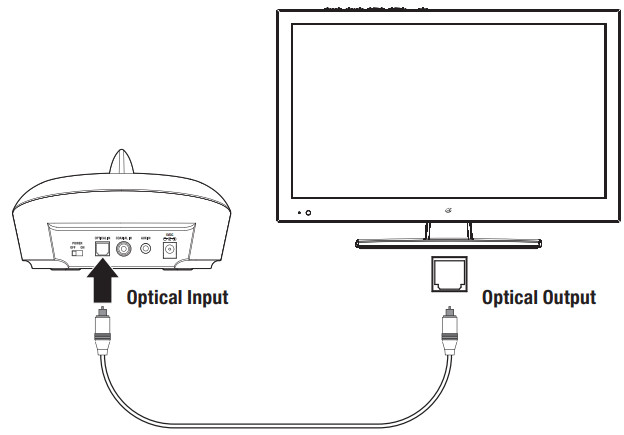
Digital Optical Audio
Requires a media source with an Optical Audio Output and a Digital Optical Audio Cable (included).
- Using a Digital Optical Audio Cable, connect the Optical Output on your media source (TV, etc.) to the Optical Input on the base.
- On the connected media source (TV, etc.), make sure the audio settings are set to PCM or Optical Audio.
- Audio played through the connected media source (TV, etc.) will now be sent through the base.
Important tips for optical audio:
- Use the correct Optical cable and make sure that it is seated in the Optical Input/Output sockets on the base and the media source.
- Optical audio output is activated from the media source (a red light should be visible from the Optical socket). It may be labeled SPDIF in the setting menu of the source.
- The optical output source should be set to output PCM and not Dolby Digital.
RCA Stereo Audio
Requires a 3.5mm to RCA stereo audio cable adapter and a 3.5mm audio cable (included). When connecting an RCA stereo audio cable (Red/White), match the colored plugs to their corresponding ports.
- Using a 3.5mm to RCA Stereo Audio Cable (included), connect the RCA Stereo Output on your media source (TV, etc.) to the Aux In (3.5mm audio input) on the base.
- Audio played through the connected media source (TV etc.) will now, be sent through the base.

CONNECTING AUDIO
Coaxial Audio
Requires a media source with a Coaxial Audio Output and a Coaxial Audio Cable (not included).
- Using a Coaxial Audio Cable, connect the Coaxial Output on your media source (TV, etc.) to the Coaxial Input on the base.
- On the connected media source (TV, settings are set to Coaxial Output. etc.), make sure the audio settings are set to Coaxial Output.
- Audio played through the connected media source (TV, be sent through the base. etc.) will now be sent through the base.

Line InRequires a 3.5mm audio cable (included). 1. Connect a 3.5mm audio cable to the Line In on the base or the headphones and the audio output/headphone jack on an audio device.

LISTENING
Pairing the Headphones to the Base
Note: After the initial pairing, the headphones will stay paired to the transmitter base. It will not be necessary to reconnect each time you use the headphones.
- Press and hold the Power/Pair button to power on the headphones.
- Press the Power/Pair button again to begin pairing. The headphones will automatically detect the base and connect to it.
- After a successful connection, the LED on the headphones will slowly blink blue. The LED on the base will turn solid blue.
- When you are using the headphones, press and hold the Power/ Pair button to power them off, then place them on the base to charge the batteries while not in use.
TROUBLESHOOTING
| PROBLEM
|
POSSIBLE SOLUTION |
| The unit will not power on |
|
| Audio distortion |
|
| Headphones won’t play or fail to connect |
|
| White noise/ Headphones will not function properly |
|
[xyz-ips snippet=”download-snippet”]