BassPro SL2Quick Start Guide
![]() BassPro SL2
BassPro SL2
THANK YOUfor choosing the JBL BassPro SL2. BassPro SL2 has been designed to provide the kind of high-performance low-frequency reproduction that used to require big, clumsy enclosures, large amplifiers, and complex installation. To ensure maximum performance, we strongly recommend that installation be entrusted to a qualified professional.WARNINGPlaying loud music in an automobile can permanently damage your hearing as well as hinder your ability to hear traffic. We recommend using low volume levels while driving. Harman International accepts no liability for hearing loss, bodily injury, or property damage resulting from the use or misuse of this product.
INSTALLATION
Choosing a mounting location Choose a location that doesn’t interfere with the loading or unloading of cargo, fold-down rear seats, or opening or closing of the trunk lid. The best location is likely to be the front or rear corner of the trunk or luggage compartment. These locations, in addition to being out of the way, will provide the best sonicreproduction in the 60Hz – 1 00Hz range because the output of the woofer will be “corner loaded” against the walls of the vehicle.In any case, the BassPro SL2 must not interfere with the safe operation of the vehicle.CAUTION: Make sure mounting screws will not puncture wiring harnesses, brake or fuel lines, or the vehicle’s fuel tank. Some or all of these may be located behind or under the mounting surface.
Mounting BassPro SL2
IMPORTANT: Disconnect the vehicle’s negative(-) battery terminal before beginning the installation.
![]()
CONNECTIONS
Power Connections
![]()
NOTE: If you are using only the BassPro SL2’s line-level (RCA) inputs, you must connect the remote wire from the BassPro SL2 to the system’s head unit so BassPro SL2 will tum on and off with the system. If you will be using the speaker-level outputs from your head unit, you do not need to connect the remote output. The BassPro SL2’s speaker-level inputs will sense voltage on the speaker wires and the BassPro SL2 will turn itself on. (See Audio Sense Switch, below.)
Input Connections
Connect the subwoofer output from the source unit to either the left or right line-level input. If your source unit does not have a dedicated subwoofer output you can connect the rear left/right outputs to the BassPro SL2’s left and right inputs.If your source unit doesn’t have line-level outputs you can use the included speaker-level input harness to connect the BassPro SL2 to the source unit’s speaker outputs. See theillustration for the wiring configuration.

TUNING BASSPRO SL2
BassPro SL2 provides several controls that simplify sonic integration with virtually any vehicle’s unique acoustic properties.Please read the following section carefully to familiarize yourself with the function of each control.
Phase Switch: This switch will reverse the phase of BassPro SL2’s output with respect to its input. When installing BassPro SL2 with an existing factory or aftermarket system, depending on BassPro SL2’s location in the vehicle and the distance between it and the other speakers in the car, changing the setting of the phase switch may produce a discernable increase or decrease in the amount of upper bass reproduced. Although the position that yields the most upper bass is technically correct, you may choose the position that best suits your taste.Level Control: This control will adjust the input sensitivity of BassPro SL2. Use this control to adjust the relative volume {loudness) of BassPro SL2 with respect to the other speakers in the vehicle.Crossover Control: The crossover control adjusts the amount of upper bass and midbass information present in BassPro SL2’s output. After listening to music on the system for a time, fine-tune the Crossover control setting to achieve a smooth transition from the BassPro SL2 to the rest of the system’s speakers while avoiding a “hole,” where the sounds that occur between the BassPro SL2 and other speakers seem to drop out.Bass Boost Control: BassPro SL2’s interaction with the acoustics of your vehicle may produce a peak or dip in BassPro _SL2’s response. For the vast majority of vehicles, these peaks or dips occur at about 40Hz – around the frequency of the lowest bass guitar note. Use the Bass Boost control to correct that peak or dip. Adjustment between 0dB and +9dB is possible. Although a response without any sharp peaks or dips is technically correct, you may choose the position that best suits your taste.Audio Sense Switch: If you have used the High-Level inputs to connect the BassPro SL2 to your system’s radio/head unit (see Input Connections, above), set the Audio Sense switch in the “On” position. This will allow the BassPro SL2 to sense voltage on the speaker inputs and turn itself on when the rest of the audio system turns on.Input Load Switch: This switch has an effect only when you have used the High-Level inputs to connect the BassPro SL2 to your system’s radio/head unit. For the lowest noise in most applications, set the Input Load switch in the “High” position. In some cases, (such as when using the radio’s power fader), the “Low” position may produce better results.Remote Connection: This connector is compatible with the RBC remote volume control.
Adjustment sequence
- Start with the Level control set to minimum, the Phase switch set to “0” and the Crossover and Bass Boost controls rotated to the 3 o’clock position.
- Choo.se program material with substantial bass content and turn the volume control on your head unit to three-quarters of its total output (approximately 3 o’clock on rotary controls).
- Adjust the gain control clockwise until the BassPro SL2’s volume sounds are balanced with the rest of the system.
- Continue listening, making a mental note of the amount of upper bass present in your system.
- Switch the Phase switch to “180” and recheck for upper bass content. There may be more upper bass, less upper bass, or there may be no change. The position that provides the most upper bass is correct, but you may choose either set according to your taste.
- Adjust the Crossover control clockwise or counterclockwise until the perceived output from BassPro SL2, as heard at the listening position, contains only low-frequency information; i.e., you should NOT hear any vocals coming from BassPro SL2 when you are seated in the normal listening position.
- Adjust the Bass Boost control clockwise or counterclockwise to suit your taste.
Note: Although this adjustment sequence will in most cases provide satisfactory tuning, the actual process may include several readjustments of each of the controls since their settings will interact with each other. If necessary, consult your authorized JBL car audio dealer for help in tuning your system.
SPECIFICATIONS
| Amplifier Power | 125Wrms |
| Frequency Response | 35Hz – 120Hz |
| Fuse | 15A |
| Maximum Current Draw | 12A |
| Quiescent Current Draw | <800mA |
| Input Sensitivity | 0.05 V – 2.0 V Low-Level Input;0.5 V – 20V High-Level Input |
| Crossover Frequency | : 50Hz – 120Hz |
| Crossover Slope | : 12dB/octave |
| Bass Boost | : 0dB to +9dB @ 70Hz |
| Dimensions 0N x H x D) | : 13-9/16″ x 9-7 /8″ x 2-13/16″{344mm x 250mm x 71 mm) |
![]() HARMAN InternationalIndustries, Incorporated8500 Balboa Boulevard,Northridge, CA 91329 USA© 2019 HARMAN International Industries, Incorporated. All rights reserved.JBL is a trademark of HARMAN International Industries, Incorporated, registered in the United States and/or other countries.All Rights Reserved. Features, specifications, and appearance are subject to change without notice.
HARMAN InternationalIndustries, Incorporated8500 Balboa Boulevard,Northridge, CA 91329 USA© 2019 HARMAN International Industries, Incorporated. All rights reserved.JBL is a trademark of HARMAN International Industries, Incorporated, registered in the United States and/or other countries.All Rights Reserved. Features, specifications, and appearance are subject to change without notice.
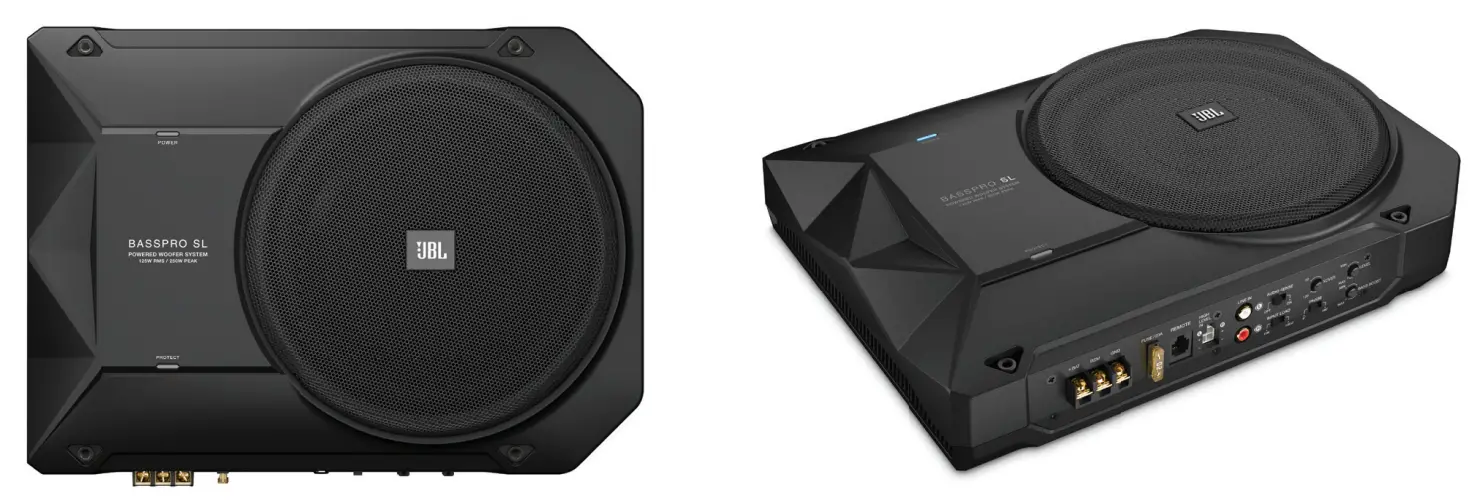
![]() BassPro SLPowered, 8″ (200mm) car audio under seat woofer system
BassPro SLPowered, 8″ (200mm) car audio under seat woofer system
![]()
Big bass from a compact powered subwoofer system.The BassPro SL-powered woofer fits under the front seat of many vehicles and adds powerful bass to any car audio system. An electronic crossover and flexible EQ adjustments let you tune the BassPro SL to your system, your car’s acoustic environment, and your listening preferences. The energy-efficient digital amplifier provides a powerful engine to drive the subwoofer while staying cool even when driven hard. The BassPro SL delivers great bass output without taking up a lot of space.Features
- Proprietary, shallow-profile woofer
- Efficient Class D amplifier
- Intelligent electronic design
- System Control
- Line- and high-level inputs
- Wired, remote level control capability
![]() UNDERSTANDING BATTERIESCAR AUDIO INSTALLATION TIPS
UNDERSTANDING BATTERIESCAR AUDIO INSTALLATION TIPS
![]()
HOW YOUR CHARGING SYSTEM WORKS
The battery’s job is to start your vehicle. Running the electrical accessories is the alternator’s job. The battery isn’t designed to be a continuous source of power. It is a renewable source and is charged by the alternator when the engine runs.Battery charging can only occur when the current demand from the electrical accessories is less than the total current-output capacity of the alternator.
BATTERY APPLICATIONS
When deciding what battery to use, or how many batteries are needed, you must meet or exceed the power and capacity requirements of your application. You should also consider what kind of cycling the battery will be subjected to. Any application where the battery is repeatedly deep-discharged and recharged will require a deep-cycle battery. This includes applications such as car audio systems, recreational vehicles, and emergency vehicles.
CONNECTING MULTIPLE BATTERIES IN PARALLEL
If your battery application requires more starting power or reserve capacity than one battery can provide, you can install multiple batteries in parallel by connecting the “same” terminals together (positive to positive/negative to negative). Each time you add a battery in parallel, you increase the CCA (cold cranking amps) and reserve capacity, while the voltage remains the same.
SUGGESTIONS FOR CONNECTING BATTERIES IN PARALLEL
- Use batteries of the same age, make, and model.
- Make sure the cable size is sufficient to handle the higher current flow.
- Protect cables from shorting.
- Clean all terminals before installation.
- Use high-quality connectors
BATTERY INSTALLATION TIPS
- Check the mounting surface for any objects that may cause damage to the case.
- Make sure the battery is properly secured in the vehicle to prevent movement or vibration.
- Replace any cables and connectors that have corrosion, rust, or other damage.
- Do not lift the batteries by the thermals.
- Do not overtighten the bolts.
![]() HARMAN International Industries, Incorporated8500 Balboa Boulevard, Northridge, CA 91329 USAwww.jbl.com© 2016 HARMAN International Industries, Incorporated. All rights reserved.JBL is a trademark of HARMAN International Industries, Incorporated, registered in the United States and/or other countries.Features, specifications, and appearance are subject to change without notice.
HARMAN International Industries, Incorporated8500 Balboa Boulevard, Northridge, CA 91329 USAwww.jbl.com© 2016 HARMAN International Industries, Incorporated. All rights reserved.JBL is a trademark of HARMAN International Industries, Incorporated, registered in the United States and/or other countries.Features, specifications, and appearance are subject to change without notice.
![]() FUSESCAR AUDIO INSTALLATION TIPS
FUSESCAR AUDIO INSTALLATION TIPS
A fuse is connected directly to an electrical circuit. Fuses are designed to interrupt the power to a circuit when the current flow exceeds safe levels. lf the electric current surges to a dangerous level, the metal in the fuse melt, and the circuit is broken. Never substitute a fuse of greater capacity than that specified for a particular circuit. If the fuse has the ability to carry more current than originally designed, then the wires will heat up before the fuse melts, which could start a fire.Installing a fuse of the proper amperage on your power cable protects everything between the fuse and your gear from a short circuit. A short circuit occurs when a current-bearing wire makes contact with bare metal (like your car chassis). Because your entire car chassis can be considered “negative” or ground, you can think of a short circuit as positive touching negative. You definitely don’t want this to happen, but if it does, then a properly installed fuse will prevent a fire or other damage.If you’re installing just one amplifier, the fuse at the battery should simply match or slightly exceed the fuse rating of the amplifier itself. If you’re installing two or more amplifiers, just add their fuse ratings together, and install a fuse rated roughly equal to this sum. Generally, it’s better to go slightly higher than lower, but a margin of five amperes is acceptable.You do not need a separate fuse block unless your amplifiers are among the few that don’t come with fuses installed. The reason you see these distribution fuse blocks is that in the early days of car audio competition, amplifiers frequently didn’t include their own fuses, or they were hidden behind panels that were hard to get to, especially in the heat of competition. Today, the use of such fuse blocks is largely a matter of style. But that’s OK – looking cool definitely counts.
![]()
![]() HARMAN International Industries, Incorporated8500 Balboa Boulevard, Northridge, CA 91329 USAwww.jbl.com© 2016 HARMAN International Industries, Incorporated. All rights reserved.JBL is a trademark of HARMAN International Industries, Incorporated, registered in the United States and/or other countries.Features, specifications, and appearance are subject to change without notice.
HARMAN International Industries, Incorporated8500 Balboa Boulevard, Northridge, CA 91329 USAwww.jbl.com© 2016 HARMAN International Industries, Incorporated. All rights reserved.JBL is a trademark of HARMAN International Industries, Incorporated, registered in the United States and/or other countries.Features, specifications, and appearance are subject to change without notice.
![]() SETTING THE CROSSOVER AND INPUT SENSITIVITYCAR AUDIO INSTALLATION TIPS
SETTING THE CROSSOVER AND INPUT SENSITIVITYCAR AUDIO INSTALLATION TIPS
![]()
IMPORTANT: If you plan to use the amplifi er to drive full-range speakers, then, set the crossover-mode switch to “FLAT,” and skip to the “Setting Input Sensitivity” section.
SETTING THE CROSSOVER
- Depending on your system plan, set the amplifi er’s crossover-mode switch to “LP” (low pass) or “HP” (high pass). Some JBL® and Infi nity® amplifi ers are low-pass amplifi ers only, designed to drive subwoofers. No crossover switch is provided.
- The crossover slope has two settings: 12 (dB per octave) or 24 (dB per octave). Select the slope that best suits your taste, but consider that a steeper low-pass filter will make the subwoofer’s sound less directional (since more midrange will be filter from the signal). A steeper highpass filter will reduce a small speaker’s unnecessary cone excursion at the lowest frequencies, which will increase power handling and reduce distortion.
- Set the amplifi ers HP-Freq control to allow the speakers to make as much bass as possible while minimizing distortion caused by small speakers trying to reproduce the lowest frequencies. The best setting is one where the speakers produce crisp, clear impact without being overdriven.
- Set the amplifi ers LP-Freq control so vocal information is not reproduced by the subwoofers, and the subwoofers’ sound blends with the sound of the midrange speakers without any missing information.
NOTE: The crossover can be set to any frequency between 32Hz and 320Hz.
SETTING INPUT SENSITIVITY
There are several methods of properly adjusting the sensitivity (or gain) setting on an amplifi er. The goal is to achieve the maximum clean output that the amp is capable of delivering. The following steps are an overview, requiring no additional test equipment:
- Turn the input-level control on the amp to a minimum (fully counter-clockwise).
- Play your favorite music, and turn up the source unit’s volume control until:• You hear distortion on the speakers connected to the amp (this can happen even with low output), or• You reach about 3/4 volume setting.
- When you begin to hear distortion, you have exceeded the maximum setting for the volume control on the receiver. Turn the volume down slightly until the distortion is eliminated. This is the highest clean signal available from the receiver.
- Now you can turn up the input level on the amp to a comfortable volume. If you begin to hear distortion, turn the input level down slightly.
NOTE: You can use the supplied remote level control to adjust the level of the bass, according to the program material after the amplifi er’s level control has been set properly.
![]() HARMAN International Industries, Incorporated8500 Balboa Boulevard, Northridge, CA 91329 USAwww.jbl.com© 2016 HARMAN International Industries, Incorporated. All rights reserved.JBL is a trademark of HARMAN International Industries, Incorporated, registered in the United States and/or other countries.Features, specifi cations, and appearance are subject to change without notice.
HARMAN International Industries, Incorporated8500 Balboa Boulevard, Northridge, CA 91329 USAwww.jbl.com© 2016 HARMAN International Industries, Incorporated. All rights reserved.JBL is a trademark of HARMAN International Industries, Incorporated, registered in the United States and/or other countries.Features, specifi cations, and appearance are subject to change without notice.
![]() BassPro SLPowered, 8″ (200mm) car audio under seat woofer system
BassPro SLPowered, 8″ (200mm) car audio under seat woofer system
Proprietary, shallow-profile wooferThe 8″ (200mm) woofer in the BassPro SL is designed specifically to provide low distortion, great bass performance contained in our proprietary ABS enclosure, whichhas a remarkably compact footprint.Effi cient Class D amplifier The amp that powers the BassPro SL produces minimal heat, and it doesn’t require a lot of current from the car’s electrical system.Intelligent electronic designThe BassPro SL employs custom circuitry to protect and provide optimum performance at varying output levels without impacting performance or clarity.System ControlAn electronic crossover control provides variable adjustment from 50Hz – 120Hz allowing you to dial in BassPro SL to best integrate with the rest of your car audio system.Line- and high-level inputsFor added installation flexibility, the BassPro SL features both line- and high-level inputs allowing you to connect to both factory-installed and aftermarket systems.If you use the high-level inputs to connect the BassPro SL to the head unit, an input load switch lets you switch from “Low” to “High” to achieve optimum results.Wired, remote level control capabilityThe BassPro SL is compatible with the RBC Remote Bass Controller (sold separately), which enables you to control the level remotely.
What’s in the Box
- 1 powered woofer enclosure
- 4 mounting screws
- Owner’s manual
Technical Specifications
report this adBassPro SL
- Description: Powered, under seat woofer enclosure
- Woofer: 8″ (200mm)
- Amplifier Power: 125W RMS
- Frequency Response: 35Hz – 120Hz
- Fuse: 20A
- Maximum Current Draw: 12A
- Quiescent Current Draw: <800mA
- Input Sensitivity: 0.2V – 2V Line-Level Input;
- 2V – 20V High-Level Input
- Crossover Frequency: 50Hz – 120Hz
- Crossover Slope: 12dB/octave
- Bass Boost: 0dB to +9dB @ 70Hz
- Dimensions (L x W x H): 13-9/16″ x 9-7/8″ x 2-13/16″ (344mm x 250mm x 71mm)
![]() HARMAN International Industries, Incorporated8500 Balboa Boulevard, Northridge, CA 91329 USAwww.jbl.com© 2015 HARMAN International Industries, Incorporated. All rights reserved.JBL is a trademark of HARMAN International Industries, Incorporated, registered in the United States and/or other countries.Features, specifications, and appearance are subject to change without notice.
HARMAN International Industries, Incorporated8500 Balboa Boulevard, Northridge, CA 91329 USAwww.jbl.com© 2015 HARMAN International Industries, Incorporated. All rights reserved.JBL is a trademark of HARMAN International Industries, Incorporated, registered in the United States and/or other countries.Features, specifications, and appearance are subject to change without notice.
References
[xyz-ips snippet=”download-snippet”]