RIF10C Rough-In Bracket Installations
Thank you for purchasing the RIF10C Rough-In Bracket. Follow the instructions below to install the rough-in bracket. Please note that the bracket installation must be done before the wallboard is put up.
Step 1:
Snap the two flat wing sections onto the frame as shown.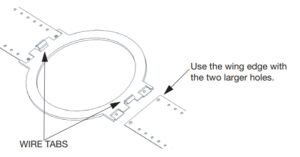
Step 2:
Position the Rough-In Bracket/Wing assembly between the wall studs so that the bracket is in the correct position for the final speaker placement. Nail the assembly into place, making sure that the nail heads are asflush against the wings as possible.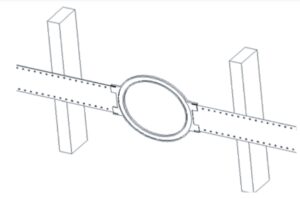
Note: Make sure that the wire tabs on the assembly are in the back, so they are on the inside of the wall.
Step 3:
Use the wire tabs to holdpre-routed speaker wires in place. Ensure that no wire remains exposed on the front (wallboard) side of the assembly.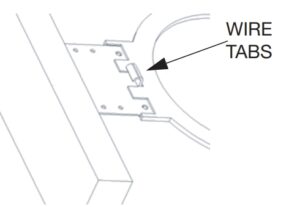
Step 4:
After the wallboard is installed, cut out the hole for the speaker using the inside cutout of the frame as a guide. The speaker wire can then be run through the opening in the wallboard and attached to the speaker system – refer to the Owner’s Manual of the loudspeaker for more information on system setup
PRO SOUND COMES HOME™
Harman Consumer Group, Inc., 250 Crossways Park Drive, Woodbury, NY 11797 USA 8500 Balboa Boulevard, Northridge, CA 91329 USA 516.255.4 JBL (4525) (USA only) www.jbl.com JBL is a trademark of Harman International Industries, Incorporated, registered in the United States and/or other countries. Pro Sound Comes Home is a trademark of Harman International Industries, Incorporated. ©2007 Harman International Industries, Incorporated. All rights reserved. Part No. TK
JBL RIF10C Speaker Frame Installation – JBL RIF10C Speaker Frame Installation –