JBL Subwoofer User Manual
Basspro 8 Subwoofer – Quick Start Guide

THANK YOU for choosing the JBL Basspro 8 powered subwoofer. To ensure maximum performance, we strongly recommend that you have it installed by a qualified professional – while these instructions offer general installation guidance, they do not show specific installation methods for your particular vehicle. If you do not have the necessary tools or hands-on experience, do not attempt the installation yourself; instead, ask your authorized JBL car-audio dealer about professional installation options. INSTALLATION
IMPORTANT: Disconnect the vehicle’s negative (–) battery terminal before beginning the installation.
- Always wear protective eyewear when using tools.
- When making electrical connections, make sure they are secure and properly insulated.
- If you must replace the fuse, be sure to use the same type of fuse and current rating as that of the original.
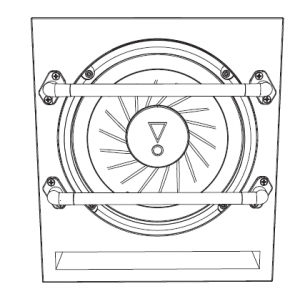
CHOOSING A MOUNTING LOCATION
Choose a location that doesn’t prevent you from loading or unloading cargo, interfere with fold-down seats, or keep you from being able to open or close thetrunk lid, or interfere with the safe operation of the vehicle.
Basspro 8 WIRING
You’ll make all signal and connections, and adjust all settings at the panel on the back of the Basspro 8.
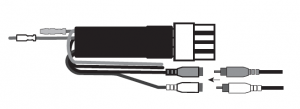
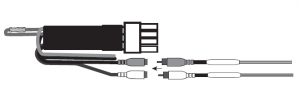
The package includes a wiring harness that features all necessary wires for power, ground, and signal, and plugs into the “INPUT” connector on the back panel ofthe Basspro 8. It also includes a pair of RCA adapters for use with speaker-level inputs.

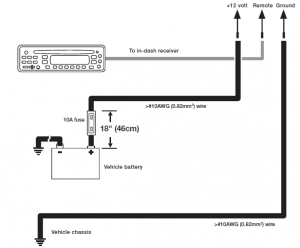
FOR POWER
Connect the end of the red 16-gauge power wire to your vehicle’s + (positive) battery terminal. Note: If an extension cable is necessary because of your mounting location, we recommend that you connect the extension to the power wire using solder. You must also install a fuse holder with a 10A fuse in-line and within 18″ of the battery.
FOR GROUND
Connect the 16-gauge black ground wire to a solid, metal point on the vehicle’s chassis using a ring terminal. Use sandpaper to clear the paint from the metal surface at the chassis location. Use a star-type lock washer to secure the wire.
REMOTE IN
If you’re using line-level inputs to provide signal to the Basspro 8 (see below), uncouple the bullet connector on the blue/white wire, and connect the longer wire marked with “REMOTE IN” to the remote output wire on your source unit.

If you’re using speaker-level inputs to provide signal to the Basspro 8 (see below), you must leave the bullet connector coupled so that the blue/white wire makes a loop.
When you’ve made all the necessary power and signal connections to the Basspro 8 wiring harness, plug the harness into the input marked “INPUT”.

GETTING SIGNAL TO THE Basspro 8
If your head unit has single or dual subwoofer outputs, use RCA patch cables to connect them to the line-level inputs of the Basspro 8 harness. For single subwoofer outputs, use an RCA Y-adapter cable to connect to the Basspro 8 line-level inputs. If your head unit offers stereo subwoofer outputs, connect to the line-level inputs of the Basspro 8 harness using stereo RCA patch cables.
SPEAKER-LEVEL SIGNAL INPUTS
If your head unit only has speaker-level outputs, use the included speaker-level input adapters. Splice the gray and gray/black wires into your vehicle’s front left speaker wires, and the green and green/black wires into your vehicle’s front right speakers wires (using solder is recommended). Then plug each adapter in to the RCA inputs of the Basspro 8 harness.
BASS LEVEL REMOTE
If you’re using a compatible JBL RBC remote bass level controller (sold separately at https://www.jbl.com), plug its connector directly in the REMOTE input on the back panel.

POWER AND PROTECT LEDs
The back panel includes two LED indicators. When POWER is illuminated, the Basspro 8 is turned on. When PROTECT is illuminated, the Basspro 8 has entered protect mode due to overheating or over/under-voltage conditions.

SETTING THE GAIN, CROSSOVER, PHASE, AND BASS BOOST
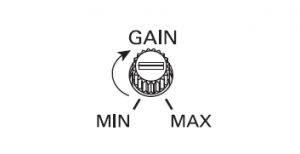
Adjusting the gain lets you match the input sensitivity of Basspro 8 with the output of your receiver, and match the relative volume to the rest of the speakers in your vehicle.
- Start with gain control set to minimum, and the crossover control and bass control rotated midway.
- Choose music with substantial bass content and turn the volume control on your receiver to ¾ of its total output.
- Adjust the gain control clockwise, listening carefully to the bass output. If you hear distortion, turn the gain control counterclockwise to decrease the gain.
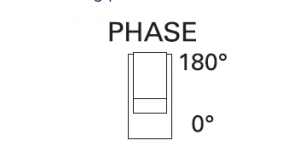
- Switch the phase back and forth between 0 and 180 degrees to determine which setting provides the most clean bass output.
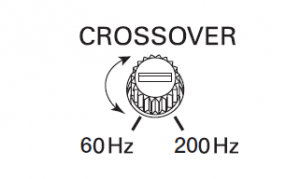
- Adjust the crossover control (between 60Hz and 200Hz) until the Basspro 8 plays only low-frequency information – you should not hear elements such as vocalscoming from the woofer.
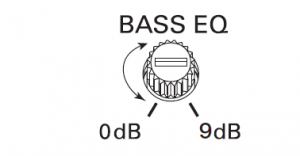
- Adjust the Bass EQ control clockwise or counterclockwise between 0 and 9 dB to enhance the bass output to suit your taste.
SPECIFICATIONS
Amplifier Power : 100Wrms; 200W peakFrequency Response : 30Hz –200HzFuse : 10AMaximum Current Draw : 9.5AQuiescent Current Draw : <0.5A 50mV – 16V Universal InterfaceCrossover Frequency : 60Hz – 200HzCrossover Slope : 12dB/octaveBass Boost : up to +9dB @ 60Hz Dimensions (W x H x D1 x D2)
Dimensions (W x H x D1 x D2) : 9-7-8″ x 11-1/4″ x 10-3/8″ x 8″ (250mm x 285mm x 263mm x 203mm)
Read More About This Manual & Download PDF:
References
[xyz-ips snippet=”download-snippet”]