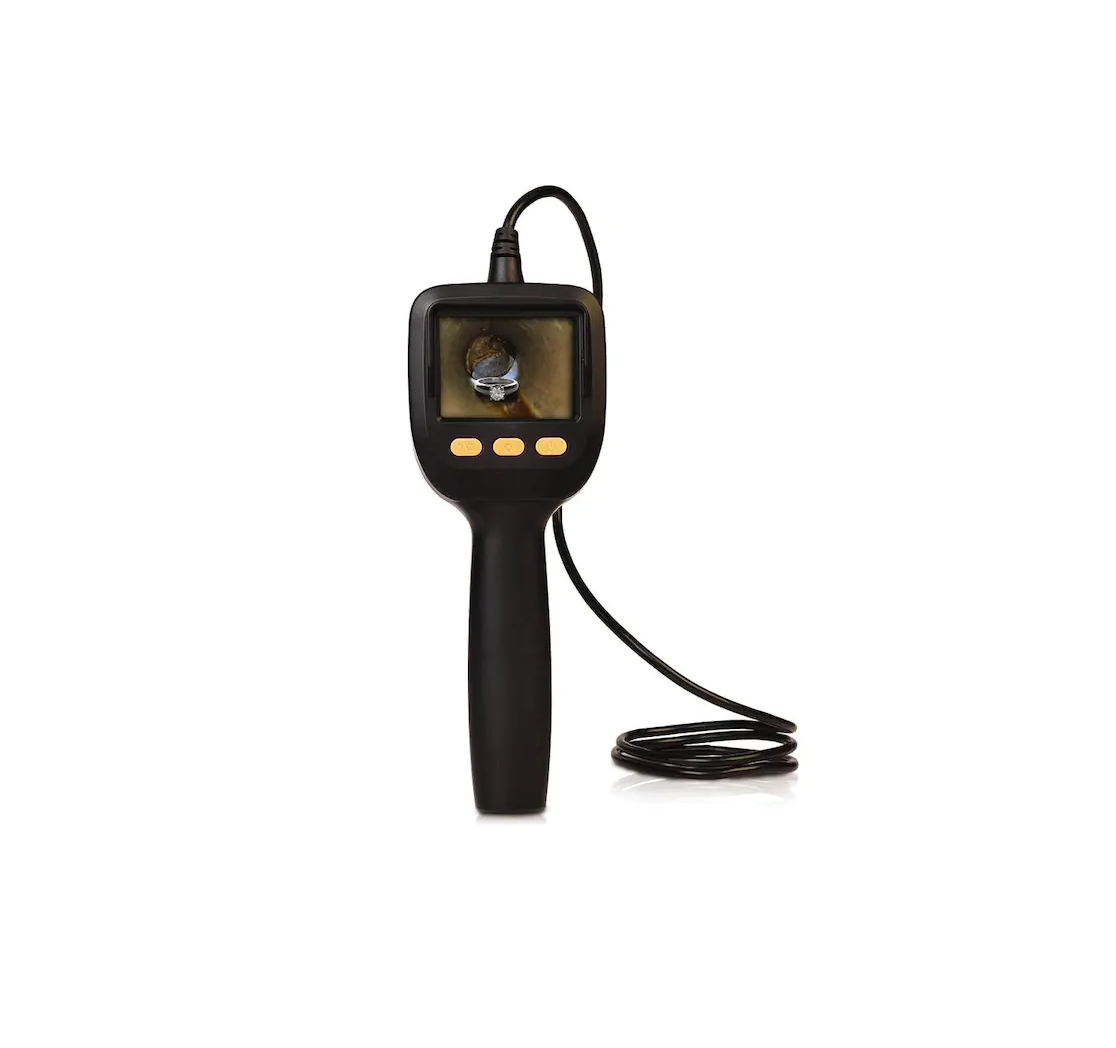
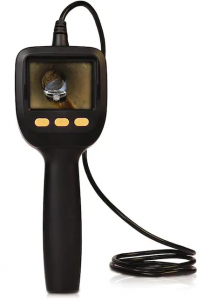
Jensen micro-inspection camera
What’s in the Box?
(1) Micro-Inspection Camera(3) Accessory Attachments
(1) Magnet ![]() (1) Mirror
(1) Mirror ![]() (1) Hook
(1) Hook ![]()
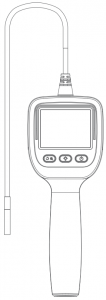
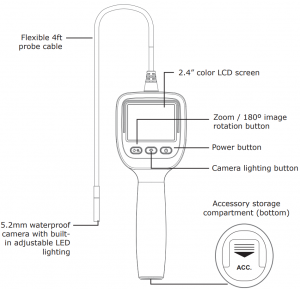
Get to Know Your Micro-Inspection Camera
Let’s Get Started!
Step 1: Install Batteries
Lift the latch on the battery compartment door on the back of your camera.Remove the battery compartment door and install four AA batteries (not included). Make sure the batteries match the + and – markings on the inside of the compartment.Replace the battery door as shown here.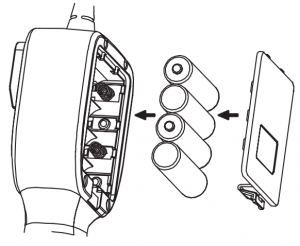
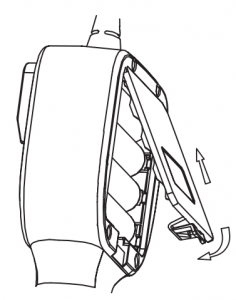
Step 2: Store the Accessory Attachments
Open the accessory storage compartment door on the bottom of the camera’s handle.Remove the door and place the accessory attachments inside the compartment for storage.
Step 3: Remove the LCD Screen’s Protective Film
Carefully remove the protective film covering the LCD screen.
Everyday Use
To turn the display on/off: Press and hold the ![]() button.To adjust the brightness of the camera’s LED lights: Press the
button.To adjust the brightness of the camera’s LED lights: Press the ![]() button repeatedly to increase LED lighting to the level you want. After the brightest setting, the lighting returns to off. Press the
button repeatedly to increase LED lighting to the level you want. After the brightest setting, the lighting returns to off. Press the ![]() button repeatedly again until you get to the level you want.To zoom the image: Press the
button repeatedly again until you get to the level you want.To zoom the image: Press the ![]() button.1 press = 1.5 times image zoom2 presses = 2 times image zoom3 presses = returns to no zoomTo rotate the image: Press and hold the button.
button.1 press = 1.5 times image zoom2 presses = 2 times image zoom3 presses = returns to no zoomTo rotate the image: Press and hold the button.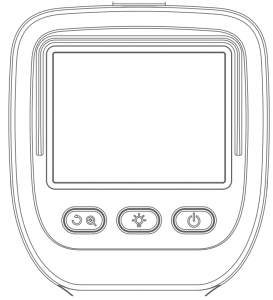
Using the Accessory Attachments
Choose the accessory attachment you want to use from the storage compartment on the bottom of the handle.Note: Make sure you close the compartment when you’ve got the one you want!)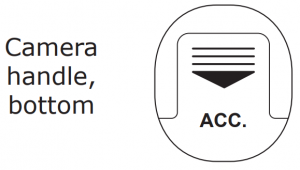
Look at the base of the accessory attachment you chose—make sure the latch on the side is open as shown here. If it isn’t, pry it open with your thumbnail.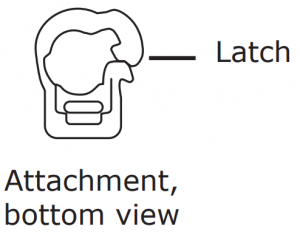
Slide the attachment over the end of the cable just past the wider section at the end, as shown here.Note: If the attachment doesn’t fit over the end of the cable, check to make sure the latch on the base of the attachment is open as explained above.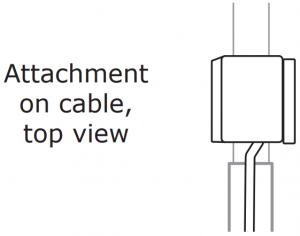
Once you’ve positioned the attachment so that it’s next to the wider section (but not on it), squeeze the sides of the attachment’s base to close the latch and secure the attachment to the cable.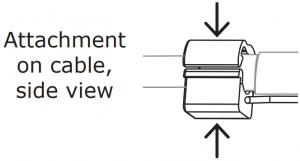 To remove the attachment from the cable: Pry the latch on the base of the attachment open with your thumbnail.
12-Month Limited Warranty
Voxx Accessories Corporation (the “Company”) warrants to the original retail purchaser of this product that should this product or any part thereof, under normal use and conditions, be proven defective in material or workmanship within 12 months from the date of original purchase, such defect(s) will be repaired or replaced with new or reconditioned product (at the Company’s option) without charge for parts and repair labor. To obtain repair or replacement within the terms of the warranty, the product is to be delivered with proof of warranty coverage (e.g. dated bill of sale), specification of defect(s), transportation prepaid, to an approved warranty station. For the location of the nearest warranty station to you, call toll-free to our control office: 1-800-645-4994.
This Warranty is not transferable and does not cover product purchased, serviced or used outside the United States or Canada. The warranty does not extend to the elimination of externally generated static, noise, or loss of range or audio/video quality due to external factors, to costs incurred for the installation, removal or reinstallation of the product, or to damage to digital media devices or memory.The warranty does not apply to any product or part thereof which, in the opinion of the company, has suffered or been damaged through alteration, improper installation, mishandling, misuse, neglect, accident or exposure to moisture. This warranty does not apply to damage caused by an AC adapter not provided with the product or by removal or defacement of factory serial number/barcode labels.
THE EXTENT OF THE COMPANY’S LIABILITY UNDER THIS WARRANTY IS LIMITED TO THE REPAIR OR REPLACEMENT PROVIDED ABOVE AND, IN NO EVENT, SHALL THE COMPANY’S LIABILITY EXCEED THE PURCHASE PRICE PAID BY PURCHASER FOR THE PRODUCT.
This Warranty is in lieu of all other express warranties or liabilities. ANY IMPLIED WARRANTIES, INCLUDING ANY IMPLIED WARRANTY OF MERCHANTABILITY OR FITNESS FOR A PARTICULAR PURPOSE, SHALL BE LIMITED TO DURATION OF THIS WARRANTY. ANY ACTION FOR BREACH OF ANY WARRANTY HEREUNDER, INCLUDING ANY IMPLIED WARRANTY, MUST BE BROUGHT WITHIN A PERIOD OF 24 MONTHS FROM THE DATE OF ORIGINAL PURCHASE. IN NO CASE SHALL THE COMPANY BE LIABLE FOR ANY CONSEQUENTIAL OR INCIDENTAL DAMAGES WHATSOEVER. No person or representative is authorized to assume for the Company any liability other than expressed herein in connection with the sale of this product.
Some states/provinces do not allow limitations on how long an implied warranty lasts or the exclusion or limitation of incidental or consequential damage so the above limitations or exclusions may not apply to you. This Warranty gives you specific legal rights and you may also have other rights which vary from state/province to state/province.
Important Information
FCC Information
Note: This equipment has been tested and found to comply with the limits for a Class B digital device, pursuant to part 1 5 of the FCC Rules. These limits are designed to provide reasonable protection against harmful interference in a residential installation. This equipment generates, uses and can radiate radio frequency energy and, if not installed and used in accordance with the instructions, may cause harmful interference to radio communications. However, there is no guarantee that interference will not occur in a particular installation. If this equipment does cause harmful interference to radio or television reception, which can be determined by turning the equipment off and on, the user is encouraged to try to correct the interference by one or more of the following measures:
- Reorient or relocate the receiving antenna.
- Increase the separation between the equipment and receiver.
- Connect the equipment into an outlet on a circuit different from that to which the receiver is connected.
- Consult the dealer or an experienced radio/TV technician for help.
Changes or modifications not expressly approved by the party responsible for compliance could void the user’s authority to operate the equipment.
This device complies with Part 15 of the FCC Rules. Operation is subject to the following two conditions: (1) this device may not cause harmful interference, and (2) this device must accept any interference received, including interference that may cause undesired operation.
Industry Canada Regulatory InformationCAN ICES-3 (B)/NMB-3 (B)
Avis d’Industrie CanadaCAN ICES-3 (B)/NMB-3 (B)
Battery Precautions:
- Do not mix old and new batteries.
- Do not mix alkaline, standard (carbon-zinc) or rechargeable (nickel cadmium) batteries.
- Always remove old, weak or worn-out batteries promptly and recycle or dispose of them in accordance with Local and National Regulations.
[xyz-ips snippet=”download-snippet”]