JideTech BC01-2MP WiFi IP Camera User Guide
Note: Due to the continuous updating of the product and software, there may be a discrepancy between the operating guide and the APP interface. All the instructions are subject to the actual operation interface.
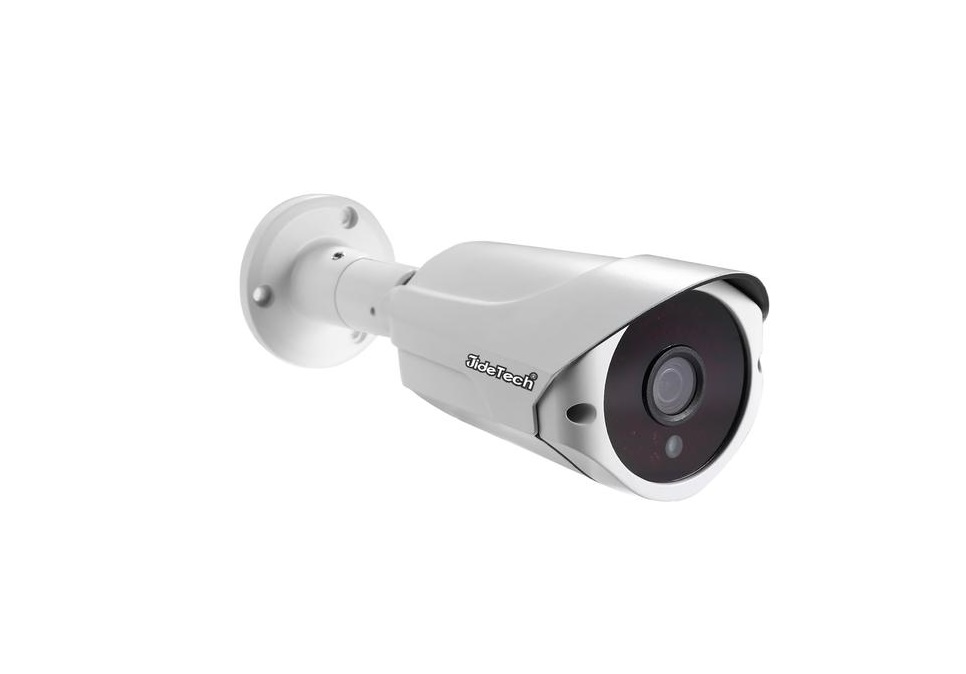
Camera Introduce
- Wi-Fi Cameras Come with H.265 and 2MP/ 1080P FULL HD VIDEO QUALITY
- Wi-Fi One Key Setting: You can setup all functions by Mobile App
- Camera Support Wi-Fi, 802.11b/g/n, 150Mbps
- With SD Card Slot, Max Support 128GB for Auto Recording
- Support Cloud Storage
- Built in 2-ways audio real time communication
- ONVIF Protocol Compatible
- Unique motion detection method
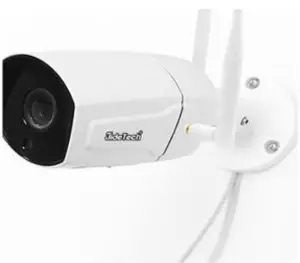
- Double signal of Enster 5db paddle antenna is stronger and farther away than the others of 3db circular antenna.
Camera shape function
Connection and Installation
- After screwing the hole, insert the plastic expansion bolt the screw hole.

- Align the hole and fix camera with the screw.
- USe the hex key of the screw package to turn the screw to adjust the direction and angle of the camera.
- The installation is complete.
App ICSee Installation
Download App“ICSee”from Google Play or Apple Store, or Scan below QR Code to install.

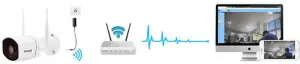
View Video by App
Download ‘ICSee’ App from App Store or Google Play to your phone. There are 2 ways connect the camera to phone.
- Power up the camera and connect the camera to with router with an network cable. Ensure your phone has connected to a 2.4GHz WIFI before configuring the APP. Run App, tap ‘+’ and ‘More’ then select ‘Add Device In the Same WLAN’ to add camera. Then turn to the Network settings, connect the camera to Wifi. Can disconnect the Ethernet cable, camera will work wirelessly.
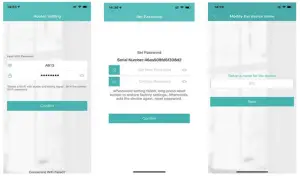
- Power up the camera, ensure your phone has connected to a 2.4GHz WIFI before configuring the APP. Run App, click Set Up My Device To Wi-Fi. Then enter the Wifi name and password. Then will search the camera, it will takes about 40 seconds finish searching. Please wait patiently. Then set your camera password and your device name. The camera will work.
Camera Function Show
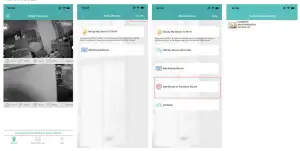
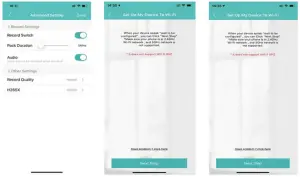
The Scissor button is to record a video. And the Snapshot is to take a picture. It will save in the Mobile storage. Just as the picture show.
And the Playback function need to have a SD card so that can use this function. The Alarm photos and videos are all save in the SD card. Also if you use the Cloud Service, the Alarm photos and videos will save in the cloud. You can click the Playback to see the Alarm photos and videos. You can set the record duration in the Advanced setting. Just as the picture show.
Alarm Setting
You can set the Alarm Action to send you the video and photos, also you can set the device Beep, the camera will sound an alarm (you can select an alarm sound or even a custom sound) Just as the picture show.
Note: This camera do not support the FTP and SMTP function. 2 kinds of motion detection methods:
alert triggered cordonalert area application scenariosYou can select the suitable method for your actual use scenario. In order to ensure accurate action alarms, we have the human shape detection, can avoid some extra action alerts.
View Video by PC Software
Download the PC software CMS for Windows and the VMS for MAC through this link: https://jidetech-cctv.com/pages/user-guide-files
Select the WIFI CAMERA SOFTWARE. Then you can use the PC software to view and set the camera. Here is the step to show camera connect to the PC software.
CMS Software
After download the CMS software, open it and the default user name is super and the password is empty. Select the System and the device manager to add the camera.
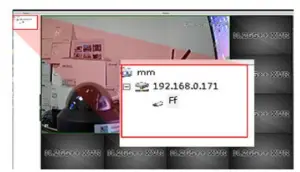
First need to add the Area, create an Area then add the device. Select the ONVIF Search and click the IP Search. You will get the camera ip address, click the camera and enter the camera password, then the camera will work. Just as the picture show.
Remote viewing
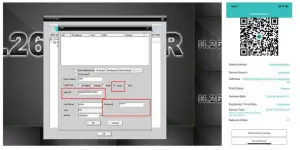
If you are not using the same network or in the far away, you can use the CMS software to Remote viewing. When add the camera, you should select the cloud and then enter the camera Serial ID and password. The camera Serial ID can be saw in the phone app(for the safety) Just as the picture show.
VMS Software
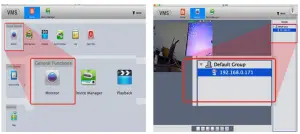
After downloaded the VMS software open it and the default user name and password are admin. Select the Device Manager, then click the IP Search button. After searched the camera, add it to the group, then edit the camera password. Back to the home page and select the Monitor, click the camera ip address can view and set the camera. Just as the pictures show.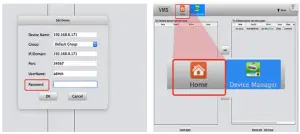
Also you can use the IE browser to view and set the camera. After using the CMS software, you can get the camera ip address, enter the camera ip address in the IE browser, you can log in the camera setting. Just as the picture show. If you want to use the chrome browser, you should install the IE TAB that our camera will work with the chrome browser.
Service Guarantee
If you have any other questions, please visit the official website of Shenzhen Jide Technology Development Co., Ltd. or consult the customer service email address.
Company Name: Shenzhen Jide Technology Development Co., Ltd.
Company Address: 9F, Niulanqian Building, Minzhi Avenue, Minzhi Street, Long Hua District, Shenzhen, Guangdong, China, 518109Website: www.jidetech-cctv.com
Email: [email protected]
Tel: +86 135 5499 2943
WhatsApp: +86 135 5499 2943
Wechat:13544012806
Skype: JideTech CC
 report this ad
Facebook: JideTech INT
References
[xyz-ips snippet=”download-snippet”]