JLABAUDIO Kids Headphones JBUDDIES User Manual
We love that you are rocking JLab Audio!We take pride in our products and fully stand behind them.
YOUR SATISFACTION IS GUARANTEED
You may exchange or return merchandise purchased within 30 days of the purchase date.Please return the item to the location you purchased it. If your item has been opened or used, restrictions may apply.
YOUR WARRANTY You may register your product at jlabaudio.com/register. All warranty claims are subject to JLab Audio authorization and at our sole discretion. Retain your proof of purchase to ensure warranty coverage.
CONTACT US Customer Support VIP Help Line:1.866.358.6640 (Monday – Friday 9:00 AM – 5:00 PM PST)
Or for even faster service, email us at:[email protected]
AUDIO BURN-IN
Your new headphones require a burn-in period to operate at their full potential. Simply plug them into your favorite sound device and let it play for 24 to 48 hours or more at normal to loud volume. This allows the driver to warm up and gain flexibility in order to reproduce a more accurate frequency range. The longer you listen to them, the better they will sound.JLab Audio has provided a simple burn-in method for your convenience at: jlabaudio.com/pages/audio-burn-in
JLab is excited and proud to have produced the first high-quality, stylish, safe headphones just for kids! Please read the following safety info carefully to ensure safe use.
This product should always be used under adult supervision. It does contain a cable with a small jack that could pose a choking hazard without adult supervision.
Please be mindful while your child enjoys using the JBuddies.If you have any questions, comments, or concerns, please feel free to contact JLab at 1.866.358.6640 or e-mail [email protected]Replacement cushions are available at jlabaudio.com
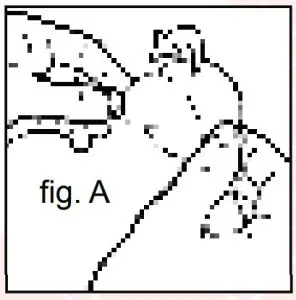
TO INSTALL YOUR FAVORITE GRAPHIC DISK
- Peel off protective paper backing to expose adhesive. (fig. A

- With the adhesive side facing the headphones, firmly press the disk into the open area on the side of the earpiece. (fig. B)Repeat steps for the other side.

TO ADJUST VOLUME LEVEL
Turn the dial on the right earpiece clockwise to lower the volume or counterclockwise to raise the volume. (fig. C)
The direction is indicated by markings on the bottom of the earpiece.
CAUTIONS
- Avoid getting moisture or liquids on the headphone cups.
- Avoid extreme heat, cold, and humidity.
- Avoid dropping or crushing headphones, stressing the cable by rapid pulling or extreme force, or bending the cable at a sharp angle.
- Wax may build up in headphone cups, lowering the sound quality.Carefully remove the wax with a cotton swab or other small tool to improve the sound quality
- If you experience discomfort or pain, try lowering the volume or discontinuing use temporarily.
- If you experience regular discomfort while using this product, discontinue use and consult your physician.
- We recommend you treat your headphones as you would a nice pair of sunglasses and keep them in safe location when not in use.
References
[xyz-ips snippet=”download-snippet”]