Elara Ceiling Lifts
User Instruction ManualOxford® Elara Ceiling LiftsTo avoid injury, read user manual prior to use. For alternative languages, contact your authorised service provider.Manuel d’utilisationSystème de levage sur rails Oxford® ElaraPour éviter les risques de blessure, lisez le manuel de l’utilisateur avant utilisation. Pour obtenir ces informations dans une autre langue,veuillez contacter votre prestataire de service agréé.BenutzerhandbuchOxford® Elara Ceiling LiftsUm Verletzungen zu vermeiden, lesen Sie bitte die Gebrauchsanweisung vor der ersten Benutzung. Für andere Sprachen wenden Sie sich an Ihren autorisierten Dienstanbieter.GebruikershandleidingOxford® Elara PlafondliftenLees voor gebruik de handleiding om letsel te voorkomen. Neem voor andere talen contact op met uw erkende dienstverlener.
Oxford® Elara Ceiling Lift
English
Contents1. Introduction………………………………………………………………………………………………………….. 3 2. The Oxford Elara Ceiling Lift………………………………………………………………………………….. 4 3. Safety Precautions ……………………………………………………………………………………………….. 7 4. Operating Instructions …………………………………………………………………………………………. 11 5. Batteries and Charging ……………………………………………………………………………………….. 36 6. Care and Maintenance Schedule………………………………………………………………………….. 40 7. Trouble Shooting ………………………………………………………………………………………………… 45 8. Technical Specification………………………………………………………………………………………… 47 9. Warranty……………………………………………………………………………………………………………. 53
Manufacturer InformationJoerns Healthcare Ltd. Drakes Broughton Business Park, Worcester Road, Drakes Broughton, Pershore, Worcestershire, WR10 2AG. England.DO NOT DESTROY THIS MANUAL SHOULD BE KEPT WITH THE LIFT AT ALL TIMESDesign Policy and Copyright Joerns Healthcare April 2022 As our policy is one of continuous improvement, we reserve the right to modify designs without prior notice. The content of this publication may not be copied either whole or in part without the consent of Joerns Healthcare.2
English
Oxford® Elara Ceiling Lift
1. Introduction
Please take time to read this manual thoroughly prior to using your Oxford Elara ceiling lift. The information contained in this manual is vital for the correct operation and maintenance of the equipment and will help ensure that both the patient and caregiver remain safe and free from injury throughout the lifting and transfer process. Furthermore, it will ensure the user is familiar with the lift’s features and functions.To help avoid injuries to both caregiver and patient, Joerns Healthcare recommends using only genuine Joerns Healthcare parts for servicing and repairs. Joerns Healthcare will not be held responsible for any accidents or incidents resulting from unauthorised servicing or the use of unauthorised parts.If you are unsure on the use of this product and/or associated accessories, please contact your local authorised service providers or Joerns Healthcare direct for further advice.
WARNING
· Prior to each and every use of your Oxford Elara ceiling lift, the daily checks detailed in the checklist in this manual should be carried out.
· Do not attempt to use your Oxford Elara ceiling lift without fully understanding this manual.
· Unauthorised modifications on any Oxford Elara ceiling lift equipment may affect its safety. Joerns Healthcare will not be held responsible for any accidents, incidents or deficiencies in performance that may occur as a result of any unauthorised modifications.
· The Oxford Elara lift unit is a reusable medical device intended to be used with patients whose weight is within the specified maximum safe working load. DO NOT attempt to lift more than the maximum safe working load of the lowest rated component within the system, considering the following:
· Track/rail system
· Lift motor unit
· Spreader bar or cradle
· Sling
· Accessories (e.g. weigh-scale)
· The Oxford Elara ceiling lift is not intended for use during patient treatment.
· The Oxford Elara ceiling lift is not intended for use in environments where there is a risk of it being splashed with water.
· If the Oxford Elara ceiling lift interferes with any other equipment it MUST be moved away from the equipment.
Definitions Used in this Manual
WARNINGMeans: Failure to understand and follow these instructions may result in injury to yourself and others.
CAUTIONMeans: Failure to understand and follow these instructions may result in damage to the product. NOTE: Means: This is important information regarding the correct use of the equipment.
Accompanying Documents
A number of documents are supplied in a wallet supplied with each ceiling lift and should be retained for future reference.
· Test Certificate
· User Manual
The TEST CERTIFICATE is an important document and is required for your insurance records. It is valid for 6 months from date of installation and once expired, the lift should be inspected and serviced in accordance with the information provided in the Service Manual. It is recommended that inspection/ servicing is only carried out by an authorised Joerns Healthcare service provider.3
Oxford® Elara Ceiling Lift
English
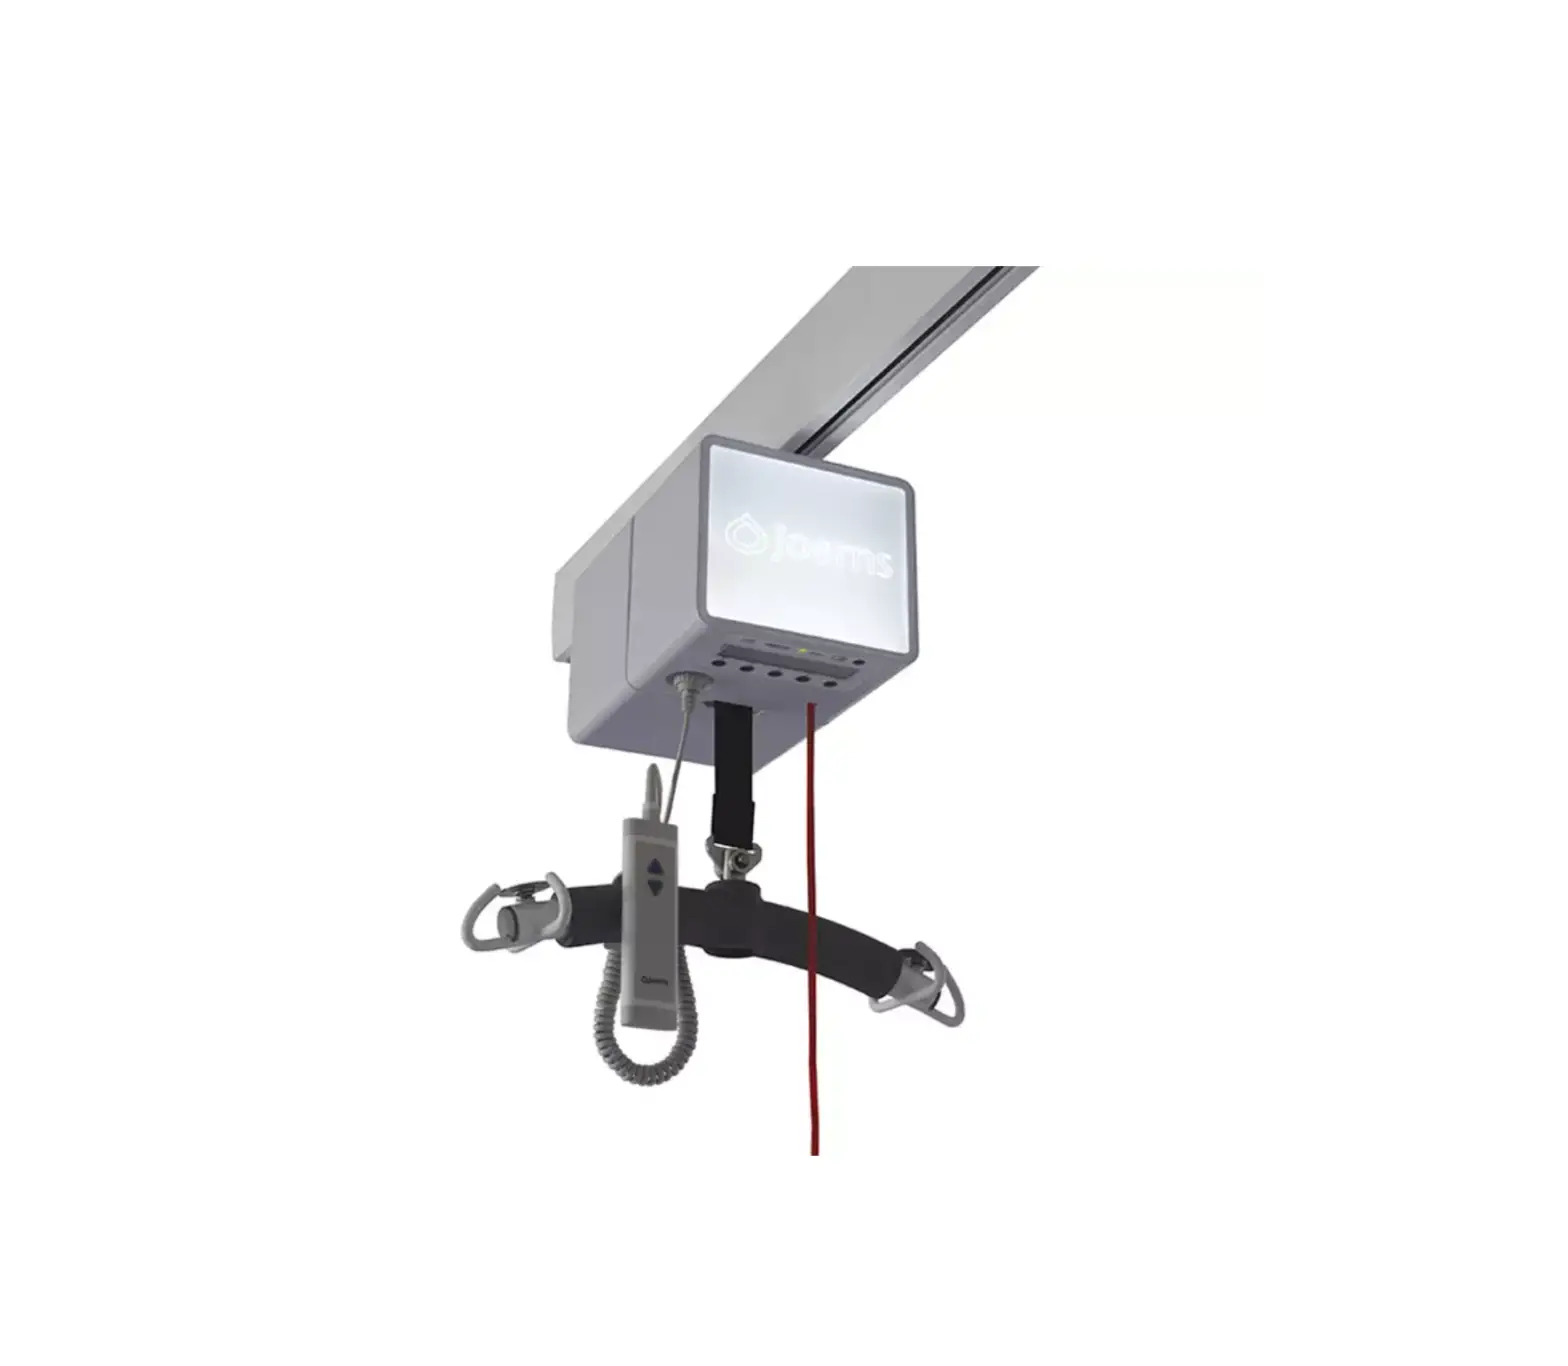
2. The Oxford Elara Ceiling LiftNOTE: Your Oxford Elara ceiling lift has purposely been electrically disabled for transportation to prevent accidental activation and battery drainage. The lift must be commissioned by an authorised Joerns Healthcare service provider prior to use.
Track / RailMotor Unit Lifting Tape 6-Point Spreader Bar
Illumination PanelAmbient Light Level Sensor Charge / Status Indicator On / Off LCD Display Screen Emergency / Redundant Controls Emergency Stop Reset Button
Hand Control
Emergency Stop/ Emergency Lower Pull CordWARNINGSee important information regarding use later in this manual
WARNINGThe Oxford Elara lift units require tools and techniques for correct and safe installation. Incorrect installation may result in damage to the lift and injury to operators and patients. Installation and commissioning should be carried out by fully trained and authorised installers. Please contact an authorised Joerns Healthcare service provider to arrange installation.4
English
Oxford® Elara Ceiling Lift
The CE MarkAll Oxford Elara ceiling lifts carry the CE mark and comply with the following directives and standards:· Medical Device Directive (93/42/EEC) · General: IEC 60601-1:2006 (Third Edition) + A12:2014 Medical Electrical Equipment Generalrequirements · IEC 60601-1-11:2015 (Second Edition) Medical Electrical equipment and medical electricalsystems used in the home healthcare environment · EMC: IEC 60601-1-2:2015 – Medical Electrical Equipment Electromagnetic Compatibility · ISO 10535:2006 – Hoists for the transfer of disabled persons requirements and test methods. · Low Voltage Directive (73/23/EEC) · IEC 61000-3-2: 2014 – Limits for Harmonic Current Emissions · IEC 61000-3-3: 2013 – Limits of Voltage Fluctuations and Flicker · IEC 62304: 2006 Medical Device Software – Software life cycle processes · IEC 62366: 2007 Medical devices – Application of usability engineering to Medical DevicesStatement of Intended UseThe Oxford Elara ceiling lift is an overhead mounted patient handling device intended for the safe lifting, repositioning and transferring of a patient up to a safe working load of 227 or 284kg (model dependent). It is suitable for patients in the sitting, sitting/recumbent and recumbent positions.It is imperative that the lift and its associated components are installed by a competent and trained engineer employed by an authorised Joerns Healthcare service provider and in accordance with local codes.NOTE: The Oxford Elara ceiling lift does not contain any parts or mechanisms that are intended to be applied directly to the patient via physical contact.WARNINGJoerns Healthcare ceiling lifts should only be operated by fully trained/competent caregivers.Expected Service LifeJoerns Healthcare ceiling lifts are designed and tested for a minimum service life of 10 years. This is based on strict adherence to the daily checks stated in this user manual and the instructions detailed in the Service Manual. All service repairs must be performed by a competent and trained engineer employed by an authorised Joerns Healthcare service provider.The expected service life for consumable components such as batteries, fuses, lamps and lifting tapes is dependent on care and usage of the equipment concerned. Consumable components must be maintained in accordance with the `Preventative Maintenance Schedule’ in this manual.Serious Incident ReportingIn the event of a serious incident taking place during use of this product, affecting the patient and/ or care-giver, it must be reported to the product manufacturer or authorised distributor. Should the incident take place within the European Union (EU), it must also be reported to the local competent authority within the member state.
5
Oxford® Elara Ceiling Lift
English
Lifting Tape Inspection and RenewalWARNINGThe lifting tape must be inspected for wear, damage, fraying, cuts, discoloration and loose or damaged threads by the user/caregiver BEFORE EVERY USE. If any deterioration is detected DO NOT USE THE LIFT and contact an authorised Joerns Healthcare service provider to arrange replacement.Lift Tape ReplacementAs part of the bi-annual inspection schedule, the lifting tape should be inspected for wear, damage, fraying, cuts, discoloration and loose or damaged threads and replaced as necessary. Regardless of its condition, Joerns Healthcare recommend the lifting tape is replaced every 5 years or 5000 lift cycles, whichever comes first.Packing & DeliveryIn the unlikely event of future breakdown, it is recommended that packaging is retained. This will help minimise the possibility of transit damage if the need to return goods arises.Equipment IdentificationThe equipment identification (serial number, model number and manufacturing date) and specification (safe working load, electrical rating/electrical details in accordance with IEC 606011:2006 + A12:2014, manufacturer’s details) are detailed on the label affixed to the unit’s moulded cabinet.
6
English
Oxford® Elara Ceiling Lift
3. Safety PrecautionsPlease read and follow the safety precautions listed below. The operation and use of Joerns Healthcare ceiling lifts is simple and straight-forward. Following these few basic safety precautions will make lifting operations safe, easy and trouble free. These safety instructions should be kept with the ceiling lift at all times.Read and fully understand the Operating Instructions detailed in this manual before installing, operating or servicing this equipment.WARNINGThe Oxford Elara ceiling lift is only intended for operation by a competent/trained caregiver. It should NEVER be used by the patient for self hoisting.Safe Working Load (SWL)· The Oxford Elara 227 has been designed and tested to a maximum lifting capacity of 227kg. · The Oxford Elara 284 has been designed and tested to a maximum lifting capacity of 284kg.WARNINGThe Oxford Elara lift unit is intended to be used with patients whose weight is within the specified maximum safe working load. DO NOT attempt to lift more than the maximum safe working load of the lowest rated component within the system, considering the following: · Track/rail system · Lift motor unit · Spreader bar or cradle · Sling · Accessories (e.g. weigh-scale)Important Safety Directions WARNING· Oxford Elara ceiling lifts should ONLY be operated by fully trained/competent caregivers.· ALWAYS plan your lifting operation before commencing.· ALWAYS carry out the `DAILY CHECKLIST’ in this manual before using an Oxford Elara ceiling lift.· ALWAYS ensure Oxford Elara ceiling lifts are installed and commissioned by an authorised Joerns Healthcare service provider or in accordance with the information in the accompanying documents.· Oxford Elara ceiling lifts are intended for the lifting and transferring of patients ONLY. The lifts should NOT be used for any other purpose.· ALWAYS position any sling used in conjunction with the Oxford Elara ceiling lift in accordance with the instructions detailed in the sling’s user instruction manual. Failure to do so may result in injuries to the caregiver and/or the patient.· Ensure the equipment is ONLY used by trained personnel. · ENSURE the track installation will accept a load equal to or greater than the capacity ofthe ceiling lift.
7
Oxford® Elara Ceiling Lift
English
Contraindications· There are no known contraindications.WARNING· Before using an Oxford Elara ceiling lift, a clinical assessment of the patient’s suitability for transfer MUST be performed by a qualified health professional to evaluate aspects of the transfer procedure, including the possibility that the transfer procedure may exert substantial pressure on the patient’s body.· Oxford Elara ceiling lifts should NOT be operated by any person who is under the influence of alcohol, drugs or prescribed medication, that may adversely affect their ability to operate the equipment safely.· ENSURE a full risk assessment is conducted prior to attempting to lift or transfer a patient.· ENSURE an assessment of the suitability for transfer of any patient who is connected to electrodes, catheters or other medical devices is conducted by a qualified person prior to commencing a lift or transfer.· Excessive impact during lifting and transfer activity should be avoided.· Joerns Healthcare warns of possible risks of strangulation related to the lifting tape and advises necessary precautions should be taken to prevent this. Ensure the lifting operation is supervised by fully trained/competent caregiver.· ENSURE the sling being used for the lift/transfer is compatible with the spreader bar, is suitable for the task and will sustain the weight of the patient being lifted.· ENSURE the sling being used is in a serviceable and safe condition.· ENSURE the lifting procedures outlined in this manual are adhered to.· ALWAYS make sure any controls and safety features are used ONLY in strict accordance with the instructions within this manual. NEVER attempt to force a control or operating button on the lift.· ENSURE the sling straps are correctly and securely attached to the spreader bar.· To avoid the risk of injuries attributed to the use of inadequate replacement parts, Joerns Healthcare strongly advises and warns that only Joerns Healthcare approved parts should be used on equipment and other appliances manufactured by Joerns Healthcare. Unauthorised modifications on any Joerns Healthcare equipment may adversely affect its safety. Joerns Healthcare will not be held responsible for any accidents, incidents or lack of performance that occur as a result of any unauthorised modifications or the use of non-approved parts.· The Emergency Stop/Emergency Lower pull cord is for use in emergency situations only. It must not be used for normal lowering operations.· Immediately following use of the Emergency Stop/Emergency Lower pull cord, following reset, it is essential correct directional operation of the hand control is verified. IN THE EVENT OF INCORRECT OPERATION, DO NOT USE THE CEILING LIFT UNIT AND CONTACT AN AUTHORISED JOERNS HEALTHCARE SERVICE PROVIDER TO ARRANGE SERVICE/REPAIR.CAUTION· Keep all components of the Oxford Elara ceiling lift clean and dry and ENSURE the safety checks outlined in this manual are carried out as directed.· Excessive exposure of the hand control to water or other liquids may cause malfunction of the device.· DO NOT drop the Oxford Elara ceiling lift unit. This may result in internal damage that is not visible. If it is suspected that the ceiling lift may have sustained damage, DO NOT use the unit and contact an authorised Joerns Healthcare service provider for inspection/servicing.8
English
Oxford® Elara Ceiling Lift
No User Serviceable Parts WARNING· DO NOT attempt to service or repair the Oxford Elara ceiling lifts, batteries or charger. If the unit is malfunctioning, contact an authorised Joerns Healthcare service provider.
Shock Prevention
WARNING
· DO NOT touch or use a lift with exposed conductors or a damaged power cord. Electrically live equipment can result in serious injuries. If the lift or charger have any exposed or damaged wires, contact an authorised Joerns Healthcare service provider immediately.
· DO NOT splash or expose electrical parts of the device to water or moisture.
· CHECK the charger nameplate for the input voltage and frequency requirements. These requirements differ by country/region. DO NOT attempt to use the lift in a region that has a different voltage and frequency to that specified on the nameplate.
· ALWAYS read the battery and charger instructions prior to using, storing or disposing of them.
Fire and Explosion PreventionWARNING· DO NOT place the Oxford Elara ceiling lift in direct sunlight or near a heat source. · DO NOT expose the Oxford Elara ceiling lift or the battery charger to flames. · DO NOT use the Oxford Elara ceiling lift unit in the presence of flammable anaestheticmixtures with air or oxygen, or with nitrous oxide. · DO NOT use the Oxford Elara ceiling lift in locations where heavy dust or lint may beevident.
Human and Environmental Safety PracticesWARNING· In the unlikely event that the Oxford Elara ceiling lift casing and the casing on the battery become cracked and cause the contents to come into contact with the skin or clothing, immediately rinse with plenty of water.· Should the contents come into contact with the eyes, immediately rinse with plenty of water and seek medical attention.· Inhalation of the contents can cause respiratory irritation. In this event, provide fresh air and seek medical attention.· This product contains sealed lead acid batteries. For recycling and disposal, please contact an authorised Joerns Healthcare service provider.· DO NOT allow children to operate the Oxford Elara ceiling lift.· No known effects caused by pets or pests.
Locating and Isolating Electrical Power· Before using the Oxford Elara ceiling lift, ensure you are aware of the location of the mains power connection and how to isolate (switch-off) the mains power.
9
Oxford® Elara Ceiling Lift
English
Battery & Battery Charger Safety PracticesWARNING· Following these instructions is important for the safe use of the batteries and to keep the user (patient/caregiver) from harm. The batteries in this device are rechargeable Vent Regulated Lead Acid (sealed lead-acid).· DO NOT expose the battery charger to water or other liquids.· DO NOT expose the battery charger to flames or sources of ignition.· ONLY use the charger that has been supplied with the equipment. DO NOT charge the Oxford Elara ceiling lift in an unventilated area.· The charger must NEVER be covered or exposed to dust.· The charger is designed for use in dry areas only and for normal air humidity conditions. It should NOT be used in condensing humidity conditions.NOTE: After taking delivery of an Oxford Elara ceiling lift unit, the batteries should be charged for a minimum of 8 hours prior to initial use. NOTE: Prior to operation, allow the Oxford Elara ceiling lift unit to attain the following operational conditions within a 6 – 10 hour period of time: · Relative humidity should be between 15% to 93% non-condensing. · Ambient temperature should be between +5°C to +40°C (+41°F to +104°F). · Atmospheric pressure should be between 700 hPa to 1060 hPa.Equipment Warning LabelsWARNING· Inspect ALL precautionary labels on the equipment. Order and replace any labels that are illegible.
10
English
Oxford® Elara Ceiling Lift
4. Operating InstructionsWARNINGOxford Elara ceiling lifts should only be operated by fully trained/competent caregivers. They should NEVER be operated by an unattended patient alone.4-way Elara Unit Illustration
Track / Rail Motor Unit
B
Direction of return to chargetravel
Lifting Tape
6-Point Spreader Bar
AIllumination Panel Ambient Light Level Sensor Charge / Status Indicator On / Off LCD Display Screen Emergency / Redundant Controls Emergency Stop Reset Button
LowerLeft(Operating this button moves the lift unit in the direction of arrow B)Hand Control
Emergency Stop / Emergency Lower Pull CordWARNINGSee important information regarding use later in this manualRaiseRight(Operating this button moves the lift unit in the direction of arrow A)Return to Charge11
Oxford® Elara Ceiling Lift
English
On/Off SwitchPush the on/off button to turn on the lift. The charge / status indicator and LCD display screen will illuminate. When the lift is in operation mode, push the ON / OFF button to switch the unit off.
Ambient Light Level Sensor
Charge / Status Indicator On / Off Button
LCD Display Screen
Charge / Status IndicatorAfter approximately 10 seconds from when any command button has been depressed or following power up using the on/off button the charge / status indicator pulses green to indicate the batteries are charging. Additionally the battery charge indicator on the left of the LCD display screen will show the actual charge remaining.Batteries 1/3rd charged – For `End-of-Rail’ charge systems the lift unit should be returned to the charge station immediately once the lifting procedure is complete. When the batteries charge level reaches this critically low condition, the charge / status indicator will flash red and, in ambient light conditions, this will be accompanied by an audible beep each time an operating control is depressed. In low light conditions, only the charge / status indicator will flash red.Batteries 2/3rd charged – For `End-of-Rail’ charge systems the lift unit should be returned to the charge station.Batteries fully charged.NOTE: When the end panels are illuminated, particularly at full brightness, the charge level may not show a true reading. Lighting may effect charge display.NOTE: If the ceiling lift has not been operated for more than one minute, both the charge / status indicator and the LCD display screen go into `sleep’ mode and are no longer illuminated. This also applies when the batteries are being charged. Once any command buttons on the hand control are depressed the battery status indicator light and the LCD display screen revert to operational mode again.CAUTIONThe charge / status indicator will additionally indicate a number of alerts and warnings as follows:LOW BATTERY WARNING: If the battery charge is critically low when in sleep mode the charge / status indicator will flash red and, in ambient light conditions, this will be accompanied by an audible beep each time an operating control is depressed. In low light conditions, only the charge / status indicator will flash red.WARNINGLow battery status may not allow the lift to complete a patient lift cycle. Batteries should be placed on charge IMMEDIATELY – see details in the `Operator Display Screen’ later in this manual.12
English
Oxford® Elara Ceiling Lift
EMERGENCY STOP: NOTE: For emergency stop operating instructions refer to the `Emergency Stop / Electrical Emergency Lower’ section of this manual.When the red emergency stop cord is operated, the charge / status indicator will flash red and this will be accompanied by an audible beep.The above condition will be accompanied by the notification EMERGENCY STOP on the LCD display screen (See `Alert Warnings’ in the Operator Display Screen section of this manual).Additionally, the red ring of the `EMERGENCY STOP / EMERGENCY LOWER’ button on the lift unit will be visible.
Red indicator ring visibleELECTRICAL EMERGENCY LOWER: NOTE: For electrical emergency lower operating instructions refer to the `Emergency Stop / Electrical Emergency Lower’ section of this manual.WARNINGThe Emergency Stop/Emergency Lower pull cord is for use in emergency situations only. It must not be used for normal lowering operations.Immediately following use of the Emergency Stop/Emergency Lower pull cord, following reset, it is essential correct directional operation of the hand control is verified. IN THE EVENT OF INCORRECT OPERATION, DO NOT USE THE CEILING LIFT UNIT AND CONTACT AN AUTHORISED JOERNS HEALTHCARE SERVICE PROVIDER TO ARRANGE SERVICE/REPAIR.Continuing the pull on the red emergency stop cord after the emergency stop has activated will cause the electrical emergency lower function to commence.Whilst the electrical emergency lower is being operated, the charge / status indicator will flash red and this will be accompanied by an audible beep.The above condition will be accompanied by the notification EMERGENCY LOWER on the LCD display screen (See `Alert Warnings’ in the Operator Display Screen section of this manual).Additionally, the red ring of the `EMERGENCY STOP / EMERGENCY LOWER’ button on the lift unit will be visible.NOTE: If electric operating and emergency functions fail, use an alternative method to lower the patient and contact an authorised Joerns Healthcare service provider.13
Oxford® Elara Ceiling Lift
English
DRIVE OVERSPEED – CALL SERVICE:In the event of a serious malfunction with the ceiling lift unit which results in the `DRIVE OVERSPEED’ safety function being activated, the charge / status indicator will flash red and this will be accompanied by an audible beep each time any command buttons on the hand control are depressed. In addition, the notification `DRIVE OVERSPEED – CALL SERVICE’ will be indicated on the LCD display screen. (See `Alert Warnings’ in the Operator Display Screen section of this manual).The lift will not operate.WARNINGOnce the overspeed function has been activated the lift will not function. Service / examination is required immediately. Please contact an authorised Joerns Healthcare service provider to arrange service / examination.Hand ControlOxford Elara ceiling lifts are operated by depressing the appropriate command buttons on the hand control as described below:2-Way Units:The RAISE and LOWER buttons raise or lower the spreader bar.
LOWER
RAISE
4-Way Units:· The RAISE and LOWER buttons raise or lower the spreader bar. · The LEFT and RIGHT buttons traverse the ceiling lift along the rail. · RETURN TO CHARGE button returns the ceiling lift to the charge station. For details, see`Rail Systems Fitted with End Charge Stations’ section.
LOWER LEFT
RAISERIGHT RETURN TO CHARGE
NOTE: When pressing the descent button either on the hand control or the emergency / redundant controls on the lift unit and the spreader bar reaches its lower limit position, the descent travel will automatically halt and the notification TAPE ALL OUT will be displayed in the LCD display screen.14
English
Oxford® Elara Ceiling Lift
NOTE: The spreader bar must be attached to the lift tape and not supported on a surface in order for the hand control controls to function.A hook is provided on the back of the hand control to allow storage of the hand control on the spreader bar when not in use.
Rail Systems Fitted with End Charge Stations:Following the raising of the spreader bar to the upper limit, depressing the RETURN TO CHARGE BUTTON commences the automatic traverse of the ceiling lift to the charge station. When the ceiling lift reaches the charge station, traversing automatically ceases. NOTE: If the spreader bar has not been raised to its upper limit, the return to charge function will not operate. Additionally, the LCD display screen must be in normal operating mode for the return to charge function to operate. If the display screen is in programming mode the return to charge function will not operate. NOTE: The patient must detached from the ceiling lift before depressing the RETURN TO CHARGE BUTTON. If the lift unit senses any load attached to the spreader bar the return to charge function will not operate.CAUTION· For room covering X-Y rail systems and room covering X-Y rail systems incorporating a gate mechanism which are fitted with end charge stations, the traversing rail must be positioned so that it is in contact with the main charge point in the stationery rail prior to pressing the return to charge button.· For rail systems incorporating either a turntable or a switch track, the lift motor must be manoeuvered so that it is positioned in the rail section incorporating the end charge station prior to pressing the return to charge button.NOTE: The Elara ceiling lift unit incorporates a safety circuit which halts automatic traverse to the charge station if it has not docked with the charge station within 30 seconds of pressing the return to charge button.15
Oxford® Elara Ceiling Lift
English
Operator Display Screen
The LCD display screen on your Oxford Elara ceiling lift shows a number of parameter logs and contains a menu system allowing selection and adjustment of various settings.
Additionally, the display screen will indicate a number of alert warnings.
Alert Warnings:
Drive Overspeed – Call Service:DRIVE OVERSPEED CALL SERVICE
This warning will be displayed in the event of a serious malfunction. The lift will not operate.
WARNINGOnce the overspeed function has been activated the lift will not function. Service/examination is required immediately – please contact an authorised Joerns Healthcare service provider to arrange service/examination.
Emergency Stop: EMERGENCY STOP
This alert warning will be displayed when the red emergency stop cord has been operated. This will be accompanied by the charge/ status indicator flashing red and an audible beep being emitted.
Emergency Lower: Emergency Lower
This alert warning will be displayed when continuing to pull on the red emergency stop causing the emergency lower function to activate. This will be accompanied by the charge/status indicator flashing red and an audible beep being emitted.
WARNINGImmediately following use of the Emergency Stop/Emergency Lower pull cord, following reset, it is essential correct directional operation of the hand control is verified. IN THE EVENT OF INCORRECT OPERATION, DO NOT USE THE CEILING LIFT UNIT AND CONTACT AN AUTHORISED JOERNS HEALTHCARE SERVICE PROVIDER TO ARRANGE SERVICE/REPAIR.
Overload: OVERLOAD
This warning is displayed if an attempt is made to lift a patient whose weight exceeds the set maximum safe working load of the lift unit.
WARNINGIf the overload warning is displayed, halt the lifting operation immediately.
Low Battery: LOW BATTERY
This alert warning will be displayed when the battery level falls to a critical level i.e. when only one full lift is achievable.
16
EnglishAlert Warnings (Continued): Battery Depleted:BATTERY DEPLETED
Oxford® Elara Ceiling LiftThis alert warning will be displayed following `LOW BATTERY’ alert and one further lift operation is performed.
Service Overdue: SERVICE OVERDUE!
SERVICE INDICATOR – Once the set service period has been reached or exceeded, the `SERVICE OVERDUE’ notification will be displayed each time any of the operating controls buttons are depressed.
WARNINGContact an authorised Joerns Healthcare service provider without delay to arrange service/ examination.
Internal Error: INTERNAL ERRORTape Slack: Tape Slack
This warning will be displayed in the event of an interval electrical malfunction. The lift will not operate. Service/Examination is required immediately. Please contact an authorised Joerns Healthcare service provider.This alert warning is displayed if either the patient or the spreader bar come into contact with a surface i.e. bed or chair, resulting in no load being sensed by the lift unit.
Tape Twisted: Tape TwistedTape All Out: TAPE ALL OUT
This alert warning is displayed if the lift tape becomes twisted during the lift cycle. It may also be displayed if the patient is not lifted perfectly vertically and the lift tape enters the lift unit at an angle.This alert warning is displayed when the lower button on the hand control or control panel has been depressed and the lift tape has reached its lower limit of travel.
Top of Travel: At top of travel
This alert warning is displayed when the raise button on the hand control or control panel has been depressed and the lift tape has reached its upper limit of travel.
17
Oxford® Elara Ceiling Lift
English
Displays, Settings and Menus
1. Standby Mode In standby mode, the following information is displayed:
Battery Charge Status Symbol
Current Date
Current Time
01 Feb 2017 10:22 ááá â ââ MENU <<< >>>
Up & Down Controls
Enter
Left & Right
Options Menu Controls
NOTE: If the lift is not placed on charge following `LOW BATTERY’ alert, the LCD display panel will indicate `BATTERY DEPLETED’ and no further lifts will be possible.
BATTERY CHARGE STATUS SYMBOL The battery charge status symbol indicates the remaining charge when the lift unit is in standby mode. The indicator either shows 1/3rd, 2/3rd or fully charged. Refer to the `Charge / Status Indicator’ section for more details.CAUTIONWhen the battery level falls to a critical level (reaches the point at which only one full lift is achievable) the charge / status indicator will illuminate permanent red (not flashing). This will be accompanied by the alert `LOW BATTERY’ on the LCD display screen, Ensure the lift unit is returned to charge immediately.2. Sleep Mode To protect the batteries from unnecessary discharge, the ceiling lift enters sleep mode when no control input is detected after a period of 1 minute. The display will awake when any of the operating buttons are depressed.
18
English 3. Menu Map
Main Screen (Operation Mode)
Service Personnel OnlySet Service Dates
Set Up DisplaySet Load UnitsSet Display Contrast
Set Up IlluminationSet Lamp ModeSet Lamp BrightnessSet Lamp Off Delay
Set Up SoundsOn Off Auto
Set Clock
Show Logs
30 Jan 2017 10:30
Lift CyclesOverloadAmp Hours
System InformationSWL = XXXXServ Due 01 Jan 18Serv Warn 01 Dec 17Firmware Ver 01.00
Oxford® Elara Ceiling Lift
19
Oxford® Elara Ceiling Lift4. Menu Functions To enter the MAIN MENU depress the button immediately below MENU. The Main Menu modes are as follows:Screen 1: Setup Display Setup Displayá â SELECT EXITScreen 2: Setup IlluminationSetup Illumination á â SELECT EXIT
Screen 3: Setup SoundsSetup Sounds á â SELECT EXIT
Screen 4: Set ClockSet Clock á â SELECT
EXIT
Screen 5: Show LogsShow Logs á â SELECT EXIT
Screen 6: System InformationSystem Information á â SELECT EXIT
English
20
English
Oxford® Elara Ceiling Lift
Setting & Viewing ParametersTo enter the MAIN MENU depress the button immediately below MENU. Use the buttons below the UP and DOWN arrows to scroll through the menu options: 1. Setup DisplaySetup Display á â SELECT EXITTo enter SETUP DISPLAY depress the button below SELECT. The display screen will show SET DISPLAY CONTRAST.
1a. Set Display ContrastSet Display Contrast á â SELECT < EXIT
To enter SET DISPLAY CONTRAST depress the button below SELECT. The display screen shows ADJUST WITH UP/DOWN.
Adjust with up/down
á â
SAVE < EXIT
Use the buttons below the UP and DOWN arrows to adjust the display contrast.Once the desired display contrast is selected, depress the button below SAVE to confirm. Depress the button below < to return to the SETUP DISPLAY MENU, or depress the < button a second time to return to the main menu. Alternatively, depress the button below EXIT to return to the standby screen.Set Display Contrast á â SELECT < EXIT
21
Oxford® Elara Ceiling Lift
English
1b. Set Load Units In the SETUP DISPLAY MENU, use the button below the UP and DOWN arrows to scroll through the menu items until the SET LOAD UNITS screen is displayed.Set Load Units á â SELECT < EXIT
To enter SET LOAD UNITS, depress the button below SELECT. The screen will display the current selection.
There are two options to choose from:
Option 1: Show load in kg.
Option 2: Show load in pounds.
Show Load in kg
á â
SAVE < EXIT
Show Load in Pounds
á â
SAVE < EXIT
Use the buttons below the UP and DOWN arrows to scroll between the two options. When the desired load units selection is displayed, depress the button below SAVE. Once the desired load units has been chosen either depress the button below < once to revert to the SETUP DISPLAY MENU, or depress the < button a second time to revert to the MAIN MENU. Alternatively, depress the button below EXIT to return to the standby screen.
22
English
Oxford® Elara Ceiling Lift
2. Setup IlluminationIn the MAIN MENU, use the buttons below the UP and DOWN arrows to scroll through the menu items until the SETUP ILLUMINATION screen is displayed. To enter the SETUP ILLUMINATION menu, depress the button below SELECT.
Setup Illumination á â SELECT EXIT
Use the buttons below the UP and DOWN arrows to scroll through the 3 selectable settings.
2a. SET LAMP MODE:
Set Lamp Mode á â SELECT < EXIT
NOTE: The SET LAMP MODE settings allow the selection of when the illumination lamp is lit during normal operation.
Depress the button below SELECT and the current SET LAMP MODE selection will be shown. There are 3 options as follows:
OPTION 1: ON
á â
On SAVE < EXIT
Selection of ON will result in the illumination lamp being lit at all times during normal operation.Depress the button below SAVE to select this option or choose an alternative setting by using the buttons below the UP and DOWN arrows to scroll to another option.
OPTION 2: AUTO
á â
Auto SAVE < EXIT
Selecting this option will result in the illumination lamp activating ONLY when ambient light levels fall or during periods of darkness.If AUTO is the required setting, depress the button below SAVE or choose an alternative setting by using the buttons below the UP and DOWN arrows.
OPTION 3: OFF
á â
Off SAVE < EXIT
Selecting this option will result in the illumination lamp being disabled at all times during normal operation. Depress the button below SAVE to confirm this selection.When the desired option has been saved, either depress the button below < once to revert to the SETUP ILLUMINATION menu or depress the button below < a second time to revert to the MAIN MENU. Alternatively, depress the button below EXIT to return to the standby screen.23
Oxford® Elara Ceiling Lift2b. SET LAMP OFF DELAY:Set Lamp Off Delay á â SELECT < EXIT
English
In the SETUP ILLUMINATION menu, use the buttons below the UP and DOWN arrows to scroll through to the SET LAMP OFF DELAY screen.Enter this function by depressing the button below SELECT. The screen will show the current SET LAMP OFF DELAY setting.NOTE: The SET LAMP OFF DELAY settings allow selection of the length of time the illumination lamp remains lit in the normal operating mode following the completion of any transfer operation.
10 Seconds
á â
SAVE < EXIT
Use the buttons below the UP and DOWN arrows to scroll through six possible settings: 10 SECONDS, 20 SECONDS, 30 SECONDS, 1 MINUTE, 2 MINUTES and 5 MINUTES.When the desired setting is displayed, depress the button below SAVE.When the desired LAMP OFF DELAY has been saved, either depress the button below < once to revert to the SETUP ILLUMINATION menu or depress the button below < a second time to revert to the MAIN MENU. Alternatively, depress the button below EXIT to return to the standby screen.
2c. SET LAMP BRIGHTNESS:
Set Lamp Brightness á â SELECT < EXITUse the buttons below the UP and DOWN arrows, to scroll through to the SET LAMP BRIGHTNESS screen. Depress the button below SELECT to access these settings.
Adjust with up/down
á â
SAVE < EXIT
Use the buttons below the UP and DOWN arrows to select the brightness to the desired level and press the button below SAVE to store the setting. When the desired LAMP BRIGHTNESS has been saved, either depress the button below < once to revert to the SETUP ILLUMINATION menu or depress the button below < a second time to revert to the MAIN MENU. Alternatively, depress the button below EXIT to return to the standby screen.24
English
Oxford® Elara Ceiling Lift
3. Setup SoundsIn the MAIN MENU, use the buttons below the UP and DOWN arrows to scroll through the menu items until the SETUP SOUNDS screen is displayed. To enter the SET SOUNDS menu, depress the button below SELECT.
Setup Sounds á â SELECT EXIT
NOTE: The SETUP SOUNDS settings allow the selection of when audible notifications are emitted in the normal operating mode.
Use the buttons below the UP and DOWN arrows to scroll through the options. There are 3 options to choose from: OPTION 1: ON
á â
On SAVE < EXIT
Selection of ON will activate audible notifications during normal operation, e.g. low battery alert. To confirm this setting, depress the button below SAVE. If you require an alternative setting, use the buttons below the UP and DOWN arrows to scroll through the options.
OPTION 2: AUTOSelecting AUTO will result in audible notifications during normal ambient lighting conditions ONLY. When light levels fall, or during periods of darkness, audible notifications are automatically disabled and the status indicator light dims down to offer a more comfortable sleep environment.To select this setting, depress the button below SAVE.
á â
Auto SAVE < EXIT
If you require an alternative setting, use the buttons below the UP and DOWN arrows to scroll to another option.
OPTION 3: OFFSelecting OFF will result in all audible notifications being silenced during normal operation. To confirm this selection, depress the button below SAVE.
á â
Off SAVE < EXIT
When the desired SETUP SOUNDS setting has been saved, either depress the button below < to revert to the MAIN MENU or depress the button below EXIT to return to the standby screen.25
Oxford® Elara Ceiling Lift
English
4. Set ClockIn the MAIN MENU, use the buttons below the UP and DOWN arrows to scroll through the menu items until the SET CLOCK screen is displayed. To enter the set clock function, depress the button below SELECT.
Set Clock á â SELECT
EXIT
The screen will show the DATE and TIME and the selected parameter will pulse on and off to indicate the value can be adjusted.
01 Feb 2017 14:23
á â
SAVE > EXIT
Use the buttons below the UP and DOWN arrows to increase or decrease the selected parameter.When the desired value is shown, use the button below > to select the next parameter and adjust using the buttons below the UP and DOWN arrows.Continue to select and adjust all parameters to the desired value before depressing the button below SAVE to store them.Once the updated clock settings have been saved, depress the button below EXIT to return to the standby screen.
26
English
Oxford® Elara Ceiling Lift
5. Show LogsIn the MAIN MENU, use the buttons below the UP and DOWN arrows to scroll through the menu items until the SHOW LOGS screen is displayed. To enter the SHOW LOGS menu, depress the button below SELECT.
Show Logs á â SELECT EXIT
The display screen will now display the total number of LIFT CYCLES performed by the lift.
3652 Lift Cycles
á â
< EXIT
Use the buttons below the UP and DOWN arrows to scroll to AMP HOURS. This screen indicates the total number of Amp/hours drawn by the ceiling lift’s motor during use.
1148.8 Amp Hours
á â
< EXIT
Use the buttons below the UP and DOWN arrows to scroll to OVERLOADS. This screen shows the total number of attempts to lift in excess of the maximum set safe working load.
1 Overloads
á â
< EXIT
Once all the log parameters have been viewed, depress the button below < once to revert to the MAIN MENU. ALTERNATIVELY, depress the button below EXIT to return to the normal standby screen.
27
Oxford® Elara Ceiling Lift
English
6. System Information In the MAIN MENU, use the buttons below the UP and DOWN arrows to scroll through the menu items until the SYSTEM INFORMATION screen is displayed.System Information á â SELECT EXIT
To enter the SYSTEM INFORMATION menu, depress the button below SELECT.There are 4 SYSTEM INFORMATION screens which display set parameters which are only adjustable by an authorised Joerns Healthcare service technician using specialised programming equipment.These settings CANNOT be altered by the user.To scroll through the SYSTEM INFORMATION menu, use the buttons below the UP and DOWN arrows.The information displayed is as follows:
SWL = 227kg
á â
< EXIT
6a. This displays the set maximum safe working load of the lift.
Serv due á â
01 Aug 17 < EXIT
6b. This displays the set date when the next inspection/service is due.
Serv warn á â
31 July 17 < EXIT
6c. This displays the set date when the notification alert for the service due date will commence being displayed.
Firmware Ver 01.00
á â
< EXIT
6d. This displays the software revision which the particular lift unit is utilising.
When all the system information has been viewed, depress the button below < to revert to the MAIN MENU. Alternatively, depress the button below EXIT to return to the standby screen.7. Set Service Dates This option is for authorised Joerns Healthcare service providers only.Set Service Dates á â SELECT EXIT
28
English
Oxford® Elara Ceiling Lift
Lifting & Transferring with the Oxford Elara ceiling liftWARNING· ALWAYS read the `Safety Instructions’ before using the Oxford Elara ceiling lifts.· The track MUST be installed and modified by an authorised Joerns Healthcare service provider and in accordance with local and regional codes.· ALL tracks MUST be closed with rail end stoppers or connected to other closed track components.· Before use ENSURE all rail end stoppers are in place and secured.· The lift unit should NEVER be operated by the patient, only by the caregiver.SlingsThe Oxford Elara ceiling lift has been designed for use with Oxford slings. Therefore it is recommended that Oxford slings are used in conjunction with Oxford Elara ceiling lifts. Oxford slings are available in various sizes from paediatric through to XL and are colour coded to denote the size.Additionally, a range of more specialised slings are available. Please contact an authorised Joerns Healthcare service provider for more information.WARNING· If you are in any doubt as to the weight of the patient, use a patient scale to confirm their weight to ensure appropriate and compatible sling selection.· Loop slings are available with or without head support. A range of bathing mesh slings are also available in various sizes, with or without head support.· Joerns Healthcare recommend a full risk assessment is conducted prior to using any sling to ensure correct fit, function, comfort and safety for the patient.
29
Oxford® Elara Ceiling Lift
English
6-Point Spreader BarThe Oxford Elara ceiling lift is supplied as standard with the Oxford 6-point spreader bar. The Oxford 6-point spreader bar is fitted with spring loaded sling retainers at either end of the bar which help prevent accidental detachment of the sling loops.WARNINGNEVER use a spreader bar where the spring loaded sling retainers have been removed, are not functioning correctly or show signs of damage.
WARNING· The 6-point spreader bar is fitted with hooks and spring loaded sling retainers for use with loop attachment slings ONLY.· When attaching a loop sling to the 6-point spreader bar, always ensure the sling attachment loops are located correctly into the spreader bar hooks and are securely retained by the spring loaded sling retainers.Before Transferring a PatientWARNING· Whenever appropriate, position the patient to face the direction of travel and at all times minimise the distance between the patient and the floor (i.e. maintain chair height). This assures the patient a degree of confidence and dignity throughout the transfer process.· BEFORE commencing the transfer procedure, ENSURE the intended route of travel is clear and free from obstruction.· To ensure maximum comfort, DO NOT allow the patient to hold on to the spreader bar during the transfer procedure.
30
English
Oxford® Elara Ceiling Lift
Commencing the Transfer1. Position the patient in the appropriate sling. NOTE: Refer to the specific sling `Instructions for Use’ to ensure the sling is applied and positioned correctly.2. Carefully move the ceiling lift into position, directly above the patient. With the 2-way model, simply grasp the lift’s spreader bar and pull the lift unit along the rail. With the 4-way model, use the left and right traversing buttons to manoeuvre the lift unit along the rail.3. Use the LOWER button on the hand control to lower the spreader bar to a point level with the patient’s shoulders (steady the spreader bar with your free hand to avoid the risk of the spreader bar striking the patient’s face as a result of sudden movement). NOTE: If the patient is in the recumbent position, lower the spreader bar down near the patient’s chest, then install the sling straps.WARNINGHold the ceiling lift spreader bar with one hand at all times when it is near a patient to avoid the risk of collision/injury.4. Carefully attach the sling straps to the appropriate attachment position as instructed in the sling’s `Instructions for Use’.WARNING· Ensure the sling straps are securely attached to the spreader bar and the sling straps are retained behind the sling retainers before commencing the transfer.· Ensure the sling is not caught on any obstructions (e.g. the arms of a wheelchair). · Ensure the spreader bar is correctly and securely attached to the ceiling lift.
31
Oxford® Elara Ceiling Lift5. To lift the patient, press the RAISE button. Elara 2-Way
Elara 4-Way
Lower
Raise
Lower Left
EnglishRaise Right
6. Ensure the patient is clear of any obstacles and the path of transfer is not hampered by obstructions. Guide the patient’s legs if necessary.7. When the patient is positioned above the desired point of transfer, press the LOWER button.8. Use the positioning handles on the rear of the sling (where fitted) to manoeuvre the patient into the desired position when transferring into a chair.9. Once the patient is properly seated and the sling straps have slackened, detach the sling straps from the spreader bar and remove the sling from around the patient.10. Raise the spreader bar from the immediate area of the patient.11. Move the ceiling lift away from the patient.12. When the transfer is complete, return the ceiling lift to the charging station (if an end of rail charge station is installed). If an in rail charger is fitted, manoeuvre the ceiling lift unit so that it does not cause obstruction and it is out of the immediate vicinity of the patient.13. Ensure the charge / status indicator on the LCD display screen is pulsing green to verify the charge function is working correctly.WARNINGA patient should never be left unattended during a transfer procedure.
32
EnglishEmergency Stop / Electrical Emergency Lower
Oxford® Elara Ceiling Lift
Reset Button (Prior to activation)Emergency Stop / Emergency Lower Cord
Reset Button (Following activation)Emergency Stop / Emergency Lower Cord
Emergency StopThe emergency stop function can be activated at any time to halt the functioning of the ceiling lift.To halt the ceiling lift in an emergency situation, gently pull the red emergency cord until a click is heard and the reset button is protruding from the underside of the ceiling lift cabinet.NOTE: Continuing to pull on the red emergency stop cord after the emergency stop has activated will cause the electrical emergency lower function to commence (see below).NOTE: Whilst the emergency stop is in operation the charge / status indicator will flash red and this will be accompanied by an audible beep.The above condition will be accompanied by the notification `EMERGENCY STOP’ on the LCD display screen (See `Alert Warnings’ in the Operator Display Screen section of this manual).Additionally, the red ring of the `EMERGENCY STOP’ / EMERGENCY LOWER’ will be visible.To reset the emergency stop function, push the RESET BUTTON upwards so that the face of the button is flush with lower face of the ceiling lift cabinet.CAUTIONDo not pull the red emergency cord with excessive force as this could damage the mechanism and the ceiling lift may become inoperable.NOTE: The hand control will not function until the emergency stop is reset.WARNING· Resetting the emergency stop function may necessitate standing on a raised surface to enable the reset to be reached. To avoid the possibility of injury, ensure the raised surface is completely stable prior to stepping on to it. If necessary, the aid of a second person may be enlisted to sustain stability whilst pushing the reset button.· The Emergency Stop/Emergency Lower pull cord is for use in emergency situations only. It must not be used for normal lowering operations.· Immediately following use of the Emergency Stop/Emergency Lower pull cord, following reset, it is essential correct directional operation of the hand control is verified. IN THE EVENT OF INCORRECT OPERATION, DO NOT USE THE CEILING LIFT UNIT AND CONTACT AN AUTHORISED JOERNS HEALTHCARE SERVICE PROVIDER TO ARRANGE SERVICE/REPAIR. 33
Oxford® Elara Ceiling Lift
English
Electrical Emergency LowerThe Oxford Elara ceiling lifts are equipped with an electrical emergency lowering function to facilitate lowering of the patient should the hand control malfunction during a transfer.NOTE: The electrical emergency lowering function must only be used in the event of an emergency.At any time whilst the `ELECTRICAL EMERGENCY LOWER’ is being operated the charge / status indicator will flash red and this will be accompanied by an audible beep.The above condition will be accompanied by the notification `EMERGENCY LOWER’ on the LCD display screen. (See `Alert Warnings’ in the Operator Display Screen section of this manual).Additionally, the red ring of the `EMERGENCY STOP’ / EMERGENCY LOWER’ will be visible.WARNINGPrior to activating the electrical emergency lowering function, ensure the patient is safely positioned over a suitable stable surface such as a chair or bed.To activate the electrical emergency lower function, gently pull on the red emergency cord until a click is heard and the RESET BUTTON is protruding from the underside of the ceiling lift cabinet (See image on previous page). Continue to pull the red emergency cord to initiate lowering, ensuring the patient is safely transferred onto a safe and stable surface. Release the emergency cord to halt the lowering function.CAUTIONDo not pull the red emergency cord with excessive force as this could damage the mechanism and the ceiling lift may become inoperable.
To reset the electrical emergency lowering function, simply push the RESET BUTTON upwards so that the face of the button is flush with the lower face of the ceiling lift cabinet.WARNINGResetting the electrical emergency lowering function may necessitate standing on a raised surface to enable the reset button to be reached. To avoid the possibility of injury, ensure the raised surface is completely stable prior to stepping on to it. If necessary, the aid of a second person may be enlisted to sustain stability whilst pushing the reset button.NOTE: If electric operating and emergency functions fail, use an alternative method to lower the patient and contact an authorised Joerns Healthcare service provider.The Emergency Stop/Emergency Lower pull cord is for use in emergency situations only. It must not be used for normal lowering operations.
34
English
Oxford® Elara Ceiling Lift
Automatic Emergency BrakeThe Oxford Elara ceiling lift is equipped with an automatic emergency brake function to prevent rapid descent of the patient in the unlikely event of a transmission or motor failure.CAUTIONOnce the automatic emergency brake has been activated, the charge / status indicator will flash red and this will be accompanied by an audible beep each time an operating control is depressed.In addition, the notification `DRIVE OVERSPEED – CALL SERVICE’ will be indicated on the LCD display screen. (See `Alert Warnings’ in the Operator Display Screen section of this manual).WARNING· Following an incident where the automatic emergency brake has been deployed, DO NOT attempt to unlock the brake. Use alternative lowering equipment to lower the patient. DO NOT attempt to use either the electrical emergency lowering function or the manual emergency lowering function.· The emergency brake is intended for single activation. Once deployed, DO NOT use the ceiling lift and contact an authorised Joerns Healthcare service provider.
35
Oxford® Elara Ceiling Lift
English
5. Batteries & ChargingBattery Information WARNINGDO NOT drop the lift unit. A lift unit that has been dropped may have sustained internal damage that is not visible externally. It may lose its ability to recharge. As a result of internal damage caused when a battery is dropped, the battery charge status indicator may indicate that the battery is fully charged when it actually cannot retain a full charge.NOTE: After taking delivery of the Oxford Elara lift unit, the batteries should be charged for a minimum period of 8 hours prior to initial use.Battery Shelf LifeThe storage or shelf life of a Sealed Lead Acid (SLA) battery is usually between 12 and 18 months at 20°C starting from a charged condition.WARNINGNEVER store in a discharged or partially discharged state. Always store in a dry, clean, cool environment and keep fully packaged. If storage of 12 months or longer is required, supplementary charging will be required.Total Battery Capacity· 24Vdc – 2.3Ah.· Provides up to 10 transfers of 227kg from fully charged batteries in the middle 600mm lift zone.Life cycle of the batteries (number of charging cycles) is mainly dependant on the intensity of discharge in each cycle. The more the battery is discharged, the shorter the life span. The life cycle of the batteries is also related to factors including varying temperatures and rest periods between charge and discharge.Number of Recharges vs. Depth of DischargeBatteries should be kept in a fully charged state where possible. Deep discharging on a regular basis without immediate recharge has a detrimental effect on battery life. To prolong the life of your batteries ALWAYS leave them in a fully charged state ready for the next use of your ceiling lift.NOTE: For installations fitted with an end of rail charge station, battery life will be prolonged by returning the lift to its charge station when not in use. The batteries WILL NOT overcharge.Joerns Healthcare uses rechargeable Sealed Lead Acid in its ceiling lifts. In contrast to nickelcadmium batteries, Sealed Lead Acid batteries are not affected by `memory effect’ and therefore, do not require completely discharging prior to recharging.
36
English
Oxford® Elara Ceiling Lift
Number of Lift Cycles vs. LoadThe chart below illustrates the relationship between the load lifted and the number of lifts that can be performed with fully charged batteries.
WeWiegihgt (htkg)
300 250 200 150 10050 0 0
5
10
15
20
25
30
35
40
45
Number of lifts
CAUTIONDO NOT drain the batteries excessively. This will dramatically reduce the expected battery life span.If the lift is not being used for extended periods of time and consequently not being charged, then the lift should be switched off using the on/off switch on the underside of the lift.Failure to follow these instructions will result in the batteries being completely discharged and possibly damaged within 48 hours.If the audible low battery charge signal sounds and the battery charge indicator flashes red, the batteries should be charged without delay.NOTE: The lift may NOT function until the batteries have been recharged.
Charging the BatteriesWARNING· If the battery charger power lead is damaged or the ceiling lift has been dropped, DO NOT attempt to charge the batteries.· DO NOT forcibly bend the power lead or place heavy objects on it as this may damage the lead and cause fire or electric shock.· DO NOT pour liquid on or near the charger.NOTE: Do not place the ceiling lift unit in locations that are:· Extremely hot · Dusty or dirty · Very humid/condensing humidity · Moving or vibrating37
Oxford® Elara Ceiling Lift
English
Battery ReplacementThe batteries should be replaced when there is a noticeable reduction in the number of transfers that can be performed between charges. If you notice the battery charge status indicator failing to reach full battery condition and an audible beep is heard, refer to the instructions in the `Trouble Shooting’ section in this manual to determine if it is a battery problem. For battery replacement, contact an authorised Joerns Healthcare service provider.CAUTIONDO NOT attempt to use a battery that was not supplied by Joerns Healthcare. Joerns Healthcare batteries are specifically designed to be compatible with Joerns Healthcare charging systems. Attempting to use unauthorised batteries may seriously damage the ceiling lift and/or the charger and may invalidate the warranty.Verification of Power Source to ChargerIf the battery charge status indicator does not pulse green when there are well charged batteries installed in the lift, try the following:1. Ensure the charger is correctly connected to an AC mains supply (Rail end charger and in rail charging).2. Ensure the rail charge contacts are clean and not contaminated with dirt, dust or other debris (Rail end charger and in rail charging).3. Ensure there is good contact between the charge contact rollers of the lift trolley and the contacts of the rail end charger or the rail charge contacts (In-rail charging).NOTE: When the lift unit charge trolley rollers successfully make contact with the rail end charger or the rail charge contacts (In-rail charging) this will be confirmed by a green pulsing battery charge status indicator on the LCD display screen. After a pre-determined period, the battery charge status indicator and LCD display screen will enter `sleep’ mode and will no longer be visible.4. Confirm there is power to the AC outlet.5. Contact an authorised Joerns Healthcare service provider.Charging a 2-Way Model (with End of Rail Charging):1. Gently pull the ceiling lift to the end of rail charger. 2. Confirm the charge / status indicator pulses green to confirm charging.NOTE: After a pre-determined period of non-operation of the lift unit, the LCD display screen and battery charge status indicator enter `sleep mode’ and are no longer visible. They revert to operational mode when any operating control is activated.CAUTIONDO NOT pull the lift unit forcefully back to the end of rail charger as this may damage the charge contacts.WARNINGENSURE the patient has been safely removed from the ceiling lift prior to charging.
38
English
Oxford® Elara Ceiling Lift
Charging 4-Way Model (with End of Rail Charging):1. Use the `RAISE’ button on the hand control to raise the spreader bar until it reaches the upper limit switch (Upward travel automatically halts).2. Depress the `Return to Charge’ button on the hand control. The ceiling lift will automatically traverse to the end of rail charger.3. When the ceiling lift reaches the end of rail charger, traverse will automatically halt. 4. Confirm the charge / status indicator is pulsing green to confirm charging.
LOWER LEFT
RAISERIGHT RETURN TO CHARGE
WARNINGENSURE the patient has been safely removed from the ceiling lift prior to charging. ENSURE there are no obstructions preventing free travel to the end of rail charger.Cable Guidance WARNINGOnly use an Oxford Elara ceiling lift with the Mascot Type 2240 (24VDC) battery charger.To protect the cabling from damage, please follow the installation guidance below:a) Ensure the charge cable is a safe distance above the floor. b) Ensure any cord or cable is protected from contact with moving items. A cord or cable that maytouch the floor under any condition of intended use is considered to be exposed to abuse. c) The hand control cable is constructed to provide adjustment whilst retaining its length. The cordlength is limited so that the unstretched cord does not contact the floor whilst the hand control is in a hanging position.
39
Oxford® Elara Ceiling Lift
English
6. Care & Maintenance ScheduleJoerns Healthcare recommend a thorough inspection and test is carried out at least every six months. The examination and test should be conducted according to the recommendations and procedures below. Joerns Healthcare recommend maintenance, inspection and certified testing is carried out by authorised service providers ONLY. NOTE: These recommendations are in compliance with the requirements of 1998 No. 2307 Health and Safety: The Lifting Operations and Lifting Equipment Regulations 1998. This is a UK regulation. Outside the UK please check your local requirements.Preventative Maintenance ScheduleYour Oxford Elara ceiling lift is subject to wear and tear and the following maintenance schedule must be performed at the specified intervals to ensure that the equipment remains within its original manufacturing specifications. The recommended care and maintenance must be carried out in accordance with the preventative maintenance routine as specified below. In order that the caregiver/user is competent to satisfactorily perform the actions specified in the User Inspection Schedule, it is imperative that they have received adequate training/instruction from an authorised Joerns Healthcare service provider. Daily checks, a bi-annual thorough examination and an annual service and test will ensure your ceiling lift is kept in optimum condition and safe working order.Cleaning InstructionsThe Elara lift units are only suitable for manual cleaning. Due to the complex internal electronics, the Elara lift units ARE NOT SUITABLE for autoclaving. The lift cabinet panels can be cleaned with ordinary soap on a DAMPENED cloth. DO NOT overwet the cloth. Alternatively, use any hard surface disinfectant sparingly applied to a cloth or use proprietary disinfectant wipes. DO NOT use bleach, abrasive cleaning products or solvents as these may damage the product.WARNING· The patient MUST be removed from the Oxford Elara ceiling lift prior to commencing any maintenance routine.· The maintenance specified in the following schedule is the minimum that the manufacturer recommends. In certain circumstances, more frequent inspections should be carried out. Continuing to use this equipment without performing regular inspections or when a fault is found will seriously compromise the safety of the user/ caregiver and the patient. Local regulations and standards may be higher than those of the manufacturer. Service, repair and preventative maintenance can be arranged with an authorised Joerns Healthcare service provider. By following the Preventative Maintenance schedule specified in this manual, you can help prevent accidents and minimise repair costs.· Safety related service and maintenance MUST be performed by authorised Joerns Healthcare personnel or an authorised Joerns Healthcare service provider who are competently trained in servicing procedures detailed in both this user manual and the service manual for this product. Failure to meet these requirements could result in personal injuries and/or unsafe equipment.· Ensure patients are removed from the room during inspection and testing.40
English
Oxford® Elara Ceiling Lift
Load TestingThe load test should be carried out in accordance with the manufacturer’s test procedures and the directive detailed in EN ISO 10535:2006 – Annex B – Periodic Inspection B1 – see excerpt below. It is strongly recommended that an authorised service dealer carry out the test.EN ISO 10535:2006 Annex B(Informative) Periodic Inspection B. 1 Periodic inspection of the hoist should be undertaken at the time intervals stated by the manufacturer, but at least once a year. By periodic inspection is meant a visual examination (particularly of the hoist’s load bearing structure and lifting mechanism with attachments, brakes, controls, safety devices and person-support devices) and whatever function tests and maintenance measures may be required, e.g. adjustment of brakes, tightening of fasteners.Every inspection should include a working load test of one (1) lifting cycle with the maximum load.End of Life DisposalBattery: All batteries in the product and any accompanying accessories must be recycled separately. Batteries should be disposed of in accordance with local or national regulations.Slings: Slings and associated material accessories should be sorted as combustible waste in accordance with local or national regulations.
41
Oxford® Elara Ceiling Lift
English
User Inspection ScheduleThe following checks are to be conducted by the user and/or caregiver:
Inspections for Ceiling Lift Unit & Track SystemInspect for evidence of external damage, missing parts or broken panels.Ensure that rail end stoppers are in place and secure.Recharge batteries.Inspect the lift strap for wear, damage, fraying and loose threads. Ensure stitching is intact.Remain vigilant for excessive movement of track components. (Should such movement be observed, stop use immediately and contact an authorised Joerns Healthcare service provider).Inspections for Spreader Bar & SlingsInspect all sling parts (attachments, fabric, stitching and loops) for signs of wear, damage, discolouration, deterioration or loose threads.Examine the spreader bar attached to the lifting strap for damage or cracks. Ensure all attachments are properly secured and that the sling retainers are present and operate correctly.Ensure spreader bar is securely attached to the lifting tape coupling.Launder the sling in compliance with the instructions on the sling label.
Frequency
Initially
Before every use
X
X
X
X
X
X
X
X
XX X When necessary
42
English
Oxford® Elara Ceiling Lift
Daily ChecklistWARNINGThe patient MUST be removed from the ceiling lift prior to commencing maintenance routine.The following procedures must be performed before each use:· CHARGE the batteries. Return the lift to the charge station whenever the lift is not in use (End of rail chargers only).· INSPECT the lift for any signs of damage. If the lift cabinet looks misaligned or there is any damage evident or parts are missing, DO NOT use the lift. Contact an authorised Joerns Healthcare service provider to have the lift serviced/repaired.· EXAMINE the lifting tape for wear, fraying, cuts, loose threads or chemical damage. If any of these conditions are detected, DO NOT use the lift. Contact an authorised Joerns Healthcare service provider to have the lift serviced/repaired.· EXAMINE the sling for signs of damage, wear or bleached areas and for frayed, cut or worn straps. If any of these conditions are detected, DO NOT use the sling. Contact an authorised Joerns Healthcare service provider to have the sling replaced.· EXAMINE the spreader bar for any cracks or damage. · ENSURE the pin which secures the spreader bar to the lifting strap is secure. · ENSURE correct directional operation of the hand control. In the event of malfunction, DO NOT usethe lift and contact an authorised Joerns Healthcare service provider to have the lift serviced/repaired.WARNINGPrior to each use, confirm all rail end stops are present and secure.Cleaning and InspectionThe Oxford Elara ceiling lifts are only suitable for manual cleaning. Due to the complex internal electronics, the Elara lift units ARE NOT SUITABLE for autoclaving.The Oxford Elara ceiling lift panels should be cleaned using a damp cloth, ordinary soap and warm water and disinfecting cleaner. Alternatively, disinfecting wipes supplied impregnated with a 70% solution of isopropyl can be used. DO NOT over wet the cloth.CAUTIONDO NOT use phenol, chlorine or any other type of solvents or abrasive cleaning products which could damage the finish. Avoid wetting any of the electrical components.In order to maintain a smooth rolling surface for the trolley wheels, the inside rolling surface of the track should be cleaned every six months with a damp cloth. Insert the cloth into the track opening and wipe the entire length of the track. Additionally, any debris should be cleaned from the upper surface of the track using a damp cloth.WARNINGCleaning the lift unit may necessitate standing on a raised surface to enable the lift unit to be reached. To avoid the possibility of injury, ensure the raised surface is completely stable prior to stepping on to it. If necessary, the aid of a second person may be enlisted to sustain stability whilst cleaning.43
Oxford® Elara Ceiling Lift
English
Lifting Tape ExaminationInspect the lifting tape for evidence of wear, damage, cuts, fraying, discoloration, chemical attack or loose/damaged stitching. The maximum load the lifting tape can withstand before failure can rapidly reduce and present danger for the patient and/or caregiver. Joerns Healthcare recommends a thorough examination of the lifting strap is carried out every six months as follows: 1. Completely unwind the lifting tape 2. Inspect the lifting tape for wear, damage, fraying and loose threads and that all stitching is intact.
Threads / stitching
Cuts / damage
Edge fray Surface wear
WARNINGIf the lifting tape exhibits any evidence of the defects indicated above, it should be examined by an authorised Joerns Healthcare service provider and replaced if necessary. By continuing to use the ceiling lift without replacing a defective lifting tape, the safety of the patient/caregiver will be greatly compromised and could result in serious injury.NOTE: The manufacturer recommends the lifting tape is replaced at least every five years. By continuing to use the ceiling lift without replacing the lifting tape, the safety of the patient/caregiver will be greatly compromised and could result in serious injury.Handling and StorageNOTE: Even if the ceiling lift is not used, Joerns Healthcare recommends recharging the batteries at least every two weeks to prevent premature aging and/or failure of batteries.
44
English
Oxford® Elara Ceiling Lift
7. Trouble ShootingWARNINGDO NOT attempt to remove the Oxford Elara cabinet. Only an authorised Joerns Healthcare service provider is authorised to remove the cabinet. Alterations/repairs performed on an Oxford Elara ceiling lift by non-authorised persons may cause serious injury.
ProblemThe lift starts and stops repeatedly.During the attempted lift, the charge/status indicator illuminates red (not flashing) and this is accompanied by the alert `LOW BATTERY’ on the LCD display screen.During the attempted lift, the charge/status indicator illuminates red (not flashing) and this is accompanied by the alert `BATTERY DEPLETED’ on the LCD display screen.The charge/status indicator is not flashing green when the lift is on charge and in operating mode (not in sleep mode).When the battery charge status symbol on the LCD display screen indicates `FULL BATTERY’ does the charge/status indicator illuminate red (not flashing) following a small number of lifts. The lift does not operate when the buttons on the hand control are depressed.
Investigation / RemedyIf the maximum safe working load has been exceeded, the SWL overload protection will activate and an “OVERLOAD” message will be indicated on the LCD display screen.The battery charge is critically low and requires charging immediately.The battery charge is critically low and requires charging immediately.Check the charger is connected to the mains supply. Does the mains supply have power? Check the condition of the fuse in the mains plug. If necessary replace the fuse. If these actions are unsuccessful, contact an authorised Joerns Healthcare service provider to arrange inspection/repair.Replace the batteries with new ones. Contact an authorised Joerns Healthcare service provider to arrange battery replacement.Is the lift turned on?Is the emergency stop activated? The LCD display screen will indicate `EMERGENCY STOP’. Reset the emergency stop button so it is no longer protruding from the lift cabinetIs the hand control correctly connected?Slide the lift unit to the charge station (end of track charger variant). Does the battery/charge status indicator pulse green?Is the spreader bar resting on a surface? The lift must sense the weight of the spreader bar on the end of the lift tape in order to function correctly. Is the LCD display screen indicating a `TAPE SLACK’ message?Is the lift tape twisted where it enters the cabinet? Is the LCD display screen indicating `TAPE TWISTED’ message?If the unit will still not operate after testing the above, contact an authorised Joerns Healthcare service provider to arrange inspection/repair.The charge/status indicator illuminates red (not flashing) and the alert `BATTERY DEPLETED’ is displayed on the LCD display screen. The battery charge is critically low and requires charging immediately.The alert `INTERNAL ERROR’ is displayed on the LCD display screen. Contact an authorised Joerns Healthcare service provider to arrange inspection/repair.
45
Oxford® Elara Ceiling Lift
English
Problem
Investigation / Remedy
Following an overnight charge, the battery charge status symbol on the LCD display screen does not indicate FULL BATTERY symbol.
Check the charger is connected to the mains supply. Does the mains supply have power? Is the charge/ status indicator flashing green when the lift unit is on charge and in operating mode (not in sleep mode)? if not contact an authorised Joerns Healthcare service provider for inspection/servicing.
When operating the hand control, the directional operation is reversed, i.e. `LOWER’ raises and `RAISE’ lowers.
Do not use the lift and contact an authorised Joerns Healthcare service provider to arrange service/ repair.
46
English
Oxford® Elara Ceiling Lift
8. Technical SpecificationsLifting Capacity – Oxford Elara 227 (Maximum SWL) ….. 227kg Lifting Capacity – Oxford Elara 284 (Maximum SWL) ….. 284kgGeneral: Housing Length ……………………………………..315mm Housing Width ……………………………………….210mm Housing Depth……………………………………….179mm Lifting Range …………………………………………2200mm Lifting Speed (SWL – 227kg (500lb)………….3.4cm/sec Lifting Speed (SWL – 284kg (626Ib)………….3.0cm/sec Lifting Speed 100kg (220lbs) …………………..3.2cm/sec Lifting Speed (without load)……………………..4.3cm/sec Lifts Per Charge 100kg …………………………..35 Lifts Per Charge 80kg …………………………….40Weights: Weight (Excluding Spreader Bar)……………..12kg Spreader Bar …………………………………………4.4kg Hand Control …………………………………………1.5kgElectrical:WARNINGNOTE: ONLY operate the Oxford Elara ceiling lift with the Joerns Healthcare specified battery charger. The charger is part of the medical device system.Mascot Type 2240 Charger:Rated Input……………………………………………110-240VAC, 50-60Hz max 0.35A* Rated Output …………………………………………Max 29.4VDC – 0.5A (Orange/Red) …………………………………………………………….Ready/Standby 27.4VDC (Green) Classification …………………………………………Class II Electrical Equipment Compliance……………………………………………Meets requirements of IEC 60601-1
* The charger is rated at 100-240V by the manufacturer but for compliance with the necessary standards it has to be restricted to 110-240V. 47
Oxford® Elara Ceiling Lift
English
Oxford Elara Ceiling Lift:Internally Powered………………………………….24VDC Sealed lead acid (SLA) batteries Duty Cycle …………………………………………….Maximum 2 minutes operation/minimum 18 minutes pauseDegree of Protection Against Electric Shock: Sling……………………………………………………..Type BF applied part (no electrical connection)Environmental: Noise Level for Raising or Lowering …………63Dba without load Ingress Protection: Handset ………………………………………………..IPX4 Charger…………………………………………………IP4X Hoist …………………………………………………….Not protectedOperational Conditions: Ambient Temperature Range …………. +5°C to +40°C (+41°F to +104°F) Relative Humidity Range ……………….. 15% to 93% non-condensing Atmospheric Pressure Range …………. 700 hPa to 1060 hPaWARNINGThis equipment is not suitable for use in the presence of flammable Anaesthetic mixtures with air or oxygen, or with nitrous oxide.Recycling InformationPackaging……………………. Cardboard – recyclable Other Materials…………….. In accordance with local directives and facilities Ceiling Lift Unit …………….. Contact an authorised Joerns Healthcare service provider
48
EnglishDimensions:245mm 315mm (9.65″) (12.40″) 2445mm (96.26″)
Ceiling
Oxford® Elara Ceiling Lift
* This dimension will vary dependant on rail variant and rail suspension height.
*195mm (7.68″)370mm (14.57″)
210mm (8.27″)
2570mm (101.18″)
Electromagnetic Compliance:WARNINGWireless communication equipment such as wireless home network devices, mobile phones, cordless telephones and their base stations etc. can affect the Oxford Elara ceiling lifts and should be kept a minimum of 2340mm away from the lift unit. Cables from potentially strong sources of electromagnetic fields should not be placed near the lift unit.
Guidance and manufacturer’s declaration-electromagnetic emissions
The Oxford Elara is intended for use in the electromagnetic environment specified below. The customer or the user of the Oxford Elara should ensure that it is used in such an environment.
Emission Test
Compliance
Electromagnetic Environment Guidance
RF emissions CISPR11.
Group 1.
The Oxford Elara uses RF energy only for its internal function. Therefore, its RF emissions are very low and are not likely to cause any interference in nearby electronic equipment.
RF emissions CISPR11.Harmonic emissions IEC 61000-3-2.Voltage fluctuations/flicker emissions IEC 61000-3-3.
Class B. Not applicable.Not applicable.
The Oxford Elara is suitable for use in all establishments, including domestic establishments and those directly connected to the public low-voltage power supply network that supplies building used for domestic purposes.
If the Oxford Elara ceiling lift affects or is affected by other equipment, either the Oxford Elara ceiling lift or the equipment should be moved away.49
Oxford® Elara Ceiling Lift
English
Guidance and manufacturer’s declaration-electromagnetic immunity
The Oxford Elara ceiling lifts are intended for use in the electromagnetic environment specified below. The customer or the user of the Oxford Elara should ensure that it is used in such anenvironment.
Immunity Test
IEC 60601 Test Level Compliance Level
Electromagnetic Environment Guidance
Electrostatic discharge (ESD) IEC 61000-4-2.
+ 6kV contact. + 8kV air.
+ 6kV contact. + 8kV air.
Floors should be wood, concrete or ceramic tile. If floors are covered with synthetic material, the relative humidity should be at least 30%.
Electrical fast transient/burst IEC61000-4-4.
+ 2kV for power supply lines.
Not applicable.
+ 1kV for input/output Not applicable. lines.
Mains power quality should be that of a typical commercial or hospital environment.
Surge IEC 61000-4-5. + 1kV line(s) to line(s). Not applicable. + 2kV line(s) to earth. Not applicable.
Mains power quality should be that of a typical commercial or hospital environment.
Mains power quality should be that of a typical commercial or hospital environment.
<5% UT(>95% dip in UT) for 0.5 cycle.40% UT(60% dip in UT) for 5 cycles.
Not applicable. Not applicable .
70% UT(30% dip in UT) for 25 cycles.
Not applicable.
<5% UT(>95% dip in Not applicable. UT) for 5 cycles.
Mains power quality should be that of a typical commercial or hospital environment. If the user of the Oxford Elara requires continued operation during power mains interruptions, it is recommended that the Oxford Elara be powered from an uninterruptable power supply or battery.
Power frequency (50/60 Hz) magnetic field IEC 61000-4-8.
3 A/m.
3 A/m.
The Oxford Elara power frequency magnetic fields should be at levels characteristic of a typical location in a typical commercial or hospital environment.
NOTE: UT is the a.c. mains voltage prior to application of the test level.
50
English
Oxford® Elara Ceiling Lift
Guidance and manufacturer’s declaration-electromagnetic immunity
The Oxford Elara lifts are intended for use in the electromagnetic environment specified below. The customer or the user of the Oxford Elara should assure that it is used in such an environment.
Immunity test IEC 60601 Compliance Electromagnetic environment-guidance test level level
Conducted RF. IEC 61000-4-6.
3 Vrms.150 KHz to 80 MHz.
Not applicable.
Portable and mobile RF communications equipment should be used no closer to any part of the Oxford Elara including cables, than the recommended separation distance calculated from the equation applicable to the frequency of the transmitter.
Recommended separation distance:
d = 1.2 P.
d = 1.2 P 80MHz to 800 MHz.
Radiated RF.
3 V/m.
3 V/m.
d = 2.3 P 800MHz to 2.5 GHz.
IEC 61000-4-3. 80MHz to 2.5 GHz.
Where P is the maximum output power rating of the transmitter in watts (W) according to the transmitter manufacturer and d is the recommended separation distance in metres (m).
Field strengths from fixed RF transmitters, as determined by an electromagnetic site survey, a should be less than the compliance level in each frequency range b.
Interference may occur in the vicinity of equipment marked with the following symbol:
NOTE 1 At 80 MHz and 800 MHz, the higher frequency range applies.NOTE 2 These guidelines may not apply in all situations. Electromagnetic propagation is affected by absorption and reflection from structures, objects and people.a Field strengths from fixed transmitters, such as base stations for radio (cellular/cordless) telephones and land mobile radios, amateur radio, AM and FM radio broadcast and TV broadcast cannot be predicted theoretically with accuracy. To assess the electromagnetic environment due to fixed RF transmitters, an electromagnetic site survey should be considered. If the measured field strength in the location in which the Oxford Elara is used exceeds the applicable RF compliance level above, the Oxford Elara should be observed to verify normal operation. If abnormal performance is observed, additional measures may be necessary, such as re-orienting or relocating the Oxford Elara.b Over the frequency range 150 kHz to 80 MHz, field strengths should be less than 3 V/m.51
Oxford® Elara Ceiling Lift
English
KEY SYMBOLS AND DEFINITIONS: The following symbols are used on the charger, ceiling lift unit and peripheral items:
For indoor use.
Refer to user instructions before use (Blue background).
General warning sign (Yellow background).
| : 2 min Duty Cycle 0 : 18 min (2 minute operation 18 minute pause)
Class II equipment
2 Way Control
Alternating current.Direct current.The disposal of electronics should not be mixed with general household waste.
4 Way Control
IPX4
Protected against water spray from any direction
Indicates the entity importing the medical device into the locale.
This product is a Medical Device in accordance with EU Medical Device Regulation 2017/745.
SWL
Safe Working Load represents the maximum load the lift is rated for safe operation.
This symbol is accompanied by a date to indicate the date of manufacture and by the address of the manufacturer.A point of contact between the non-European medical device manufacturer, the national Competent Authorities (Ministry of Health) and Notified Bodies.52
Type BF applied part, no electrical connection. NOTE: The sling is identified as the applied part.Certification mark indicating conformity with the applicable requirements for products sold within Great Britain.A unique device identification intended to provide single, globally harmonised positive identification of medical devices through distribution and use.
English
Oxford® Elara Ceiling Lift
9. WarrantyJoerns Healthcare has an established network of authorised distributors and service agents who will be pleased to handle all of your purchasing, warranty, repair and maintenance enquiries. It is recommended that our products are commissioned by your authorised distributor or service agent.The distributor or service agent operates the warranty programme, so it is important to keep a record of their name, address and telephone number so they can be contacted should any problem arise. If you are in any doubt as to where your lift was purchased, Joerns Healthcare can trace the supplier if you quote the serial number of the lift.All warranty claims are subject to the correct use and maintenance in accordance with the user instruction manual provided with each lift. Damage caused by use in unsuitable environmental conditions or failure to maintain the product in accordance with user and service instructions is not covered. Your statutory rights remain unaffected.REMEMBER: Contact your authorised distributor or service agent for purchases, repairs, servicing and certified maintenance.Your distributor:
53
Oxford® Elara
Francais
Sommaire
1. Introduction………………………………………………………………………………………………………… 55 2. L’unité de levage sur rails Oxford Elara…………………………………………………………………. 56 3. Consignes de sécurité…………………………………………………………………………………………. 59 4. Fonctionnement………………………………………………………………………………………………….. 63 5. Batteries et recharge…………………………………………………………………………………………… 88 6. Calendrier d’entretien et de maintenance ………………………………………………………………. 92 7. Dépannage………………………………………………………………………………………………………… 97 8. Spécifications techniques…………………………………………………………………………………….. 99 9. Garantie…………………………………………………………………………………………………………… 105
Informations relatives au fabricantJoerns Healthcare Ltd. Drakes Broughton Business Park, Worcester Road, Drakes Broughton, Pershore, Worcestershire, WR10 2AG. Angleterre.NE PAS DÉTRUIRE IL CONVIENT DE CONSERVER CE MANUEL À PROXIMITÉ DE L’UNITÉ DE LEVAGE.Politique de conception et droits d’auteur Joerns Healthcare April 2022 Dans le cadre de notre politique d’amélioration continue, nous nous réservons le droit de modifier la conception de l’équipement sans avis préalable. Le contenu du présent document ne peut être copié sans l’autorisation partiel ou total de Joerns Healthcare.54
Francais
Oxford® Elara
1. Introduction
Prenez le temps de lire attentivement ce manuel avant d’utiliser le système de levage sur rails Oxford Elara. Les informations contenues dans le présent manuel sont essentielles au bon fonctionnement et à l’entretien du matériel. Elles garantissent la sécurité et la protection du patient et du personnel soignant contre les risques de blessures au cours du levage et du transfert. Par ailleurs, ces informations vous permettront de vous familiariser avec les fonctionnalités et le fonctionnement du lève-personne.Pour éviter les risques de blessures pour le patient et le personnel soignant, Joerns Healthcare recommande l’utilisation exclusive de pièces Joerns Healthcare en cas de révision et de réparation. Joerns Healthcare décline toute responsabilité en cas d’accident ou d’incident découlant d’une intervention non autorisée ou de l’utilisation de pièces non homologuées.En cas d’incertitude quant à l’utilisation de ce produit et/ou d’accessoires, consultez votre le professionnel agréé le plus proche ou Joerns Healthcare directement pour obtenir des informations complémentaires.
AVERTISSEMENT
· Avant chaque utilisation du système de levage sur rails Oxford Elara, effectuez les contrôles quotidiens énoncés dans la liste des éléments à inspecter.
· N’utilisez pas le système de levage sur rails Oxford Elara si vous avez le moindre doute concernant certains aspects de son fonctionnement.· Toute modification non autorisée du système de levage sur rails peut compromettre la sécurité. Joerns Healthcare décline toute responsabilité en cas d’accidents, d’incidents ou de perte de performance découlant de la réalisation de modifications non autorisées.
· Le système de levage sur rails est un équipement médical réutilisable destiné à des
patients dont le poids ne dépasse pas la charge maximale de sécurité spécifiée. NE
TENTEZ PAS de lever une charge supérieure à la charge maximale de sécurité de l’élément
le plus faible du système, en tenant compte de ce qui suit :
· Système de rails
· Moteur de levage
· Fléau ou berceau
· Harnais
· Accessoires (p.e. pèse-personne)
· Le système de levage Oxford Elara n’est pas prévu pour être utilisé pendant le traitement
d’un patient.
· Le système de levage Oxford Elara n’est pas prévu pour être utilisé dans un environnement où il risquerait d’être éclaboussé avec de l’eau.
· Si le système de levage Oxford Elara entrave le bon fonctionnement d’autres équipements,
il DOIT être éloigné des équipements.
Termes employés dans ce manuel
AVERTISSEMENTSignification : Le non-respect de ces consignes peut entraîner des blessures pour vous et toute autre personne.
CAUTION
Signification : Le non-respect de ces consignes pourrait endommager le matériel.
REMARQUE: Signification : Importantes informations relatives à l’utilisation correcte du matériel.
Documents joints au matériel
Vous trouverez à l’intérieur du carton une pochette contenant différents documents qu’il convient de conserver soigneusement pour référence ultérieure.
· Certificat d’essai
· Manuel de l’utilisateur
Le CERTIFICAT D’ESSAI est un document important qui doit être conservé dans votre dossier
d’assurance. Il a une validité de 6 mois à compter de la date d’installation. Une fois la date du certificat expirée, le lève-personne doit faire l’objet d’une inspection et d’une révision conformément. 55
Oxford® Elara
Francais
2. L’unité de levage sur rails Oxford ElaraREMARQUE : Votre unité de levage sur rails Oxford Elara a été délibérément désactivée pendant le transport afin d’éviter toute activation accidentelle et la décharge de la batterie. L’unité de levage doit être mise en service par un prestataire de service Joerns Healthcare agréé.
RailMoteur Sangle de levageBarre d’écartement à six points
Panneau éclairéCapteur de niveau de luminosité ambiante Indicateur de charge / d’état Marche / Arrêt Écran d’affichage LCD Commandes d’urgence / de secours Bouton de réinitialisation de l’arrêt d’urgence
Commande manuelle
Tirette d’arrêt d’urgence/ de descente d’urgenceAVERTISSEMENTDe plus amples informations à ce sujet plus loin dans le manuel
AVERTISSEMENTPour garantir une installation correcte et sécurisée de l’unité de levage sur rails Oxford Elara, des outils et techniques spécifiques sont prévus. Une installation défaillante peut endommager l’unité et occasionner des blessures pour l’opérateur et le patient. L’installation et la mise en service doivent être réalisées par nos installateurs agréés et formés à cet effet. Pour procéder à l’installation de votre unité, veuillez contacter un prestataire de service Joerns Healthcare agréé.56
Francais
Oxford® Elara
Le marquage CETous les systèmes de levage sur rails Oxford Elara portent le marquage CE et sont conformes aux directives et normes suivantes :· Directive relative aux dispositifs médicaux (93/42/CEE) · Considérations générales : IEC 60601-1:2006 (Troisième édition) + A12:2014 Appareilsélectromédicaux – Exigences générales · IEC 60601-1-11:2015 (Deuxième édition) Exigences pour les appareils électromédicaux et lessystèmes électromédicaux utilisés dans l’environnement des soins à domicile · CEM : IEC 60601-1-2:2015 – Appareils électromédicaux – Compatibilité électromagnétique · ISO 10535:2006 – Lève-personnes pour transférer des personnes handicapées — Exigenceset méthodes d’essai. · Directive relative au matériel électrique destiné à être employé dans certaines limites detension (73/23/CEE) · IEC 61000-3-2 : 2014 – Limites pour les émissions de courant harmonique · IEC 61000-3-3 : 2013 – Limitation des fluctuations de tension et du papillotement · IEC 62304 : 2006 Logiciels de dispositifs médicaux – Processus du cycle de vie du logiciel · IEC 62366 : 2007 Dispositifs médicaux – Application de l’ingénierie de l’aptitude à l’utilisationaux dispositifs médicauxUsage prévuLe système de levage sur rails Oxford Elara est un dispositif suspendu permettant le transfert des patients. Il est prévu pour lever, repositionner et transférer en toute sécurité des patients. La charge de service maximale est de 227 ou de 284 kg, selon le modèle. Il est prévu pour les patients en position assise, en position assise/allongée et en position allongée.L’unité de levage et ses composants doivent impérativement être installés par un technicien compétent et formé à cet effet, employé par un prestataire de service Joerns Healthcare agréé et conformément aux codes locaux en vigueur.REMARQUE : Aucun des éléments ou mécanismes de l’unité de levage sur rails Oxford Elara n’est destiné à entrer en contact physique direct avec les patients.AVERTISSEMENTLes systèmes de levage sur rails de Joerns Healthcare doivent être manipulés exclusivement par du personnel soignant formé/compétent.Durée de vie prévueLes systèmes de levage sur rails de Joerns Healthcare sont conçus et testés pour une durée de vie minimum de 10 ans. Cette estimation dépend du respect total des exigences relatives aux contrôles quotidiens énoncés dans le manuel d’utilisation et des instructions détaillées dans le manuel de service. Toute réparation doit être effectuée par un technicien compétent et formé à cet effet, employé par un prestataire de service Joerns Healthcare agréé.La durée de vie prévue des consommables tels que les batteries, fusibles, lampes et sangles de levage dépend du soin apporté au matériel et de l’utilisation qui en est faite. Les consommables doivent être entretenus conformément au calendrier de maintenance préventive présenté dans ce manuel.Signalement d’un incident graveTout incident survenant durant l’utilisation de ce produit et ayant des conséquences pour le patient et/ou le professionnel de santé doit être porté à la connaissance du fabricant du produit ou du distributeur agréé. SI l’incident se produit au sein de l’Union européenne (UE), il doit également être signalé aux autorités compétentes de l’État membre.57
Oxford® Elara
Francais
Inspection et remplacement de la sangle de levageAVERTISSEMENTL’utilisateur ou le personnel soignant doit impérativement inspecter la sangle de levage AVANT CHAQUE UTILISATION afin de s’assurer qu’elle n’est pas usée, détériorée, effilochée, entaillée, décolorée ou détendue. En présence de signes de détérioration de la sangle de levage, N’UTILISEZ PAS L’UNITÉ et contactez un prestataire de service Joerns Healthcare agréé pour faire remplacer la sangle.Changement de la sangle de levageDans le cadre de l’inspection bi-annuelle il convient d’inspecter la sangle de levage afin de s’assurer qu’elle n’est pas usée, détériorée, effilochée, entaillée, décolorée ou détendue, et de la remplacer si besoin est. Quel que soit l’état de la sangle de levage, Joerns Healthcare recommande de la remplacer tous les 5 ans ou tous les 5 000 cycles de levage, selon la première de ces éventualités.Emballage et livraisonDans le cas improbable d’une panne, il est conseillé de conserver l’emballage. Cela permettra d’éviter toute dégradation durant le transport si votre matériel devait être renvoyé.Identification de l’équipementL’identification de l’équipement (numéro de série, numéro de modèle et date de fabrication) et les spécifications (charge maximale d’utilisation, caractéristiques électriques conformément à IEC 60601-1:2006 + A12:2014 – Coordonnées du fabricant) figurent sur l’étiquette apposée sur le boîtier de l’unité.
58
Francais
Oxford® Elara
3. Consignes de sécuritéVeuillez lire et respecter les consignes de sécurité suivantes. Le fonctionnement et l’utilisation des systèmes de levage sur rails de Joerns Healthcare sont simples. Le respect de ces quelques consignes de sécurité élémentaires garantira un fonctionnement simple, efficace et en toute sécurité. Il convient de conserver ces consignes de sécurité à proximité de l’unité de levage afin de pouvoir les consulter à tout moment.Il convient de lire attentivement les instructions relatives à l’utilisation de l’unité énoncées dans le présent manuel avant d’installer, d’actionner ou d’entretenir cet équipement.AVERTISSEMENTL’unité de levage Oxford Elara doit être opérée exclusivement par du personnel soignant compétent et formé à cet effet. Le patient ne doit JAMAIS utiliser l’unité lui-même pour son propre transfert.Charge maximale d’utilisation (SWL)· L’unité de levage Oxford Elara 227 a été conçue et testée pour une capacité de levage maximale de 227 kg.· L’unité de levage Oxford Elara 284 a été conçue et testée pour une capacité de levage maximale de 284 kg.AVERTISSEMENTLe système de levage sur rails est destiné à des patients dont le poids ne dépasse pas la charge maximale de sécurité spécifiée. NE TENTEZ PAS de lever une charge supérieure à la charge maximale de sécurité de l’élément le plus faible du système, en tenant compte de ce qui suit: · Système de rails · Moteur de levage · Fléau ou berceau · Harnais · Accessoires (p.e. pèse-personne)Importantes consignes de sécuritéAVERTISSEMENT· Les systèmes de levage sur rails Oxford Elara doivent être manipulés EXCLUSIVEMENT par du personnel soignant formé/compétent.· Effectuez TOUJOURS vos préparatifs de levage avant de commencer. · Procédez TOUJOURS aux CONTRÔLES QUOTIDIENS énoncés dans le présent manuelavant d’utiliser l’unité de levage sur rails Oxford Elara. · Le système de levage sur rails doit TOUJOURS être installé et mis en service par unprestataire agréé Joerns Healthcare ou conformément aux informations indiquées dans les documents fournis avec le matériel. · Les systèmes de levage sur rails Oxford Elara sont prévues EXCLUSIVEMENT pour le levage et le transfert des patients. Elles ne doivent PAS être utilisées à d’autres fins. · Installez TOUJOURS le harnais utilisé avec l’unité Oxford Elara conformément aux instructions fournies avec le manuel d’utilisation du harnais. Le non-respect de cette consigne peut entraîner des blessures pour le patient et/ou le personnel soignant. · L’équipement doit être utilisé EXCLUSIVEMENT par du personnel formé. · ASSUREZ-VOUS que les rails sont capables de supporter une charge égale ou supérieure à la capacité de l’unité de levage.59
Oxford® Elara
Francais
Contre-indications· Il n’existe aucune contre-indication connue.AVERTISSEMENT· Avant d’utiliser un système de levage sur rails, le professionnel de santé compétent DOIT déterminer si le patient est apte à être déplacé, afin d’évaluer tous les aspects de la procédure de transfert, y compris les risques de pression considérable sur certaines parties du corps du patient.· Les systèmes de levage sur rails Oxford Elara NE DOIT PAS être manipulé par une personne sous l’emprise de l’alcool, de drogues ou de médicaments susceptibles de compromettre sa capacité à manipuler le matériel en toute sécurité.· EFFECTUEZ une évaluation complète des risques préalablement au levage/transfert du patient.· Avant d’utiliser l’unité de levage, demandez TOUJOURS à une personne qualifiée de déterminer si le transfert d’un patient relié à des électrodes, des cathéters ou à tout autre dispositif médical est approprié.· Il convient d’éviter les impacts excessifs durant les activités de levage et de transfert.· Joerns Healthcare attire l’attention sur les éventuels risques de strangulation causée par la sangle de levage et recommande de prendre les précautions nécessaires pour éviter tout accident. Veillez à ce que l’opération de levage soit supervisée par du personnel soignant formé et compétent.· ASSUREZ-VOUS que le harnais utilisé pour le levage/transfert est compatible avec le fléau, qu’il est adapté à la tâche et qu’il est capable de supporter le poids du patient.· ASSUREZ-VOUS que le harnais utilisé est en bon état et ne présente aucun danger.· VEILLEZ au respect des procédures de levage énoncées dans le présent manuel.· ASSUREZ-VOUS de toujours utiliser les commandes et les dispositifs de sécurité CONFORMÉMENT aux instructions énoncées dans le présent manuel. NE TENTEZ JAMAIS de forcer une commande ou une touche.· VÉRIFIEZ que le harnais est correctement et solidement attaché au fléau.· Afin d’éviter tout risque de blessure découlant de l’utilisation de pièces détachées inadéquates, Joerns Healthcare recommande vivement l’utilisation exclusive de pièces homologuées Joerns Healthcare avec le matériel fabriqué par Joerns Healthcare. Toute modification non autorisée de matériel Joerns Healthcare peut compromettre sa sécurité. Joerns Healthcare décline toute responsabilité en cas d’accidents, d’incidents ou de perte de performance découlant de la réalisation de modifications non autorisées ou de l’utilisation de pièces non approuvées.· La tirette d’arrêt d’urgence / de descente d’urgence ne doit être actionnée qu’en cas d’urgence. Elle n’est pas destinée à être utilisée pour abaisser le lève-personne en condition normale d’utilisation.· Suite à l’activation de la tirette d’arrêt d’urgence / de descente d’urgence et à la réinitialisation, il est impératif de vérifier le bon fonctionnement directionnel de la commande manuelle. EN CAS D’ANOMALIE, METTEZ L’UNITÉ DE LAVAGE HORS SERVICE ET CONTACTEZ UN PRESTATAIRE DE SERVICE JOERNS HEALTHCARE AGRÉÉ AFIN DE LA FAIRE RÉVISER/RÉPARER.ATTENTION· Les éléments de l’unité de levage sur rails Oxford Elara doivent être propres et secs. VEILLEZ à respecter les contrôles de sécurité énoncés dans le présent manuel.· Une exposition excessive de la commande manuelle à de l’eau ou à d’autres liquides peut entraîner son dysfonctionnement.· NE FAITES PAS tomber l’unité de levage Oxford Elara. Cela pourrait entraîner des dégâts internes invisibles. Si vous avez des raisons de croire que l’unité de levage a subi un dommage, N’UTILISEZ PAS l’unité et contactez un prestataire de service Joerns Healthcare agréé afin de procéder à une inspection/révision.60
Francais
Oxford® Elara
Pièces non susceptibles d’être réparées par l’utilisateur AVERTISSEMENT· NE TENTEZ PAS de réviser ou de réparer le système de levage Oxford Elara, les batteries ou le chargeur. En cas de dysfonctionnement de l’unité, contactez un prestataire de service Joerns Healthcare agréé.Prévention de décharges électriques AVERTISSEMENT· NE TOUCHEZ PAS et n’utilisez pas une unité de levage dont les conducteurs sont exposés ou dont le câble d’alimentation est endommagé. Les équipements électriques sous tension peuvent causer de graves blessures. Si des fils de l’unité ou du chargeur sont exposés ou endommagés, contactez immédiatement un prestataire de service Joerns Healthcare agréé.· N’ÉCLABOUSSEZ PAS les composants électriques de l’unité et ne les exposez pas à l’humidité. · REPORTEZ-VOUS à la plaque signalétique du chargeur pour connaître les exigencesliées à la tension d’entrée et à la fréquence. Ces exigences varient selon les pays/régions. N’UTILISEZ PAS l’unité de levage dans une région dont la tension et la fréquence diffèrent de celles indiquées sur la plaque signalétique. · LISEZ TOUJOURS les instructions relatives à la batterie et au chargeur avant de les utiliser, de les entreposer ou de les éliminer.Prévention des incendies et explosionsAVERTISSEMENT· N’INSTALLEZ PAS l’unité de levage sur rails Oxford Elara à proximité d’une source de chaleur et ne l’exposez pas directement aux rayons du soleil.· N’EXPOSEZ PAS l’unité de levage Oxford Elara ou le chargeur de batteries à des flammes. · N’UTILISEZ PAS l’unité de levage Oxford Elara en présence de mélanges anesthésiantsinflammables avec de l’air, de l’oxygène ou de l’oxyde nitreux. · N’UTILISEZ PAS l’unité de levage Oxford Elara dans des environnements chargés depoussières ou de peluchage.Mesures de protection de la santé humaine et de l’environnementAVERTISSEMENT· Dans le cas très improbable où le boîtier de l’unité de levage Oxford Elara ou le boîtier de la batterie venait à être fissuré, causant l’écoulement de ses substances sur la peau ou les vêtements, rincez immédiatement et abondamment avec de l’eau.· En cas de contact avec les yeux, rincez immédiatement et abondamment avec de l’eau et consultez un médecin.· L’inhalation des substances peut entraîner une irritation respiratoire. Dans ce cas, aérez la pièce et consultez un médecin.· Ce produit est alimenté par des batteries plomb-acide scellées. Pour procéder à leur recyclage ou mise au rebut, veuillez contacter un prestataire de service Joerns Healthcare agréé.· NE laissez PAS les enfants manipuler l’unité de levage Oxford Elara. · Aucun effet connu causé par des animaux ou des nuisibles.Emplacement et coupure de l’alimentation électrique· Avant d’utiliser l’unité de levage Oxford Elara, repérez l’emplacement du bloc secteur et assurez-vous de savoir isoler (couper) l’alimentation électrique. 61
Oxford® Elara
Francais
Mesures de protection relatives aux batteries et au chargeur de batteriesAVERTISSEMENT· Il est important de respecter les consignes suivantes pour garantir une utilisation sécurisée des batteries et veiller à la sécurité de l’utilisateur (patient/personnel soignant). Les batteries de cet équipement sont de type plomb-acide scellées, rechargeables et régulées par soupape.· N’EXPOSEZ PAS le chargeur de batteries à de l’eau ou à d’autres liquides.· N’EXPOSEZ PAS le chargeur de batteries aux flammes ou aux sources d’ignition.· UTILISEZ exclusivement le chargeur fourni avec l’équipement. NE RECHARGEZ PAS l’unité de levage Oxford Elara dans une pièce non ventilée.· Le chargeur ne doit JAMAIS être recouvert ou exposé à la poussière.· Le chargeur est destiné à être utilisé dans les endroits secs exclusivement et dans des conditions normales d’humidité. Il NE DOIT PAS être utilisé en présence d’humidité avec condensation.REMARQUE : Après réception de l’unité de levage Oxford Elara, il convient de recharger les batteries pendant au moins 8 heures avant la première utilisation.REMARQUE : Avant la première utilisation, laissez à l’unité de levage Oxford Elara le temps de satisfaire les conditions opérationnelles suivantes dans un délai compris entre 6 et 10 heures : · Humidité relative sans condensation comprise entre 15 % et 93 %. · Température ambiante comprise entre +5 °C et +40 °C · Pression atmosphérique comprise entre 700 hPa et 1060 hPa.Étiquettes d’avertissementAVERTISSEMENT· Prenez connaissance de TOUTES les étiquettes de mise en garde apposées sur le matériel. Commandez et remplacez les étiquettes devenues illisibles.
62
Francais
Oxford® Elara
4. FonctionnementAVERTISSEMENTLes systèmes de levage sur rails Oxford Elara doivent être manipulés exclusivement par du personnel soignant formé/compétent. Ne JAMAIS laisser un patient opérer l’unité seul, sans supervision.Illustration de l’unité Elara à 4 voies
Rail Moteur
B
Sens du déplacementdu retour à la charge
Sangle de levage
Barre d’écartement à six points
APanneau éclairéCapteur de niveau de luminosité ambiante Indicateur de charge / d’état Marche / Arrêt Écran d’affichage LCD Commandes d’urgence / de secoursBouton de réinitialisation de l’arrêt d’urgence
AbaisserGauche(l’activation de ce bouton déplace l’unité dans le sens de la flèche B)Commande manuelle
Tirette d’arrêt d’urgence / de descente d’urgenceAVERTISSEMENTDe plus amples informations à ce sujet plus loin dans le manuelMonterDroit(l’activation de ce bouton déplace l’unité dans le sens de la flèche A)Retour charge63
Oxford® Elara
Francais
Bouton Marche/Arrêt
Enfoncez le bouton Marche/Arrêt pour mettre l’unité sous tension. L’indicateur de charge / d’état et l’écran d’affichage LCD s’allument alors. Pour mettre l’unité hors tension, il suffit d’appuyer sur le bouton Marche/Arrêt.
Capteur de niveau de luminosité ambiante
Indicateur de charge / d’étatBouton Marche/Arrêt
Écran d’affichage LCD
Indicateur de charge / d’étatEnviron 10 secondes après l’activation d’un bouton ou après la mise sous tension de l’unité au moyen du bouton Marche/Arrêt, l’indicateur de charge / d’état clignote vert, indiquant que les batteries sont en cours de recharge. Par ailleurs, l’indicateur de charge dans le coin gauche de l’écran d’affichage LCD indique la charge actuelle restante.Batteries chargées à un tiers – Pour les systèmes intégrant une station de recharge à l’extrémité des rails, il convient de ramener immédiatement l’unité de levage à sa station de recharge une fois l’opération de levage terminée. Lorsque le niveau de charge des batteries atteint ce niveau critique, l’indicateur de charge / d’état clignote rouge et en conditions de luminosité ambiante, le clignotement s’accompagne d’un bip sonore à chaque fois qu’un bouton est actionné. Si la luminosité est faible, seul l’indicateur de charge / d’état clignote rouge.Batteries chargées à deux tiers – Pour les systèmes intégrant une station de recharge à l’extrémité des rails, il convient de ramener l’unité de levage à sa station de recharge.Batteries complètement rechargées.REMARQUE : Lorsque les panneaux latéraux sont éclairés, notamment en condition de pleine luminosité, le niveau de charge affiché peut être quelque-peu biaisé. L’éclairage peut avoir un effet sur la précision de l’affichage de la charge. REMARQUE : En cas de non-utilisation de l’unité de levage pendant plus d’une minute, l’indicateur de charge / d’état et l’écran d’affichage LCD passent en mode veille et s’éteignent. Cela vaut également lorsque les batteries sont en charge. Dès l’activation d’un bouton de la commande manuelle, l’indicateur d’état des batteries se rallume et l’écran d’affichage LCD est à nouveau opérationnel.ATTENTIONDe plus, l’indicateur de charge / d’état indiquera un nombre d’alertes et d’avertissements, comme suit :AVERTISSEMENT BATTERIE FAIBLE : Lorsque le niveau de charge des batteries atteint un niveau critique en mode Veille, l’indicateur de charge / d’état clignote rouge, et en conditions de luminosité ambiante, le clignotement s’accompagne d’un bip sonore à chaque fois qu’un bouton est actionné. Si la luminosité est faible, seul l’indicateur de charge / d’état clignote rouge.AVERTISSEMENTUne batterie faible peut ne pas permettre à l’unité de terminer le cycle de levage d’un patient. Il convient de recharger les batteries IMMÉDIATEMENT – se reporter à la section « Écran d’affichage de l’opérateur », plus loin dans le présent manuel. 64
Francais
Oxford® Elara
ARRÊT D’URGENCE :REMARQUE : Pour connaître la procédure d’arrêt d’urgence, reportez-vous à la section « Arrêt d’urgence / Descente d’urgence électrique » du présent manuel.Lorsque la tirette d’arrêt d’urgence est actionnée, l’indicateur de charge / d’état clignote rouge et un bip sonore se fait entendre.Outre le clignotement et le bip, s’affichera à l’écran LSD la notification EMERGENCY STOP (ARRÊT D’URGENCE) (Se reporter à « Messages d’alerte » de la section Écran d’affichage de l’opérateur du présent manuel).Par ailleurs, l’anneau rouge du bouton d’arrêt d’urgence / descente d’urgence de l’unité de levage sortira du boîtier et sera visible.
Anneau rouge visibleDESCENTE D’URGENCE ÉLECTRIQUE : REMARQUE : Pour connaître la procédure de descente d’urgence électrique, reportez-vous à la section « Arrêt d’urgence / Descente d’urgence électrique » du présent manuel.AVERTISSEMENTLa tirette d’arrêt d’urgence / de descente d’urgence ne doit être actionnée qu’en cas d’urgence. Elle n’est pas destinée à être utilisée pour abaisser le lève-personne en condition normale d’utilisation. Suite à l’activation de la tirette d’arrêt d’urgence / de descente d’urgence et à la réinitialisation, il est impératif de vérifier le bon fonctionnement directionnel de la commande manuelle. EN CAS D’ANOMALIE, METTEZ L’UNITÉ DE LAVAGE HORS SERVICE ET CONTACTEZ UN PRESTATAIRE DE SERVICE JOERNS HEALTHCARE AGRÉÉ AFIN DE LA FAIRE RÉVISER/RÉPARER. Si vous continuez à tirer sur la tirette rouge d’arrêt d’urgence après l’arrêt de l’unité, celle-ci entame alors sa descente d’urgence électrique. Pendant la descente d’urgence électrique, l’indicateur de charge / d’état clignote rouge et un bip sonore se fait entendre. Outre le clignotement et le bip, s’affichera à l’écran LSD la notification EMERGENCY LOWER (DESCENTE D’URGENCE). (Se reporter à « Messages d’alerte » de la section Écran d’affichage de l’opérateur du présent manuel.) Par ailleurs, l’anneau rouge du bouton d’arrêt d’urgence / descente d’urgence de l’unité de levage sortira du boîtier et sera visible. REMARQUE : En cas de défaillance de l’opération électrique et des fonctions d’urgence, utilisez une méthode alternative pour faire descendre le patient et contactez un prestataire de service Joerns Healthcare agréé.65
Oxford® Elara
Francais
SURVITESSE D’ENTRAÎNEMENT – APPELER SERVICE :En cas de dysfonctionnement grave de l’unité de levage qui a pour effet de déclencher l’activation de la fonction de sécurité `DRIVE OVERSPEED’ (SURVITESSE D’ENTRAÎNEMENT), l’indicateur de charge / d’état se met à clignoter rouge, accompagné d’un bip sonore émis à chaque fois qu’un bouton de la commande manuelle est activé. De plus, la notification `DRIVE OVERSPEED – CALL SERVICE’ (SURVITESSE D’ENTRAÎNEMENT – APPELER SERVICE) s’affiche à l’écran LCD. (Se reporter à « Messages d’alerte » de la section Écran d’affichage de l’opérateur du présent manuel.)L’unité de levage est hors service.AVERTISSEMENTUne fois la fonction de survitesse activée, l’unité de levage est hors service. Faites immédiatement réparer ou inspecter l’unité de levage. Pour procéder à la réparation ou à l’inspection de votre unité, veuillez contacter un prestataire de service Joerns Healthcare agréé.Commande manuelleLe fonctionnement des systèmes de levage sur rails Oxford Elara est contrôlé par les boutons de la commande manuelle décrits ci-dessous :Unités à 2 voies :Les boutons HAUT et BAS permettent de monter et d’abaisser le fléau.
ABAISSER
MONTER
Unités à 4 voies :· Les boutons HAUT et BAS permettent de monter et d’abaisser le fléau. · Les boutons GAUCHE et DROITE permettent de déplacer l’unité le long des rails. · Le bouton RETOUR RECHARGE ramène l’unité à la station de recharge. Pour plusd’informations, se reporter à la section « Systèmes de rails avec station de recharge ».
ABAISSER GAUCHE
MONTERDROIT RETOUR CHARGE
REMARQUE : Lorsque vous appuyez sur le bouton de descente, que ce soit sur la commande manuelle ou via les commandes d’urgence / de secours de l’unité de levage, le fléau entame sa descente. Il s’arrête automatiquement dès qu’il a atteint sa position basse maximale et la notification TAPE ALL OUT (LIMITE SANGLE) s’affiche à l’écran d’affichage LCD. 66
Francais
Oxford® Elara
REMARQUE : Pour activer les fonctions de la commande manuelle, le fléau doit être suspendu à la sangle de levage et ne pas reposer sur une surface.Un crochet au dos de la commande manuelle permet de ranger la commande manuelle sur le fléau pendant les périodes de non-utilisation.
Systèmes de rails avec station de recharge :Après avoir élevé le fléau à sa position maximale, l’activation du bouton RETURN TO CHARGE (Retour recharge) a pour effet d’amener automatiquement l’unité à la station de recharge. Lorsque l’unité de levage arrive à la station de recharge, elle s’immobilise automatiquement. REMARQUE : Si le fléau n’a pas été élevé à sa position maximale, la fonction de retour à la station de recharge ne sera pas activée. Par ailleurs, l’écran d’affichage LCD doit être en mode de fonctionnement normal pour que la fonction de retour à la station de recharge puisse être activée. Si l’écran d’affichage est en mode de programmation, le retour à la station de recharge ne pourra avoir lieu. REMARQUE : Le patient doit être détaché de l’unité de levage avant d’activer le bouton RETOUR RECHARGE. Si l’unité de levage détecte une charge pesant sur le fléau, la fonction de retour à la station de recharge ne sera pas activée.ATTENTION· Pour les systèmes de rails X-Y et les systèmes de rails X-Y avec un mécanisme à portillon et dotés d’une station de recharge à l’extrémité du rail, le rail mobile doit être positionné de sorte à être en contact avec le point de recharge principal du rail stationnaire avant d’activer le bouton de retour à la station de recharge.· Pour les systèmes de rails intégrant un plateau tournant ou une voie d’aiguillage, le moteur doit être manoeuvré de sorte à être positionné dans la section du rail auquel est fixée la station de recharge avant d’actionner le bouton Retour charge.REMARQUE : L’unité de levage Elara est dotée d’un circuit de sécurité qui interrompt automatiquement le déplacement transversal vers la station de recharge si elle n’est pas amarrée à la station de recharge dans un délai de 30 secondes après l’activation du bouton Retour charge.67
Oxford® Elara
Francais
Écran d’affichage de l’opérateur
L’écran d’affichage LCD de votre unité de levage Oxford Elara affiche plusieurs fichiers de paramètres et intègre un système à menus qui permet de sélectionner et de configurer les divers paramètres.
L’écran affiche par ailleurs différents messages d’alerte. Messages d’alerte :
Drive Overspeed – Call Service (Survitesse d’entraînement – Appeler service) :
DRIVE OVERSPEED CALL SERVICE
Cet avertissement s’affiche en cas de grave dysfonctionnement. L’unité de levage est hors service.
AVERTISSEMENTUne fois la fonction de survitesse activée, l’unité de levage est hors service. Faites immédiatement inspecter/réparer l’unité – Pour procéder à la réparation ou à l’inspection de votre unité, veuillez contacter un prestataire de service Joerns Healthcare agréé.
Arrêt d’urgence : EMERGENCY STOP
Cet avertissement s’affiche lorsque la tirette rouge d’arrêt d’urgence a été actionnée. L’indicateur de charge / d’état clignote rouge et un bip sonore est émis.
Abaissement d’urgence : Emergency Lower
Cet avertissement s’affiche lorsque l’opérateur continue de tirer sur la tirette rouge d’arrêt d’urgence, entraînant l’activation de la fonction de descente. L’indicateur de charge / d’état clignote rouge et un bip sonore est émis.
AVERTISSEMENTSuite à l’activation de la tirette d’arrêt d’urgence / de descente d’urgence et à la réinitialisation, il est impératif de vérifier le bon fonctionnement directionnel de la commande manuelle. EN CAS D’ANOMALIE, METTEZ L’UNITÉ DE LAVAGE HORS SERVICE ET CONTACTEZ UN PRESTATAIRE DE SERVICE JOERNS HEALTHCARE AGRÉÉ AFIN DE LA FAIRE RÉVISER/RÉPARER.
Surcharge : OVERLOAD
Cet avertissement s’affiche si, au moment de lever le patient, l’unité de levage détecte que le poids du patient dépasse la charge maximale d’utilisation.
AVERTISSEMENTSi le message de surcharge est affiché, interrompez immédiatement l’opération.
Batterie faible : LOW BATTERY
Cet avertissement s’affiche lorsque la charge de la batterie atteint un niveau bas critique, au point de ne pouvoir plus faire qu’un seul transfert.
68
FrancaisMessages d’alerte (Suite) : Batterie épuisée :BATTERY DEPLETED
Oxford® ElaraCet avertissement s’affiche après l’alerte de batterie faible et tandis qu’un transfert supplémentaire est effectué.
Révision requise : SERVICE OVERDUE!
INDICATEUR DE RÉVISION – Une fois le délai de révision échu ou dépassé, la notification `SERVICE OVERDUE’ s’affiche à chaque fois qu’un bouton de commande est activé.
AVERTISSEMENTPour procéder à la révision/inspection de votre unité, veuillez contacter un prestataire de service Joerns Healthcare agréé dans les plus brefs délais.
Erreur interne : INTERNAL ERRORSangle lâche : Tape SlackSangle entortillée : Tape TwistedLimite sangle : TAPE ALL OUT
Cet avertissement s’affiche en cas de dysfonctionnement électrique interne. L’unité de levage est hors service. Faites immédiatement réparer/inspecter l’unité de levage. Contactez un prestataire de service Joerns Healthcare agréé.Cet avertissement s’affiche lorsque le patient ou le fléau entre en contact avec une surface, à savoir un lit ou une chaise, ce qui a pour effet que l’unité de levage ne détecte plus la charge.Cet avertissement s’affiche si la sangle de levage s’entortille pendant un cycle de levage. Il peut aussi s’afficher si le patient n’est pas levé parfaitement verticalement, ce qui a pour effet que la sangle remonte de biais dans l’unité.Cet avertissement s’affiche lorsque l’opérateur appuie sur le bouton Bas de la commande manuelle ou du panneau de commande alors que la sangle a atteint sa course maximale en descente.
Hauteur maximale : At top of travel
Cet avertissement s’affiche lorsque l’opérateur appuie sur le bouton Haut de la commande manuelle ou du panneau de commande alors que la sangle a atteint sa course maximale en montée.
69
Oxford® Elara
Francais
Affichages, réglages et menus
1. Mode Attente En mode Attente, les informations suivantes sont affichées :
Symbole de niveau de charge de la batterie
Date Actuelle
Heure Actuelle
01 Feb 2017 10:22 ááá â ââ MENU <<< >>>
Commandes
Entrer
Commandes
Haut et Bas Menu d’options Gauche et droite
REMARQUE : Si l’unité de levage n’a pas été rechargée après l’affichage de l’alerte `LOW BATTERY’ (Batterie faible), le panneau LCD affiche la notification `BATTERY DEPLETED’ (Batterie épuisée) et aucun nouveau transfert ne pourra être effectué.
SYMBOLE DE NIVEAU DE CHARGE DE LA BATTERIE Le symbole de niveau de charge de la batterie indique la charge restante lorsque l’unité est en mode Attente. L’indicateur affiche une charge à 1/3, à 2/3 ou pleine. Pour plus d’informations, reportez-vous à la section `Indicateur de charge / d’état’.ATTENTIONLorsque la charge de la batterie atteint un niveau bas critique (impossibilité de réaliser un transfert complet), l’indicateur de charge / d’état s’allume en rouge (non clignotant). L’alerte `LOW BATTERY’ (Batterie faible) s’affiche également à l’écran LCD. Ramenez immédiatement l’unité à la station de charge.2. Mode Veille Pour éviter que les batteries ne se déchargent inutilement, l’unité de levage entre en mode Veille lorsqu’aucune action n’a été demandée pendant une période d’une minute. L’écran se réveille lorsqu’un bouton de commande est activé.
70
Francais 3. Cartographie des menus
Main Screen (Operation Mode)
Service Personnel OnlySet Service Dates
Set Up DisplaySet Load UnitsSet Display Contrast
Set Up IlluminationSet Lamp ModeSet Lamp BrightnessSet Lamp Off Delay
Set Up SoundsOn Off Auto
Set Clock
Show Logs
30 Jan 2017 10:30
Lift CyclesOverloadAmp Hours
System InformationSWL = XXXXServ Due 01 Jan 18Serv Warn 01 Dec 17Firmware Ver 01.00
Oxford® Elara
71
Oxford® Elara
Francais
4. Fonctions des menus Pour accéder au MENU PRINCIPAL, appuyez sur le bouton situé juste en dessous de MENU. Les modes du menu principal sont les suivants :Écran 1 : Configuration Affichage Setup Displayá â SELECT EXIT
Écran 2 : Configuration ÉclairageSetup Illumination á â SELECT EXIT
Écran 3 : Configuration SonSetup Sounds á â SELECT EXIT
Écran 4 : Réglage Horloge
Set Clock á â SELECT
EXIT
Écran 5 : Affichage JournauxShow Logs á â SELECT EXIT
Écran 6 : Informations systèmeSystem Information á â SELECT EXIT
72
Francais
Oxford® Elara
Configuration et affichage des paramètresPour accéder au MENU PRINCIPAL, appuyez sur le bouton situé juste en dessous de MENU. Naviguez à travers les options de menu à l’aide des boutons situés sous les flèches HAUT et BAS :1. Configuration AffichageSetup Display á â SELECT EXITPour accéder à SETUP DISPLAY, appuyez sur le bouton situé sous SELECT. L’écran affiche alors SET DISPLAY CONTRAST (Réglage contraste d’affichage).
1a. Réglage contraste d’affichageSet Display Contrast á â SELECT < EXIT
Pour accéder à SETUP DISPLAY CONTRAST, appuyez sur le bouton situé sous SELECT. L’écran affiche alors ADJUST WITH UP/DOWN (Réglage avec touche Haut/Bas).
Adjust with up/down
á â
SAVE < EXIT
Réglez le contraste de l’affichage à l’aide des boutons situés sous les flèches HAUT et BAS.Une fois le contraste désiré obtenu, appuyez sur le bouton situé sous SAVE pour l’enregistrer. Appuyez sur le bouton situé sous < pour revenir à SETUP DISPLAY MENU, ou appuyez une deuxième fois sur le bouton < pour revenir au menu principal. Vous pouvez également appuyer sur le bouton situé sous EXIT pour revenir à l’écran de standby.Set Display Contrast á â SELECT < EXIT
73
Oxford® Elara
Francais
1b. Sélection Unité de charge Depuis le menu SETUP DISPLAY, naviguez au sein des options de menu à l’aide des flèches HAUT et BAS jusqu’à ce que s’affiche SET LOAD UNITS.Set Load Units á â SELECT < EXIT
Pour accéder à SET LOAD UNITS (séléction Unité de charge), appuyez sur le bouton situé sous SELECT. S’affiche alors à l’écran la sélection active.Vous pouvez choisir entre deux options :
Option 1 : Afficher la charge en kg.
Option 2 : Afficher la charge en livres.
 report this ad
Show Load i
References
[xyz-ips snippet=”download-snippet”]