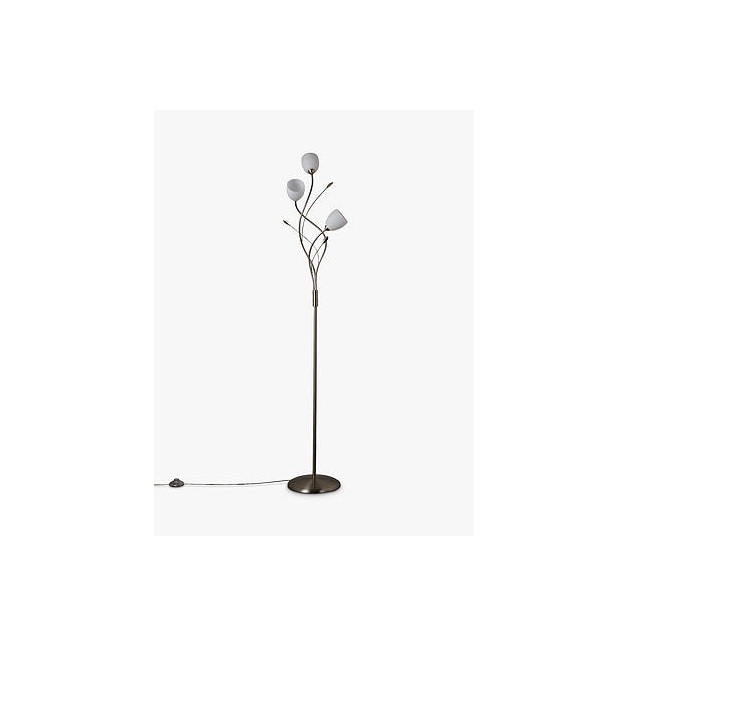
Johan Lewis Amara 3 Light Floor Lamp User Manual
Warnings
- If the flexible cable of this product is damaged it should be exclusively replaced by the manufacturer or a similar qualified person in order to avoid a hazard.
- To prevent electrocution switch off at the mains supply before assembling or maintaining this fitting. Ensure the plug is not connected to any power supply and read instruction before assembly.
- This product is fitted with a 3 amp fuse and is suitable for 240 volt ring mains.
- Always be sure to use the correct type and wattage of bulbs as indicated on the fitting. Never exceed the wattage stated.
- When changing the bulb, ensure product is unplugged and allow the old bulb to cool down before handling. Dispose of used bulbs carefully.
- This fitting is designed for use with self-shielded tungsten halogen lamps only

Lamp Fitment
Unpack the lamp and remove all packaging. Be careful not to scratch surfaces of the product whilst unpacking. The arms of this floor lamp are packaged in a folded position to save space inside the packaging. Once the floor lamp has been fully assembled use the hex key provided to loosen the two grub screws at the base of each arm before separating the arms out and re tightening the screws. Do not rotate the arms passed 360 degrees as this will cause the internal wire to twist.
Step 1:Screw the centre pole section and the lamp head section of the fitting together taking care to hold the parts parallel so that they do not cross thread. If in doubt, undo and start again. Keep the lampholder section still and only rotate the lower pole to prevent twisting of the cable.
Step 2:Screw the lower pole section and the centre pole section of the fitting together taking care to hold the parts parallel so that they do not cross thread. If in doubt, undo and start again. Keep the lampholder section still and only rotate the lower pole to prevent twisting of the cable.
Step 3:With the fitting laid on the floor screw the lamp base plate to the lower pole taking extra care not to cross thread. Pull any excess cable through the base plate.
Step 4:Remove the metal shade rings from the lampholders.
Step 5:Fit the glass over the lampholders taking care not to damage the bulb in the process. Fit the metal shade ring into the tool provided as shown in the diagram and screw the ring onto the lampholder to secure the glass in place. Take care not to overtighten the ring otherwise damage may occur.
Step 6:Fit bulb, type and wattage as indicated on fitting. The wattage indicated must not be exceeded. Do not touch halogen lamps with bare hands as this will shorten their life.Please retain this information leaflet for future reference
GENERAL INFORMATIONThis product is designed for internal use only Do not use polish or an abrasive cleaner – just a soft dry cloth.
John Lewis Partnership 171Victoria Street London SW1E 5NNwww.johnlewis.com
[xyz-ips snippet=”download-snippet”]