Johan Lewis Ethan Copper Lustre Hoops Pendant User Manual
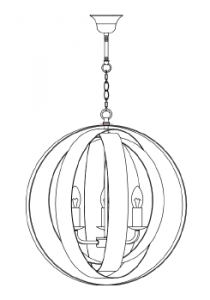
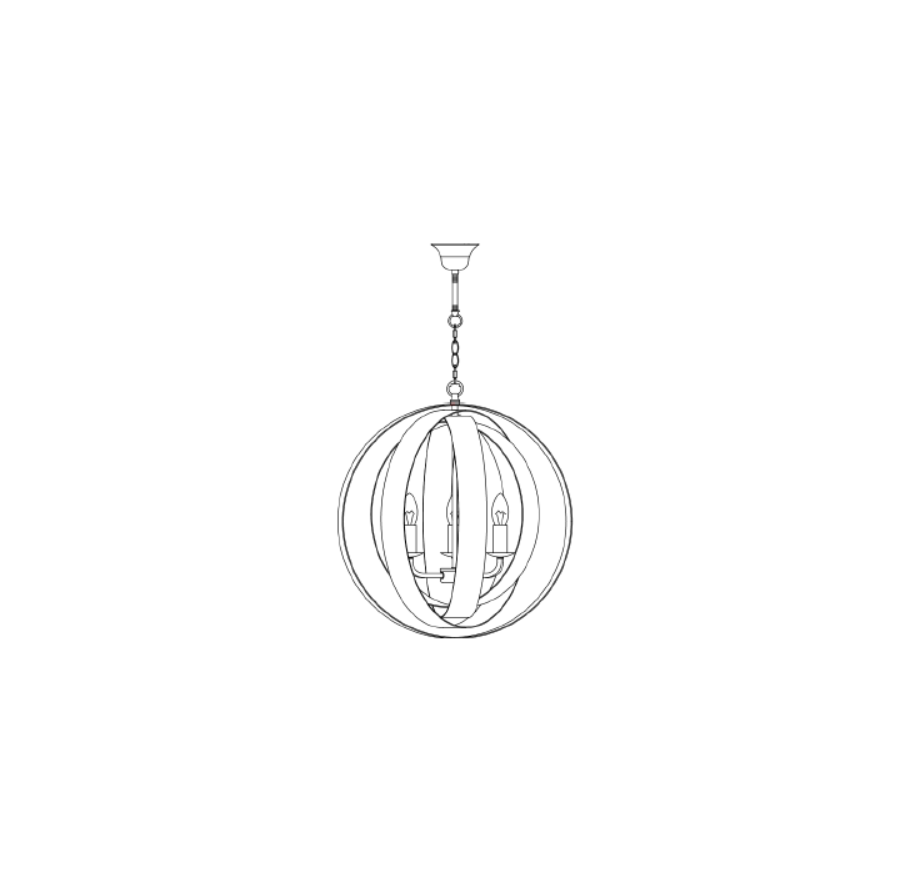
Ethan Copper Lustre Hoops Pendant
Recommended bulb
3 x 3-6 Watt E14 (SES) energy efficient LED candle bulbor3 x 28 Watt E14 eco halogen candle bulbBulb not included
Specification
Max power: 28WVoltage: 220~240V, 50/60HzIP20Weight 9 Kg
Please retain these instructions for future reference.This symbolindicates that this product should not be treated as normal house-hold waste and it should be recycled. John Lewis does not operate in store take back, but as members of the Distributer Take Back scheme have funded the development and upgrade of recycling facilities across the UK. Please take it to your nearest collection facility or for further details contact your local council or visit www.recycle-more.co.uk.We have taken great care to ensure that this product reaches you in perfect condition. However, should any parts be damaged or missing please e-mail
Trouble shooting:
Why is the light not working when switched on?Check your power supply is switched onTurn off light and check that the bulb is inserted correctlyCheck the bulb is still in working order.John Lewis partnership171 Victoria StreetLondon SW1E 5NN Johnlewis.comMade in ChinaIssue 1 09/18
Thank you for purchasing this Ethan pendant. Please read the instructions carefully before use to ensure safe and satisfactory operations of this product. Please keep this instruction for future reference.
Warnings!
For your safety, this product must be installed in accordance with local Building Regulations.If in any doubt, or where required by the law, consult a competent person who is registered with an electrical self-certification scheme. Further information is available online or phone your Local Authority.To prevent electric shock, switch off the mains supply before installing or maintaining this product. Ensure other persons cannot restore the electricity supply without your knowledge.Always use the correct bulb type with the correct wattage as indicated in the specification table. This product is Class I = and should be fitted to a lighting Supply (with earth) protected by a 5 amp fuse or equivalent circuit breaker. When changing the bulb, always switch off at the mains and allow the old bulb to cool down before handling. Dispose of used bulbs carefully.Caution! The bulb and surrounding parts can become hot during use. For indoor use only.
Care instructions
We recommend cleaning with a soft dry cloth. Do not use abrasive materials as these will damage the finish.Replace bulb from John Lewis or established brand of the same type and compatibility.
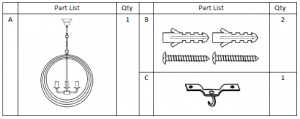
Parts list
Assembly
Never install your appliance on a wet, freshly painted or plastered surface. Ensure the house electricity supply is switched off at the fuse box. If removing an existing fitting, note down all wiring connections. Check the fixings will not touch any existing wiring before drilling and attaching the light to the wall.Ensure you thread the wall wires through the black insulating tube fixed to the appliance.
Step 1

Remove mounting hook from fitting or fixing pack. Using the mounting hook as a template, mark and then drill the fixing holes in the ceiling (ensure the screws are firmly fixed into a solid or other suitable mounting and not just the plasterboard.) Attach mounting hook to the mounting surface using suitable fixings. Do not attach fitting to mounting bracket at this stage.
Step 2
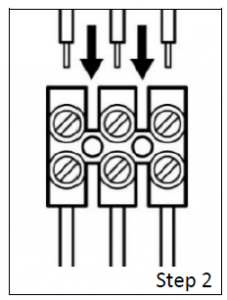
Ensuring that the power has been isolated, connect the electrical supply wires to the connector blocks corresponding terminals. Make the electrical connections as follows:
- Connect supply live (normally brown or red) to fitting live (marked “L”) on the terminal block.
- Connect supply neutral (normally blue or black) to fitting neutral (marked “N”) on the terminal block.
- Connect the supply earth (normally green/yellow or unsheathed) to the earth (marked “”) on the terminal blockNOTE: Ensure electrical connections are tight and no loose strands of wire are left out of the connector block. Ensure terminals and rubber sleeve are correctly seated then close connector block housing. This fitting is height adjustable at point of installation only. No attempt must be made to adjust the height once it has been attached to the ceiling. If adjustment is required at a later date the fitting must be isolated from the mains and removed from the ceiling first. Open and remove the lower adjustable chain link by loosening the barrel nut located at the side of the link. Using a pair of pliers, carefully open the chain links and remove the required number of links. Reattach the lower removable chain link. Any clamping/restraining of the electrical cable inside the ceiling cup may require loosening for height adjustment but must be reinstated afterwards.Note: The weight of the fitting must be supported by the chain and not the electrical cable.Note: A cloth should be used between the jaws of the pliers to protect the decorative finish. Pull any excess cable through the ceiling cup.
Step 3
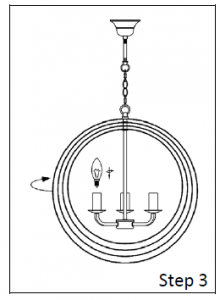
Excess cable must be carefully located inside ceiling cup or within the ceiling void. Carefully offer fitting over the mounting hook taking care not to trap the wiring in the process. Slide the bell shaped ceiling cup up the stem to conceal the ceiling hook and wiring and secure in place by tightening the screw located at the side of the stem.Fit the bulb: type and wattage as indicated on the fitting. The wattage indicated must not be exceeded.Carefully separate the hoops of the pendant until they are evenly spaced to form a spherical shape.Once installation is complete, the house electricity may be restored at the f
Read More About This Manual & Download PDF:
References
[xyz-ips snippet=”download-snippet”]