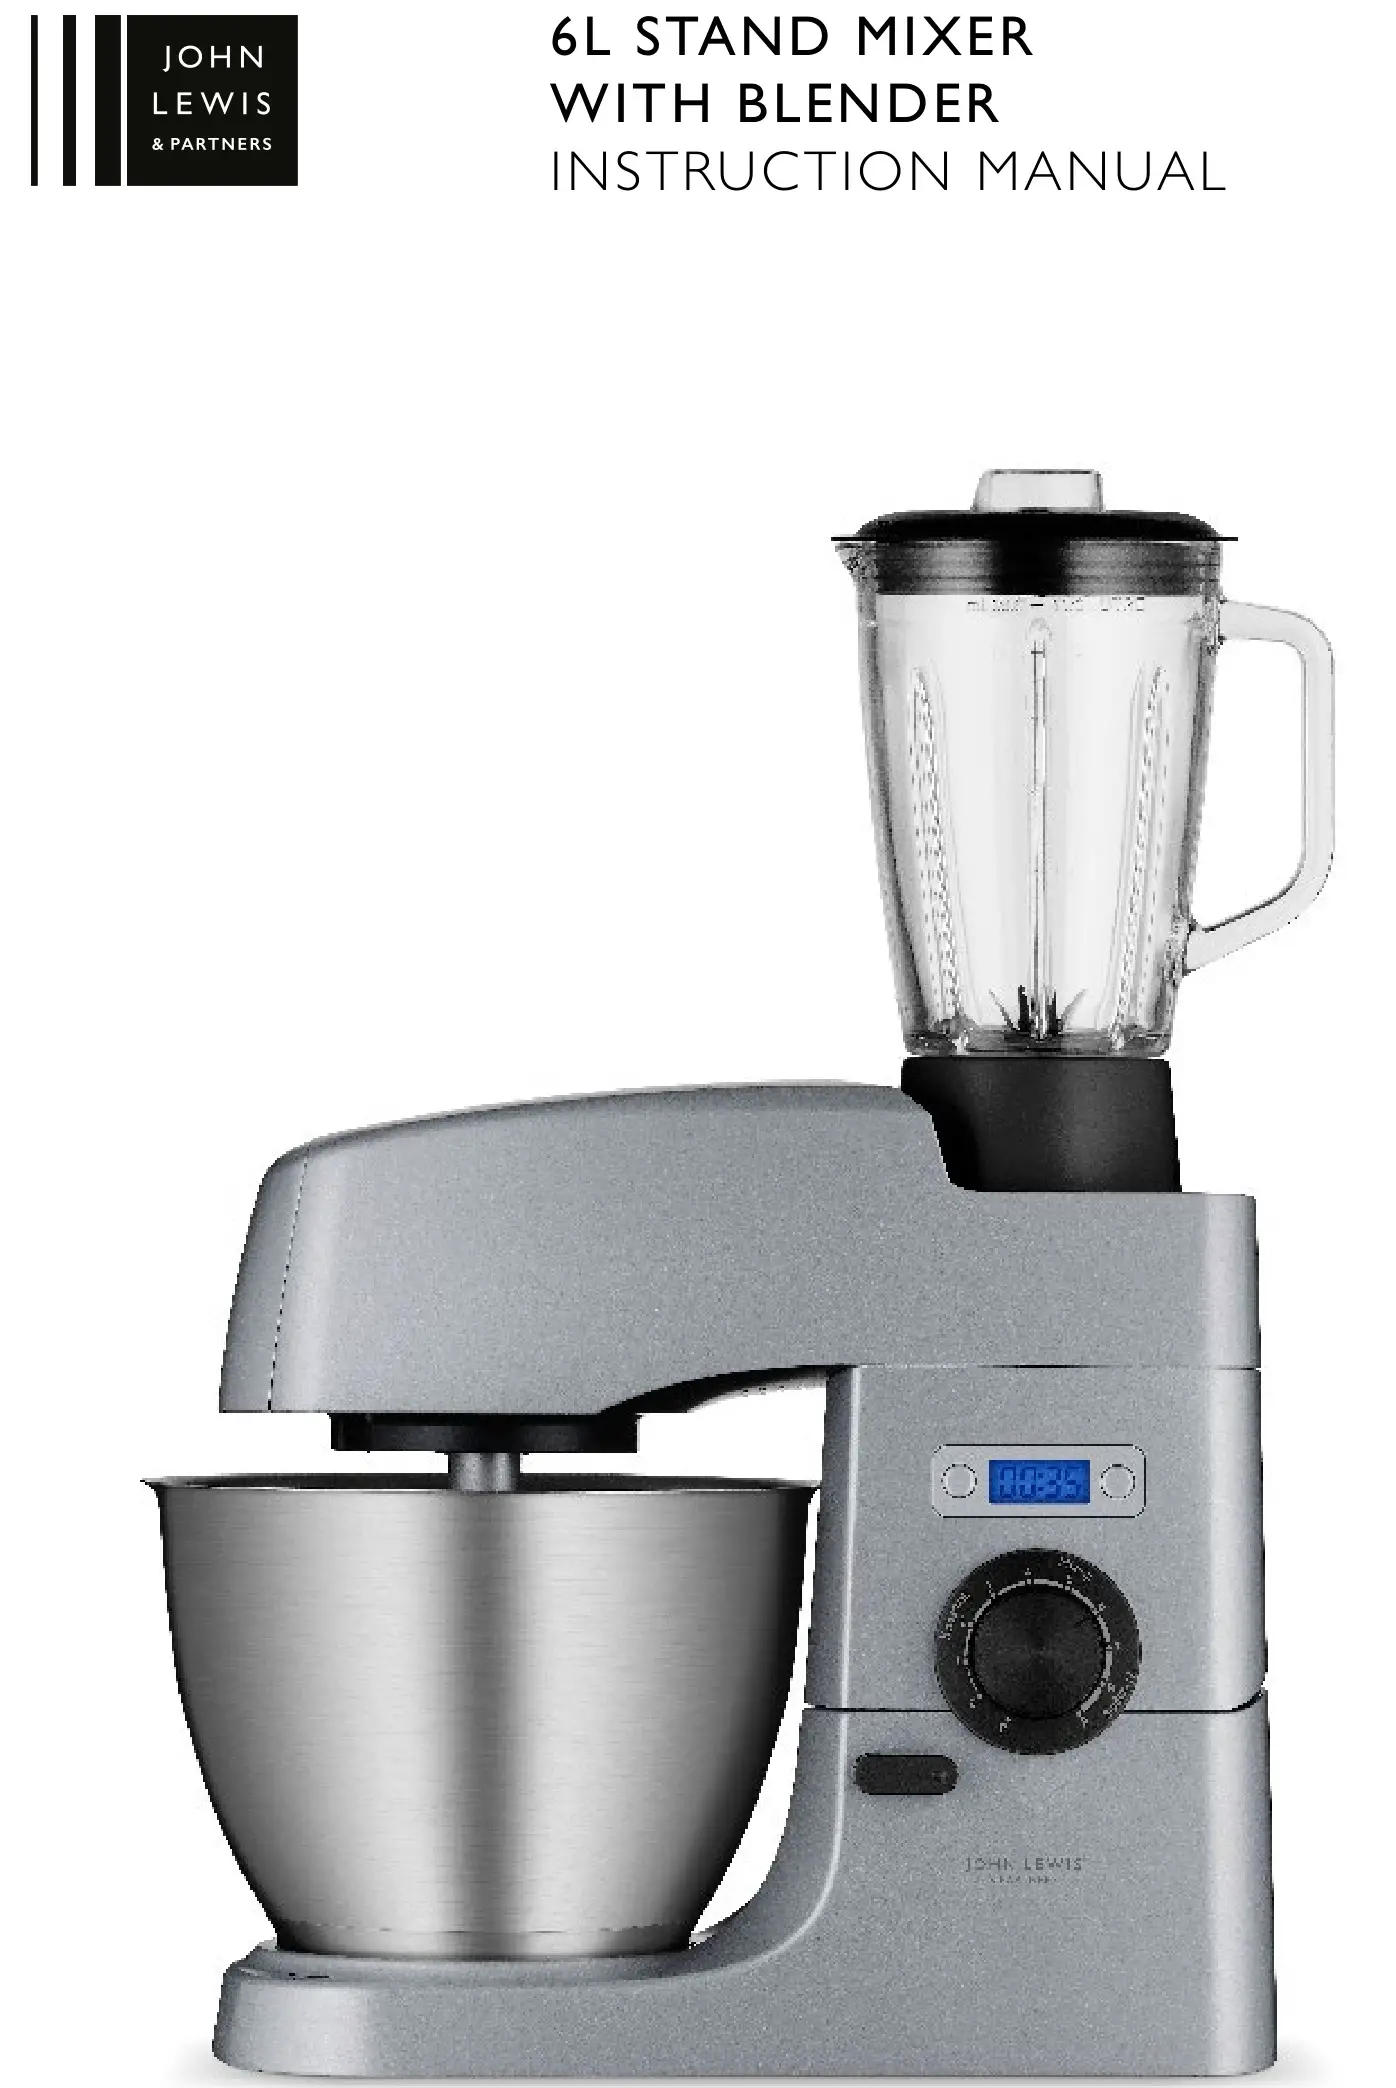
JOHN LEWIS 85547002 6L Stand Mixer with Blender
Instruction Manual
Important safety information
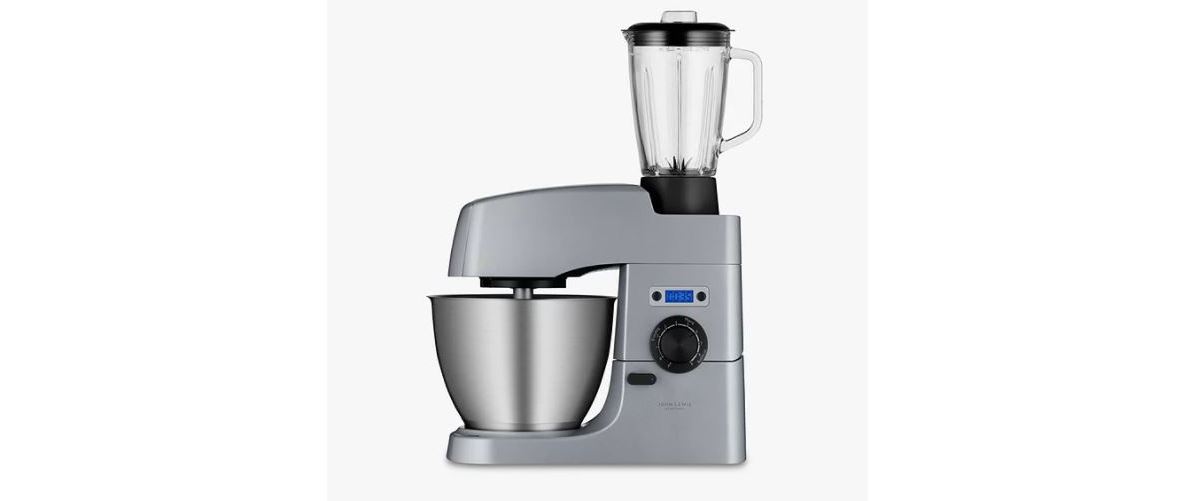
Thank you for purchasing this John Lewis & Partners Stand Mixer
Please read the instructions and warnings carefully to ensure a long life for your product and safe usage. This instruction leaflet must be retained with the product for future reference. These warnings have been provided in the interest of safety. You MUST read them carefully before using the appliance.
If you are unsure of the meaning of any of these warnings, please contact your nearest John Lewis & Partners shop or John Lewis & Partners Technical Support on 03301 230106
This appliance shall not be used by children. Keep the appliance and its cord out of reach of children. Cleaning and maintenance should not be carried out by children.
This product is not intended for use by persons with reduced physical, sensory or mental capabilities, unless they are properly supervised or given instructions concerning the safe use of the item by a person responsible for their wellbeing.
Closely follow the instructions provided in this manual.
Do not immerse the cord, plug, or any part of the appliance in water or other liquids. Unplug from the mains when not in use, when removing or attaching accessories and before cleaning any part of the appliance.
Do not operate any appliance with a damaged cord or plug. Should the item malfunction, or if it is damaged in any manner, please stop using it and return it to your nearest John Lewis branch. Do not attempt to repair it yourself. Do not modify the appliance plug.
Do not let the power cord overhang the edge of the surface on which it stands, or touch anything hot. When unplugging the device, hold the plug itself, not the power cord.
Do not use the appliance for any purpose other than its intended use.
This appliance is for indoor use only. Do not use it outdoors. This product is intended for household and light commercial use.
Do not use accessories or attachments that are not recommended by the manufacturer.
Always remove and safely discard any packaging material and promotional labels before using the stand mixer for first time.
Children must not play with the appliance. Remove and safely discard the protective plastic bag over the power plug of this appliance to eliminate a choking hazard for children.
When any appliance is used near children, close supervision is necessary.
During operation, do not place the stand mixer near the edge of a bench or table. Ensure the surface is level, clean and free of water and other substances. The vibration during operation may cause the appliance to move. Do not put the stand mixer on or near a hot gas or electric burner, or where it could touch a heated oven.
Always ensure the stand mixer is completely assembled before operation.
Avoid contact with moving parts and fitted attachments during operation. In order to reduce the risk of injury to persons and/or damage to the mixer, always keep hands, hair, clothing and other utensils away from beaters during operation.
Should an object such as a spoon or fork fall into the bowl while mixing, immediately ensure the speed control dial is in the ‘Off’ position, turn the stand mixer off, unplug it from the power outlet and remove the object.
Do not use attachments other than those provided with the stand mixer. Use only the beater whisk and dough hook supplied with the mixer. The use of other attachments may cause fire, electric shock or injury
Do not operate the appliance continuously on heavy loads for more than 7 minutes.
Do not exceed the maximum capacities listed in this manual. Do not use the stand mixer if it is damaged or if there is anything abnormal about its operation. Before disassembling, ensure the motor and beater, whisk or dough hook have completely stopped.
Always remove the beater, whisk or dough hook from the stand mixer before cleaning
To protect against the risk of electric shock, do not immerse the power unit in water or other liquids.
Do not operate any appliance with a damaged cord or plug. Should the item malfunction, or if it is damaged in any manner, please stop using it and return it to your nearest John Lewis & Partners shop. Do not attempt to repair it yourself. Do not modify the appliance’s plug.
When unplugging the device, hold the plug itself, not the power cord.
Do not use the appliance for any purpose other than its intended use. Do not use outdoors.
Switch off the appliance and disconnect from supply before changing accessories or approaching parts that move in use.
![]() WARNING: Polythene bags over the product or within packaging may be dangerous. To avoid the risk of suffocation, please keep away from pets, babies and children.
WARNING: Polythene bags over the product or within packaging may be dangerous. To avoid the risk of suffocation, please keep away from pets, babies and children.
![]() CAUTION: Ensure that the blender is switched off before removing it from the stand.
CAUTION: Ensure that the blender is switched off before removing it from the stand.
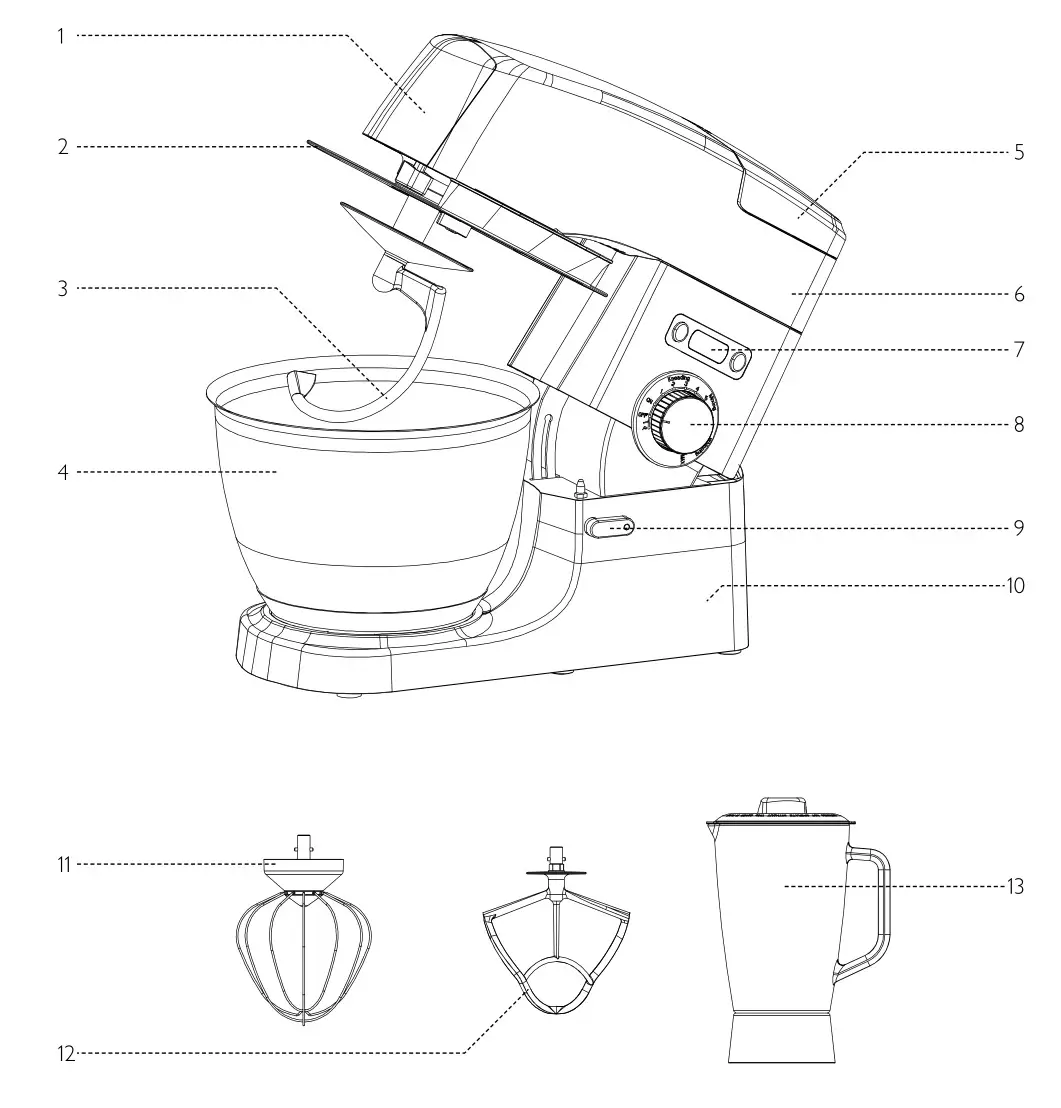
Stand mixer diagram
- Front cover
- Splash guard
- Dough hook
- Mixing bowl
- Back cover
- Top cover
- LCD display panel
- Dial
- Lever
- Lower main body
- Whisk
- Beater
- Blender jug
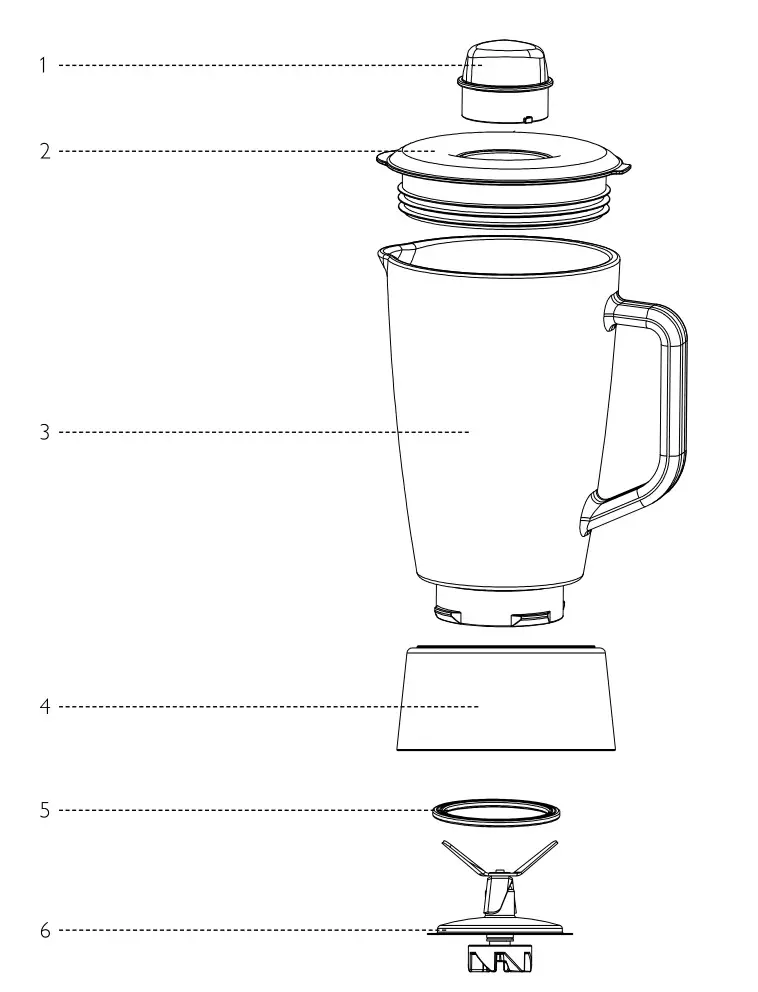
Blender jug diagram
- Measuring cup
- Lid
- Glass jug
- Jug base
- Sealing ring
- Blade base
Before first use
– Remove the required length of cable from the cable tidy on the base and plug in the appliance.– Clean all parts of the stand mixer thoroughly according to the instructions in the ‘Cleaning and maintenance’ section.
Fitting the blending jug
- Mount the jug sealing ring onto the blade base.
- Fit the blade base into the base of the jug. The inside ring should be tightly fitted onto the base.
- After putting your ingredients into the jug, fit the lid onto the jug by pressing down firmly.
- Insert the measuring cup into the opening of the lid. Turn it anticlockwise until it locks into place.
- Mount the jug onto the main base, again turning it anticlockwise until it locks into place.
Fitting the mixing bowl
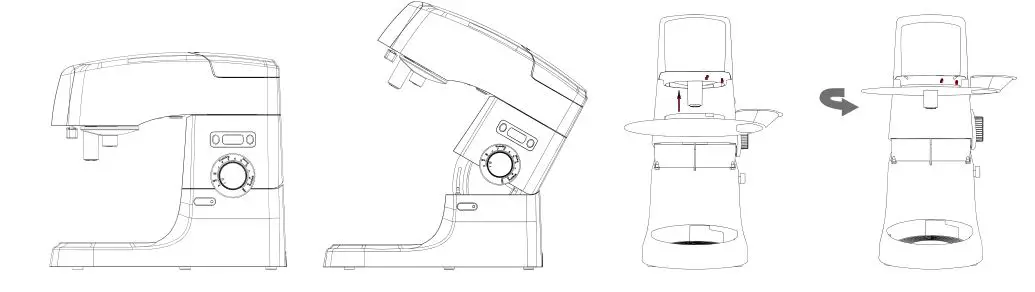
- To lift the upper housing cover, put the lid horizontally. The guard position aim to the lock and turn the lever.

- To attach the mixing bowl, ensure that the speed control dial is set to ‘Off’. Place the mixing bowl on the device plate and turn it anticlockwise until it is fixed firmly in place.
- Place the dough blade or the eggs whisk or the mixer blade in the socket, locating the shaft pin in the groove and then turn to lock into position stirring tool – to fit the stirring tool, insert the shaft into the socket, then line up the slot on the extension so that it is located beneath the metal pin on the underside of the mixer head. Hold the paddle and turn so that the shaft pin is below the groove then push up and turn to lock into position.
- To lock the motor head, make sure the head is completely down. Set the lever to the lock position by turning it in the direction of the arrow on the mixer stand.
- To operate the speed control, start at the lowest setting, then move up to the recommended speed. Position ‘P’ is for high-speeduse for short periods only.
- Make sure the speed position is set to ‘Off’ when you lift up the upper housing cover by turning the lever clockwise.
- Now you can remove the mixing bowl from the device plate.

Popular uses Mix or knead dough
– Use the dough hook or beater.– Add flour and water at a suggested ratio of 5:3.– Start at speed setting 1 and mix for 30 seconds. Change to speed setting 2 and mix for a further 30 seconds. Next, change to speed 3 and mix for 30 seconds. Finally, change to speed 4 for 3 minutes.– When filling the mixing bowl, please ensure that the maximum quantity is not exceeded.– The maximum quantity of flour to be used is 1,200g.– Do not use the mixer for longer than 4 minutes continuously.Allow the mixer to cool between uses.
![]() WARNING: Dough hook is to only be used at speed level 1-3
WARNING: Dough hook is to only be used at speed level 1-3
Whip egg whites or cream
– Use the whisk attachment.– Set the dial to a speed setting between 7 and 9. Whip the egg whites without stopping for about 5 minutes or until stiff.– For whipped cream, whip 250ml fresh cream at a speed setting between 7 and 9 for about 5 minutes.– When filling the mixing bowl with fresh milk, cream or other ingredients, please ensure that the maximum quantity is not exceeded.
Mix shakes, cocktails or other liquids
– Use the blender.– Mix the ingredients according to your recipe. Set the mixer at a speed between 4 and 9 for approximately 4 minutes.– Do not exceed the maximum quantity for the blender
Using the blender
– Place your ingredients in the glass jug.– Put the lid on the jug and ensure it is fitted securely. Place the measuring cup into the aperture in the lid and turn clockwise to lock it into place.
Mixing cake batter or dough
- Use the mixing blade attachment.
- Add ingredients according to your recipe. Ensure that the mixing bowl is not overfilled.
- Mix your ingredients using a speed setting between 4 and 6 for about 3 minutes.
Speed settings
Settings 6-7: Light usage for liquidsSettings 8-9: More solid consistency – for mixing liquids and solid foodSetting ‘P’: For ice crushing and short powerful bursts of use
After use, always turn the dial to the ‘Off’ setting and unplug the mixer.To remove the glass jug, simply lift it up
The count-up timer
The count-up timer is particularly useful to gauge mixing times or to use when a recipe does not specify a mixing time. Simply use the count-up timer to monitor the time it takes to mix the ingredients. The next time you follow the same recipe, you will know for how long a period to set the countdown timer.
The count-up timer will automatically begin timing when the speed control dial is rotated from the ‘Off’ position to one of the mixing speeds. When the dial is returned to the ‘Off’ position, the LCD screen will display ‘0:00’.
Cleaning and maintenance
– Allow the mixer to cool down before cleaning.– Use a moist cloth and a mild detergent to clean the exterior of the appliance.– Do not use abrasive detergents or alcohol when cleaning the interior or exterior of the bowl cover.– Do not wash or immerse the mixer head or mixer base in water or any other liquid. Clean with a soft, damp cloth and dry thoroughly.Do not allow water or other liquids to enter the gear system as this may cause damage.– The dough beater, egg whisk and mixer beater are not dishwasher safe. The accessories should only be cleaned in warm water and washing-up liquid.– The mixing bowl is dishwasher safe. The bowl can also be cleaned with warm water and washing-up liquid. Do not use abrasive cleaners.– The blender jug and blades can be cleaned with warm water and washing-up liquid. Do not use abrasive cleaners.– Do not soak attachments in water for extended periods of time – for example, for several hours or overnight – as this may damage their finish.
Storage
The mixer should be kept in an easy-to-reach position on your kitchen counter or in an accessible cupboard.
- Turn the speed control dial to the ‘Off’ position and unplug the mixer.
- Insert the mixing bowl into the bowl recess and lock it into place.
- Place the attachments inside the mixing bowl.
- To lock the motor head, ensure that the head is completely down. Ensure that the lever is in the lock position by turning it in the direction of the arrow.
- The mixer head cannot be removed from the mixer base for any reason.
Technical specifications
Voltage/frequency: 220-240V ~ 50/60Hz 1600WBowl capacity: 6.0 litresGlass jug capacity: 1.5 litresModel: JLSM628
![]() WARNING: The Stand mixer has a function to protect the motor. After 15 minutes of continuous use of the stand mixer, it will stopautomatically to prevent overheat. Please wait for 2 minutes to let the motor cool down and then you can continue using the stand mixer.
WARNING: The Stand mixer has a function to protect the motor. After 15 minutes of continuous use of the stand mixer, it will stopautomatically to prevent overheat. Please wait for 2 minutes to let the motor cool down and then you can continue using the stand mixer.
Servicing and disposal
This product should only be repaired or serviced by an authorized service engineer. Only genuine, approved spare parts should be used.
This symbol ![]() indicates that this product should not be treated as normal household waste and should be recycled. John Lewis & Partners does not operate in-store take back, but as a member of the Distributor Take Back scheme has funded the development and upgrade of recycling facilities across the UK.
indicates that this product should not be treated as normal household waste and should be recycled. John Lewis & Partners does not operate in-store take back, but as a member of the Distributor Take Back scheme has funded the development and upgrade of recycling facilities across the UK.
Please take your old appliance to your nearest collection facility. For further details, contact your local council or visit: www.recyclemore.co.uk
Guarantee
This item is guaranteed for two years in respect of defects found to be due to faulty workmanship or materials. Proof of purchase is required for the validity of the guarantee. This guarantee is no longer valid in the case of accidental damage, alteration, repair by any unauthorized persons or poor maintenance. This guarantee in no way affects your statutory rights.
Please retain these instructions for further use.
![]()
 report this ad
John Lewis Partnership171 Victoria StreetLondon SW1E 5NNjohnlewis.com
References
[xyz-ips snippet=”download-snippet”]