JOHN LEWIS Franklin Desk

Thank you for purchasing the Franklin Desk. Please read the instructions and warnings carefully before use, to ensure safe and satisfactory operation of this product. At John Lewis, we are committed to making great products possible. From our in-house Design Team, to our Buyers, we work together to bring great design to life. Our expert Product Technologists work collaboratively with our buyers and suppliers to assure the legality, safety and quality of the product we sell. We are all committed to designing and developing products to the highest industry standards. We hope you are happy with your product and welcome any feedback or comments you may have.
Important safety information
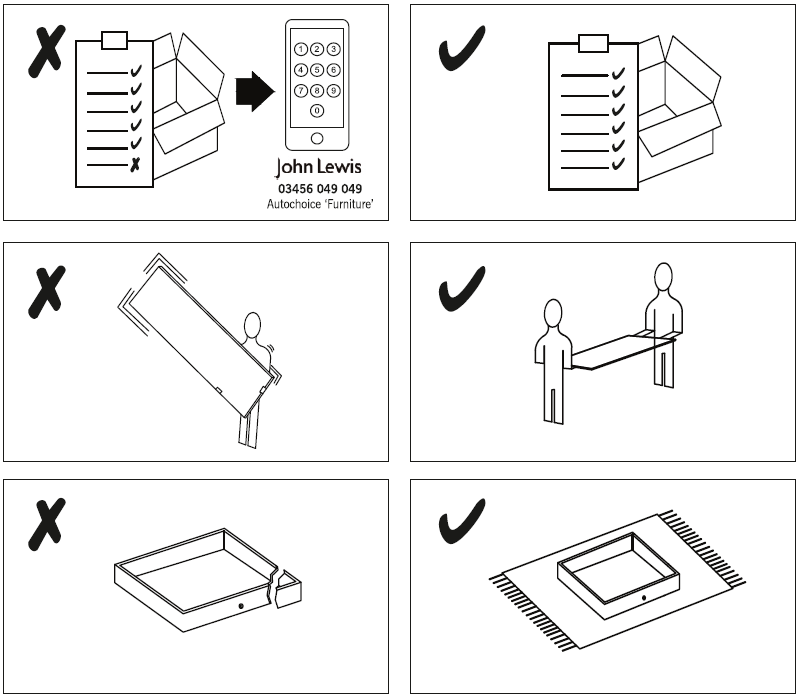
WarningsThe product should only be used on firm, level ground.Keep small parts out of reach of children.Ensure the product is fully assembled as illustrated before use.
Do’sCheck the pack and make sure you have all the parts listed.Check all screws or bolts are tightened and inspect regularly.Make sure the legs remain in contact with ground at all times.
Don’tDo not over tighten screws or bolts.Do not stand on the product.Do not use power tools to construct as overtightening and panel failure may occur.
Franklin Desk
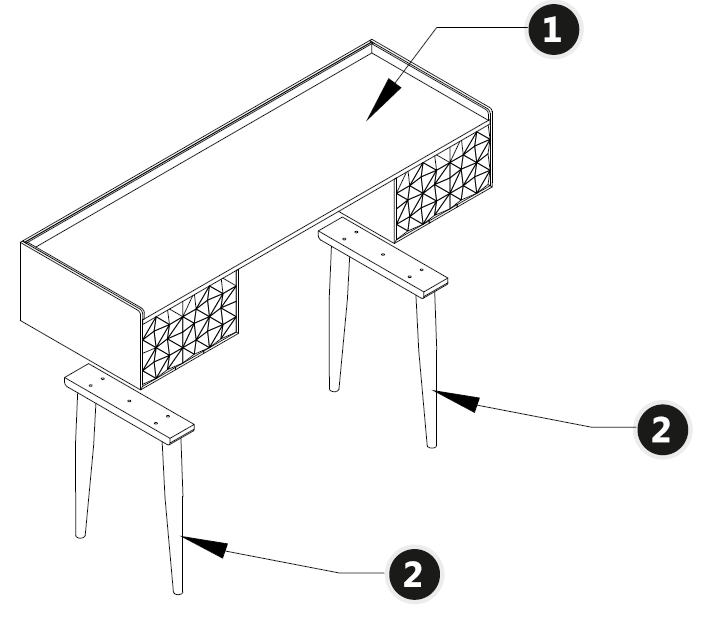
| Ref | Description | Dimensions | Qty. |
| 1 | Franklin Desk Top | 132 x 45cm | 1 |
| 2 | Leg | 40 x 53cm | 2 |
Fixtures and Fittings Supplied

Fixtures and Fittings Supplied (Actual Size)
| Ref | Description | Dimensions | Qty. | |
| A | Screw | 5 x 15mm | 2 |
|
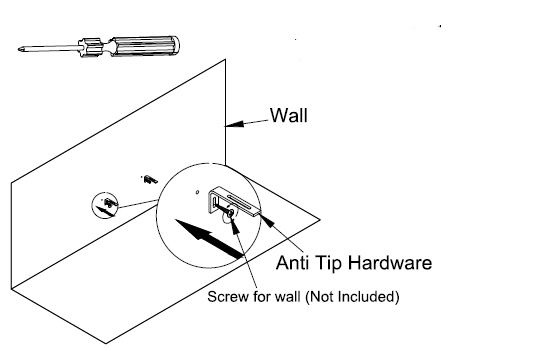
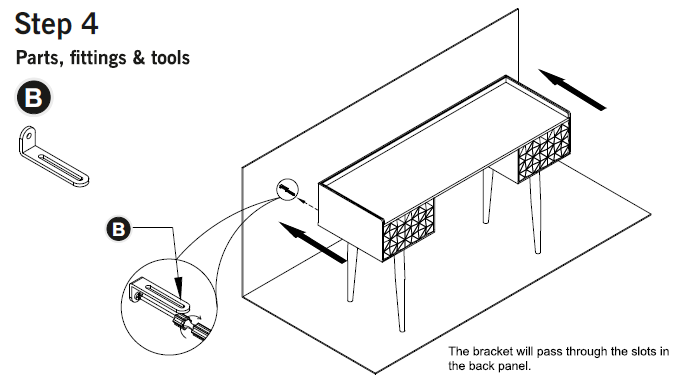
| B | Anti tip | 15 x 70mm | 2 | |
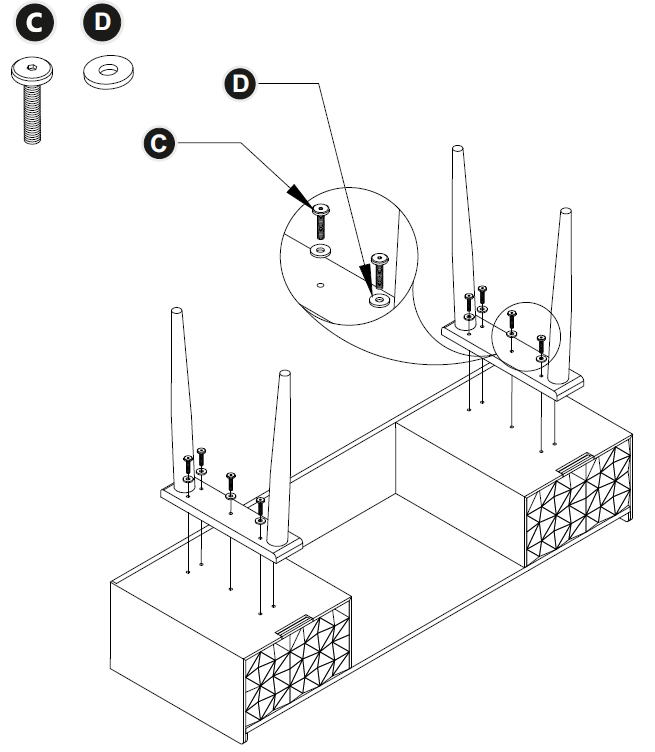
| C | Allen bolt | 8 x 35mm | 10 | |
| D | Washer | 8 x 24mm | 10 | |
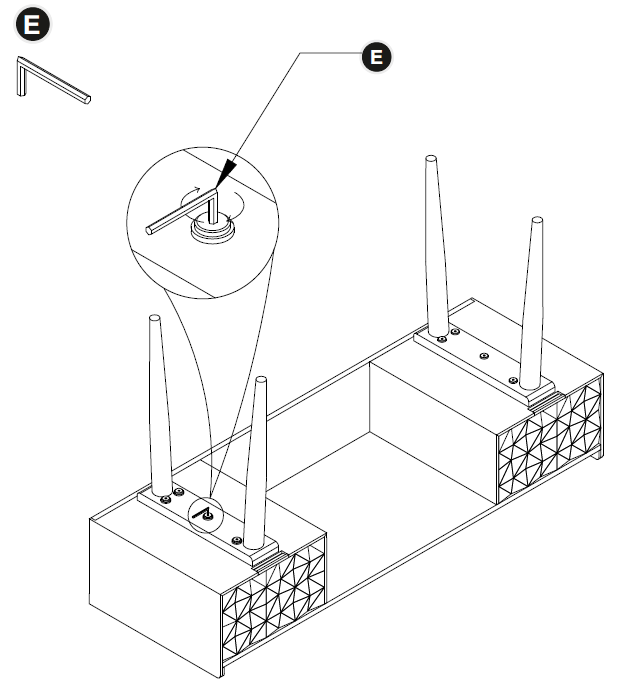
| E | Allen key | 5 x 70mm | 1 |
ASSEMBLY Franklin Desk
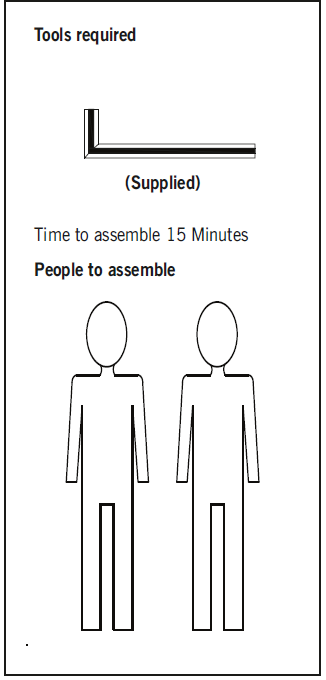
Step 1 Parts ,Fittings and Tools
Step 2
Step 3
Step 4
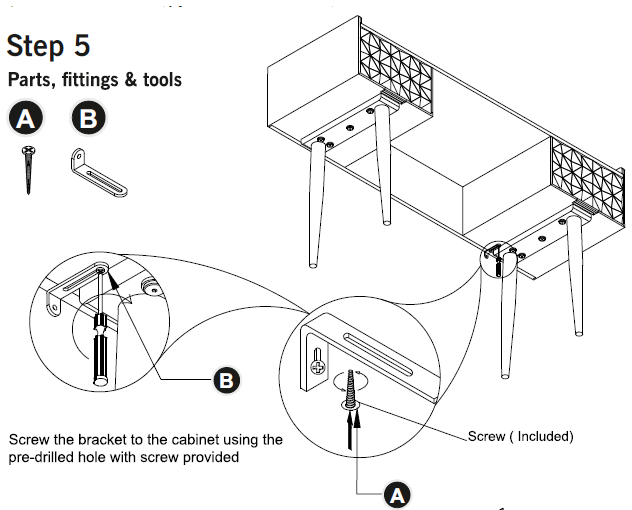
Step 5
Step 6
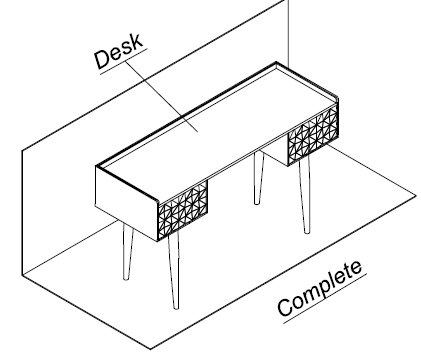
Ready to use
Wall attached item only:A guide to wall mounting and fixingsWarning Wall fixing screws are not included, since different wall materials require different type of screws / fixings. Please insure you use the correct screws / fixings for your type of walls and seek professional advice if you are not sure.Failure of the product due to incorrect fixings is the responsibility of the installer.Important: When drilling into the walls always check that there are no hidden wires or pipes etc.
Types of wallsYou can use one of the following types of wall plug if your walls are made of brick, breezeblock, concrete, stone or wood.
- General Purpose wall plugGenerally aerated blocks should not be used to support heavy loads, use a specialist fitting in this case. For light loads, general purpose wall plugs can be used.
- Plasterboard wall plugFor use when attaching light loads on to plasterboard partitions.
- Cavity fixing wall plugFor use with plasterboard partition or hollow wooden doors.
- Cavity fixing – heavy duty wall plugFor use when fitting or supporting heavy loads such as shelving, wall cabinets and coat racks.
- Hammer fixing wall plugFor use with wall stuck with plasterboard. The hammer fixing allows it to be fixed to the wall rather than the plasterboard. Always check the fixing is secure to the retaining wall.
- Shield Anchor wall plug-Heavy loadsFor use with heavier loads such as TV and Hi-Fi speakers and satellite dishes etc.
Care and maintenanceSafety: Periodically check all fittings and wall fixings to ensure they have not come loose and retighten as necessary.
Care and maintenance
Wood furniture
Wood displays different grain patterns depending on which way it is cut – for example, the ‘medullary ray’ which can appear on oak furniture is a mark of good quality timber – these are just characteristics of the natural beauty of the wood. Some furniture is also deliberately aged and rustic.Wood veneers also allows a distinctive pattern to be created on some surfaces, such as tabletops and drawer fronts by the way slivers are arranged.All timber and veneer surfaces will change colour and mellow over time. New furniture will initially vary in shade from items that have been previously purchased.
How to care for your wood furniture
Furniture with a hard lacquer, wax polish or painted surface should be dusted with a dry cloth. Spray polishes are best avoided as they contain silicones which may spoil the furniture’s surface when building up over time.Make sure all surfaces are protected from heat and liquids by mats and coasters. Wipe up spills immediately and ensure that a mat or pad is placed under paper if you are writing.Our furniture will endure most temperatures in the home, but it is best to avoid placing furniture next to heat sources such as radiators or fires. Be particularly careful with solid wood as the lack of humidity caused by home heating can cause damage such as warping.
Safety instructions
- Never drag furniture when moving it, always lift it.
- Periodically check all fixings to ensure none have come loose and retighten when necessary.
- Please take care when handling or moving the furniture as careless handling may cause damage or injury.
- Furniture can be dangerous if incorrectly installed. Assembly should be carried out by a competent person.
- No liability will be accepted for damage or injury caused by incorrectly installed or assembled furniture.
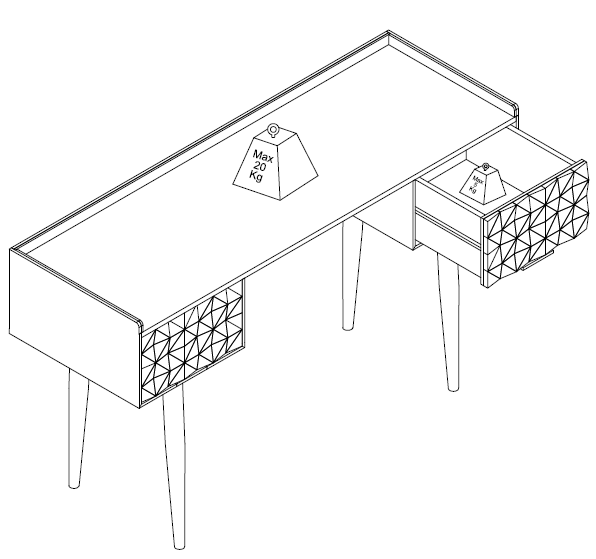
- Do not place weight too close edge of the table and do not lean on it

[xyz-ips snippet=”download-snippet”]