
JOHN LEWIS Glass Pendant Ceiling Light

Introduction
Thank you for purchasing this Glass Pendant Ceiling light. Please read the instructions carefully before use to ensure safe and satisfactory operation of this product.
Warnings
![]() This product is Class I and must be earthed.
This product is Class I and must be earthed.
This fitting should be fitted in accordance with IEE Regulations and the Building Regulations. If in any doubt, or where required by law, consult a competent person who is registered with an electrical self-certification scheme.Further information is available online or from your Local Authority.To prevent electric shock, switch off at the mains supply before installing or maintaining this fitting. Ensure other persons cannot restore the electricity supply without your knowledge.If you are in any doubt, please consult a qualified electrician.If replacing an existing fitting, make a note of the connections.Always use the correct type and power bulb. Never exceed the power stated. When changing a bulb, always switch off at the mains and allow the old bulb to cool down before handling. Dispose of used bulbs carefully.
The flexible cable on this luminaire, if damaged, shall only be replaced by the manufacturer or his service agent or a similar qualified person.
It is the installer’s responsibility to ensure that the fixings and plugs used are suitable for the surface you are fixing your product on.
Caution! The bulb and surrounding parts can become hot during use
Parts list
|
Description |
Image |
Quantity |
|
 |
RAW PLUG |  |
X2 |
 |
FIXING SCRE |  |
X2 |
 |
FIXING BRACKET | 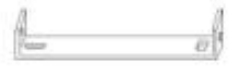 |
X1 |
 |
CONNECTOR BLOCK | 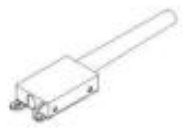 |
X1 |
 |
GRUB SCREW | 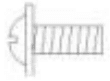 |
X2 |
 |
CEILIN G PALTE/CABLE SET |  |
X1 |
 |
GLASS SHADE | 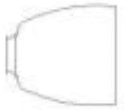 |
X1 |
 |
SHAE RING |  |
X1 |
Product assembly
Ensure the mains electricity supply switched off at the fuse board.
Step 1Ensure that the bracket (supplied) is fixed to a wooden joist, or use a suitable fixing to the ceiling which will support the weight of the fitting.
Step 2Connect cables to terminals as shown below.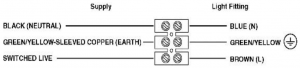 Check all wires are tight in the terminal block and no loose strands are left out.Cover with insulating tape (not included)
Step 3Push up ceiling cup and secure with grub screws provided.
Step 4Attach shade onto the lamp holder and then secure with shade ring.
Step 5Attach the correct type and wattage bulb to the lamp holder (bulb not included). The maximum power indicated must not be exceeded.
Switch on the electricity supply at the fuse board.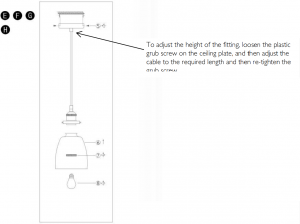
Caring for your product
Indoor use onlyDimmableReplace bulbs from John Lewis or established brand of the same type and compatibility Recommended the fitting should be cleaned with a soft dry cloth.
Aftercare and Troubleshooting
Why is the light not working when switched on?Check your power supply is switched on Turn off light and check that the bulb is inserted correctly Check the bulb is still in working order.
If you experience any unresolvable technical issues with the product, contact your nearest John Lewis & Partners shop or John Lewis & Partners Technical Support on 03301 230106.
Specification
- Recommended bulb: ES GLS bulb
- Rated power: 40W Max. Bulb not included
- Voltage: 220 –240V, 50Hz
- IP rating: 20
- Weight: 0.73kg
5 year guarantee
At John Lewis & Partners we test every light to high quality standards so we are able to offer you a 5 year guarantee.
Recycling
This symbol indicates that this product should not be treated as normalhousehold waste and it should be recycled. John Lewis & Partners do not operate instore take back, but as members of the Distributor Take Back scheme have funded the development and upgrade of recycling facilities across the UK. Please take it to your nearest collection facility or for further details contact your local council or visit www.recycle-more.co.uk.
John Lewis Partnership171 Victoria StreetLondon SW1E 5NNjohnlewis.com
References
[xyz-ips snippet=”download-snippet”]