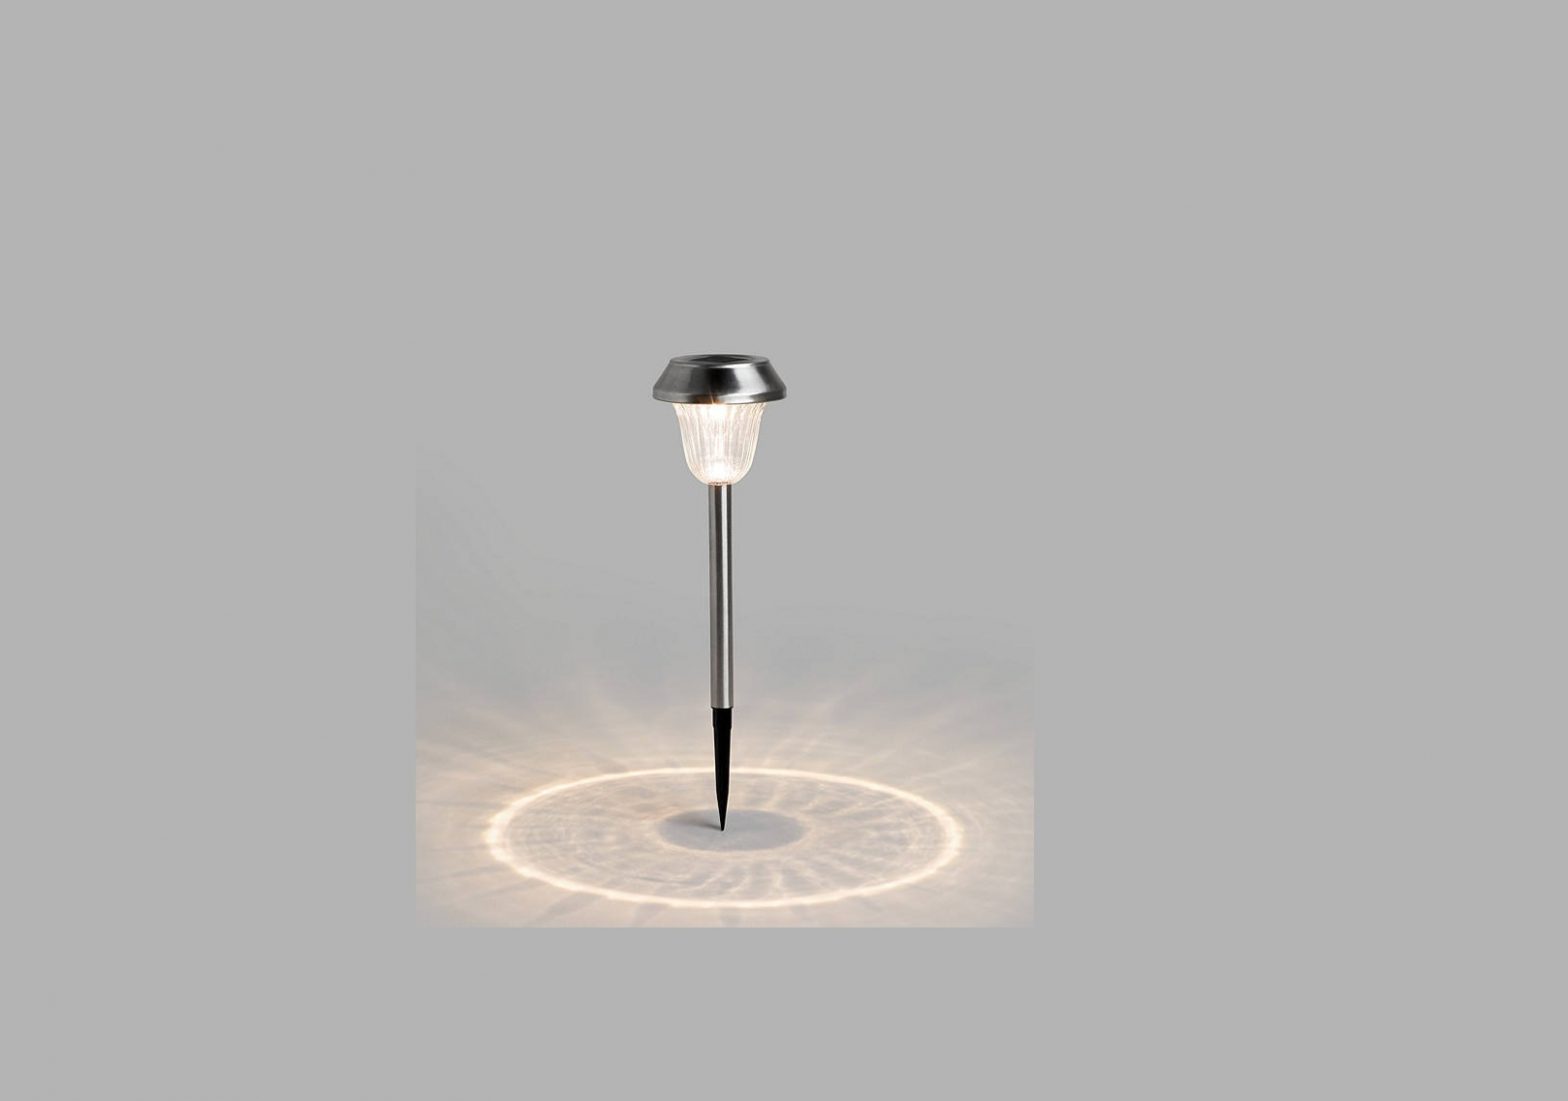
JOHN LEWIS Outdoor Solar Stakes Chrome User Guide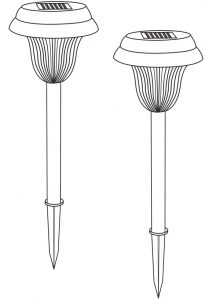
Thank you for purchasing this pair of Outdoor Solar Stakes. Please read the instructions carefully before use to ensure safe and satisfactory operations of this product.
Before using the light set for the first time, we would recommend you charge the product for 2 full days (turning off at dusk).
WarningsWhen not in use or weather is not favourable, remove and store indoors in a dry location.Keep out of the reach of children and pets.Do not attempt to connect the light set electrically to any other light set or power source.Do not attempt to replace the product battery.
This symbol  indicates that batteries should not be disposed of in the normal household waste, but taken to appropriate local recycling facilities, where and when these are available.Never throw batteries in a fire or attempt to open the outer casing.
Parts List
|
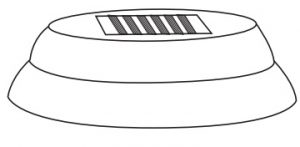
A |
 |
X 2 |
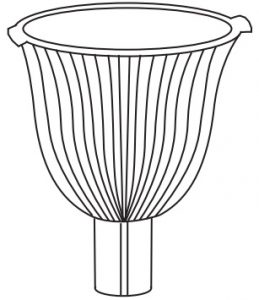
B |
 |
X 2 |
|
C |
 |
X 2 |
D |
 |
X 2 |
Care instructions
We recommend cleaning with a soft, dry cloth. Do not use abrasive materials, as these will damage the finish.
Assembly
Carefully unpack the carton, make sure all parts are present before assembly.Please ensure you remove all packaging from the product before positioning outside. Peel off the protective film that is covering the solar panel.Position the solar panel in direct sunlight and where it will be exposed for the longest time.Do not position the solar panel where there are shadows from buildings, trees or other foliage, as this will reduce the charging performance.
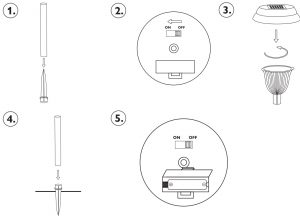
- The stake “D” has been put inside the tubing “C” for safe transit. Remove the stake “D” from the tubing “C”.
- Before putting the top part of the stake together, you will need to turn the solar panel on.You will locate the on/off switch on the underside of the solar panel “A”. Push the switch to ON for continuous operation.
- Attach the solar panel “A” to the glass shade “B”. You will need to rotate the edges of the glass shades inside a recess within the solar panel lid. To do this you will need to push and rotate the lid at the same time.
- To avoid damaging the solar panel, install the ground spike into soft ground first, (see recommendations on positioning before installing into the ground). Once you have chosen the ideal place for your solar stake attach the tubing “C”, then the top part of the stake (“A” + “B”).
- To replace the battery, you can access the battery box on the bottom of the solar panel.
- Only replace the rechargeable battery with the recommended type: 1 x 1.2V AA Ni-Mh 600 mAh battery. Full charge will last up to 6-8 hours per day.
Light Source
Integrated LED1 x 0.36 Watt Energy Efficient LED Bulbs (non replaceable)
Specification
Max Power: 0.36WVoltage: 1.2VPower Source: 1 x AA Ni-Mh 600 mAh Battery (included) / Solar Panel (included)IP Rating: 44Lumens: 5Net Weight: 2 x 0.35 Kgs
Quality Guaranteed
At John Lewis & Partners we test every light to high quality standards, so we can offer a 2-year guarantee.
RecyclingPlease retain these instructions for future reference.

This symbol indicates that this product should not be treated as normal house-hold waste and it should be recycled. John Lewis does not operate in store take back, but as members of the Distributer Take Back scheme have funded the development and upgrade of recycling facilities across the UK. Please take it to your nearest collection facility or for further details contact your local council or visit www.recycle-more.co.uk.
We have taken great care to ensure that this product reaches you in perfect condition. However, should any parts be damaged or missing please contact the customer service team on 03456 050 144.
John Lewis Partnership171 Victoria StreetLondon SW1E 5NNJohnlewis.com
Made in China
References
[xyz-ips snippet=”download-snippet”]