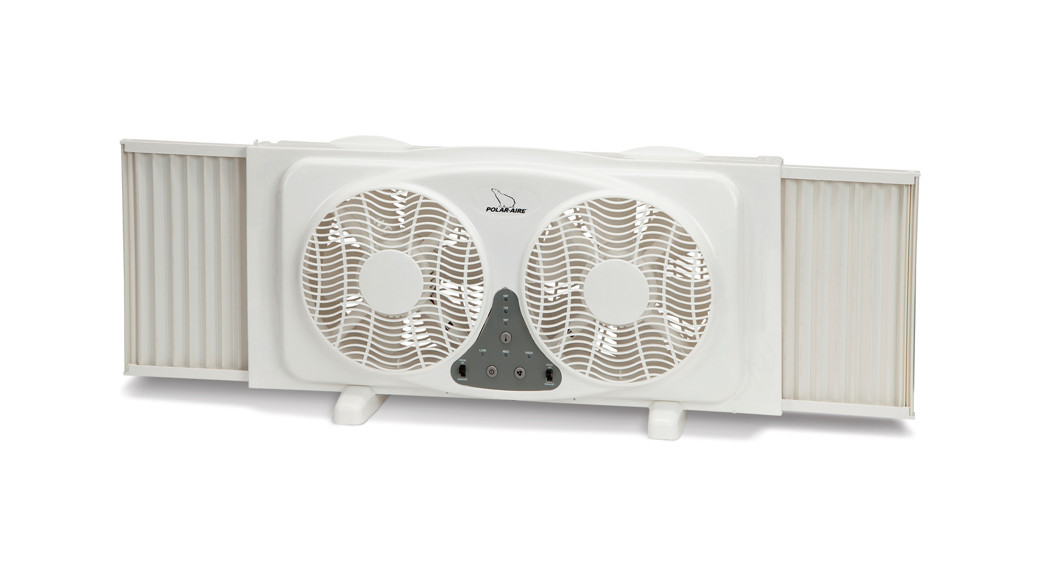
![]() 9 INCH DIGITAL TWIN WINDOW FANITEM NO.: VF-9WFDINSTRUCTION MANUAL
9 INCH DIGITAL TWIN WINDOW FANITEM NO.: VF-9WFDINSTRUCTION MANUAL
– FOR HOUSEHOLD USE ONLY –PLEASE READ AND SAVE THIS INSTRUCTION.Attention: Pictures in the IM are for reference only.
IMPORTANT SAFEGUARDS
DefinitionsWhenever used, the following identifies safety and property damage messages and designate a level of hazard seriousness. – This is the safety alert symbol. It alerts you to potential personal injury hazards. Obey all safety messages that follow this symbol to avoid possible injury or death.DANGER – Indicates an imminently hazardous situation, which, if not avoided, will result in death or serious injury. Usage of this signal word is limited to the most extreme situations.WARNING – Indicates a potentially hazardous situation, which, if not avoided, could result in death or serious injury.CAUTION – Indicates a potentially hazardous situation, which, if not avoided, may result in minor/moderate injury.NOTICE – Addresses practices not related to personal injuries, such as product and/or property damage.Always follow basic safety precautions when using electrical products, especially when children are present.
 READ ALL INSTRUCTIONS BEFORE USE.
DANGER — To reduce the risk of electric shock:
- Do not expose this product to rain, snow, or hail, as an electrocution hazard exists and serious personal injury may occur.
WARNING– To reduce the risk of fire, electric shock, or serious personal injury:
- Keep this product out of the reach of children and pets. This product is not intended for use by children. Extra caution and close supervision are necessary when using this product near children.
- Always ensure the product is unplugged from the electrical outlet before servicing, relocating, or cleaning it. Always unplug the product from the electrical outlet when it is not in use or will be left unattended.
- Do not operate this product with any solid-state speed control device.
- Do not plug/unplug the product into/from the electrical outlet with a wet hand.
- Keep hands, hair, and clothing away from moving blades during operation.
- Do not immerse the product, power cord, or plug in water or other liquids.
- To disconnect the product from an electrical outlet, press the Power Button on the Control Panel and then pull directly on the plug; do not pull on the power cord.
- If using an extension cord with this product, the marked electrical rating of the cord set or extension cord should be at least as great as the electrical rating of the product.
- Do not operate the product if it has a damaged or cut power cord or plug if wires are exposed, if it malfunctions, if it is dropped or damaged, or if it is dropped in or exposed to water. This product has no user-serviceable parts.
- Do not attempt to examine or repair this product yourself. Only qualified service personnel should perform any servicing; take the product to theappliance repair shop of your choice for inspection and repair.
CAUTION– To reduce the risk of personal injury:
- This product is intended solely for non-commercial, non-industrial, indoor, household use in circulating air; do not use outdoors or for any otherpurpose than intended.
- Do not hang or wall-mount this product.
- Do not run the power cord under carpeting, throw rugs, runners, or similar coverings. Arrange the power cord away from traffic areas and where it will not be tripped over.
- Always operate the product on a flat, level, stable surface.
WARNING: This product has a polarized plug (one blade is wider than the other). To reduce the risk of electric shock, this plug will fit in a polarized outlet only one way. If the plug does not fit fully in the outlet, reverse the plug. If it still does not fit, contact a qualified electrician. Do not modify the plugin anyway.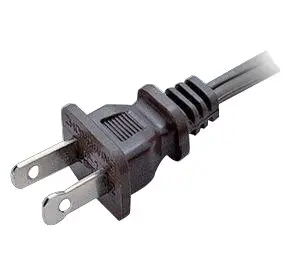
NOTE: This product employs overload protection (fuse). A blown fuse indicates an overload or short-circuits situation. If the fuse blows, unplug the product from the outlet. Replace the fuse as per the user servicing instructions (follow product marking for proper fuse rating) and check the product. If the replacement fuse blows, a short-circuit may be present and the product should be discarded or returned to a qualified service facility for examination and/or repair.
SAVE THESE INSTRUCTIONS FOR FUTURE REFERENCE
Parts
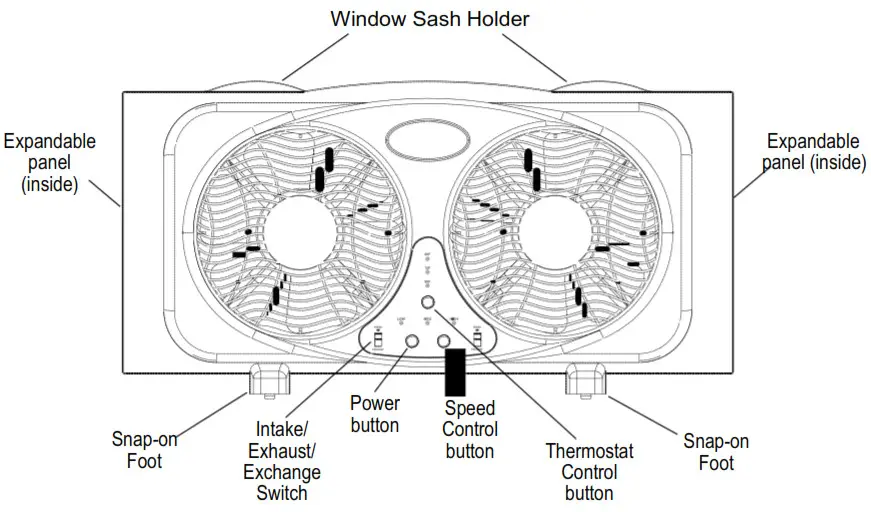
To Set UpAs a floor or table fan:
- Slide the Snap-on Feet onto the edged slots, located on the bottom of the Fan, until they securely snap into place (see Fig.1).
- Place the Fan on a flat, level, stable surface.


As a window fan:NOTICE: Do not set this product in a window that opens and closes horizontally (side-to-side), as product damage may result.
NOTES:Remove Snap-on Feet when using the product as a window fan.This product is designed to fit double-hung, casement, or vertically-sliding windows.The minimum window space opening is 23 inches (58 cm) x 11 inches (28 cm).
- Ensure all four LOCK/UNLOCK Switches for the Expandable Panels (see Fig. 2) are set to the UNLOCK position.
- Open the window where the fan is to be placed. Raise the lower sash to make an opening of at least 11 inches (28 cm) high.
- Center the Fan on the windowsill in the window opening with the Control Panel facing the inside of the room.NOTE: Make sure the lower edge of the Fan is positioned over the windowsill cap.
- Grasp the Fan handle and gently lower the window sash onto the top edge of the Fan.NOTE: Make sure the window sash rests between the Sash Holders protruding from the top edge of the Fan.
- Pull out the Expandable Panels so they reach the side edges of the window.
- Once the fan is securely in place, slide all four LOCK/UNLOCK Switches to the LOCK position.

WARNING: Do not lift the sash of a double-hung window while the Fan is in operation, as there may be a risk of serious personal injury and/or product damage.
To UseWARNING: Do not expose this product to rain, snow, or hail, as electrocution the hazard exists and serious personal injury and/or product damage may occur.
- Plug the Fan into a standard 120-volt AC electrical outlet, the fan will stay on standby mode.
- Choose an airflow direction by sliding the FRESH AIR/EXHAUST Switches to the desired positions.NOTICE: Never change the airflow direction (Intake, Exhaust, or Air Exchange) while the Fan is operating.NOTES:-Intake: Air is pulled into the room from the outside.– Exhaust: Air is pushed from inside the room to the outside.– Air Exchange: One Fan is set on “Intake”, pulling fresh air into the room, while the other Fan is set on “Exhaust”, simultaneously pushing stale air from inside the room to the outside.
- To turn on the fan, press the power button( ) located on the left side of the control panel. The fan will start on “HIGH” speed (Default Setting), and the “HIGH” speed indication light illuminates. Press the fan speed control button ( ) located on the right side of the control panel repeatedly to change fan speed from “HIGH-MED-LOW”, the indicator light will illuminate accordingly. The thermostat default setting is “OFF”, three Temperature indication lights are “OFF”.
- THERMOSTATChoose from 60F, 75F or 90F settings by performing the following function:•60F: Press the Thermostat Control Button ( ) once.•75F: Press the Thermostat Control Button ( ) twice.•90F: Press the Thermostat Control Button ( ) a third time.The temperature indicator light will illuminate accordingly. Press the Temperature Control Button a fourth time to turn the temperature feature off, and all temperature indication lights will turn off.NOTE: The fan will turn off if the room temperature drops below setting and will turn on again if the room temperature climbs above setting.
- To turn off the Fan, press the Power Button a second time, and then unplug the Fan from the electrical outlet.CAUTION: Always unplug the product from the electrical outlet when it is not in use or will be left unattended.
User Servicing Instructions
WARNING: Always ensure the product is unplugged from the electrical outlet before servicing, relocating, cleaning, or storing it.
- This product is permanently lubricated at the factory before shipping and will not require further lubrication for the life of the product.WARNING: Additional lubrication of motor parts could increase the risk of a fire hazard.
- Clean the exterior surfaces only by wiping them with a soft, damp cloth. Dust can be removed from the Front/Rear Guards using a small vacuum.WARNING: Do not use abrasive cleaners/pads to clean the product, and do not allow water or other liquids to enter the interior of the product.NOTICE: Do not disassemble the product for cleaning of internal parts, as doing so may result in product damage and will void the warranty.
- Make sure the product is completely dry before the next use.
- Store the product with these instructions in the original box in a cool, dry place.
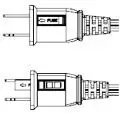
To Replace Fuse:
- Grasp plug and remove it from the receptacle or other outlet device.CAUTION: Do not unplug by pulling on the power cord.
- Open the fuse compartment cover on top of the plug by sliding it toward the blades.
- Using a small flat blade screwdriver, carefully remove the fuse by prying it up from the end closest to the cord.
- Replace the fuse with a 2.5 amp, 125-volt fuse (not included).WARNING: Risk of fire. Use a 2.5 amp, 125-volt fuse only.
- Close the fuse compartment cover by sliding it away from the blades.
Electrical Specifications
 report this ad
Voltage: 120VACFrequency: 60HzWattage: 60W
LIMITED ONE-YEAR WARRANTY
POWER INC warrants this product to be free of defects in material and workmanship for the applications specified in the Owner’s Manual for a period of 12 months for the whole fan from the date of purchase. This warranty only applies to the original purchaser of this product.This warranty excludes damage, accidental or otherwise, to the unit not caused by a defect in material or workmanship.The warranty also excludes damage caused by misuse, tampering, modification, disassembly, repairs or alterations, or failure to adequately maintain and care for the unit. Operating this product under any conditions other than those recommended or at voltages other than indicated will also void this warranty For warranty issues, contact the place of purchase for repair/ replacement opportunities. The original dated receipt or proof of purchase must accompany all returns.All warranties, expressed or implied, are limited to 12 months for the whole fan from the date of purchase. POWER is a registered trademark of POWER INC.Some states do not allow for the limitation or exclusion of incidental or consequential damages or do not allow limitation on implied warranties. The above limitations and exclusions may not apply to you.This warranty gives you specific legal rights, and may also include other rights that vary state by state.E-mail: [email protected]Website: www.jpowerus.com
FOR CALIFORNIA CONSUMERS WARNING: This product can expose you to chemicals including lead and phthalates, which are known to the State of California to cause cancer and birth defects, or other reproductive harm. For more information go to www.P65Warnings.ca.gov.
[xyz-ips snippet=”download-snippet”]