![]()
Project WattsStudio/Live Subwoofer
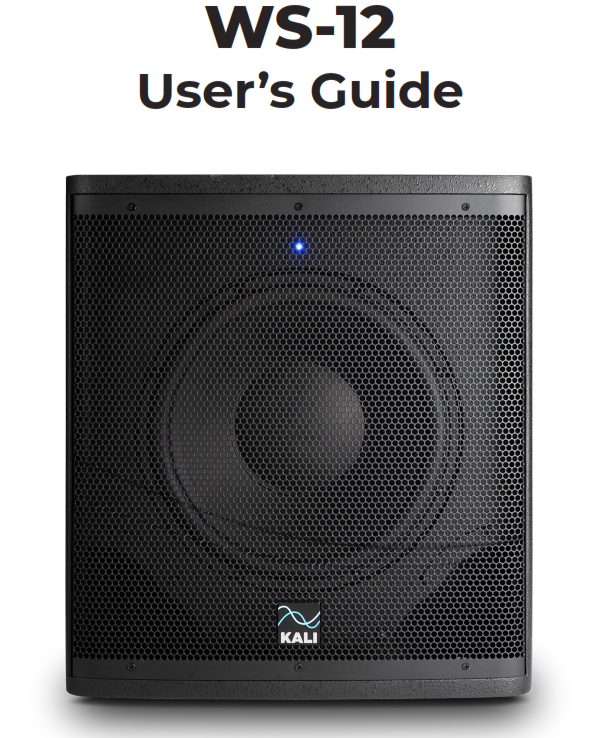
KALI AUDIO WS-12 Studio/Live Subwoofer User’s Guide

Important Safety Information
- Read these instructions.
- Keep these instructions.
- Heed all warnings.
- Follow all instructions.
- Do not use this apparatus near water.
- Power the product down, and unplug it from power before cleaning.
- Clean only with a dry cloth.
- Do not block any ventilation openings.
- Keep ventilation opening free of dust or other matter.
- Do not install near any heat sources such as radiators, heat registers, stoves, or other apparatus (including amplifiers) that produce heat.
- No naked flame sources (such as lighted candles,) should be placed on the product.
- Do not defeat the safety purpose of the polarized or grounding-type plug. A polarized plug has two blades, with one blade wider than the other. A grounding-type plug has two blades and a third grounding prong. The wide blade or the third prong are provided for your safety. If the provided plug does not fit into your outlet, consult an electrician for the replacement of the obsolete outlet.
- Protect the power cord from being walked on or pinched, particularly at plugs, receptacles, and at the point where they exit the apparatus.
- Use only attachments and/or accessories specified by the manufacturer.
- Use only with a cart, stand, tripod, plate, bracket, or table specified by the manufacturer. When a cart is used, use caution when moving the cart/apparatus combination to avoid injury from tip-over.

- Unplug this apparatus during lightning storms or when unused for long periods of time.
- Refer all servicing to qualified service personnel. Servicing is required when:A. The apparatus is damaged in any wayB. The power supply cord or plug is damagedC. Liquid or other objects have fallen into the productD. The product has been exposed to rain or moistureE. The product does not operate normallyF. The product has been dropped
- This apparatus shall not be exposed to dripping or splashing.
- No object filled with liquids, such as a vase or a glass, should be placed on the apparatus.
- This apparatus is to be used in a moderate climate. Do not expose to extremely high or low temperatures.
- High sound pressure in excess of 85 dB can cause hearing damage and/or loss. Do not expose yourself to high sound pressure levels.

![]() CAUTION
CAUTION ![]() RISK A RISK OF ELECTRIC SHOCK DO NOT OPENWARNING: SHOCK HAZARD-DO NOT OPEN. AVIS:RISQUE DE CHOC ELECTRIQUE-NE PAS OUVRIR
RISK A RISK OF ELECTRIC SHOCK DO NOT OPENWARNING: SHOCK HAZARD-DO NOT OPEN. AVIS:RISQUE DE CHOC ELECTRIQUE-NE PAS OUVRIR
![]() The lightning bolt with an arrowhead symbol within an equilateral triangle is intended to alert the user to the presence of uninsulated “dangerous voltage” within the product’s enclosure that may be of sufficient magnitude to constitute a risk of electric shock to persons.
The lightning bolt with an arrowhead symbol within an equilateral triangle is intended to alert the user to the presence of uninsulated “dangerous voltage” within the product’s enclosure that may be of sufficient magnitude to constitute a risk of electric shock to persons.
![]() The exclamation point within an equilateral triangle is intended to alert the user of the presence of important operation and maintaining (servicing) instructions in the literature accompanying the appliance.
The exclamation point within an equilateral triangle is intended to alert the user of the presence of important operation and maintaining (servicing) instructions in the literature accompanying the appliance.
About Your Subwoofer
Congratulations on your Kali Audio WS-12 Subwoofer! This subwoofer was designed to deliver accurate, authoritative low end for recording studios, and also to be used on stage in light-duty applications. Whether you need to mix very-low-frequency content, or if you’re just looking for some punch, you’ve picked an excellent subwoofer!Where does “WS” come from?The official name of this product line is “Project Watts.” Kali names all of our product lines after towns in California. Watts is a neighborhood in Los Angeles that features prominently in the history of West Coast Hip-Hop. The name is also an allusion to the high power of this subwoofer; capable of 1000W peaks, this subwoofer far outpowers other studio subwoofers in its price range.
Output and BandwidthThe WS-12 is designed to provide enough output to serve as the subwoofer in a 5.1 setup with 5x Kali Audio LP-8s. Having been designed for this demanding task, the WS-12 is easily capable of serving as the subwoofer in most stereo monitoring applications.
This high level of output also makes the subwoofer suitable for use alongside small portable PA systems. A single subwoofer may be used alongside PA speakers with similar Max SPL specs in small settings. In larger settings, two subwoofers may be used side by side.
The WS-12 plays down to 23Hz at -10dB. This is low enough to reveal details in very low frequencies in film soundtracks, as well as bass-heavy music like EDM and Hip-Hop. This bandwidth also makes the WS-12 an excellent choice for live playback of these genres.
The WS-12 is equipped with a limiter circuit that will protect the subwoofer from unsafe voltage levels. This will be plainly audible as distortion, indicating that the speaker is receiving too much input signal. If this is the case, it is recommended to reduce the volume of the playback material.
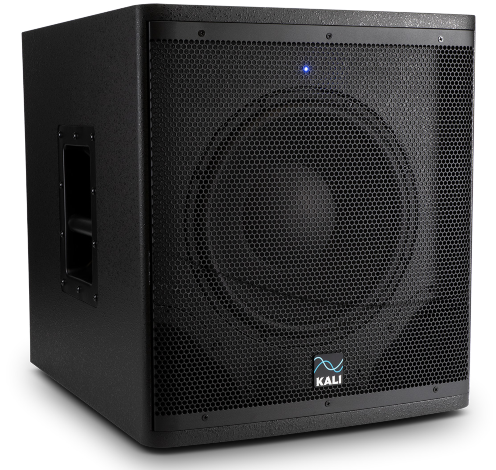
Form Factor and Build QualityThe WS-12 is designed to fit under desks for use in small studios. By adding handles and using high-quality materials for the cabinet, Kali Audio has made the WS-12 roadworthy and ready for live duty. The subwoofer will fit easily into most small cars.Low Noise Port TubeSimilar to the LP-Series Studio Monitors, the port tube on the WS-12 was designed to deliver all the benefits of a front-firing port tube, without any drawbacks associated with noise.On most port tubes, air leaves at different speeds from different points of the opening, creating noisy turbulence. This turbulence can be heard as “chuffing,” or an audible air sound coming from the subwoofer. This sound will add to the noise floor and obscure the details of the low end.The port tube on the WS-12 was designed to ensure that all of the air leaves the port tube at the same velocity. This helps add to the low end response of the subwoofer while keeping the bass clean, tight, and devoid of extra noise.Robust Configuration OptionsBecause the WS-12 is designed to serve in such a wide variety of applications, it is equipped with features to allow you to get the most out of it, whatever your use case. The back panel features switches to control the crossover frequency, the level of the subwoofer, the polarity, and various inputs. Users can bypass the sub using a third-party on/off footswitch with a 1/4” connector. Such footswitches are readily available from any musical equipment retailer.
Full Specifications
| Powered: | Yes |
| Amplifier Class: | D |
| Continuous Power | 500W |
| Peak Power: | 1000W |
| Driver Size: | 12 Inches |
| Frequency Response: (-10dB) | 23Hz – 160 Hz |
| Frequency Range: (+/-3 dB) | 30Hz – 160Hz |
| Crossover: | User-Selectable; see pages 11-12 |
| Max SPL: | 123dB |
| Unbalanced Inputs: | Stereo RCA |
| Balanced Inputs: | Stereo TRS/XLR Combi Jack |
| TRS/XLR Input Sensitivity: (+4 dBu) | 106dB SPL @1m for +4dBu (1.23VRMS) input |
| RCA Input Sensitivity:`(-10 dBV) | 106dB SPL @1m for -10dBV (0.316VRMS) input |
| Balanced Outputs: | Stereo XLR |
| XLR Output Noise Floor: | .09 mV; 99 dB Signal-to-Noise |
| Other Inputs/Outputs: | 1/4-Inch Footswitch Input |
| Enclosure: | 18mm Plywood |
| Height: | 19 Inches (48.3cm) |
| Depth: | 17 Inches (43.2cm) |
| Width: | 16 Inches (40.7cm) |
Inputs and Controls
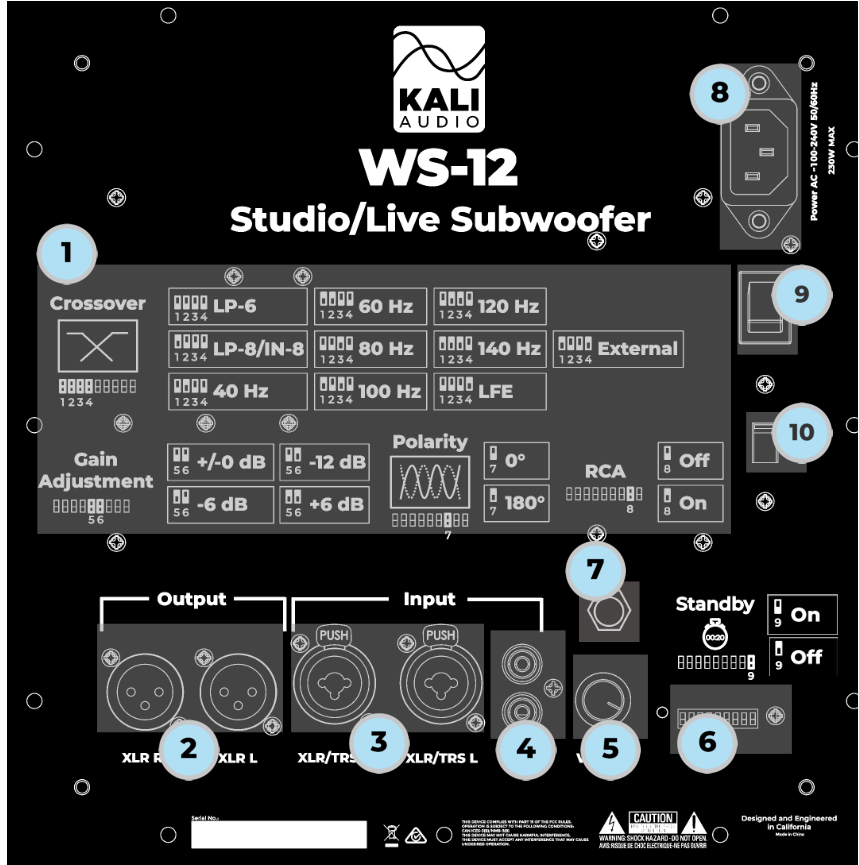
- Dip Switch Quick Reference GuideThe quick reference guide on the back of the speaker can help you set the dip switches to the appropriate positions for your application without needing to consult this manual.
- XLR OutputsUse the XLR Outputs to pass signal through the subwoofer and to a stereo pair of speakers. The signal from the subwoofer will be high- passed according to the crossover set with dip switches 1-4. If using more than 2 full-range speakers, it is recommended to use an external processor and crossover.
- XLR/TRS Combi Jack Inputs (+4 dBu Sensitivity)The XLR/TRS input is for use with professional audio devices like mixers, interfaces, and controllers. Depending on your device, it will either use XLR or ¼” TRS outputs, either of which can be used with this input.
- RCA Inputs (-10 dBV Sensitivity)The RCA input is for use with consumer devices like record players, laptops, smartphones, and media players. Commonly, the playback device will either have an RCA or a 3.5mm (Aux) output. Cables from either of these outputs to RCA are easy to find.By default, the RCA input on the speaker is OFF. This is to prevent interference when that input is not being used. When connecting to the RCA input, enable it by moving switch #8 on the dip switches UP to the ON position. If the RCA input is no longer being used, be sure to move switch #8 back DOWN to the OFF position.
- Volume ControlThe volume control allows users to adjust the output of the speaker from -∞ to +6 dB. There is a center detente at the +0 dB setting. When using the crossovers for the LP-6 or the LP-8/IN-8, leave the volume at the center detente on all Kali speakers. We have calibrated the levels, which will help you get closer to a precise match in your environment.For all other speakers, it will be necessary to match the level of the subwoofer to the other speakers manually.
- Dip SwitchesThe dip switches control crossover, location-based gain, polarity, standby mode, and power to the RCA input. A full explanation of the operation of the dip switches can be found on page 11.
- Footswitch InputThe footswitch input allows for a footswitch to be connected to the subwoofer to toggle between normal operation and bypassed operation. When the subwoofer is bypassed, the subwoofer will no longer play, and the high-pass filter on the outputs will be disabled. his is useful for monitoring with or without a subwoofer depending on your current use case, or even just to check mixes back and forth.
- Power InputConnect the provided power cord to this input. Before powering the unit on, be sure that the 110V-230V switch (10) is set to the appropriate setting for your location. Most areas in North America use 110V power, and most areas in Europe use 220V power. If you are unsure of the voltage in your location, search “Local Voltage (Name of your country.)”
- On/Off SwitchPower the speaker on and off. e sure to power the speaker off when connecting or disconnecting the power cable, during lightning storms, or during extended periods of disuse. Before powering the unit on, be sure that the 110V-230V switch (10) is set to the appropriate setting for your ocation. Most areas in North America use 110V power, and most areas in Europe use 220V power. If you are unsure of the voltage in our location, search “Local Voltage (Name of your country.)”
- 110V-230V Power SwitchThe WS-12 requires you to select the appropriate input voltage for your location. Before powering the unit on, be sure that the 110V-230V switch (10) is set to the appropriate setting for your location. Most areas in North America use 110V power, and most areas in Europe use 220V power. If you are unsure of the voltage in your location, search “Local Voltage (Name of your country.)”
Front LEDSolid Blue: The WS-12 is on and operating normally.Flashing Blue: The WS-12 is on, but bypassed via the footswitch.Solid Orange: The WS-12 is in Standby Mode. See page 14.
Dip Switches
Like the LP-Series Studio Monitors, the WS-12 features easy-to-use dip switches on the back that help you configure it to your specific application. Note that each set of switches is completely independent of one another, so any adjustments you make to one set of switches will not affect any other set of switches.Switches 1-4: CrossoverThese switches control a low-pass filter that passes the signal to the subwoofer, and a highpass filter that passes the signal out through the XLR outputs. If you’re using more than 2 full range speakers, it is recommended to set the crossover to “External” and use an external processor and crossover.
![]() Position 1: LP-6The subwoofer is connected to a stereo pair of Kali Audio LP-6 Studio Monitors. For best results, turn volume control on the subwoofer and both monitors to the center detente. As long as the subwoofer is roughly the same distance to the listener as the monitors, the volume of the subwoofer will be matched to the monitors.Switch 1: DOWNSwitch 2: DOWNSwitch 3: DOWNSwitch 4: DOWN
Position 1: LP-6The subwoofer is connected to a stereo pair of Kali Audio LP-6 Studio Monitors. For best results, turn volume control on the subwoofer and both monitors to the center detente. As long as the subwoofer is roughly the same distance to the listener as the monitors, the volume of the subwoofer will be matched to the monitors.Switch 1: DOWNSwitch 2: DOWNSwitch 3: DOWNSwitch 4: DOWN
![]() Position 2: LP-8/IN-8The subwoofer is connected to a stereo pair of Kali Audio LP-8 or IN-8 Studio Monitors. For best results, turn volume control on the subwoofer and both monitors to the center detente. As long as the subwoofer is roughly the same distance to the listener as the monitors, the volume of the subwoofer will be matched to the monitors.Switch 1: UPSwitch 2: DOWNSwitch 3: DOWNSwitch 4: DOWN
Position 2: LP-8/IN-8The subwoofer is connected to a stereo pair of Kali Audio LP-8 or IN-8 Studio Monitors. For best results, turn volume control on the subwoofer and both monitors to the center detente. As long as the subwoofer is roughly the same distance to the listener as the monitors, the volume of the subwoofer will be matched to the monitors.Switch 1: UPSwitch 2: DOWNSwitch 3: DOWNSwitch 4: DOWN
![]() Position 9: LFEThe subwoofer is being used as a dedicated subwoofer for Low-Frequency Effects (LFE) while mixing for film.Switch 1: DOWNSwitch 2: DOWNSwitch 3: DOWNSwitch 4: UP
Position 9: LFEThe subwoofer is being used as a dedicated subwoofer for Low-Frequency Effects (LFE) while mixing for film.Switch 1: DOWNSwitch 2: DOWNSwitch 3: DOWNSwitch 4: UP
Switches 1-4: Crossover![]() Position 10: External CrossoverThe subwoofer is receiving a low-passed signal from an external source, and full-range sound is being crossed over and processed by an external processor. Use this setting if you want to use your own crossover, or if you’re using a system larger than 2.1. Note that in this position, the subwoofer will play up to about 1 kHz unless the signal you send to it is low-passed.Switch 1: UPSwitch 2: DOWNSwitch 3: DOWNSwitch 4: UP
Position 10: External CrossoverThe subwoofer is receiving a low-passed signal from an external source, and full-range sound is being crossed over and processed by an external processor. Use this setting if you want to use your own crossover, or if you’re using a system larger than 2.1. Note that in this position, the subwoofer will play up to about 1 kHz unless the signal you send to it is low-passed.Switch 1: UPSwitch 2: DOWNSwitch 3: DOWNSwitch 4: UP
Positions 3-8: Generic CrossoversThe subwoofer is passing signals to full-range speakers not made by Kali Audio. These crossovers will send a low-passed signal to the subwoofer, and a complementary high-passed signal to the full range speakers via the XLR output. If you’re unsure which to use, try them each and see which one sounds best in your application.
![]() Position 3: 40 HzSwitch 1: DOWNSwitch 2: UPSwitch 3: DOWNSwitch 4: DOWN
Position 3: 40 HzSwitch 1: DOWNSwitch 2: UPSwitch 3: DOWNSwitch 4: DOWN
![]() Position 4: 60 HzSwitch 1: UPSwitch 2: UPSwitch 3: DOWNSwitch 4: DOWN
Position 4: 60 HzSwitch 1: UPSwitch 2: UPSwitch 3: DOWNSwitch 4: DOWN
![]() Position 5: 80 HzSwitch 1: DOWNSwitch 2: DOWNSwitch 3: UPSwitch 4: DOWN
Position 5: 80 HzSwitch 1: DOWNSwitch 2: DOWNSwitch 3: UPSwitch 4: DOWN
![]() Position 6: 100 HzSwitch 1: UPSwitch 2: DOWNSwitch 3: UPSwitch 4: DOWN
Position 6: 100 HzSwitch 1: UPSwitch 2: DOWNSwitch 3: UPSwitch 4: DOWN
![]() Position 7: 120 HzSwitch 1: DOWNSwitch 2: UPSwitch 3: UPSwitch 4: DOWN
Position 7: 120 HzSwitch 1: DOWNSwitch 2: UPSwitch 3: UPSwitch 4: DOWN
![]() Position 8: 140 HzSwitch 1: UPSwitch 2: UPSwitch 3: UPSwitch 4: DOWN
Position 8: 140 HzSwitch 1: UPSwitch 2: UPSwitch 3: UPSwitch 4: DOWN
Switches 5-6: Gain AdjustmentSwitches 5 & 6 provide gain adjustment. These are particularly useful when using the WS12 with Kali Audio Studio Monitors. These switches will compensate the output of the subwoofer based on where it is positioned, allowing for a useful baseline gain setting from which to make adjustments
![]() Position 1: +/-0 dBThis is the recommended setting if the subwoofer is in the middle of a room, more than .5 Meters (19 inches) away from any walls.Switch 5: DOWNSwitch 6: DOWN
Position 1: +/-0 dBThis is the recommended setting if the subwoofer is in the middle of a room, more than .5 Meters (19 inches) away from any walls.Switch 5: DOWNSwitch 6: DOWN
![]() Position 2: -6 dBThis is the recommended setting if the subwoofer is within .5 Meters (19 inches) of any walls.Switch 5: UPSwitch 6: DOWN
Position 2: -6 dBThis is the recommended setting if the subwoofer is within .5 Meters (19 inches) of any walls.Switch 5: UPSwitch 6: DOWN
![]() Position 3: -12 dBThis is the recommended setting if the subwoofer is in a corner: within .5 Meters (19 inches) of two perpendicular walls.Switch 5: DOWNSwitch 6: UP
Position 3: -12 dBThis is the recommended setting if the subwoofer is in a corner: within .5 Meters (19 inches) of two perpendicular walls.Switch 5: DOWNSwitch 6: UP
![]() Position 4: +6 dBThis is the recommended setting if the subwoofer is being used with a larger system, at a greater distance, or in a live sound setting.Switch 5: UPSwitch 6: UP
Position 4: +6 dBThis is the recommended setting if the subwoofer is being used with a larger system, at a greater distance, or in a live sound setting.Switch 5: UPSwitch 6: UP
Switch 7: PolarityDepending on the shape and size of your room, the position of the subwoofer relative to the monitors, and your listening position relative to all of those factors, the subwoofer may sum better with the monitors with the polarity reversed. To test which setting is more appropriate, simply try both settings, and use the one that sounds better. It is also possible to use free software such as Room EQ Wizard (REW) to test the polarity of your subwoofer. Instructions for doing so are readily available with a quick internet search.
![]() Position 1: 0°Switch 7: DOWN
Position 1: 0°Switch 7: DOWN
![]() Position 2: 180°Switch 7: UP
Position 2: 180°Switch 7: UP
Switch 8: RCA InputSwitch 8 turns the RCA input on and off. By default, the RCA input on the speaker is OFF. This is to prevent interference when that input is not being used. When connecting to the RCA input, enable it by moving switch #8 on the dip switches UP to the ON position. If the RCA input is no longer being used, move switch #8 back DOWN to the OFF position.
![]() Position 1: OffSwitch 8: DOWN
Position 1: OffSwitch 8: DOWN
![]() Position 2: OnSwitch 8: UP
Position 2: OnSwitch 8: UP
Switch 9: Standby ModeThe WS-12 is equipped with a standby feature that will put the subwoofer into a low-power mode after 20 minutes of disuse. In low-power mode, the power LED will turn orange, and the subwoofer will not pass audio. The subwoofer will come back online once it receives the signal. If this operation is not desired, turn switch 9 up to disable standby mode.
![]() Position 1: OnSwitch 9: DOWN
Position 1: OnSwitch 9: DOWN
![]() Position 2: OffSwitch 9: UP
Position 2: OffSwitch 9: UP
First Time Setup
Note: This guide assumes that you are setting up a WS-12 with a stereo pair of studio monitors. If you require assistance with a more complicated setup, contact [email protected].
- Place the subwoofer on the floor between the two studio monitors. Try to make sure that it is roughly the same distance from your ears as the monitors.*
- Before you plug the speaker in, make sure that the power switch is in the OFF position.
- Make sure that the 110V-230V selector switch is set to the appropriate position for your location. Consult page 10 for more information.
- Plug the speaker in.
- Connect audio cables to the subwoofer’s inputs.
- If you’re connecting RCA, make sure that dip switch #8 is switched UP to the ON position.
- If you’re connecting XLR or TRS, make sure that dip switch #8 is switched DOWN to the OFF position.
- Connect XLR cables from the subwoofer’s outputs to the inputs of your full-range speakers.
- Adjust dip switches 5&6 based on the position of the subwoofer in your room. See page 13 for details.
- Turn the subwoofer and the speakers on.
- Select your desired crossover setting.
- Listen to the interaction between the subwoofer and the speakers. Experiment with the polarity switch (switch 7) and determine whether or not to reverse the polarity of the subwoofer.
- If you’re using Kali Audio studio monitors, turn the volume on all systems to the center detente. If you’re using other full-range speakers, adjust the volume of the subwoofer until it is balanced with the monitors at the listening position.
- Sit in your listening position, and turn the volume up on your playback device to the desired level
- Enjoy your new subwoofer!*While this is generally a good starting point, smaller rooms and rectangular rooms can have odd interactions with low frequencies, and this placement may yield less than desirable results. If you’re struggling to find the right placement for your subwoofer, place it in your chair where you sit to listen, and play a familiar track with a lot of low ends. Move around the room with your head close to the ground until the bass sounds the way it should. You may have to crawl, but you shouldn’t feel silly. Once the bass sounds right, Eureka! You’ve found the right position for the subwoofer. Place the subwoofer where you are standing. If possible, arrange your monitors around it.
Troubleshooting
1. I opened the subwoofer, and it is damaged.If you received a subwoofer that is obviously damaged, please contact your dealer immediately.2. The subwoofer is making no sound.
- Is the subwoofer plugged in?
- Is the subwoofer turned on? There should be a blue LED on the front of the subwoofer if it is on. If this light is off, the subwoofer is turned off.
- Is the volume turned up?
- Are all cables plugged in to both your playback device and the subwoofer?
- Are you passing audio via your playback device?
- Are you using RCA? If so, have you moved dip switch #8 UP to the ON position?If you’ve answered “Yes” to all the above and the speaker is still not making any sound, refer to number 5 below.3. The subwoofer sounds distorted.
- Is the subwoofer playing too loud? Turn down the volume on the back of the subwoofer. If the distortion goes away, you may be playing the subwoofer too loud. Besides the problem of distortion, this can be damaging to your hearing if you are close to the subwoofer.If you’ve turned down the volume on the speaker, and you’re still hearing distortion, refer to number 5 below.4. I hear cracks, hums, or buzzing.
- Are you using RCA?a. If “yes,” be advised that RCA is an unbalanced connection, and is prone to picking up noise as signal travels through the cable.b. If “no,” be sure that the dip switch # 8 is moved DOWN to the OFF position.
- Is the subwoofer close to electronics like a television, wireless router, phone, motor, or radio? If so, these can interact with the subwoofer’s electronics in ways that cause unwanted noise. Try moving the subwoofer at least .5 Meters (20 inches) from any such devices.
- Are there loose objects in the room that may be buzzing with the bass? Low frequencies can cause objects in a room to vibrate loudly. Make sure that small, hard objects like screws and other hardware are secure. If none of the above solves the problem, refer to number 5 below.5. Isolate the problemThere are many issues in the signal path which might be causing any of the above problems. Before you initiate a return, do your best to make sure that the problem isn’t with your cables or your playback device. Here’s a simple way to check:
- Disconnect your subwoofer from your source.
- Plug in the problematic speaker and allow it to play for a minute. Take careful note of the problems you’re hearing.
- Disconnect the problematic speaker and plug that same cable into another speaker. If you’re hearing the same issues, there is likely a problem in your signal path and not the speaker.
- If you’ve determined that your problem is with your subwoofer, contact your dealer to initiate a return.
Warranty
What does this warranty cover?This warranty covers defects in materials or workmanship for a period of one year (365 days) after the purchase date of the product.What will Kali do?If your product is defective (materials or workmanship,) Kali will replace or repair the product at our discretion – free of charge.How do you initiate a warranty claim?Contact the retailer from whom you bought the product to initiate a warranty process. You will need the original receipt showing the date of purchase. The retailer may ask you to provide specific details about the nature of the defect.What is not covered?The following cases are NOT covered by this warranty:• Damage from shipping• Damage from dropping or otherwise mishandling the speakers• Damage resulting from failure to heed any of the warnings outlined on pages 3 and 4 of the user’s manual, including:1. Water damage.2. Damage from foreign objects or substances entering the port tube.3. Damage resulting from an unauthorized person servicing the product.4. Damage resulting from failure to set the 110V-230V selector switch to the appropriate setting.The warranty applies only in the United States. International Customers should contact their dealer about their warranty policy.
KALI AUDIO WS-12 Studio/Live Subwoofer User’s Guide
[xyz-ips snippet=”download-snippet”]