
Kidzone 060-ROT-02V2 24v Truck User Guide
Ride On SUV Personalize License Plate (24V)item number: 060-ROT-02V2
Warning!The foam on the product belongs to the packaging, please remove it when using it
![]() ATTENTION
ATTENTION
 This product is packed with the battery disconnected. Connect the battery before use.
Safety Instruction
When using electrical product, basic safety precaution should always be followed including the following
Read all Instruction before use
- To Protect against electrical shock, do not immerse cord, charger, transformer, battery, or the product in water or other liquid.
- Only use charging devices, transformer, and battery provided or recommended by the manufacturer.
- For your children’s safety, the product should be assembled by adult.
- This toy is not intended for children below 37 months old.
- Close supervision is necessary when your children is using the product.
- Unlatch the battery if not used for a long time.
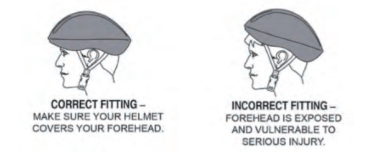
- Personal protective equipment such as helmet is needed when using this product.
- Do not use this product as a traffic tool.
- Do not use this product on public road, raceway, by the swimming pool, or at any potential dangerous places.
- Do not use this product on slippery surface.
- Always keep hands, hair, and clothing away from moving parts.
- Maximum users weight for this product is 77.2 lb.
- Do not change, modify or add any electrical wiring on this product.
- Avoid using this product in tight environment to prevent damage to the product or injury to the user.
- Do not use this product in the dark. Only operate this product during daytime or well lit area.
- For your child’s safety, pls make sure fasten the seat belt when using this product.
- Personal protective equipment such as helmet is needed when using this product.
Product Specification
Item: 060-ROT-02V2Battery:12V7AH*2(24V)Motor:200W*2,550,20000rpmAge:37-96 MonthsMax Weight:77.2LBProduct Dimension:48.4” x 34.6” x 31.5”Speed:1.8-3.1MPHPlay time:50 minutesCharger:DC 24V1000mAFirst charging time:8-12hoursCharging time after first charge: 8-12hoursMax charging time:12 hoursAverage battery life:One yearBattery (Temperature tolerance):-68 F to 140 F
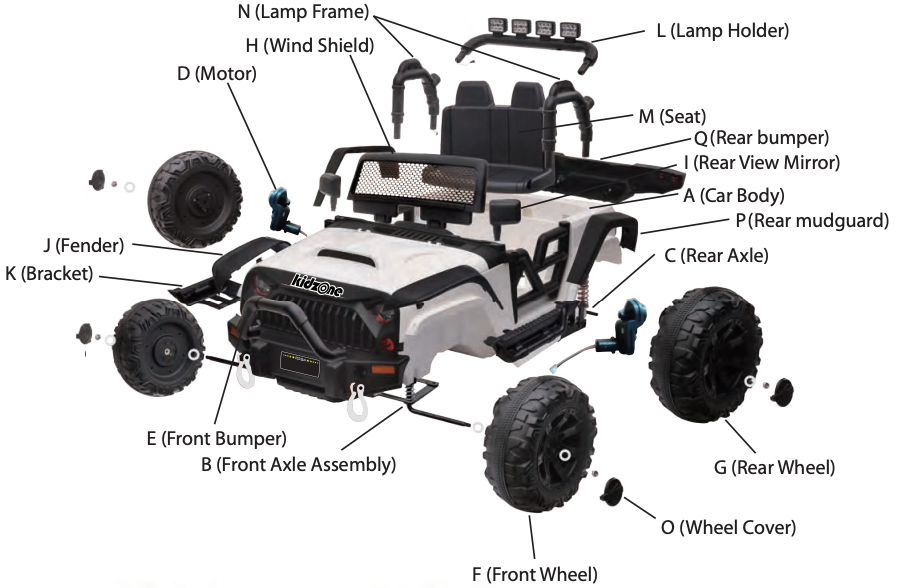
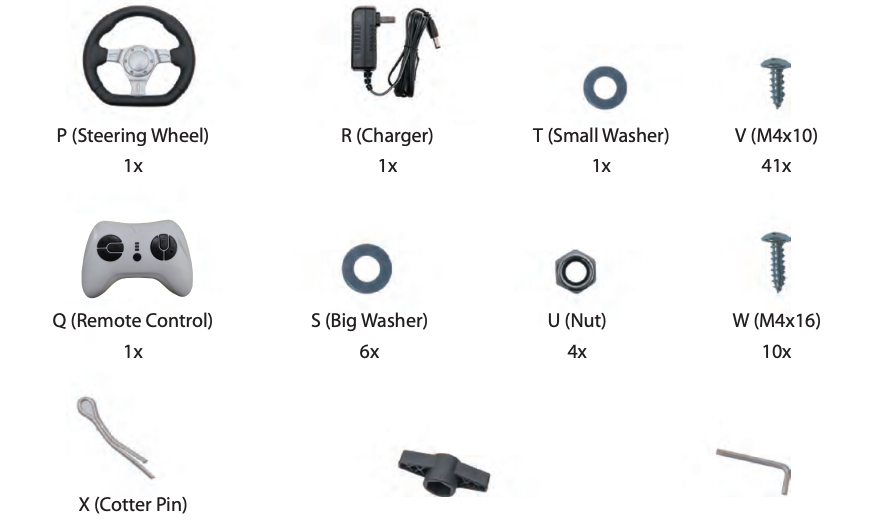
Parts and Feature
Assembly Instruction
Align the rear bumper to the vehicle body. Hold the support the vehicle body with 1 hand, press and click the bumper into place.
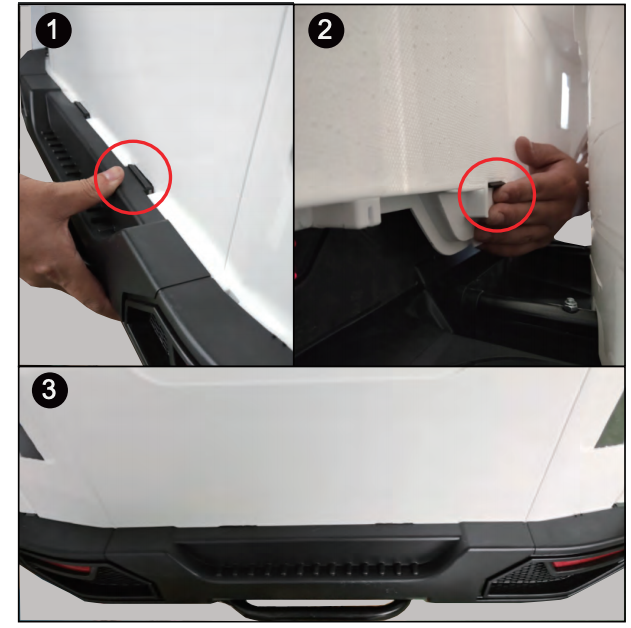
Assemble the rear bumper to the car body.
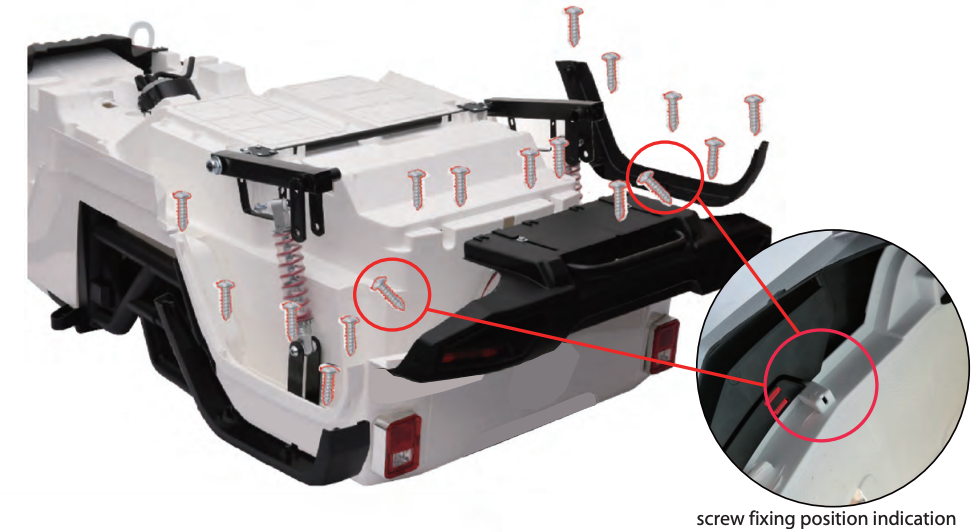
Assemble rear mudguard to the side of the car body and secure using M4x10 screws
Complete the front axle Assemble.
Turn the car body and assemble the front axle assemble and secure using 8 M4x16 screws.
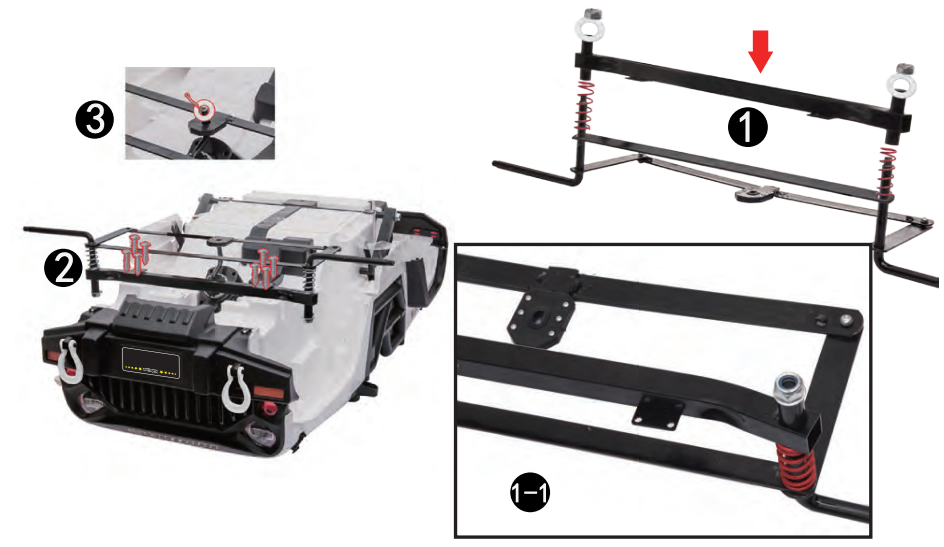
Connect the direction lever with a washer and cotter pin.
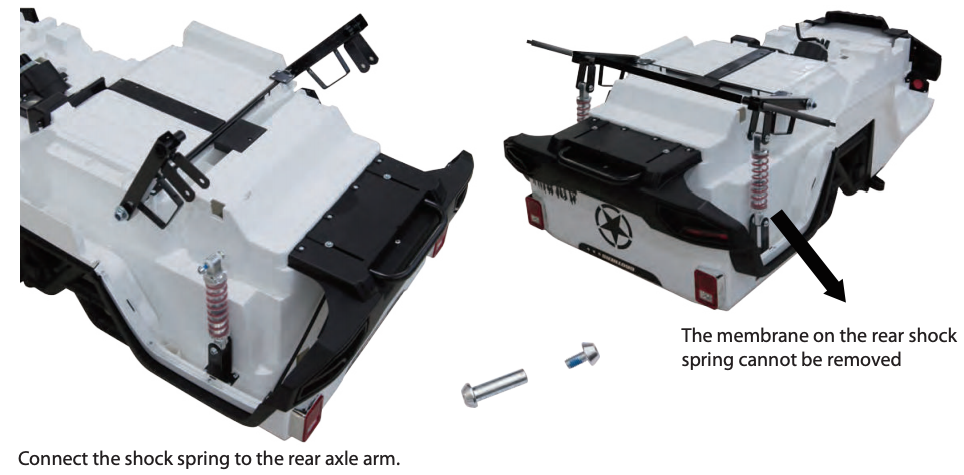
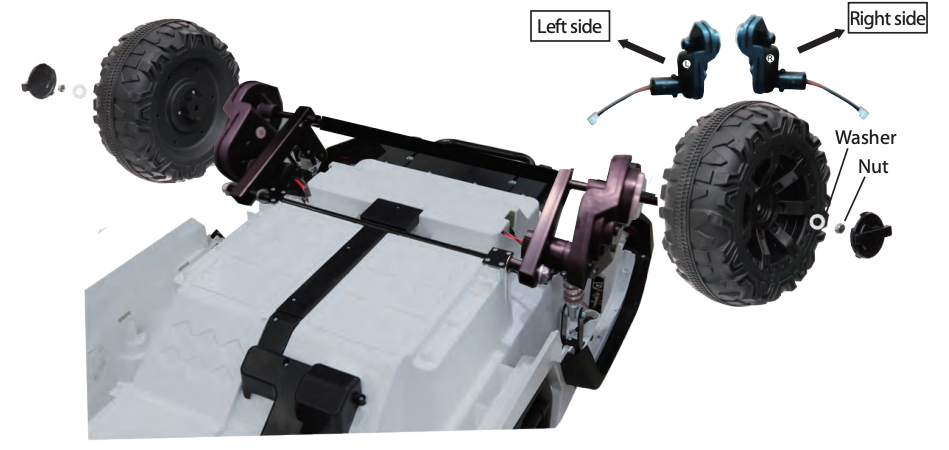
Assemble the motor, rear wheel, nut to the rear axle and secure with provided nut. Then cover it with the wheel cover. Make sure the motors are asseble on the correct side.

Install the brackets and fender to the car body and fix it with screws. Make sure to assemble the parts on the correct side.
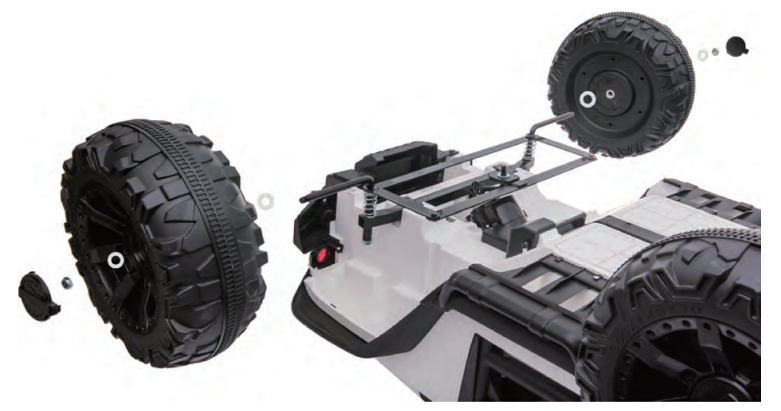
Assemble the washer, front wheel, follow by another washer to the front axle and secure with provided nut. Then cover it with the wheel cover.
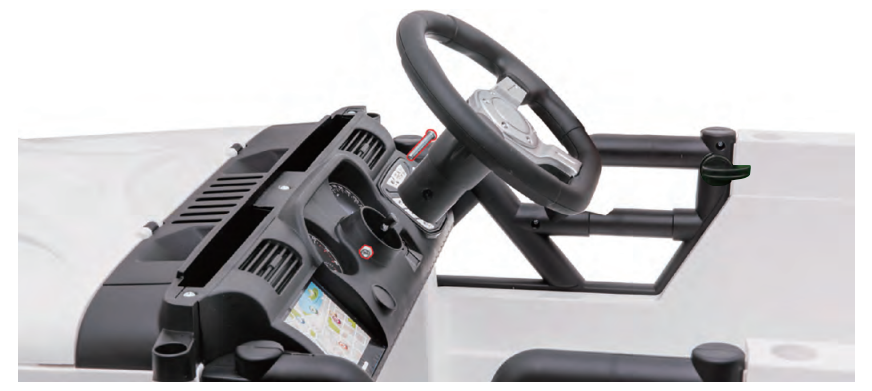
Remove the screw and nut from the steering wheel.
Slide the steering wheel to the car body and align the screw hole. Then secure it with the previously removed screw and nut.
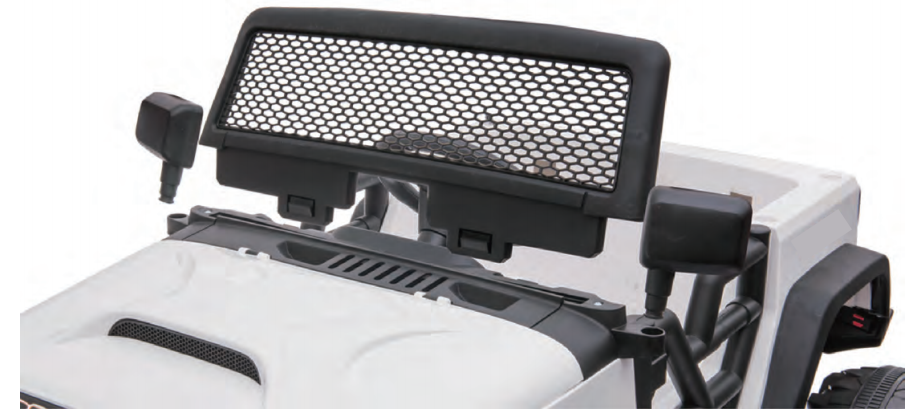
Insert the windshield and rear view mirrors on the vehicle body.

Insert the light frame on the car body. Then connect the electric terminals of that to the car and to the light. Insert the light holder to the light frame.
Note: after the wire terminal is inserted on the rear tailstock, insert the wire terminal into the hole of the rear tailstock, so that it will be installed the rear tailstock better
【As shown on the picture, press the two buckles of the rear bumper by hand for better installing】
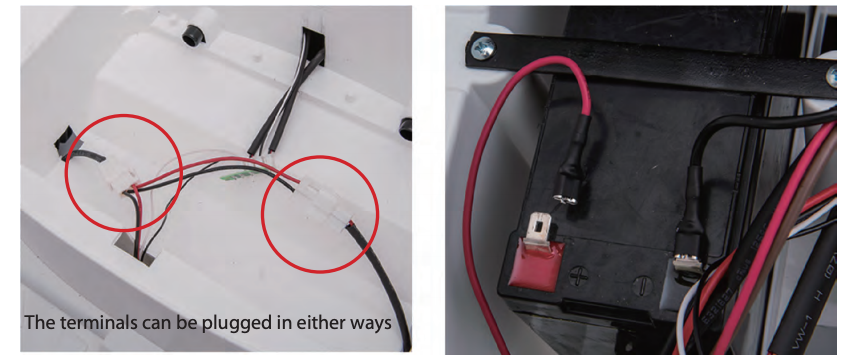
Connect the motor wiring under the seat.
Open the front engine hood and connect the battery wiring.
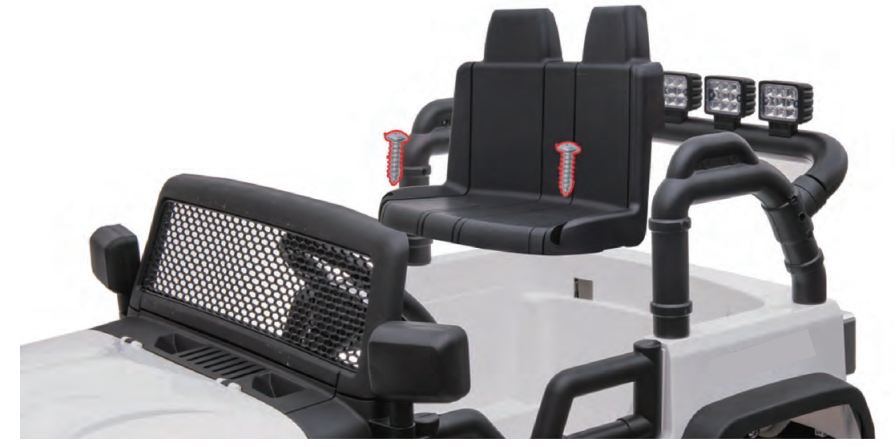
Assemble the seat on the car body and secure with 2 M4 x 16 screws.
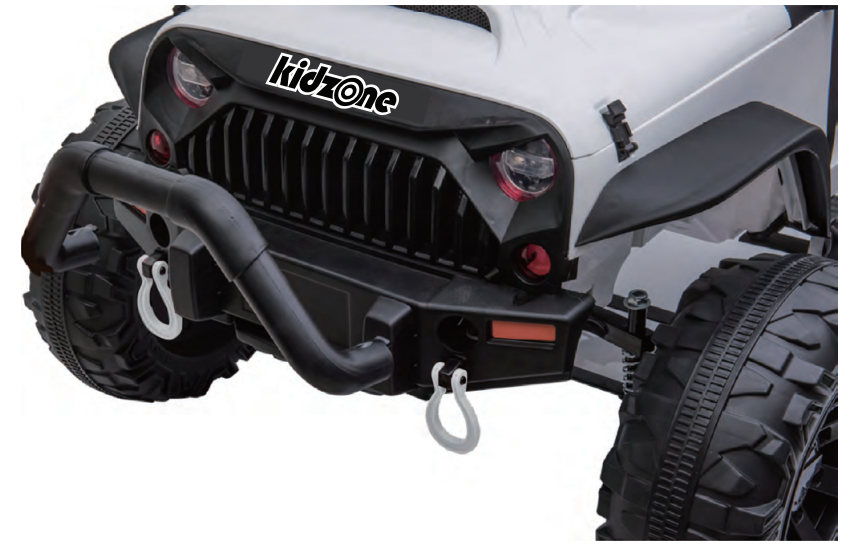
Insert the front bumper to the front of the car.
User Instruction
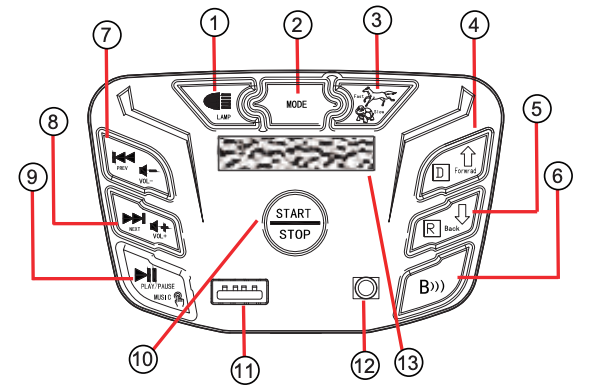
Control the vehicle
- Light ButtonTurn the light On and Off.
- Multifunction ButtonPress the multifunction button to cycle through different modes: Bluetooth (Kidzone Ride-On) / Radio / USB.
- Speed ButtonChoose between high and low speed.
- Forward ButtonPress the button to enable the vehicle to move forward.
- Reverse SwitchPress the switch to enable the vehicle to move reverse.
 Do not change the speed or direction until the vehicle comes to a complete stop.
 - Bluetooth ButtonPress the button to enable the Bluetooth mode.
- Previous track / Decrease Volume ButtonPress the button once to play the previous track. Press and hold to decrease volume.
- Next track / Increase Volume ButtonPress the button once to play the next track. Press and hold to increase volume.
- Play / Pause Button
- Start / Stop ButtonPress to turn on or off the vehicle.
- USB connectorInsert USB to play the music.
- AUX connectorAuxiliary port.
- Power display
User Instruction (Remote Control)
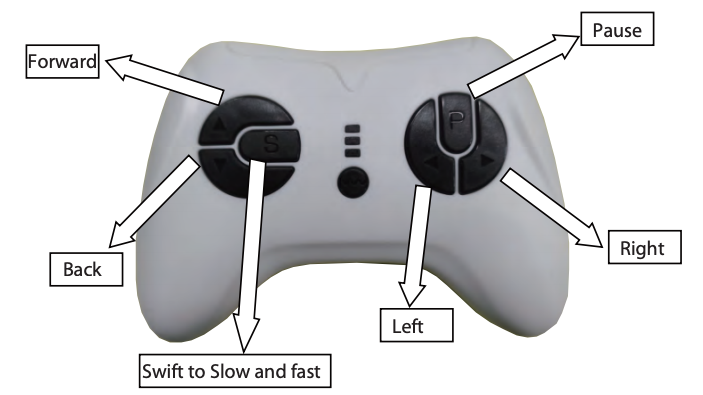
Using the remote control
The remote control should only be used by adult. Remote control will over ride all control input from the vehicle
To pair the remote control to the vehicle,
- Turn on the power of the vehicle.
- Press and hold the forward and backward button for 3 seconds on the remote control until the indicator lights up.
![]() WARNING!
WARNING!
The battery should only be replaced by an adult.
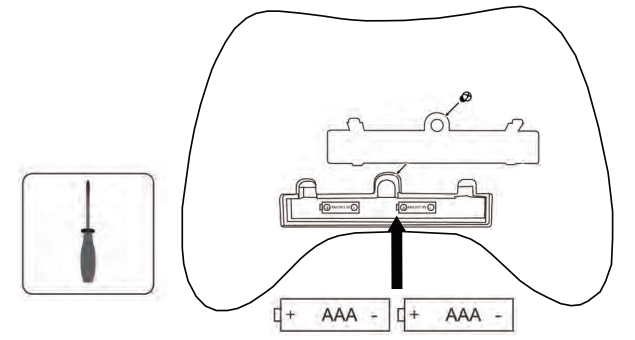
Replacing the battery
- Remove the cover on the back side with a screwdriver.
- Replace the old battery with two new AAA 1.5V batteries in correct polarity.
- Put the cover back in place and secure with the screw.
User Instruction (Charging)
![]() WARNING!
WARNING!
The battery should only be charged by an adult.
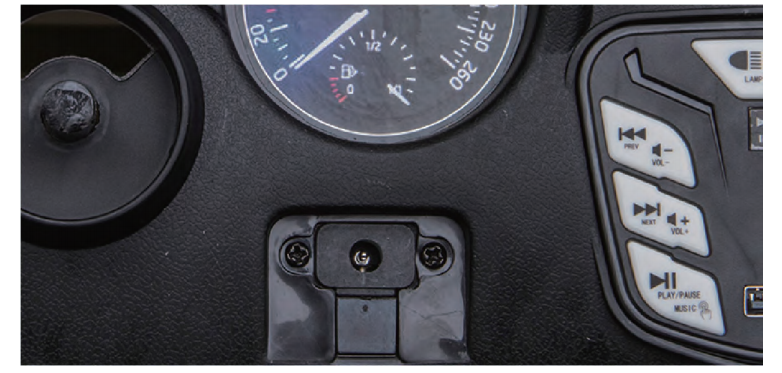
Charging the battery
- Insert the charging cable to the charging port located below the vehicle seat.
- Insert the charger plug into a wall outlet.
- The vehicle must be OFF when charging.
- Recharge the battery if the vehicle operates slowly.
- The vehicle cannot be operated when charging.
NOTE:Damage to the battery may occur if it is completely drained.Do not charge the battery for more than 12 hours.
Care and Maintenance
- Check the product regularly and make sure there is no missing or loose parts. Re-tighten any loose parts if necessary.
- Make sure there is no cracked or broken plastic parts.
- When not using store the product away from heat source, cover it with a tarp and away from wet weather.
- Turn off the product and disconnect the battery if the product is not use for a long period of time.
- Clean the vehicle with a cloth. Use a non-wax furniture polish to restore shine to plastic parts. Do not use abrasive cleaner.
- Do not wash the product with a hose or immerse any parts in water or other liquid.
- Occasionally use lightweight oil to lubricate moving parts
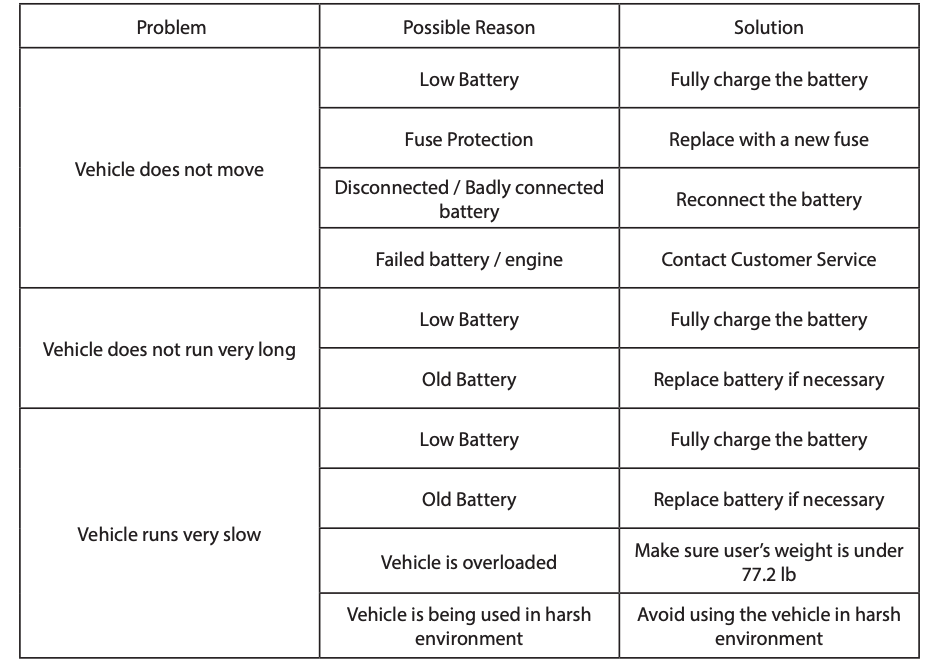
Troubleshooting

[xyz-ips snippet=”download-snippet”]