Quick Start GuideNDI® Converter12G-SDI/NDI Bi-directional Converter+2020 REV.1NDI® is a registered trademark of NewTek, Inc
Before you use this product, we recommend that you read the instruction manual of this product carefully. To ensure your personal safety and to protect your equipment from physical or electrical damage, please follow the instructions in this manual or use the product under the guidance of a professional. Improper electrical connections or physical installations can cause permanent damage to the equipment and even threaten personal safety.
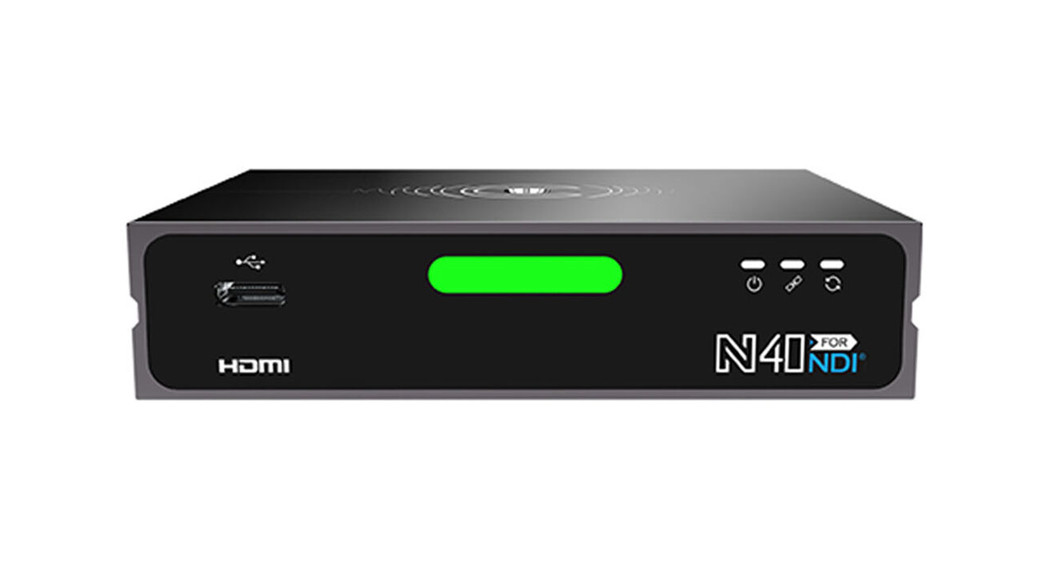
This guide is intended to guide you to use this NDI® Converter device.
Packing list
| Name | Unit |
Quantity |
| NDI® Converter | PCS | 1 |
| TYPE – C power cable | PCS | 1 |
| TYPE -C to TYPE -A cable | PCS | 1 |
| Certificate/ Warranty card | PCS | 1 |
| Power adapter | PCS | 1 |
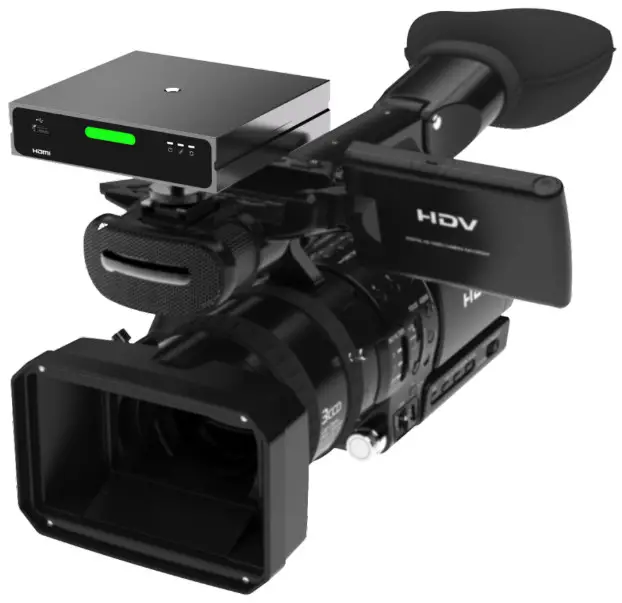
| Hot shoe | PCS | 1 |
| Quick start guide | PGS | 1 |
 Note: The items in the packing list st may be different due To product upgrades.
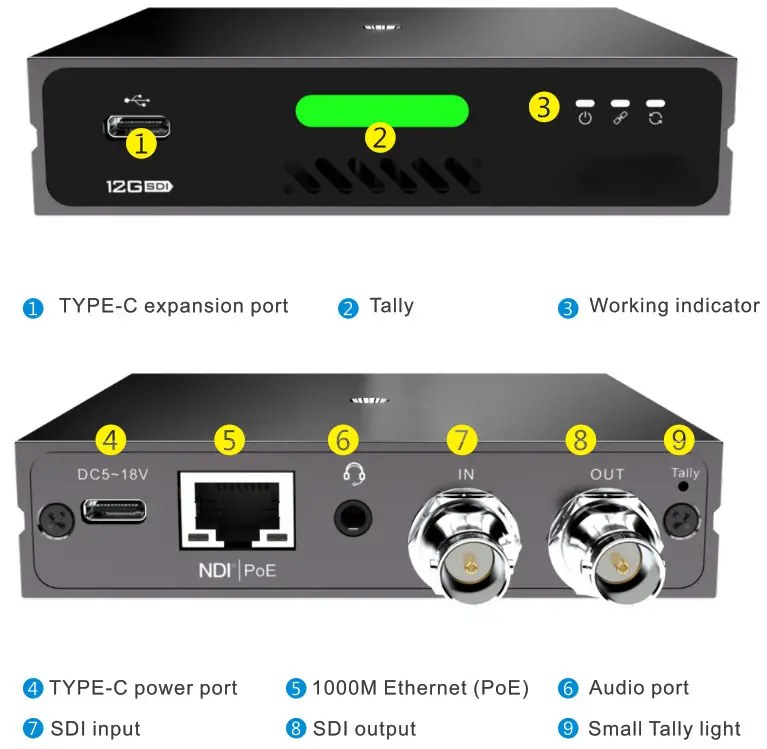
Device Interface Description

Device Installation and Connections
1. Installation
Connect video signalConnect the SDI signal from a source (such as a camera) to the SDI input port of the device through a cable.The SDI output is connected to the display device via a SDI cable.
Note: The output interface can be loop for encoding or output for decoding but cannot be used at the same time.
Connect networkConnect the network cable to the Ethernet port of the device. The other end of the network cable is connected to the switch. You can also connect directly to the network port of the computer.
Connect to the switch od directly to the network port of the computer.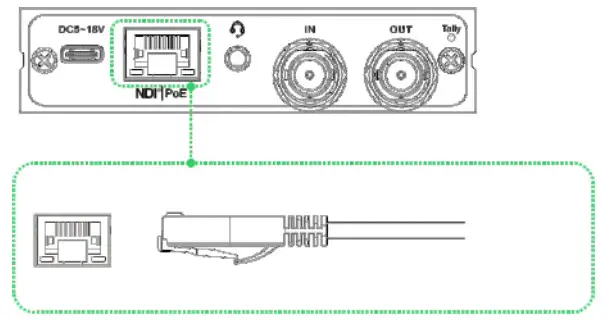 Connect audioUsing a 3.5mm interface headset with a microphone to connect to the device for voice intercom.
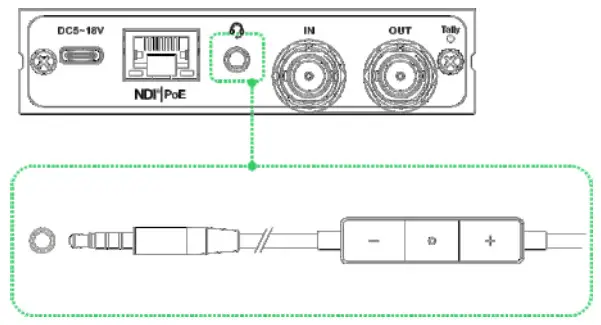
Connect power supplyAfter connecting with the power adapter(DC 5v), the power light will be on and the device starts working.It is packed with one USB charging cable, which can power the device by a DC5-18V power supply. 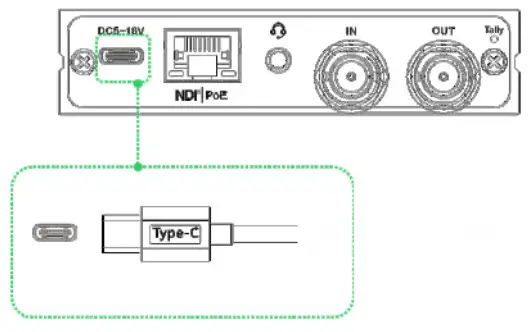
Note: When the network switch provides PoE, there is no need to connect to the power supply.
2. Cheak LED LightAfter connected with the power adapter, the device starts to boot. The power light is always on till the device working. II Iasts about 30-40s.
LED Indicator
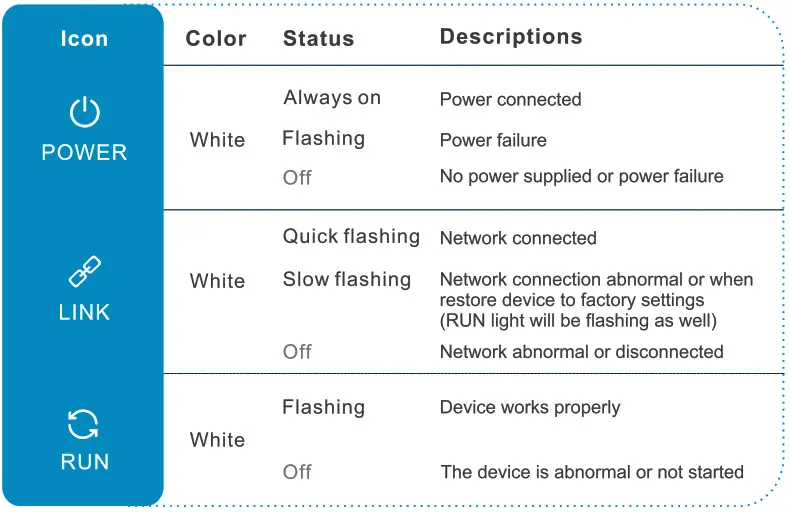
Note:If the indicator light is abnormal, please check the corresponding power supply/network/equipment hardware, etc.
3) Log in to the device management interface
Device default IP addressThe default IP of the device is 192.168.1.168 and the subnet mask is 255.255.255.0.
This IP address is the Failsafe address.Normally you don’t need to modify this IP address.
Login the WEB PageFirst set your PC’s IP address to 192.168.1.0/24 subnet, and then log in using the default IP address.You can access http://192.168.1.168, to login the web page.![]() Note: For the first login or after restoring the factory settings, you need to agree to the popping up “End User License Agreement”. Otherwise, the device cannot work normally.
Note: For the first login or after restoring the factory settings, you need to agree to the popping up “End User License Agreement”. Otherwise, the device cannot work normally.
IP address configurationAfter login, you can configure the IP address according to the network. It can be manually set or DHCP dynamic (Default set is DHCP dynamic).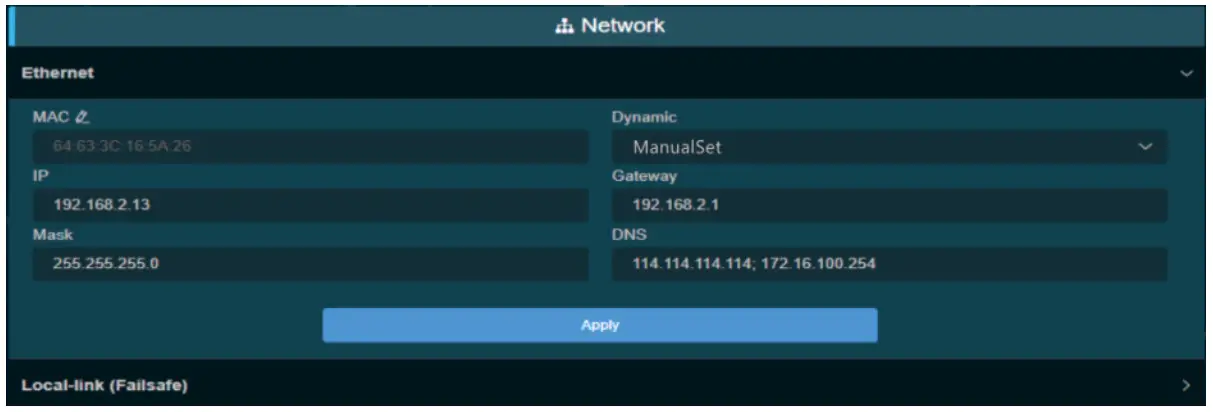
4. NDI Encoding
It is a Full NDI encoding transmission device, up to 126-SDI input. When video resolution is4Kp60, the bitrate can be up to 250Mbps. Therefore, the device and the receiving port should be connected to a gigabit network.
Status Column

Here it will display the resolution, frame rate, bitrate, and audio format parameters of the video source.
Coding quality settingsThe encoding resolution is the resolution that is output from the video source, which cannot be configured for scaled encoding. Encoding bitrate can be appropriately lowered or increased by adjusting encoding quality. The default encoding quality is 100%.
Encoder channel settingsWhen there are multi NDI sources in the same network, channel names need to be modified to identify different devices because the default channel names are the same.
Note.There is no need to save the parameters after modified since the modification will take effect immediately if click other locations of the page.
Advanced settings In advanced settings, you can set the connection mode of NDI stream, which can be unicast or multicast. Here you can also set the PTZ control function.
5. NDI Connection
Compatible Softwares: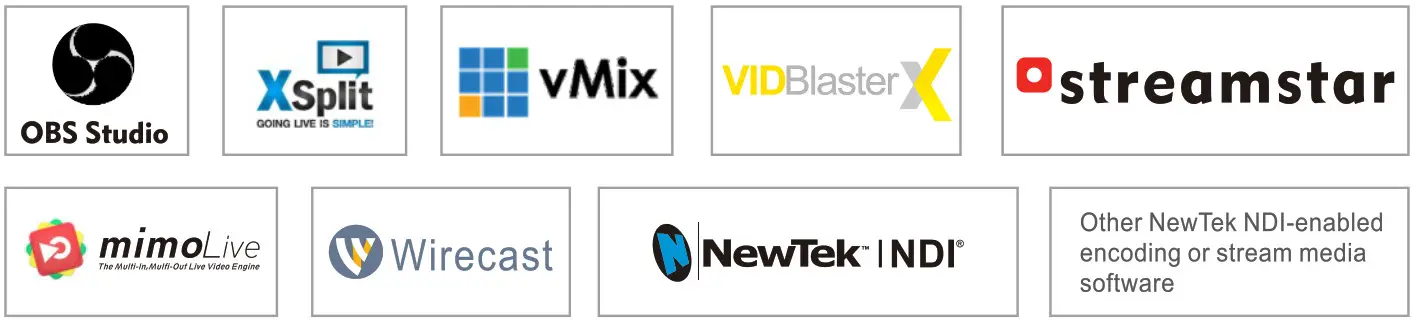
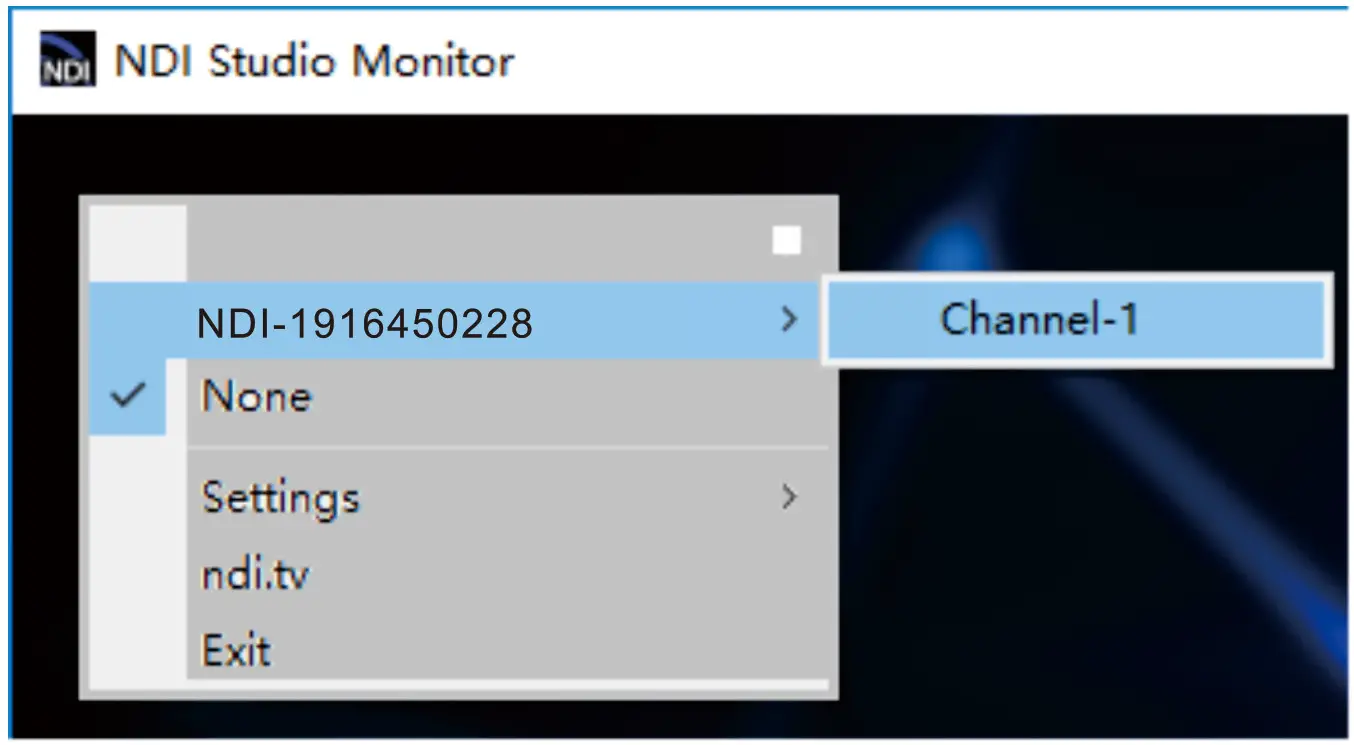
It is compatible with NewTek NDI®. NDI stream service is enabled by default. When the device is in the same subnet with NewTek Studio Monitorsoftware or others like OBS, vMix, etc. that supports NDI protocol, the device can be automatically discovered. Select the corresponding device and channel, then you can play the NDI video stream.
6. NDI Decoding
Discover NDI sources in the networkNDI sources can be detected automatically and will be listed at the same subnet and you can renew the NDI sources by click ![]()
Add target NDI source
Click ![]() to add the source to the decoding presupposition
to add the source to the decoding presupposition Switch output NDI source
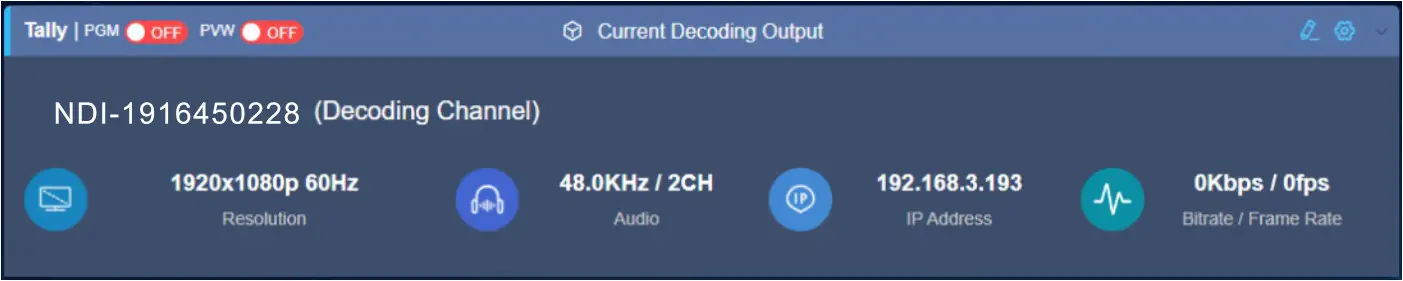
You can add up to 9 NDI sources In the decoding preset and click the corresponding source to decode. Decoding output can be quickly switched by clicking different NDI sources.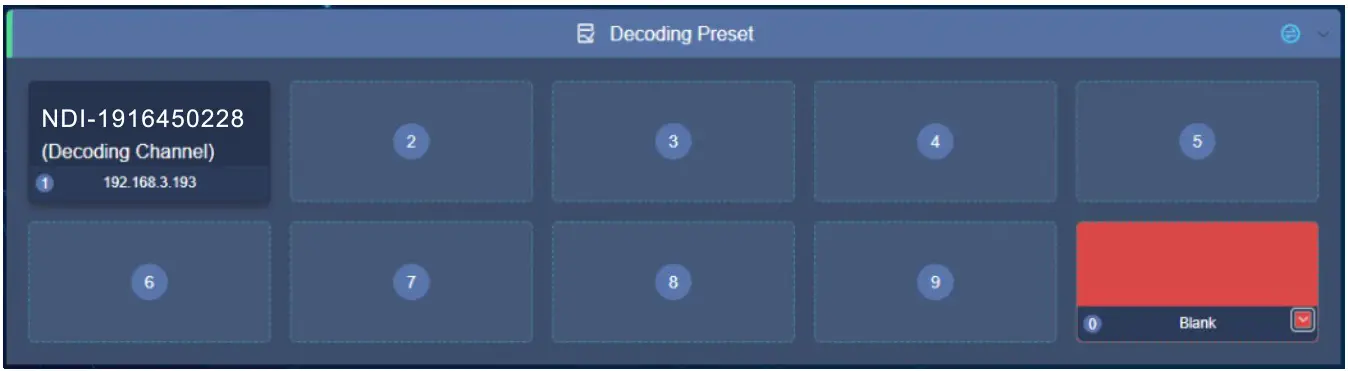 Decoding Parameter SettingsSome information such as resolution, audio parameters, IP address and bit rate of the decoding source will be displayed in “Current Decoding” zone. Please enter into Web page and set the decoding resolution & framerate by clicking
 ![]()
Note:This NDI Converter cannot conduct encoding and decoding at the same time, encoding will stop if you enable the decoding function.
Restore Factory Settings
Restore Factory SettingsIf the parameters are changed that lead the converter couldn’t work (The typical situation is that the network address was changed, so it couldn’t visit the device by network), users could restore factory setting to default value.
Two methods for restoring factory settings:
- Click “System Settings>Restore factory settings” on the web console.
- Press “Reset” button at the bottom of the deviceThere is a reset button at the bottom of the device, hold the button for more than 5 seconds, the device will restore to factory settings. Restoring factory settings will lead to the restarting of the device. The restarting process takes about 30s.
Note: These parameters will be restored to default value after restoring factory setting:
- Login Username and password will be “admin”;
- IP address will be restored as 192.168.1.168, subnet mask will be 255.255.255.0;
- All encoding and decoding parameters of video and audio will be restored to the default value;
- Media transmission parameters will be restored as default values.
Firmware Upgrading
Firmware upgradingThis device supports online firmware upgrading to upgrade software. Click “System Settings>” Firmware Upgrade’ on the Web management interface for upgrading. Click *Select a file to upload the firmware file to upgrade the device.
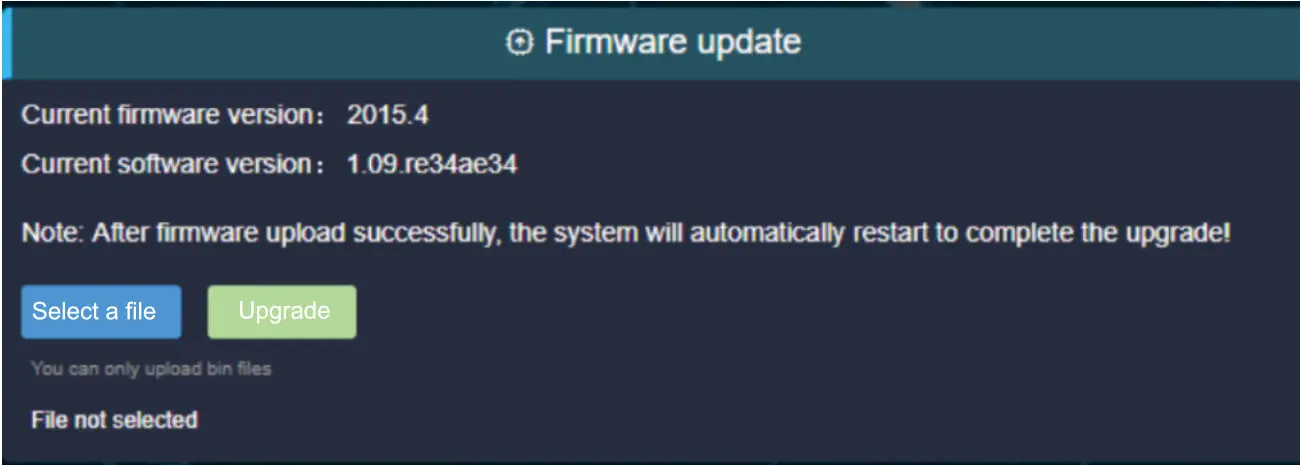
Note:After uploading the firmware file successfully, the device will automatically restart, this process will take about 30s-60s (the time will be different according to upgrade content), and please be patient.After the upgrade is complete, please click![]() to check whether the latest version information is as expected to confirm if the upgrade is succeeded.
to check whether the latest version information is as expected to confirm if the upgrade is succeeded.
Quick Reset and Reboot
Quick Reset and Reboot“Quick Reset” function is to reset encoding and decoding service. normally it’s used for changing parameters to effect immediately. The quick Reset process lasts around 3s.
The “Reboot” function is used for encoder reboot. Device rebooting last around the 20s.
Note:Select “Quick Reset”, current encoding and decoding service will be suspended for a while; Select “Reboot”, the encoder will ‘warm’ reboot. Under some circumstances, a reboot might be realized with the help of a cold restart, that is by turning on/off the power.
[xyz-ips snippet=”download-snippet”]