![]()
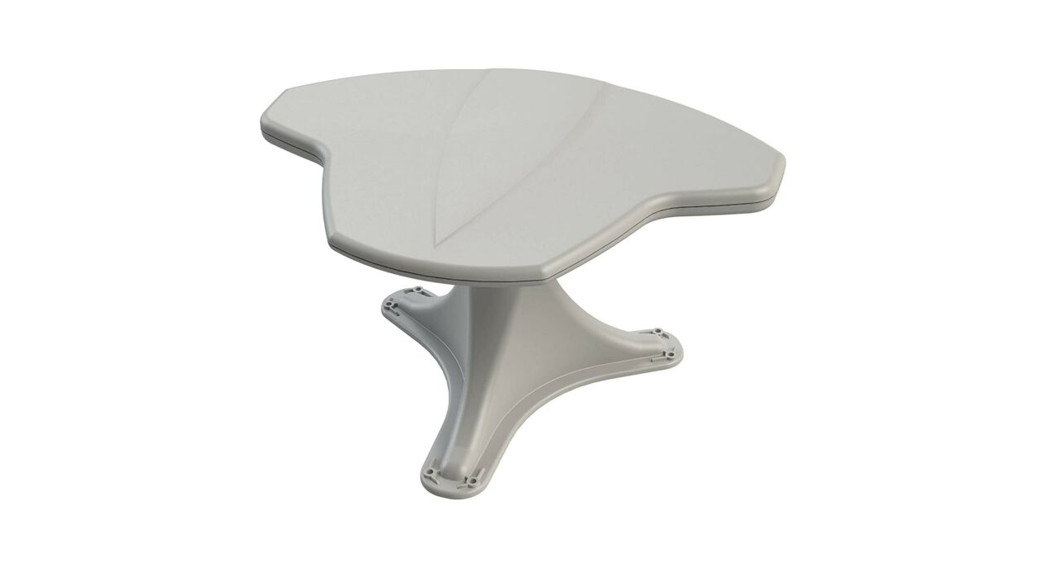
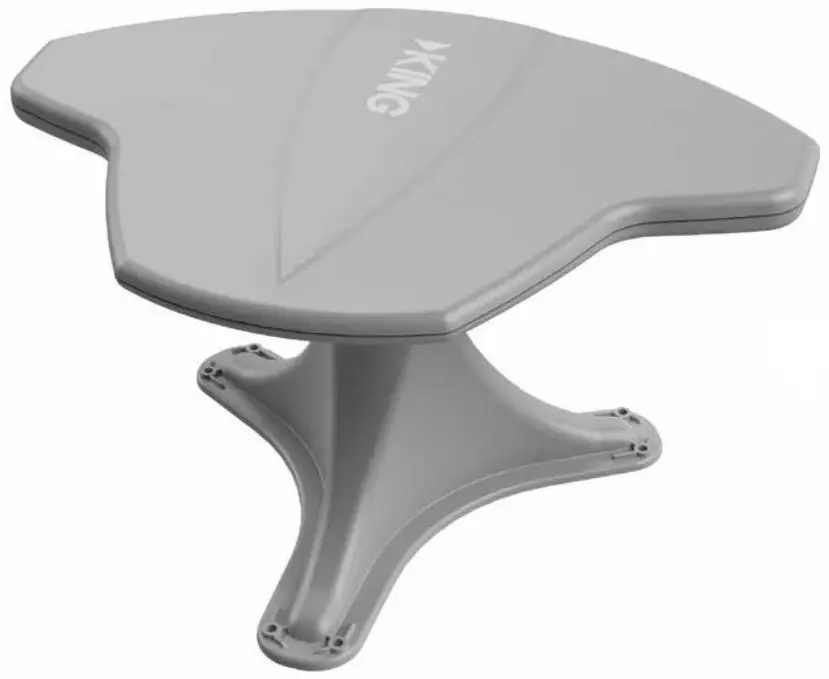
Low Profile Digital HDTV Over-the-Air AntennaOwner’s Manual
Roof Thickness: 1″ to 4-1/2″Roof Thickness: 4-1/2″ to 8″ (when installed with KING extension #21850)0A8400 • White0A8401 • Black
Note: Please read thru the installation instructions before beginning.
| SPECIFICATIONS | |||
| Dimensions: | 8.7″ H x 16″ W x 12.5″ L | Frequency Bands:
|
VHF (54-216 MHz) UHF (470-698 MHz) FM (87.9-107.9 MHz) |
| Weight: | 2.3 lbs. | ||
| Power Requirement: | 12 VDC / 100 mA(supplied by KING Wall Mount Power Inserter) | Enclosure/Mount: | ASA-Automotive grade |
Thank you for choosing a KING Antenna!
OPERATION
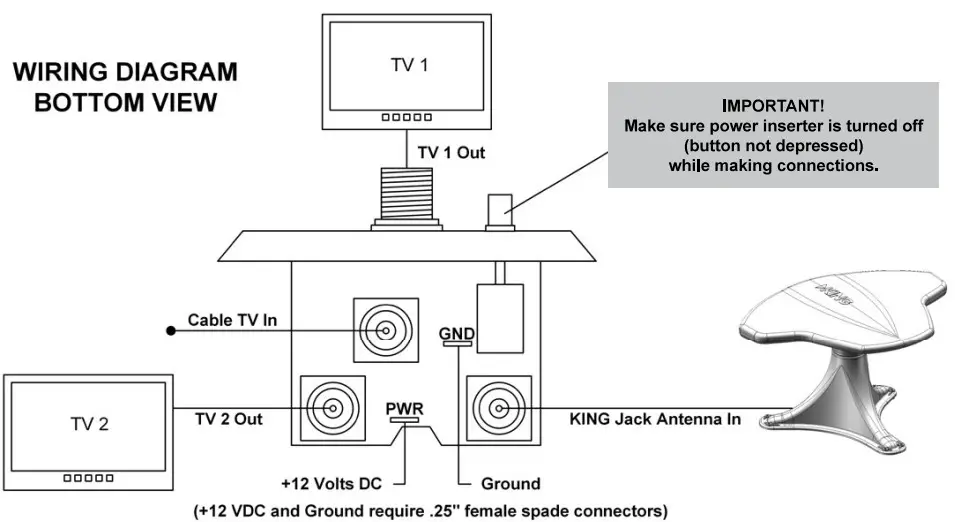
Power button depressedThe power light turns green indicating +12 volts to the KING Jack antenna, and the over-the-air signal from the KING Jack antenna will be fed to the two TV outputs.
Power button is not depressedPower light is off, no power to the KING Jack antenna, and the cable TV signal will be fed to the two TV outputs if wired for cable TV input.
AIMING THE ANTENNA
- Turn on the TV and power the inserter (see above).NOTE: In steps 2-6, keep track of the knob position where you receive the most channels.
- Press the button and rotate the antenna all of the way in one direction until it hits the stop.
- Perform a channel scan per the digital TV or digital TV converter box manufacturer’s instructions. Note the number of channels received.
- Press the button and rotate the antenna 90 degrees. Scan again. Note the number of channels received.
- Press the button and rotate the antenna 90 degrees. Scan again. Note the number of channels received.
- Press the button and rotate the antenna 90 degrees. Scan again. Note the number of channels received.
- Reposition your KING Jack antenna to where you received the most channels.Choose one of those channels on your TV.Now monitor the signal strength screen and fine-tune KING Jack until the highest signal strength is achieved. Perform one final scan.
- Watch TV!

CONTENTS
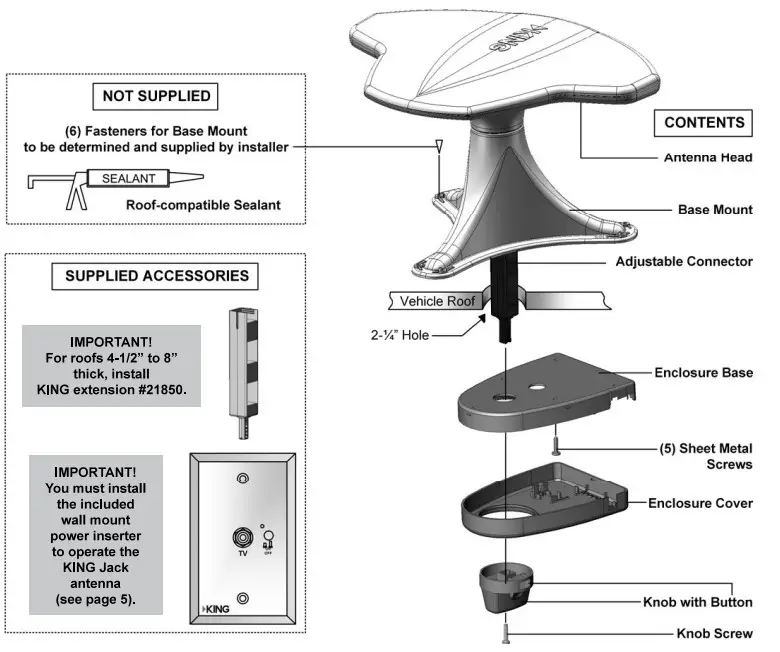
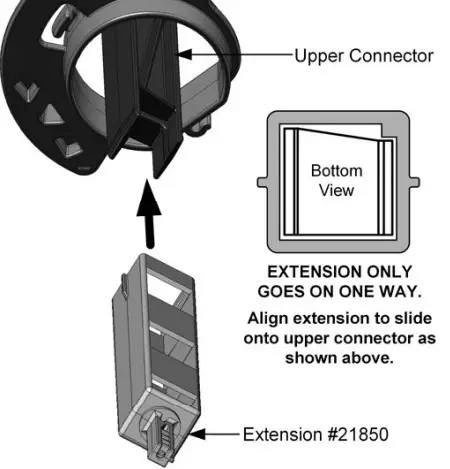
EXTENSION INSTALLATION
ROOFS 4 1/2″ to 8″ THICK ONLY! Roofs thinner than 4 1/2″ go to the next page.If your roof is 4-1/2″ to 8″ thick you will need to install KING extension #21850.If using the extension, install it now, BEFORE INSTALLING BASE MOUNT ON ROOF.
- Remove the existing adjustable connector from the upper connector located in the base mount.
- The extension only fits onto the upper connector one way. Line up as shown at right and engage the extension onto the upper connector.
- Leave extension sticking out of the base mount more than the thickness of the roof.
EXTERIOR BASE MOUNT INSTALLATION
IMPORTANT! The installer is responsible for determining and supplying the most appropriate fasteners to secure the base mount to the roof and weatherproofing all holes with roof-compatible sealant.
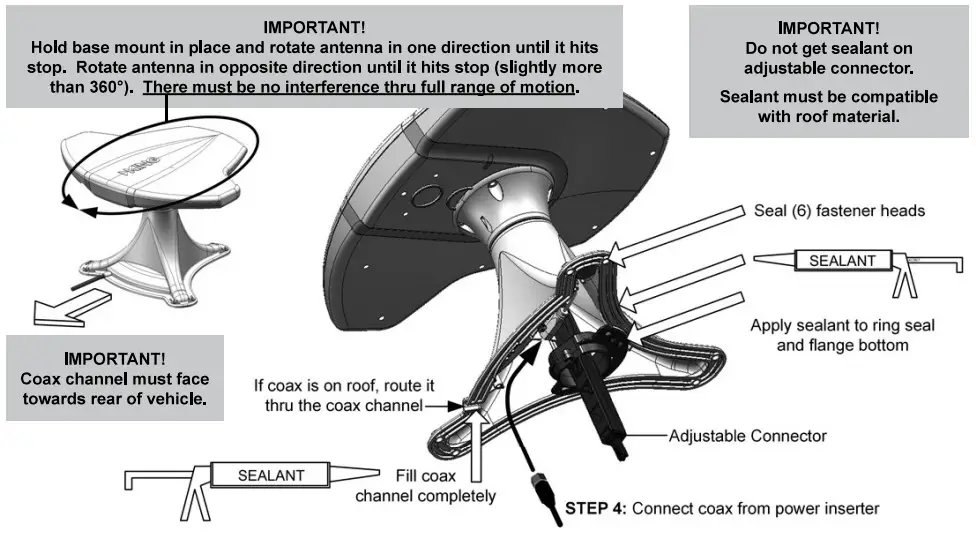
- Select an area on the roof for the base mount keeping in mind the following IMPORTANT POINTS:a) The antenna should be mounted with the coax channel towards the rear of the vehicle.b) The center of the roof hole must be at least 20″ away from any object taller than 8″ to provide clearance for the antenna head to rotate freely. The center of the roof hole must also be at least 8″ from the edge of the roof.c) For roof thicknesses 1 1/4″ to 6″, the roof pitch can not be more than 3 degrees.d) There must be room on the interior ceiling of the vehicle to attach the rotation knob and enclosure to the adjustable connector. The interior enclosure can be mounted in any direction.
- Drill a 2 1/4″ hole perpendicular to the roof surface all the way thru the vehicle roof where the adjustable connector will go.
- Carefully pull out the adjustable connector so it will extend beyond the thickness of the roof when the base mount is installed. It must extend thru the roof to allow installation of interior components. The exact length will be adjusted when interior components are installed.
- Connect the coax from the power inserter’s antenna input to the coax cable in the base mount. (The coax may come up thru the roof or enter thru the coax channel.)IMPORTANT! In Step 5, DO NOT get sealant on the adjustable connector.
- Apply sealant to ring seal and base mount, and fill the coax channel with sealant. Place the base mount in position with the adjustable connector going thru the roof hole and into the interior of the vehicle. Make sure adjustable connector ia centered in hole – nd the coax channel faces towards the rear of the vehicle
- Hold the base mount in position and rotate the antenna by hand. It must rotate freely in both directions until it hits the stop, without interference from sealant, coax, roof insulation, etc. Fasten the base mount to the roof. Make sure the base mount is sealed all the way around. Make sure the coax channel and fastener heads are sealed as well.
INTERIOR ENCLOSURE INSTALLATION
IMPORTANT!Before starting step 1, turn the adjustable connector in one direction until the antenna hits the stop. Now turn the connector all the way in the other direction until the antenna hits the stop again (slightly more than 360°). THE ANTENNA MUST ROTATE FREELY THRU THE ENTIRE DISTANCE.
- Press the knob button and remove the knob from the enclosure base.
- Place the enclosure base around the adjustable connector and place the enclosure base against the ceiling. (The enclosure base will seat around the centering ring on the adjustable connector.) Rotate the enclosure base to the desired position and fasten it to the ceiling with the five included screws.
- Press the knob button and push the knob onto the end of the adjustable connector. THE KNOB ONLY FITS ON THE END OF THE ADJUSTABLE CONNECTOR—IN ONE DIRECTION and fits into the raised ring on the enclosure.Fasten the knob to the connector with the included screw.
- Carefully align the enclosure cover and snap it into place.
POWER INSERTER INSTALLATION
The Wall Mount Power Inserter:
- Can be mounted in most standard electrical boxes.
- Requires a +12 Volt DC power source. (Inadequate voltage may cause the green LED to not illuminate and the unit to not function properly.
- Requires .25″ female spade connectors for power and ground connections.
- Has an internal fuse rated @ 400 mA max? If tripped. the fuse will reset when the circuit cools.
- Is not an amplifier. No devices other than those shown below should be connected.
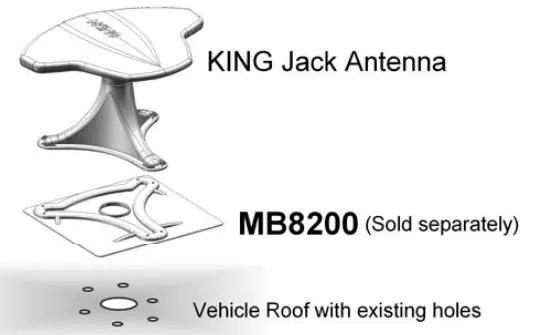
MB8200 Mounting Plate
The MB8200 provides a convenient way to cover your previous crank-up antenna’s mounting holes for a watertight seal.Please see your dealer or contact KING at (952) 922-6889 or visit our website at kingconnect.com,.
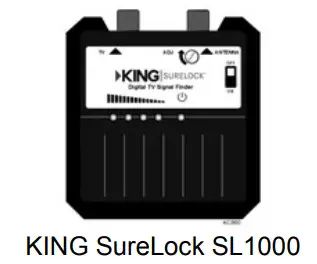
KING SureLockni Digital TV Signal Meter (Sold separately)The optional KING SureLock Digital TV Signal Meter allows you to pinpoint the location of local DTV towers and eliminate the need for multiple channel scans. It also allows you to more accurately locate distant towers that might be missed with the 4 quadrant scan. Consult your local dealer or visit kingconnect.com for additional information.
LIMITED WARRANTY
IMPORTANT! Do not power-wash any part of the KING Jack antenna head or base mount.
Every new KING Jack HDTV Antenna System is thoroughly inspected and tested before leaving the factory, and is covered by the following limited warranty from the date of original purchase:
- Four-year parts warranty: The customer is not responsible for the cost of replacement parts if the original part is determined to be defective under the terms of the warranty. The customer is responsible for the cost of replacement parts after four years.
- One-year labor warranty: The customer is not responsible for labor costs to repair the unit if the unit falls under the terms of the Any warranty labor outside of that performed at the factory is not covered unless the product has been installed by an authorized dealer/installer or OEM manufacturer. The customer is responsible for all labor costs after one year.
Should any trouble develop during the warranty period, contact KING. You must contact KING before the warranty period expires. The customer must supply proof of purchase (such as a dated sales receipt) when requesting warranty service If the customer cannot supply proof of purchase, the warranty period shall start 30 days after the date of manufacture.Only KING and certified dealers are authorized to perform warranty evaluations and repairs. Depending upon the problem, KING may authorize the dealer to perform the necessary repairs, or may have the unit returned to KING for repairs.A certified dealer must not perform any repair without first contacting KING for a Service Order Number. KING will advise the dealer on how to proceed with any repairs.If it is determined that the unit needs to be returned to KING, the customer must return the COMPLETE product, freight prepaid, to KING, 11200 Hampshire Avenue South, Bloomington, MN 55438–2453.If inspection shows the trouble is caused by defective workmanship or material, KING will repair (or at its option, replace) without charge.When returning the product, KING will supply an RMA number (Return Merchandise Authorization). This number must be clearly written on the box. Failure to clearly write the RMA number on the box may result in delays in processing the claim. Along with the product, the customer should include in the box: his/her name, address, daytime phone number, proof of purchase, and description of the problem.This warranty does not cover installation and external wiring, or remanufactured units. This warranty is not transferable from the original owner.This warranty also does not apply where:
- The product has been abused, misused, improperly installed or improperly maintained.
- The product has been used with an accessory other than a KING accessory designed for the product.
- Repairs have been made or attempted by others that are not certified by KING to do such repairs.
- Repairs are required because of normal wear and tear.
- Alterations have been made to the product.
- The product or any associated component has been opened without authorization or disassembled to any degree.
- Damage has been caused by power washing.
- Circumstances beyond the control of KING cause the product to no longer operate correctly.
- The customer is not the original owner.
In no event shall KING be liable for any indirect, incidental, or consequential damages from the sale or use of the product. This disclaimer applies both during and after the term of this warranty.KING disclaims liability for any implied warranties, including implied warranties of “merchantability” and “fitness for a specific purpose,” after the term of this warranty.This warranty gives you specific legal rights, and you may also have other rights, which vary from state to state. Some states do not allow the exclusion or limitation of incidental or consequential damages, so the above limitation or exclusion may not apply to you. Some states do not allow limitations on how long an implied warranty lasts, so the above limitation may not apply to you.
Simply better, by design™.
report this ad
11200 Hampshire Avenue South, Bloomington, MN 55438PH 952.922.6889 || FAX 952.922.8424 || kingconnect.com© 2018 KING 22599 Rev B
References
[xyz-ips snippet=”download-snippet”]