![]() Quick Reference GuideCooking gestures are invisible ingredients. They turn inspiration into emotions and emotions into a masterpiece. It’s all about artisanality, that’s why we take it so seriously.Thanks for choosingIndexTwelixArtisan Pyro SCOven
Quick Reference GuideCooking gestures are invisible ingredients. They turn inspiration into emotions and emotions into a masterpiece. It’s all about artisanality, that’s why we take it so seriously.Thanks for choosingIndexTwelixArtisan Pyro SCOven![]() THANK YOU FOR BUYING A KITCHENAID PRODUCT In order to receive more complete assistance, please register your product on www.kitchenaid.eu/register
THANK YOU FOR BUYING A KITCHENAID PRODUCT In order to receive more complete assistance, please register your product on www.kitchenaid.eu/register![]() Before using the appliance carefully read the Safety Instruction.
Before using the appliance carefully read the Safety Instruction.
Oven Parts and Features
 |
1. Control panel2. Upper heating element/grill3. Cooling fan (not visible)4. Data plate (please do not remove)5. Lamp6. Circular heating element (not visible)7. Fan8. Rotisserie (if supplied)9. Lower heating element (not visible)10. Door11. Position of shelves (the level is shown on the front of the oven)12. Rear wall13. Meat probe connection14. Twelix disc15. Modular plug connection16. Cavity plug cap (when the Artisan Accessory is not in the oven, insert the cap to prevent splatters from entering the electrical outlet)17. Glass lid18. Perforated shelf19. Drip tray + a heating element20. Drip tray rack |
Control Panel
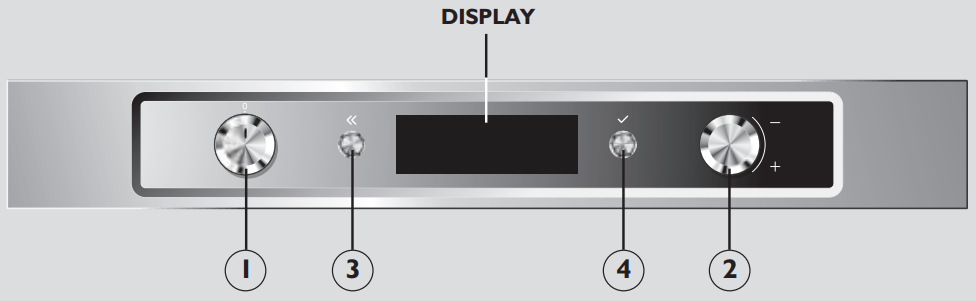 |
1. Function knob: to switch the oven on/off and select the various functions2. Browse knob: to navigate through the suggested menus on the display and change the pre-set values3. (⇐)Back button: to return to the previous screen4. (√)OK button: to confirm and activate selected |
Getting Started and Daily Oven Use
The first time you switch on your new oven, you will need to set the language and the time of day Turn the Function knob in any direction, then turn the Browse knob to scroll through the list of available languages Once you have found your language of choice, press the(√) button to confirm. Immediately after, “12:00” will flash on the display indicating that you should set the time of day. To do so, turn the Browse knob until the display shows the correct time of day, then press the (√) button to confirm.
DAILY OVEN USE
 Switching on the oven and selecting a cooking function from the Main MenuTurn the Function knob to switch on the oven and display theMain Menu functions:• General Settings• Traditional Functions• Special Functions• Professional Functions: Bakery, Pastry, Rotisserie• Artisan: Pure Steam, Custom Steam, Artisan FunctionsTo see the related submenus and select a cooking function, turn the Browse knob then press the (√) button to confirm your desired function. The display will show all of
- Configuring function detailsTo move among the different zones on the display, turn the Browse knob; this will place the cursor next to the values that can be modified. The cursor will move in the order shown in the figure. When the default values flash on the display, make your changes by turning the Browse knob, then press the button to confirm.For more details, please refer to the Instructions for Use Manual or www.kitchenaid.eu
 Switching on the oven and selecting a cooking function from the Main MenuTurn the Function knob to switch on the oven and display theMain Menu functions:• General Settings• Traditional Functions• Special Functions• Professional Functions: Bakery, Pastry, Rotisserie• Artisan: Pure Steam, Custom Steam, Artisan FunctionsTo see the related submenus and select a cooking function, turn the Browse knob then press the (√) button to confirm your desired function. The display will show all of
Cooking Functions
 report this ad
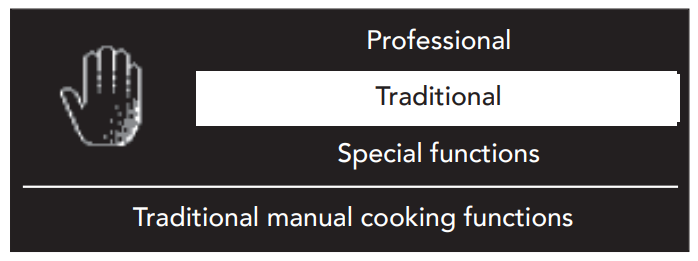
TRADITIONAL FUNCTIONS
- Conventional: All types of food
- Grill: Meat, steak, kebabs, sausages, vegetables, bread
- Turbo Grill: Large cuts of meat and poultry
- Twelve-grill: Meat, fish, vegetables.
- Forced Air: Different food items cooked simultaneously on several levels
- Convection Bake: Meat, filled cakes, stuffed vegetables.
SPECIAL FUNCTIONS
- Fast Preheating: Use this function to rapidly preheat the oven
- Defrost: All types of food
- Keep Warm: Any dish that has just been cooked
- Rising: Sweet or savory dough
- Slow Cooking: Meat, fish (Accessory: meat probe).
- Dehydration: Fruit, vegetables, mushrooms (Accessory: dehydration tray)
- Yogurt: Home-made yogurt
- Twelve-base: All types of food
- Eco Forced Air: Roasts and stuffed meat (Accessory: meat probe)Please refer to the Instructions for Use Manual or www.kitchenaid.eu for more information on the Traditional, Professional, and Artisan functions.
Accessories
The number of oven accessories may vary depending on the model purchased It is possible to purchase accessories separately from the Customer Service Center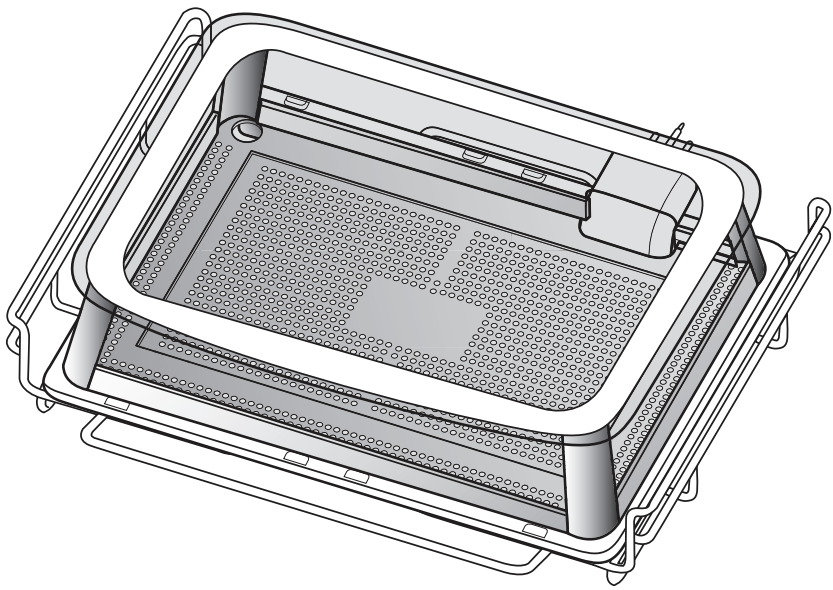
ARTISAN ACCESSORY
The Artisan Steam Accessory comprises: glass lid, perforated shelf, drip tray + heating element and the support, cap for the internal socketWe suggest that the accessory be assembled as outlined in the Instructions for Use Manual or at www.kitchenaid.eu Add water as per your recipe, then start the Artisan functions from the Main MenuThe Artisan Accessory can reach very high temperatures so we suggest using oven gloves any time you need to touch or move it, and not to add water during the steam cooking cycle. Please refer to the Instructions for Use Manual or www.kitchenaid.eu for more information on the Accessories and their functionsMaintenanceBefore cleaning your appliance, please ensure that it is cold and disconnected from the electricity grid. It is best to avoid the use of steam cleaning equipment, steel wool pads, abrasive cloths, and corrosive detergents that could damage the appliance.Automatic CleaningRemove all accessories – including shelf guides – from the oven before activating the function. For optimum cleaning results, remove large deposits with a damp sponge before starting the pyrolytic function. It is recommended to activate the pyrolytic function depending on the soiling present in the oven and the frequency of use of the oven.TroubleshootingIf you experience problems in operating your oven:
- First, check that there is an electrical current and that the oven is properly connected to the electricity grid;
- Switch off the oven then switch it back on to see if the problem is solved;
- If you see an “F” immediately followed by an error code on the display, contact your nearest Customer Service Center.
It will be necessary to provide the following information to the technician: the precise type and model of the oven, the assistance code (visible on the right-hand inside edge when the oven door is open), and the error code that appears on the display. This information will enable the technician to immediately identify the type of intervention required. If the oven needs to be repaired, we suggest you refer to an Authorised Technical Service Center.Please refer to our website www.kitchenaid.eu for complete instructions for use. In addition, you will find a lot more useful information about your products, such as inspiring recipes created and tested by our brand ambassadors or the nearest KitchenAid cookery school.Printed in Italy
![]()
References
[xyz-ips snippet=”download-snippet”]