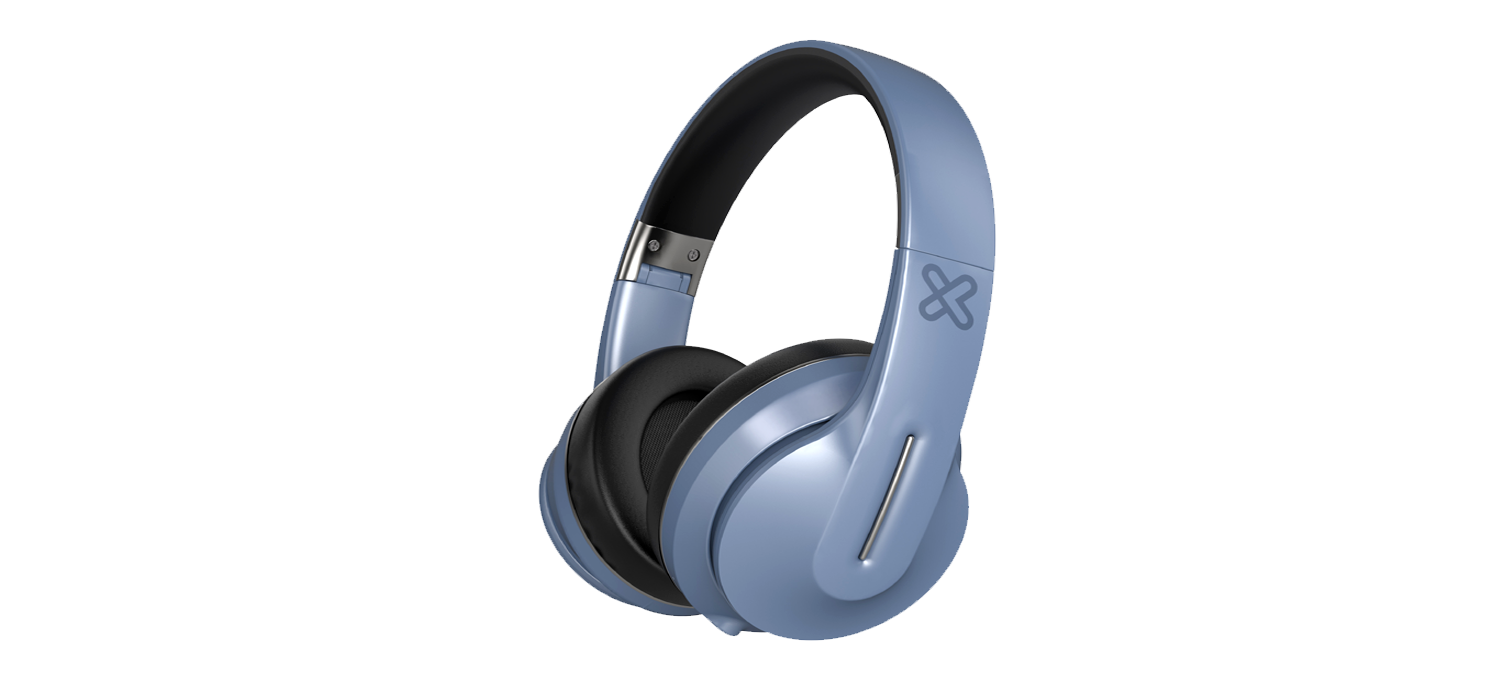
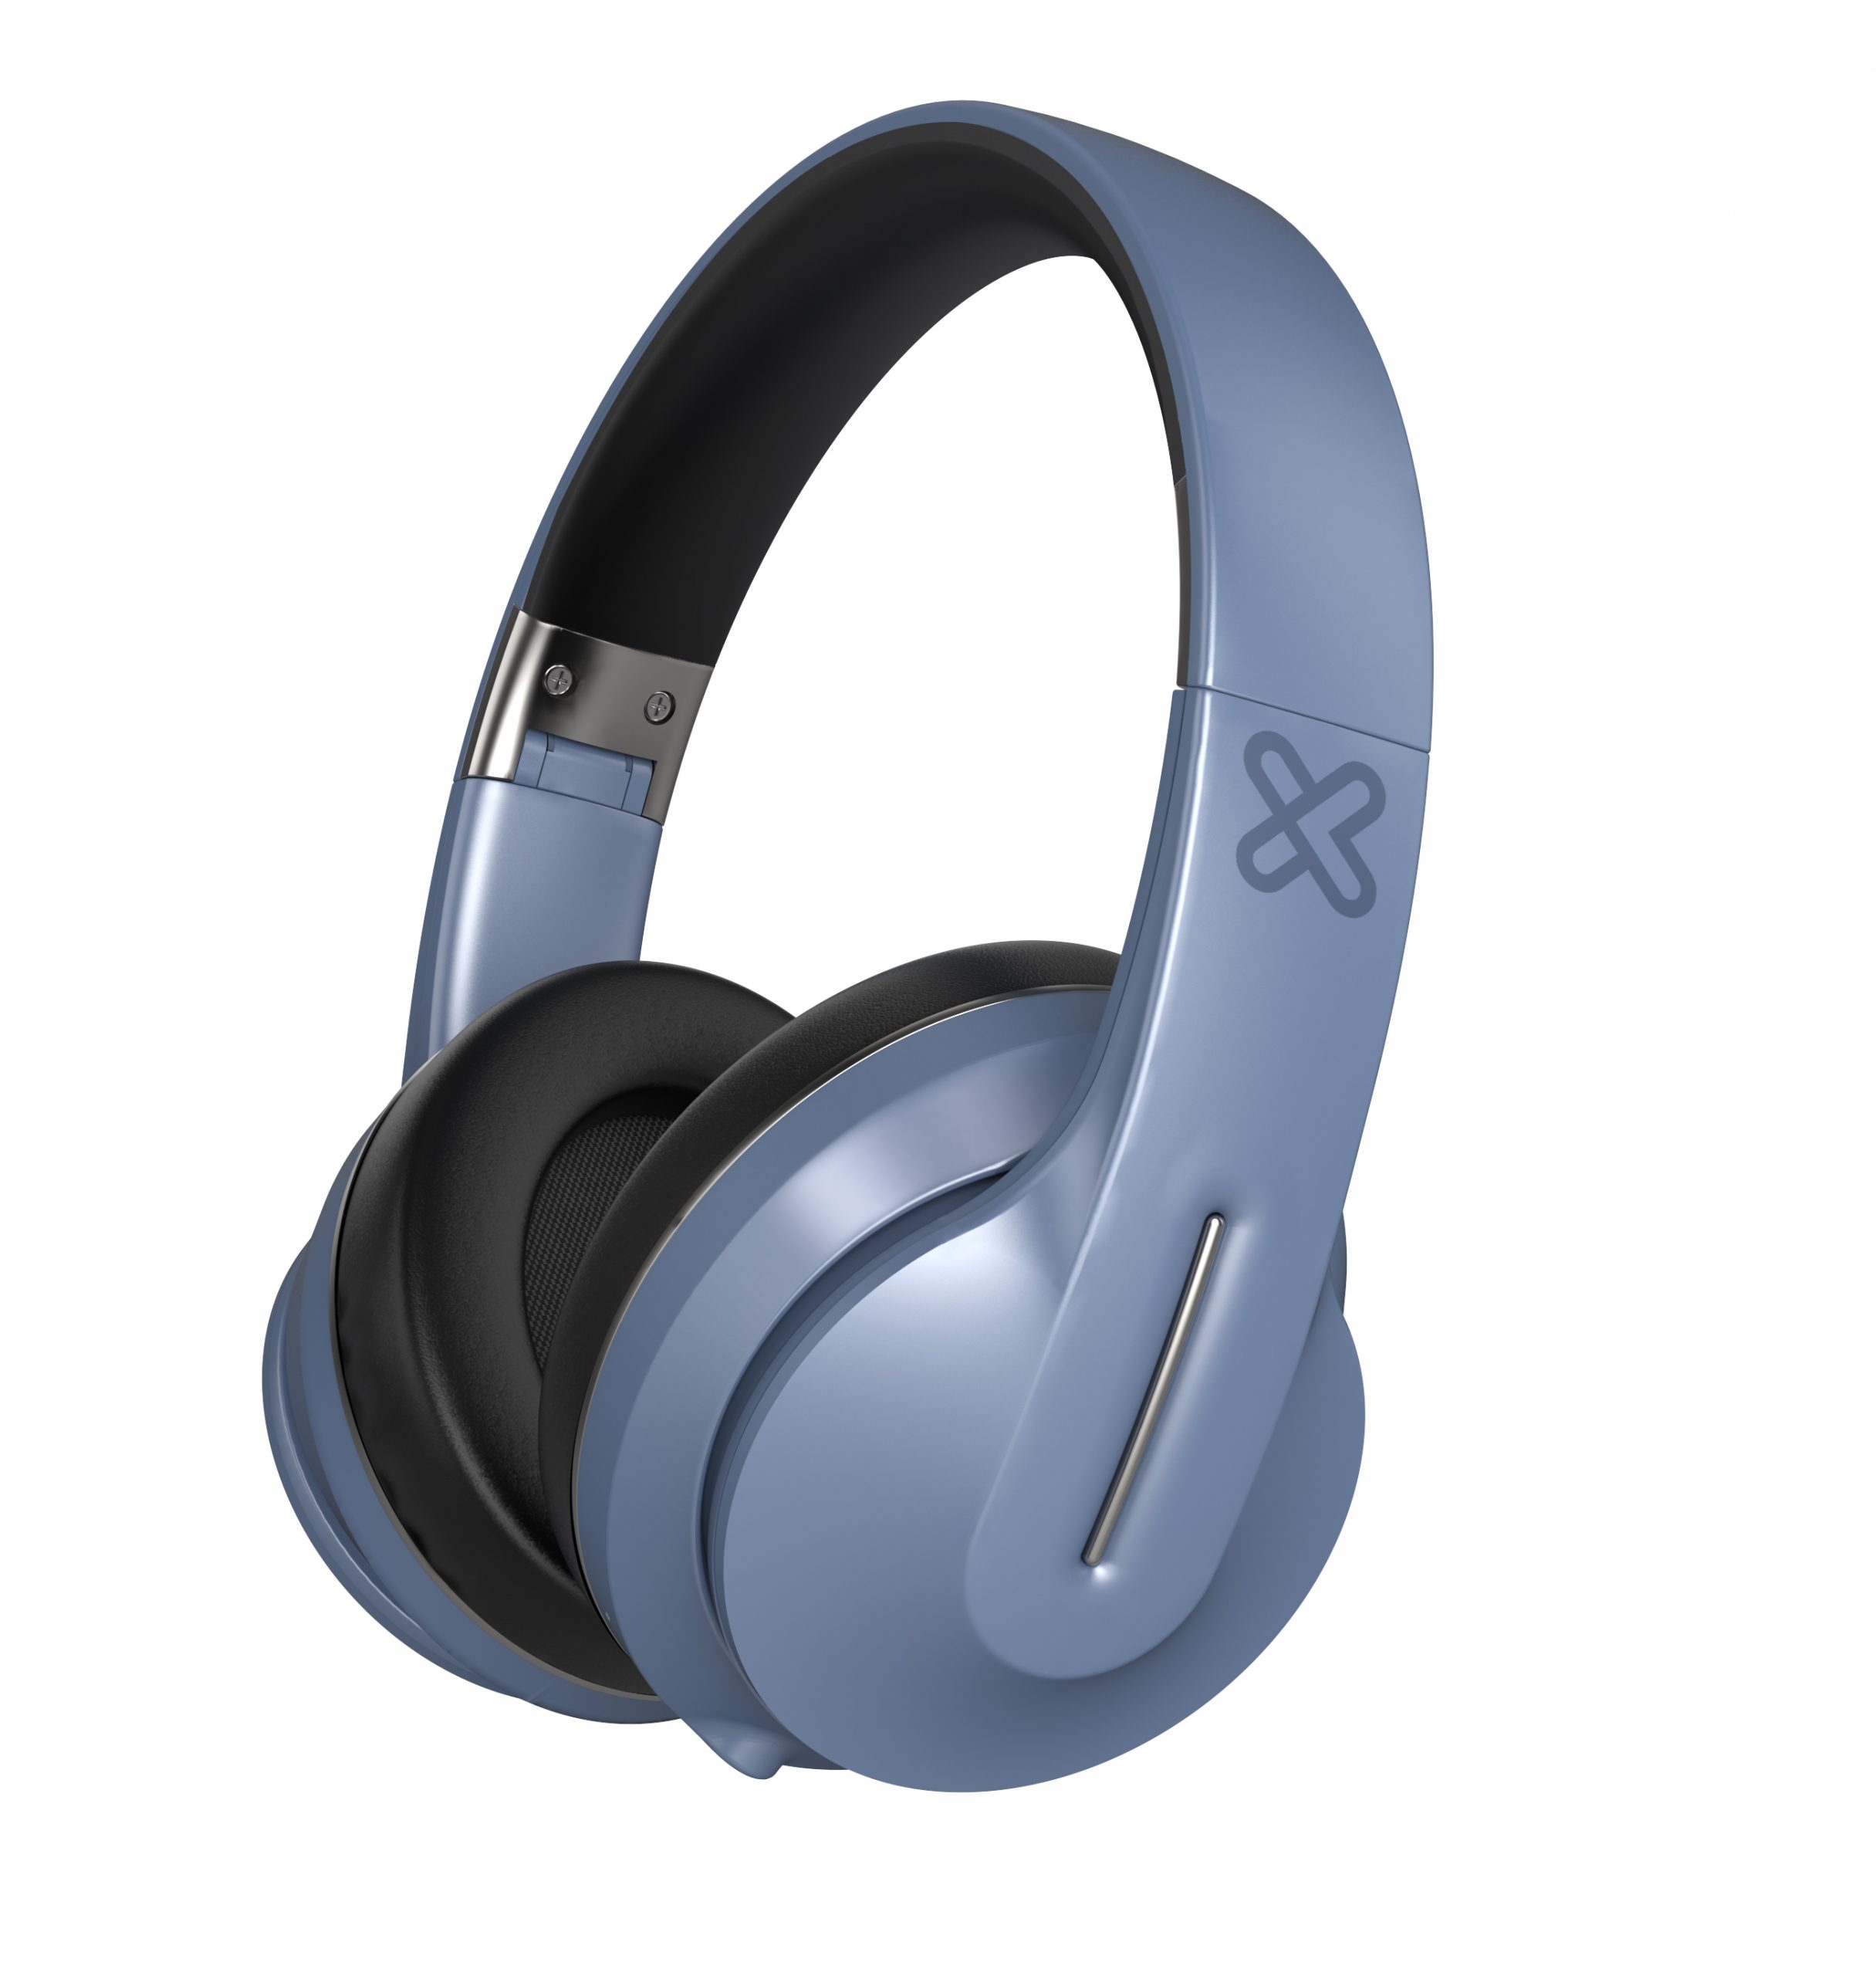
klipxtreme Funk KWH-150 Headphones
User Manual
1. Introduction
Thank you for purchasing the KWH-150 stereo headphones with Bluetooth® wireless technology. We encourage you to read this quick installation guide thoroughly to get the most of this innovative wireless device.
Main features
- Bluetooth® V5.0 platform, for greater wireless range, and a reliable wireless connection
- Long-lasting 18-hours battery life, with 30 hours of standby time
- Includes enhanced technology to deliver better sound quality
- Delivers flexibility with its Aux-in function to connect the headphones to a 3.5mm cable and save battery
- Seamless and hands-free experience when answering or making calls
- On-board controls for power, music, and phone call management
- Foldable design for limitless mobility and easy to fit in tight spaces
- Cushioned leatherette headband that conveniently extends for maximum comfort
- Lightweight design with comfortable ear cups
- Fashionable and modern appearance to enhance your style
Package content
- Wireless headphones
- Micro-USB charging cable
- Aux in (3.5mm) audio cable
- Quick installation guide
2. Product components
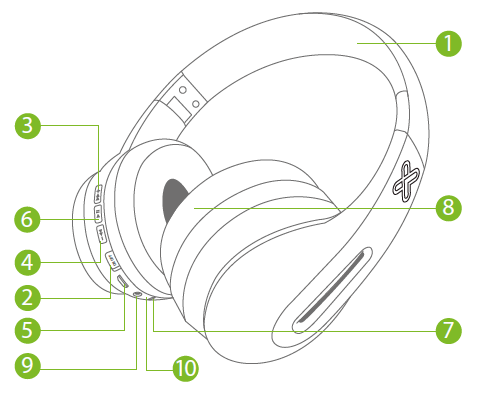
- Adjustable headband
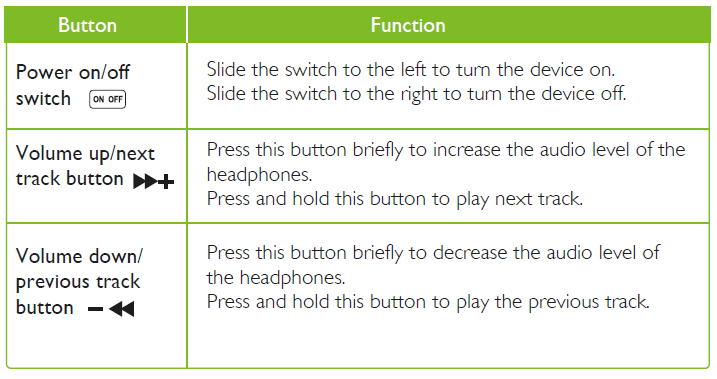
- Power On/Off switch
 : Volume+/next song
- Volume-/previous song
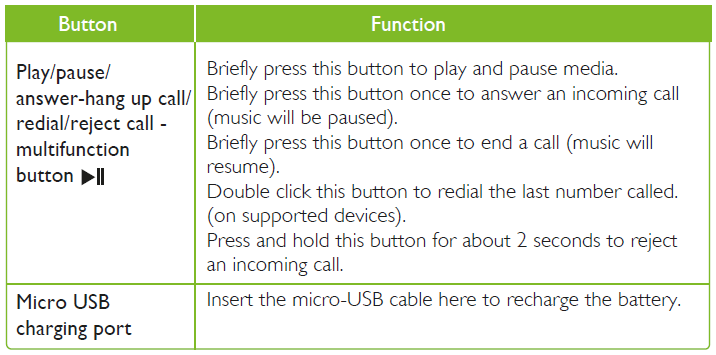
- Micro USB charging port
- Play/pause/multifunction button
- LED indicator: For power/battery charging/and Bluetooth® status
- Cushioned ear pads
- 3.5mm auxiliary input port
- Microphone
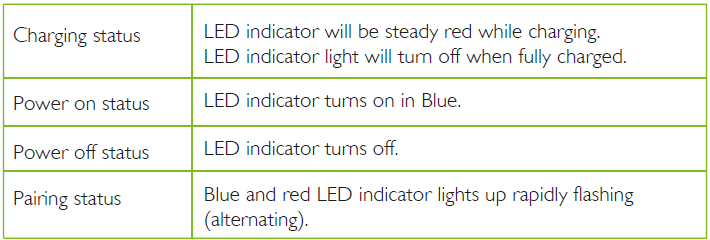
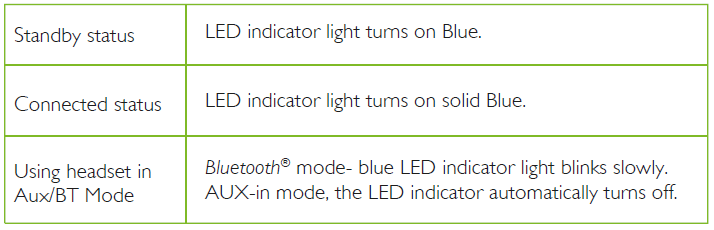
LED indicator light status
3. Basic operation
Charging your headphones
- Plug one end of the supplied micro-USB cable to your headphones micro-USB port and the other end into the USB port of your computer or to a 5VDC 500mAh to a USB adapter to fully charge the battery.*
- The headphones’ battery should be initially charged for at least 5 hours.Thereafter, the battery will take about 3.5 hours to recharge.
- Make sure that the headphones are fully charged before using them for the first time.
- When battery is low a voice prompt will be heard to indicate battery status.
*Do not use a USB fast charging or PD adapters with an output power greater than 5VDC oryou will damage your headphones and void the warranty.
4. Auxiliary wired connection
- With the headset ON you can insert the 3.5mm cable to switch to Aux in mode.Plug one end of the supplied 3.5mm cable to your headphones and the other end to the 3.5mm auxiliary port in your input source.
- The LED indicator on the headset will turn off and the headset will automatically switch to aux in mode.
- Set the desired volume on the input source. The volume controls on the headphone will not operate when they are connected to an external wired audio source.
Note: Once you remove the cable you cannot return to Bluetooth® mode, you must turn the unit on again to enter Bluetooth® mode.
5. Advanced operation
Pairing the headset with your mobile phone
- Turn on the device, the LED light will start in Bluetooth® mode automatically, blinking red and blue indicating that it is ready for pairing mode.
- Next, set your Bluetooth® mobile device to “discover” the wireless headphones.
- Place both devices not more than one meter away from each other.
- On your mobile phone, tap the newly discovered audio device KWH-150 being displayed in the Bluetooth® list.
- If you have a lower Bluetooth® version, you may be prompted to enter the passkey 0000 (4 zeros).
- If pairing is successful, an audible tone will be heard. If after 60 seconds the pairing process fails, please turn off the headset and repeat steps 1 through 5 described above.
- The headset will enter into standby mode and will eventually turn off automatically after five minutes if there is no Bluetooth® device available for pairing.
Note: The headset will automatically pair to the last known connected device in 3 seconds after headset is powered on.
6. Using the wireless headset
a. Answering and ending a call using your mobile phone
- When there is an incoming call, an alert tone will be heard through your headphones. Briefly press the play/pause, multifunction button to pick it up. You may also press the answer button on your smartphone to take the call. (music will be paused)
- To end a call, simply press the multifunction button once again. Likewise, you may also finish the call directly using the end key on your mobile. (music will resume automatically)
- To reject an incoming call, press the multifunction button for about 2 seconds.
- If you want to redial the last number dialed, double click this button to redial the last number called. (on supported devices).
b. Music playback
- Briefly press the play/pause, multifunction button to reproduce and stop audio playback.
- Press and hold the and buttons for 2 seconds to go to the next or previous track.
- Briefly press the and buttons to increase or decrease the volume on the headphones.
- When listening to music using your smartphone, playback will pause to allow the call to go through.
- As soon as you hang up, music playback will resume automatically
7. Troubleshooting
a. The headphones are not turning on.
- Charge the headphones. If they don’t turn on even after charging, contact customer service for help.
b. The headphones are not charging.
- Check if the supplied USB charging cable has been properly connected to the headphones and the power source.
- Verify if the power source is on and properly connected.
- If using a USB charging cable different from the one supplied, make sure that it is properly connected and functioning.
c. The headphones are not pairing.
- Check if the Bluetooth® device is powered on.
- Verify if the Bluetooth® mode is enabled on the device.
- Check if both devices are within 1 meter from each other.
- Verify if the Bluetooth® device is compatible with the headphones.
d. Music will not play through the headphones.
- Check if the headphones and the Bluetooth® device are powered on.
- Verify if there is music playing on your Bluetooth® device.
- Check the volume level on your Bluetooth® device.
e. There is distortion, lag or interference in the connection.
- Check if there is a 2.4GHz device close to the headphones or Bluetooth® device.
- Verify that both devices are placed within the recommended distance.
f. Difficulty in listening to a caller when receiving a call.
- Check if the headphones are connected to the Bluetooth® device.
- Verify if the Bluetooth® mode is enabled on your device.
- Check the volume level on your Bluetooth® device.
Technical specifications
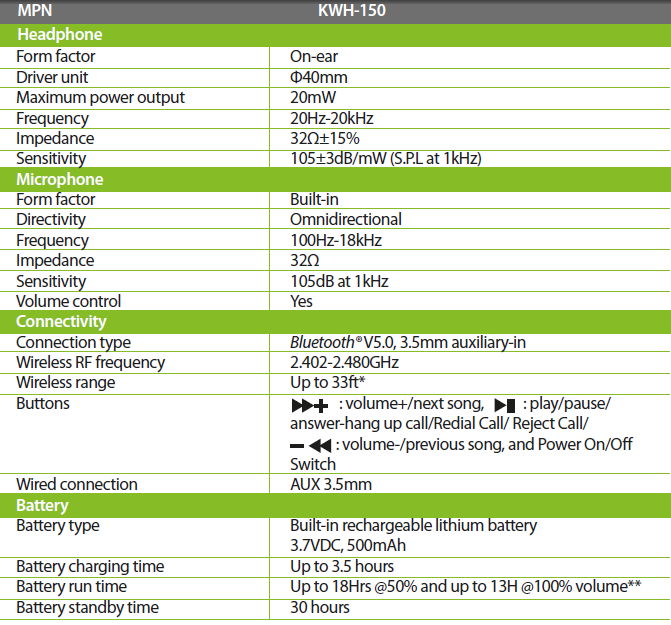
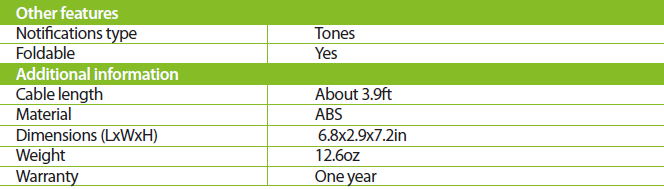
- Range estimate is based on an area free and clear of obstacles and interference, and within the line of sight between devices.
- Depending on the volume level and type of music file being played.
Precautions
- Do NOT drop, hit or shake the device.
- Do NOT disassemble, repair or modify the headphones yourself.
- Do not use cleaning products that contain benzene, solvents or alcohol.
- Do NOT expose headphones to excessive heat or to direct sunlight for long periods of time.
- Do NOT store the device in a place with high humidity or dust.
- Do NOT place heavy objects on top of the headphones.
- Do NOT use near a microwave oven or wireless LAN products.
FCC statement
This equipment has been tested and found to comply with the limits for a Class B digital device, pursuant to part 15 of the FCC Rules. These limits are designed to provide reasonable protection against harmful interference in a residential installation. This equipment generates, uses, and can radiate radio frequency energy and, if not installed and used in accordance with the instructions, may cause harmful interference to radio communications. However, there is no guarantee that interference will not occur in a particular installation. If this equipment does cause harmful interference to radio or television reception, which can be determined by turning the equipment off and on, the user is encouraged to try to correct the interference by one or more of the following measures:
- Reorient or relocate the receiving antenna.
- Increase the separation between the equipment and receiver.
- Connect the equipment into an outlet on a circuit different from that to which the receiver is connected.
- Consult the dealer or an experienced radio/TV technician for help.
References
[xyz-ips snippet=”download-snippet”]