
 LaguhamKWC-500
Introduction
Thank you for purchasing the KWC-500 Full HD video streaming webcam. We encourage you to read this user guide thoroughly to get the most of this device.Main features
- Features 2.1MP resolution that delivers smooth HD video allowing you to clearly see and hear others
- Built-in HD microphone enables clear conversations
- Plug and play design for immediate use
- HD image sensor with an effective resolution of up to 1920x1080p delivers clear video of your relatives or coworkers
- The articulated configuration enables to swivel and tilts the webcam to make calls at almost any angle
- Compatible with Windows, macOS, and Chrome OS operating systems
- Versatile mounting options: on top of the monitor or on the laptop’s screen
- Sleek and lightweight for easier handling
- 78-degree field of view to deliver a better viewing experience
Package content
- Webcam
- USB cable
- User guide
Product overview
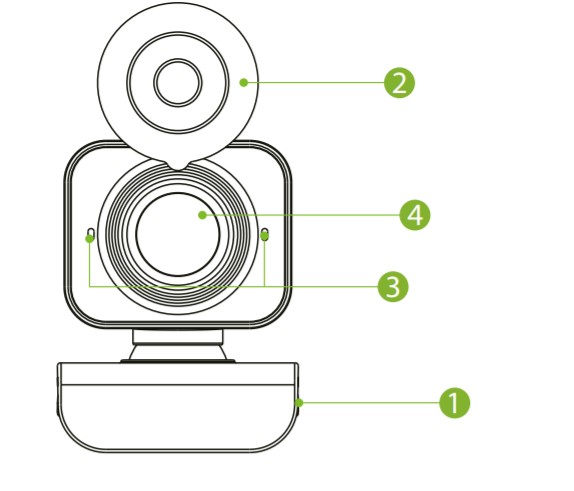
- Multi-function bracket
- Privacy cover
- Microphone
- Lens
Safety precautions
Observe the following guidelines to ensure that the webcam will operate safely and to prevent defects.
- Do not use or store your webcam under direct sunlight, in a very humid and dusty environment, or near any kind of heat source.
- If your webcam gets wet, dry it with a soft cloth as soon as possible.
- If the lens is dirty, do NOT touch the lens with your fingers.
- Clean the outside of the webcam with a soft cloth.
- Do NOT use cleaning fluids based on alcohol, methylated spirit, or ammonia.
- Do NOT attempt to disassemble or repair your webcam by yourself otherwise, the warranty will be voided.
Installation
- Turn on the PC/laptop.
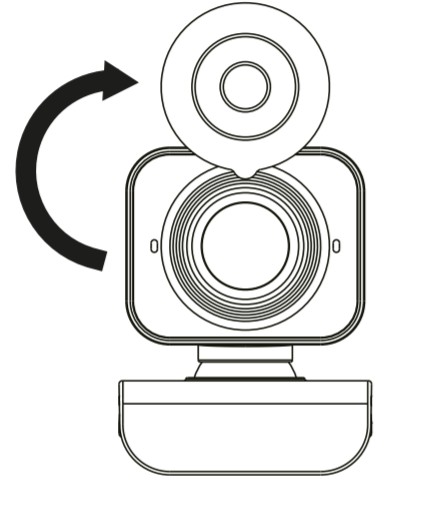
- Place the webcam in an upward position.Take the privacy cover and remove the double-sided tape. Place the privacy cover around the camera lens. (In order to use the webcam you will need to slide the privacy cover’s lid clockwise)

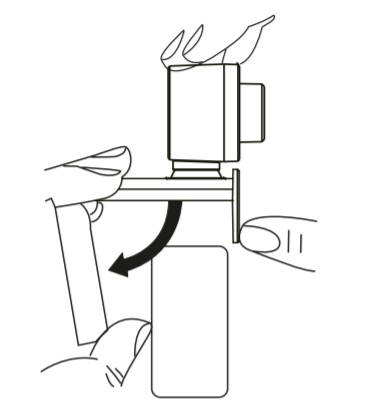
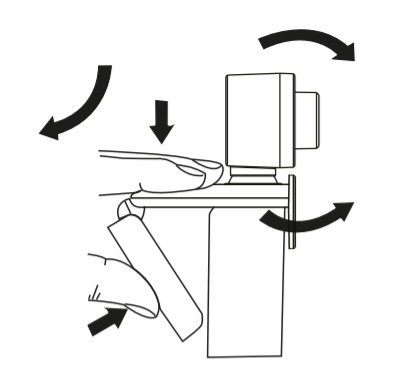
- Grasp the webcam as shown and open the clip base with your other hand.
- Mount the webcam on the display making sure the foot on the clip base is adjusted to the back of the PC monitor or the laptop screen.Once positioned in the desired location, make sure that the foot on the base is flushed against the back of the monitor or laptop for stability.
- Adjust the angle of the webcam as desired.
- Plug the webcam into the USB port of your PC or laptop.Wait about 1 minute, the webcam will install automatically.
Starting a video call
To start a video call, both you and the person you want to call must have installed a video call application such as Skype, Zoom, Windows , Gmail, Teams, etc.Both users will also need the following to start:*A USB webcam with built-in microphone preferred.
- A computer with speakers (or a headset) and a microphone (this webcam has a built-in microphone).
- A broadband internet connection.
- Please check the requirements of the video call application you are going to use.
Note: Requirements may vary between different applications but usually a minimum of 2Mbps upload speed is required.
How to use your webcam with a video conference application
- Connect the camera USB cable to the computer’s USB port.
- In your video conference application, change the camera source to USB Camera.

Note: Remember to enable the use of the microphone as well, as this camera has a built-in microphone.
How to use your webcam with Microsoft Teams
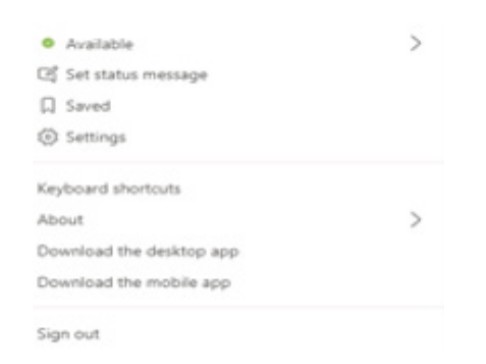
- Open Microsoft Teams
- Log in to your account
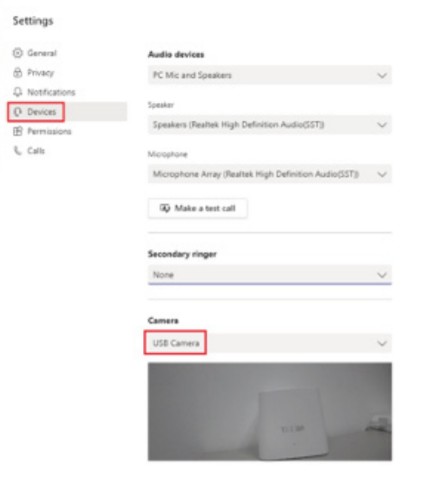
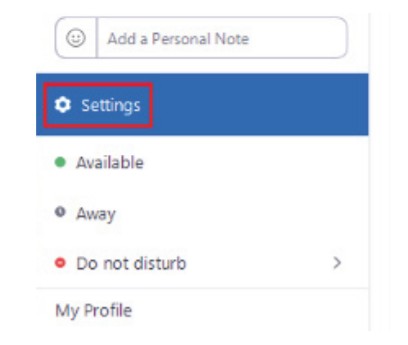
- In the main menu click on settings
- Under devices, select Camera USB camera


How to use your webcam with Zoom
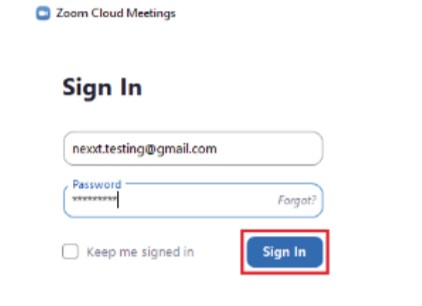
- Open the Zoom App
- Log in to your account
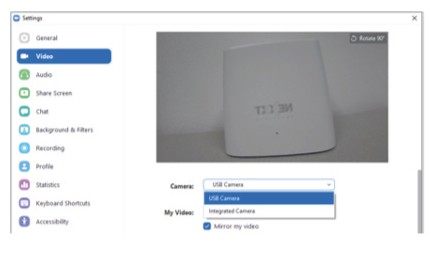
- Click on Settings
- Under video select camera USB camera

How to use your webcam with Skype for Business
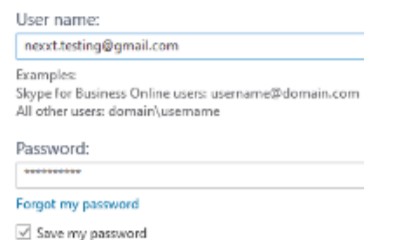
- Open Skype for Business
- Log in to your Skype account
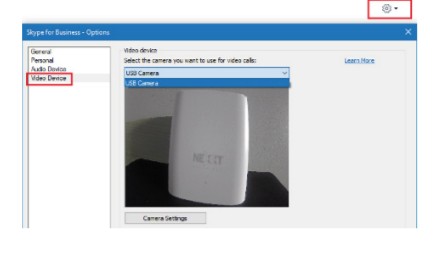
- Click on the settings menu, select Video Device →USB Camera
Troubleshooting
a. How do I know if the webcam is recognized by the operating system?The webcam can connect to any USB 2.0/3.0 port. To confirm the camera is installed correctly, check the following:Under control panel > system settings > device manager.b. How do I know if my video call application can use this webcam?All video applications have an optional setting to review the audio and video device. Using the video application review the following:– The audio selection to confirm that the HD webcam is selected. If not, change the selection to the HD webcam.– The video selection to confirm that the HD webcam is selected. If not, change the selection to the HD webcam.
Specifications
|
KWC-500 |
|
|
Webcam |
|
| Type | FULL HD video streaming webcam |
| Video mode resolution | Up to |
| Focus type | Fixed focus |
| Lens type | HD 3.6mm |
| Built-in mic | Yes |
| Field of view | 80° |
| Focus distance | 16.4ft |
| Video format | H264, MJPEG/YUY2 |
| Image format | MJPEG |
| Connectivity | USB 2.0 |
| Drivers OS and streamingcompatibility | Plug and play Windows: XP/Vista/Windows 7/Windows 8.1/Windows 10.Mac: MacOS Catalina, MacOS Mojave, MacOS High Sierra, MacOS Sierra. Mac OX: Yosemite/Mavericks.Android: versions 6-11 Chrome OS Ver. 29.01547.70 |
| Output format | USB video streaming |
| Interface type | USB 2.0 |
| Positioning | Swivel and tilt |
| Base options | Monitor mount |
|
Additional information |
|
| Size (LxDxH) | 2.63×1.59×2.11in |
| Weight | 2.6oz |
| Cable length | 1.5m |
| Color | Black |
| Material | ABS |
| Cables | 1 USB cable |
| Warranty | One year |
FCC Statement
This equipment has been tested and found to comply with the limits for a Class B digital device, pursuant to part 15 of the FCC Rules.These limits are designed to provide reasonable protection against harmful interference in a residential installation. This equipment generates, uses, and can radiate radio frequency energy and, if not installed and used in accordance with the instructions, may cause harmful interference to radio communications. However, there is no guarantee that interference will not occur in a particular installation. If this equipment does cause harmful interference to radio or television reception, which can be determined by turning the equipment off and on, the user is encouraged to try to correct the interference by one or more of the following measures:
- Reorient or relocate the receiving antenna.
- Increase the separation between the equipment and receiver.
- Connect the equipment into an outlet on a circuit different from that to which the receiver is connected.
- Consult the dealer or an experienced radio/TV technician for help.
For more information, go to www.klipXtreme.com.KlipXtreme® is a registered trademark. All rights reserved.All other brand names and trademarks are the property of their respective owners. Any mention of such is only intended for identification purposes, and therefore shall not be construed as a claim to any or all rights pertaining to those brands. Made in China.
References
[xyz-ips snippet=”download-snippet”]