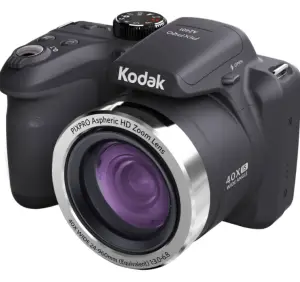
KODAK PIXPRO AZ401 Digital Camera User Guide
The Kodak trademark, logo and trade dress are used under license from Eastman Kodak Company.


Battery Usage Precautions
- Please use brand name batteries (such as Energizer® or Duracell®) for optimal performance. Do not mix new and old batteries or use different brands of batteries. When replacing batteries, please replace all 4 batteries at the same time.
- The performance and life expectancy of alkaline batteries will vary depending on the brand.
- Do not mix alkaline, standard (carbon-zinc), or rechargeable (ni-cad, ni-mh, etc.) batteries.
The Camera User Manual is available online at the website location below:


- Camera Views.
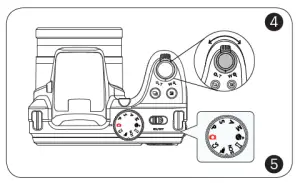
1 Zoom Lever 16 Fast Video Recording Button 2 Shutter Button 17 Menu Button 3 Strap Eyelet 18 Micro USB Port 4 Exposure Compensation Button 19 Micro HDMI Port 5 Continuous Shot Button 20 AF Button/Up Button 6 Power Switch 21 Flash Button/Right Button 7 AF Assist Beam/Self-Timer Lamp 22 Delete Button/Self-Timer Button/Down Button 8 Mode Dial 23 Display Button 9 Flash Lamp 24 Battery Cover Buckle 10 Flash Button 25 Battery Cover 11 Microphone 26 Playback Button 12 Speaker 27 Tripod Socket 13 Lens 28 Macro Button/Left Button 14 “i” Button 29 SET Button 15 Indicator Lamp 30 LCD - Inserting the Batteries and the Memory Card.1. Open the battery cover door as show in step ①, ② and ③.2. Insert the batteries into the battery compartment.3. Insert the memory card into the slot.4. Close the battery cover door as shown in step ④ and ⑤.
- Setting the Language/Date/Time.1. Push the power switch to turn on the camera and the language menu will appear. Use the up/down/left/right button to select a language, and press the button to confirm the language.2. Use the up/down/left/right button again to set the date and time, and press the button to confirm.
- Taking a Picture.1. Hold the camera securely.2. Use the zoom lever to select Tele or Wide positions to zoom in or out on your subject.3. Press the shutter button half way to focus on the subject. When the focus frame turns green, press the shutter button completely down to take the picture.
- Using the Mode DialThis camera provides a convenient mode dial that allows you to manually switch among different camera settings with ease. Available modes are listed below:

- Under shooting mode, press the
 button to begin recording a video and press the
  button again to stop recording. The camera will storethe video and return to the shooting screen.
 - In each mode, press the
 button to access the “Easy Menu”. Press the
  buttons to move among options, then press thebutton to make a selection. Choosing the
  within this list will provide access to the “Full Menu”:
Read More About This Manual & Download PDF:
References
[xyz-ips snippet=”download-snippet”]

