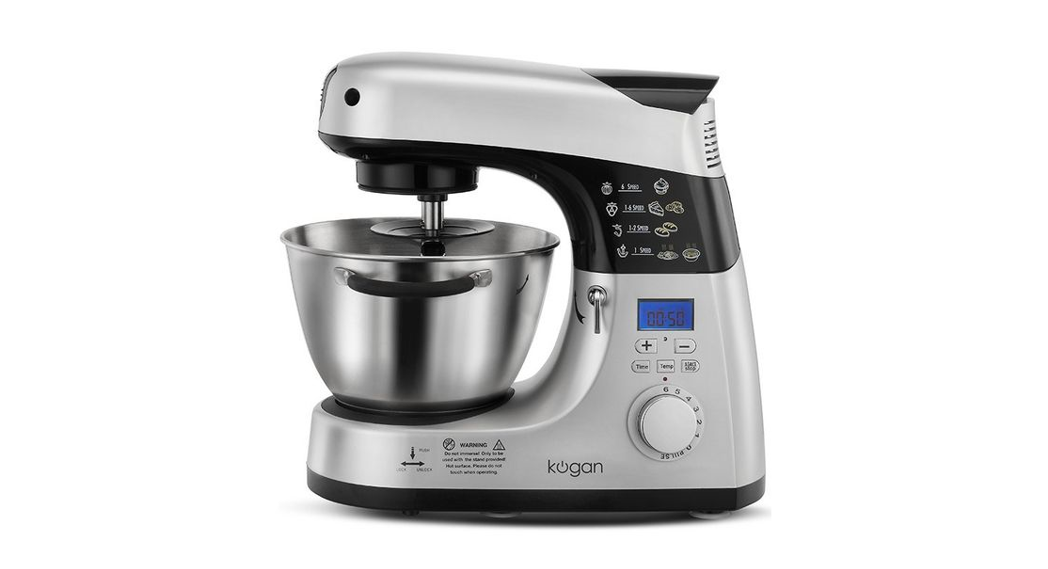

1200W Cooking Stand MixerKAHTYNSNDMIXUSER MANUAL
Attention
| Please handle this product with care and inspect it regularly to ensure it is in good working order.
If the product, power supply cord, or plug shows any signs of damage: stop use, unplug, and contact Kogan.com support. |
Technical Specifications
| Model | KAHTNSNDMIX |
| Rated Voltage | 220-240V-, 50/60Hz |
| Power Consumption | Mixer: 800W
Heating Elements: 1200W |
| Protection Class | I |
| Speed Control | 0 – Pulse1,2,3,4,5,6 Speed Control (1 = lowest, 6 = highest) |
| Timer Control | From seconds to 3 hours |
| Temperature Control | From 40°C to 200°C |
| LCD Display | – |
Important Safeguards
Please read all instructions carefully before use and retain a copy for futurereference.
- To protect against the risk of electric shock, do not immerse the appliance, cord, or plug in water or any other liquid.
- Do not put hands or fingers near running parts.
- To protect against the risk of electrical shock, fire or injury, do not use any attachments that are not supplied by Kogan.com.
- Unplug the appliance when not in use, when attaching or removing accessories, and before cleaning.
- Do not push the unit beyond the maximum limits.
- Do not operate any appliance with a damaged cord or plug, after the appliance malfunctions, or after the appliance is dropped or damaged in any manner. In the event of any of these instances occurring, contact the Kogan customer support team for further information.
- Do not operate this appliance to perform more than one function at a time.
- This appliance is not intended for use by persons (including children) with reduced physical, sensory or mental capabilities, experience, or knowledge unless they are being given supervision or instruction concerning the use of the appliance by a person responsible for their safety.
- This appliance is designed exclusively for private home use. It is not fit for commercial use. Do not use outdoors. Keep unit away from sources of heat, direct sunlight, humidity, and sharp edges. Do not use with wet hands. If the appliance gets wet, unplug it immediately.
- When cleaning or putting appliances away, always pull the plug from the power socket (by pulling on the plug itself, never on the cable).
- Do not leave the appliance running without supervision. If you should need to leave the work area, always switch the appliance off or unplug from the power socket.
- Check the appliance and cable for any signs of damage on a regular baDo not use the appliance if it is damaged.
- Do not attempt to repair the appliance on your own. Contact the Kogan customer support team for information regarding any repairs or part replacement.
- Use only original spare parts.
- Do not insert anything into the rotating hooks while the appliance is working.
- Place the machine on a flat, smooth, stable working surface.
- Do not plug the appliance into the power socket without having already installed any required accessories.
Special Notes for Children and Frail Individuals
- In order to ensure your children’s safety, please keep all packaging (play bags, boxes, polystyrene, etc..) out of their reach. Do not let children near the appliance when it is in use.
- When not in use, store appliances out of children’s reach.
WARNING: When in cooking mode, make sure the appliance has been stopped before your lift up the arm.
NOTE: For safety reasons, when the Stand Mixer stops or restarts, if itstemperature is above 50°C the speed of the beater will be at 1. It is necessary for the temperature goes down below 50°C before you can use the other speed levels (2 to 6). The cooling downtime depends on the temperature that was used to cook.
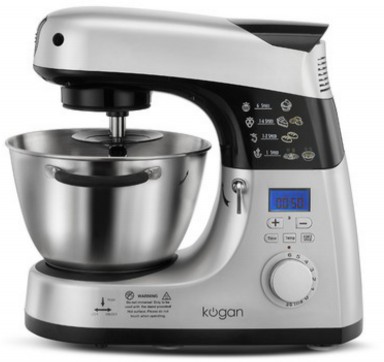
Overview of Components

| 1 | Drive Shaft | 6a Transparent Cover |
| 2a | Helix Drive Cover | 6b Funnel & Chute Feeder |
| 2b | Top Cover with Screw | 7 Container (Mixing/cooking bowl) |
| 3 | Back Cover | 8a Dough Hook |
| 4 | Lever for raising/lowering arm | 8b Whisk |
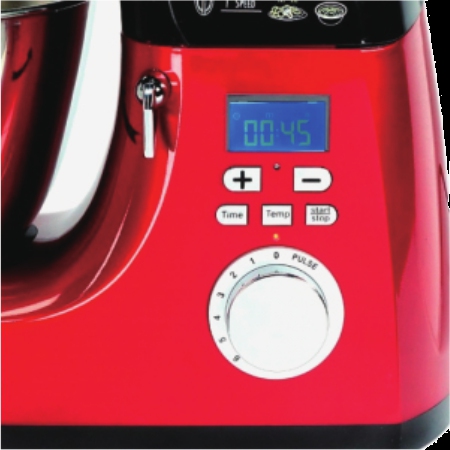
| 5a | LCD Display | 8c Beater |
| 5b | Timer/Temperature Button | 8d Cooking Beater |
| 5c | Pulse Operator and Level Regulator |
Operations
How to use the Mixer
- First, take the ingredients as required for your recipe and combine them into the mixing bowl.
- Lift the arm of the mixer by turning the raising/lowering lever, then place the bowl into the base, turning it in a clockwise direction to lock it in.
- Insert the dough hook/beater into the driveshaft, turning it in a clockwise direction to lock it in.
- Fit the transparent cover onto the mixing bowl ensuring it is securely attached.
- Lower the arm of the mixer so that the stirring accessory is inside the bowl.
- Plug the mixer into the power supply.
- Use the controls to set the unit to function in whichever operations you require.
- Once you have finished, set the control switch to 0.
- Unplug the mixer from the power supply.
- Raise the arm by turning the raising/lowering lever.
- Turn the mixing bowl in a clockwise direction to remove it from the base.
Functions and Maximum Loads
- Dough mixingA) Add flour and water in proportions of 1:0.6B) Stir starting at speed 1, then speed 2, then speed 3 for 2 minutes each.C) The maximum flour load is 1500g.
- Egg whiskingA) Start whisking from speed 4 up to speed 6 over a time of 5 minutes.B) The maximum egg load is 16 eggs. The minimum egg load is 2 eggs.
- Liquid mixingA) Beat from speeds 1 through to speed 6 as required.B) Do not exceed the maximum level amount of the mixing bowl.
- CookingA) Liquids or soup: maximum of 1.5L.
Note: do not operate the unit for longer than 6 minutes continuously. After 6 minutes, allow the unit to cool for 20 minutes.When the unit is stopped, the speed control must be returned to the ‘0’ position before you select your desired speed for the motor to work. During heating, the speed should be set to ‘1’.If the power to the unit is cut or a blackout is experienced, then the speed of the control must be returned to the ‘0’ position upon return of power for the motor to work.If the unit shuts down due to the temperature exceeding 50°C, the speed of the control must be returned to the ‘0’ position once it has cooled down for the motor to work.
Using the Mixing Bowl
- Place the mixing bowl into its holding device and turn the bowl in the direction of the LOCK until it locks into place.
- In order to lift the arm, press the raising/lowering lever downwards in the direction of the arrow. The arm will now move upwards.
- Mount the required utensil by inserting the top into the driveshaft and locking the cotter pin in the shaft by turning it to the right.
- Fill the bowl with your ingredients. Do not overfill the bowl. The maximum amount is 1.5kg.
- Lower the arm using the lever.
- Insert the power plug into a wall socket and turn it on.
- Switch the machine on using the level regulator control to a speed between 1 and 6 (depending on the mixture and requirements).
- For pulse operations (kneading at short intervals), turn the switch to the “PULSE” position. The switch has to be held in this position according to the desired interval length. When the switch is released, it will return automatically to the ‘0’ position.Adjusting the Speed Control for different mixtures
Speed Utensil Type of Mixture 1 – 3 Dough Hook Heavy mixtures (eg bread or short pastry) 6 Beater Medium/heavy mixtures (eg crepes or sponge) 5 – 6 Whisk Light mixtures (eg cream, egg whites, blancmange) Pulse Whisk Intervals (eg for mixing under the sponge, egg whites..) Note: use the splash guard to protect against spills and prevent burns.
- After kneading/stirring, turn the switch back to the ‘0’ position as soon as the mixture has formed a ball, then remove the mains plug from the power supply.
- Press the lowering/raising lever downwards to raise the arm.
- The mixture can now be released with the help of a spatula from the mixing bowl.
- The mixing bowl can now be removed by turning it to the left.
- Clean the parts as instructed under ‘Cleaning’.
Using the Cooking Function
How to use and maximum loading quantitiesIn order to use the cooking function, it is necessary to start doing steps 1 to 7 from “How to use the Mixer”. Then press the TIME button to set the cooking time using the + and – buttons. Once set, press the TEMP button and set the temperature using the + and – buttons. Once the cooking time and temperature are set, press START/STOP to start cooking.
When cooking liquids or soups, the maximum amount you can put in the bowl is 1.5L. For all other types of ingredients, the maximum quantity is 1500g.For the best performance of the unit, you must follow the maximum load quantities.
Notes:
- When the unit is stopped, the speed control must be returned to the position ‘0’ before selecting another speed level, otherwise, the motor will not work. When using the cooking function, no matter what speed is selected, the unit will remain working at speed ‘1’.
- To prevent burns, use the splash cover at all times when using the cooking function and use the silicone handles to move the bowl.
Cleaning
- Before cleaning, remove the mains lead from the socket.
- Never immerse the housing into water.
- Do not use any sharp objects or abrasive detergents.
Motor Housing
- Wipe the housing down with a damp cloth.
Mixing Bowl and Mixing Equipment
- The components are NOT suitable for cleaning in the dishwasher. If exposed to heat or caustic cleaners, they may become misshapen or discolored.
- Components that have come into contact with food can simply be cleaned with soapy water.
- Allow the parts to dry thoroughly before reassembling the device.
Suggested Recipes
Sponge MixtureIngredients250g butter or margarine, 250g sugar, 1 packet vanilla sugar, 1 pinch of salt, 4 eggs, 500g wheat flour, 1 packet baking powder, 1/8 liter of milk.
Preparation
- Transfer the wheat flour and the remaining ingredients to the mixing bowl.Stir with stirrer for 30 seconds on speed 1, then for approximately 3 minutes on speed 3.
- Grease a tin or cover with baking paper. Fill in the mixture and bake in the oven for 50-60 minutes at 180C.
- Before the cake is removed from the oven, test to see if it is done by pressing a sharp stick down into the center of the cake. If no mixture sticks to it, then it is cooked.
- Turn the cake out onto a cake grid and allow it to cool.
Linseed Bread RollsIngredients500-550g wheat flour, 50g linseed, 3/8 liter water, 1 cube of yeast (40g), 100g low-fat curds well-drained, 1 tsp salt. For coating: 2 tbsp of water.
Preparation
- Soak linseed in 1/8 liter of warm water.
- Transfer remaining lukewarm water (liter) into the mixing bowl. Crumble ¼ in yeast, add curds and mix with the kneading hook on speed 2 until yeast is thoroughly dissolved.
- Put flour, soaked linseed, and salt into a mixing bowl. Knead thoroughly on speed 1, then switch to level 2 and knead for 3-5 minutes.
- Cover mixture and allow to rise in a warm place for 45-60 minutes.
- Knead thoroughly once more, remove from bowl, and form into sixteen rolls.
- Cover baking tin with wet baking paper and place rolls onto paper and allow to rise for 15 minutes.
- Coat with lukewarm water and bake in the oven for 30-40 minutes at 210C.
Chocolate CreamIngredients200ml sweet cream, 150g semi-bitter chocolate coating, 3 eggs, 50-60g sugar, 1 pinch salt, 1 packet of vanilla sugar, 1 tablespoon cognac or rum, chocolate flakes
Preparation
- Beat cream in mixing bowl with whisk until stiff. Remove from bowl and place somewhere to cool.
- Melt the chocolate coating in accordance with the instructions on the packet, or in the microwave at 600W for 3 minutes.
- Meanwhile, beat eggs, sugar, vanilla sugar, cognac or rum, and salt in the mixing bowl with the whisk on speed 3 to form a foam.
- Add melted chocolate and stir in evenly at speeds 5-6.
- Leave a little cream for decoration.
- Add the remaining cream to the mixture and stir in briefly using the pulse function.
- Decorate chocolate cream and serve well cooled.
[xyz-ips snippet=”download-snippet”]