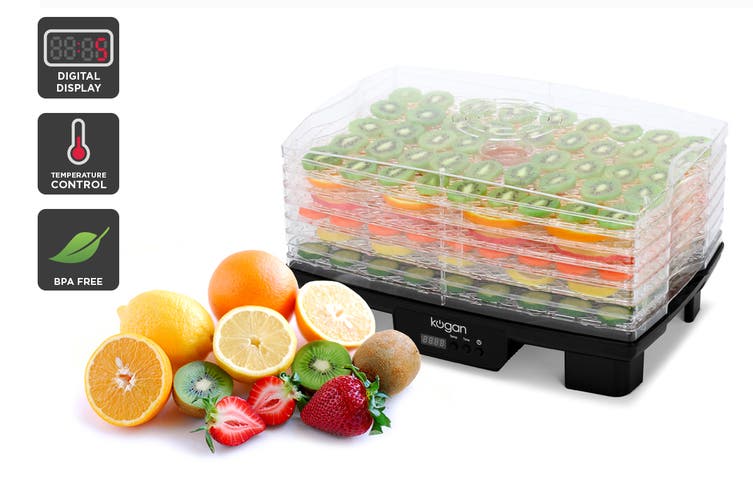
kogan 6 Tray Food Dehydrator with TImer
Safety & Warnings
• Do not touch hot surfaces or allow them to come into contact with flammable materials. Use handles or knobs.• Do not immerse the cord, the plug or the base of the dehydrator in water or other liquid. Do not wash the appliance in sink or dishwasher.• This appliance should not be used by or near children. Keep out of reach of children.• Unplug from outlet when not in use and before cleaning. Allow to cool before putting on or taking off parts.• Do not operate this appliance if it has a damaged cord or plug, if it is not working properly or if it has been damaged or dropped. If the supply cord is damaged, cease use immediately and contact Kogan.com.• The use of accessory attachments other than those supplied or recommended by the manufacturer may cause hazards and can void your warranty.• Arrange cord so that it cannot be caught or tripped over. Do not allow cord to hang over edge of table or counter. Keep cord away from hot surfaces.• This appliance is for indoor, household use only. Do not use appliance outdoors or other than as described in this manual.• To disconnect, turn the control to “OFF” before removing the plug from the outlet.• Operate the dehydrator only in a clean, dust-free area. Dust and dirt can be drawn into the dehydrator and can contaminate the food being dried.• Make sure the appliance and all controls are in OFF position before inserting plug in electrical outlet.• Do not place the dehydrator on a towel or carpet. This will reduce or cut off the dehydrator’s airflow and could result in damage to the appliance.• Always leave at least 3cm of space around the dehydrator on all sides for proper ventilation.• Do not use more than 20 drying trays at one time.• To clean the heating base, unplug from wall outlet and wipe with damp cloth or sponge and mild soap. Do not immerse base or cord in water. Top lid and trays may be submerged in warm water and washed with mild soap or washed in TOP rack of dishwasher only. Heat from the drying cycle can warp trays which is not covered by warranty.• Before each time you operate your food dehydrator, be sure to wash and dry the trays and any other parts which will contact the food.• Only use the appliance on a suitable heat-resistant surface to avoid damage.
Setup
Before first useRead the manual in full and retain for future reference.
The first time you turn on the food dehydrator, you may notice an odour. This is normal. To avoid odour from being transferred to the food, place one tray covered with lid on the base of the unit, and following instructions, allow the unit to run without food in place until the odour is gone. This is only necessary the first time you use the dehydrator and takes less than one hour.
Preparing for use
Place the dehydrator on a flat, dry, stable and heat-protected surface. Ensure there is at least 3cm of clearance in all directions to allow proper ventilation.Prepare food according to the instructions given in this manual and fill the drying trays. NEVER cover the centre hole in the trays or the vents on the top lid.
Before you begin preparing your food, wash and dry the trays, the lid and the tray liners, if they are to be used. Place dehydrator base where you intend to use it for the dehydration process and insure electrical cord reaches an outlet in a safe manner. This way, as you prepare the food, you can place it right on the trays. As a tray is filled, it can be placed on the dehydrator for easy setup. Before loading the trays with food, it is a good idea to make sure that they are all aligned fight-side up by stacking them up in one place near the preparation area. The narrow side of the tray always is the top. Trays have alignment arrows cast into the handle. The arrow (as seen below) should all be visible on the top of the tray handles. Improperly stacked trays will negatively affect the drying process.
Once the trays are all right-side up you can stack them in two different ways.Depending on their orientation to each other, they can be set for thick or thin foods. To change the stacking height simply rotate a tray 180 degrees to change whether it is tall or short stacked.
Any combination of stacking can be used to accommodate the foods being dried. An example would be some short tray stacking for banana chips and some tall stacking for large strawberry halves. When properly stacked, trays will be locked into each other whether tall stacked or short stacked and in any combination thereof.
Operation
How to use
- Set up as per the previous “Setup” section and plug into an electrical outlet.
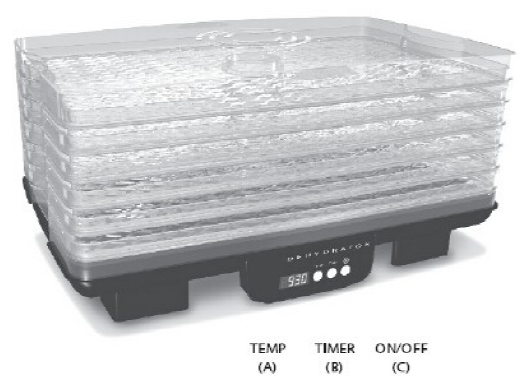
- To adjust the “Temperature”, press the <TEMP> button (A) to set the desired temperature range from 40°C to 70°C. A single press of the button increases the temperature by 5°C, and holding the button down increases the temperature more quickly.
- To adjust the “Time”, press the <TIMER> button (B) to set the desired time range from 1 hour to 48 hours. Press and hold the button and release when desired hours are achieved.
- Inspect drying trays periodically. Rotate trays if the food you are drying requires it. Remove all the trays as a unit, and then remove the lid. Place the top tray on the base, followed by the next uppermost tray, until all trays have been rotated.
NOTE: The model will stop automatically when the time expires or you can stop it at any time using the <ON/OFF> button. Remove the plug from the outlet once it has stopped.Consult the various tables at the end of this manual to get an idea as to when food is properly dehydrated and ready to be stored.
Storing Food
Once food is properly dried, it is important to store it properly for best results.By following these storage techniques, your food will stay fresh and ready to use for the longest time possible.
Containers
Any container which is clean, airtight and moisture-proof is suitable for storage.Heavy, zippered plastic bags or heat-sealing cooking bags are excellent. Fill each bag as much as possible and squeeze out excess air. Filled bags may be placed in metal cans with lids (shortening or coffee cans are good) to keep out insects. Glass jars with tight-fitting lids can be used with or without plastic bags. Quality plastic containers with tight-fitting lids are good but they must be airtight. Do not use paper or cloth bags, lightweight plastic bags, bread wrappers, or any container without a tight-fitting lid.
Troubleshooting
| Symptom | Possible Cause | Steps to Resolve |
| No Heat No Fan | No power | 1. Be sure unit is plugged in.
2. Make sure power switch is on. 3. Check that out let is working. |
| No Heat Fan-OK | Broken wire in unit | Contact Kogan Support |
| Heat-OK No Fan | Motor stalled or fan blocked | 1. Turn off immediately.
2. Check for foreign objects(pieces of dried food) jamming fan. Turn base assembly up side down and shake vigorously. Turn unit on side and shake particles out. Iff an still doesn’t operate, contact Kogan Support. 3. If liquid has been spilled in to the air vents or the fan housing, unplug immediately and contact Kogan Support. |
| Slow drying | Trays over filled
Fan jammed or running too slowly
Air leaks due to war pedor improperly stacked trays |
1. Air must flow freely around for proper drying. Reduce quantity in trays or rear range food.
2. Check for foreign objects jamming fan(see <Heat-OK, No Fan>above). 3. Fan motor running slow. Contact Kogan Support. 4. Replace warped trays. NOTE: The heat during drying cycle on most dish washers may warp the drying trays. 5. Re-stack trays properly. |
| Un even drying | Variation in food thickness and ripeness
Trays not rotated
Too much food in drying trays |
1. Check that food is similar thickness.
2. Rotate trays once or twice during dehydration process. 3. Check that food on trays is not blocking air flow through trays tack. Make sure central chimney of tray is not obstructed. |
| Overheating or insufficient heat | Temperature control not functioning at proper range | Temperature in the lowest trays hould be approximately60°Cwithemptytraysinplace. If temperature varies significantly, adjust accordingly high eror lower or contact Kogan Support. |
| Noisy Fan/Motor | Foreign matter in fan Motor bearing worn | 1. Check for foreign objects jamming fan(see
<Heat-OK, No Fan>above). 2. Contact Kogan Support. |
Food Dehydration Tips and Ideas
- Fruit and vegetable peel is often the most healthful part of the food. It is best not to peel fruits and vegetables unless a recipe specifically calls for it.
- As much as possible, slice food evenly and with wide, diagonal cuts so that the food dries best and most evenly.
- Vegetables can be pre-treated by steaming until slightly tender.
- Green beans, cauliflower, broccoli, asparagus, potatoes and peas can be blanched by placing in boiling water for 3-5 minutes.
- You can make cheap and delicious fruit leathers with the dehydrator. Simply wash, remove pits/seeds as necessary and skin according to taste and puree, adding liquid (honey, fruit juice or water) to produce a suitable texture.
- Lean meat can be used for dried meat or jerky. White meat must always be cooked and other meats should be cooked unless being made into jerky.
To make jerky:
- Choose a high-quality cut of beef.
- Prepare by cutting away fat and connective tissue.
- Freeze partially (30 minutes one side, turn and freeze another 15).
- Cut into strips about 3-5mm thick.
- Marinate overnight or for upwards of 3 hours.
- Season with salt, pepper, garlic/onion powder or other spices to taste.
- Note that flavours intensify during dehydration, so use strong flavours like salt sparingly.
Food Preparation Tables
| Vegetable | Preparation | Dryness Test | Approx. Time(hrs) |
| Artichokes | Cutinto1/2inchstrips.Boilabout10minutes | brittle | 6to14 |
| Asparagus | Cutinto1-inchpieces.Tipsyieldbetterproduct | brittle | 6to14 |
| Beans | Cut and steam blanch until translucent | brittle | 8to26 |
| Beets | Blanch, cool, remove top sand roots. Slice | brittle | 8to26 |
| Brussel Sprout | Cut sprouts from stalk Cut in half length wise | crispy | 8to30 |
| Broccoli | Trim and cut. Steam tender,about3to5min. | brittle | 6to20 |
| Cabbage | Trim andcutinto1/2inchstrips.Cutcoreinto1/4 inch strips | leathery | 6to14 |
| Carrots | Steam until tender .Shred or cut in to slices | leathery | 6to12 |
| Cauliflower | Steam blanch until tender. Trim and cut | leathery | 6to16 |
| Celery | Cutstalksinto1/4inchslices | brittle | 6to14 |
| Chives | Chop | brittle | 6to10 |
| Cucumber | Pareandcutinto1/2inchslices | leathery | 6to18 |
| Eggplant/Squash | Trim andslice1/4inchto1/2inchthick | brittle | 6to18 |
| Garlic | Remove skin from clove and slice | brittle | 6to16 |
| Hot Peppers | Dry whole | leathery | 6to14 |
| Mushrooms | Slice chop, or dry whole | leathery | 6to14 |
| Onions | Slice thin lyor chop | brittle | 8to14 |
| Peas | Shellandblanchfor3to5minutes | brittle | 8to14 |
| peppers | Cutinto1/4inchstripsorrings.Removeseeds | brittle | 4to14 |
| Potatoes | Slice, dicor cut. Steam blanch8to10min. | brittle | 6to18 |
| Rhubarb | Removeouterskinandcutinto1/2inchlengths | No moisture | 6to38 |
| Spinach | Steam blanch until wilted, but not soggy. Kale, etc | brittle | 6to16 |
| Tomatoes | Remove skin. Cut in halves or slices | leathery | 8to24 |
| Zucchini | Sliceinto1/4inchpieces | brittle | 6to18 |
| Fruit | Preparation | Dryness Test | Approx. Time(hrs) |
| Apples | Pear, core and cut slices or rings | pliable | 5to6 |
| Artichokes | Cutinto1/2inchstrips | brittle | 5to13 |
| Apricots | Clean, cut in halve sor in slices | pliable | 12to38 |
| Bananas | Peelandcutinto1/2inchslices | crisp | 8to38 |
| Berries | Cutstrawberriesinto3/2inchslice.Otherberries whole | no moisture | 8to26 |
| Cherries | Pittingisoptional,orpitwhen50% dry | leathery | 8to34 |
| Cranberries | Choppor leave whole | pliable | 6to26 |
| Dates | pit and slice | leathery | 6to26 |
| Figs | Slice | leathery | 6to26 |
| Grapes | Leave whole | pliable | 8to38 |
| Nectarines | Cutinhalf,drywithskinsidedown.Pitwhen50% dry | pliable | 8to26 |
| Orange Rind | Peel in long strips | brittle | 8to16 |
| Peaches | Pitwhen50% dry. Halve or quarter with cut side up | pliable | 10to34 |
| Pears | Pee land slice | pliable | 8to30 |
![]()
[xyz-ips snippet=”download-snippet”]