kogan 65″ LED TV Full HD User Manual
Assembling the Stand
Before attaching/detaching the stand, be sure to turn the TV off. Before performing any work, spread cushioning out over the base area to laythe TV on. This will prevent it from being damaged.
Stand Installation Instructions

Safety Instructions
General Safety Instructions
Risk of electric shock. DO NOT OPEN! Do not attempt to service the television yourself, as opening or removing the covers may expose you to dangerous voltage or other hazards. Refer all servicing to the Kogan customer support team.
To reduce the risk of fire or electric shock, do not expose this product to rain or moisture. The television should not be exposed to dripping or or splashing, and no liquid filled objectssuch as vases should be placed on the case.

In the event of smoke, strange noises or a strange smell from the unit, you should follow these steps:
- Turn off the unit immediately.
- Disconnect the power plug from the power outlet.
- Contact the Kogan customer support team. Never attempt to make repairs yourself.

Never push objects of any kind into the set through the cabinet slots as they may touch dangerous voltage points or short-circuit parts that could result in a fire orelectric shock. Never spill any liquids onto the set. Use special caution in households where children are present. The television is not suitable for children under 4 years old to operate.
Power supply cords should be routed safely to prevent dangers due to damaged cords.The mains plug is the main disconnect method, so it should be easily accessible and not be obstructed during use.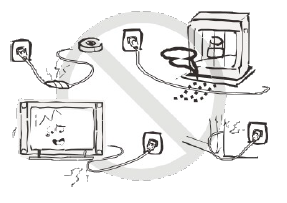
To avoid fires, no naked flame sources such as lit candles or burning incense should be placed onto the casing of the television.
Do not pull the plug out of a power outlet by pulling on the power cable. Always grasp the plug and pull.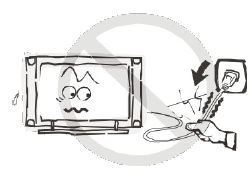
Never touch the plug with wet hands.
An outside antenna system should not be located in the vicinity of overhead power lines or other electric light or power circuits.When installing an outside antenna system, extreme care should be taken to keep from touching such power lines or circuits, as contact with them may be fatal.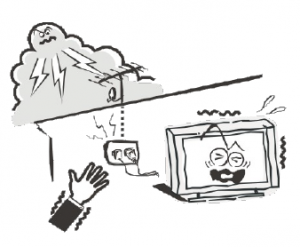
Always turn the set off when it is not being used. Unplug the television from the power outlet when it will not be used for a long time or when there is an electrical storm.Never touch the antenna cable during a lightning storm.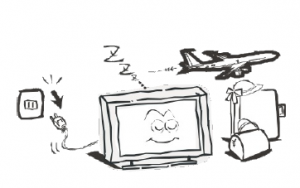
Excessive volume from earphones and headphones can cause permanent hearing loss. Always monitor the volume of noise from these devices, especially when children are using them.
Installation
Ventilation should not be impeded or limited by covering the ventilation slots with items such as newspapers, tablecloths, curtains etc..At least 10cm of space should be left around the apparatus for sufficient ventilation. The television should be situated away from heat sources such as radiators, heaters, stoves or other products that product heat. Place the television in a position where the screen isnot exposed to direct sunlight. It is best to have soft indirect lighting while watching, and you should avoid a completely dark viewing environment and reflections to avoid eye fatigue.Keep the product away from high magnetic fields(such as near an amplifier speaker) to avoid affecting the tint.

Do not place the television on an unstable table, stand or shelf. The set may fall, causing serious injury as well as damage to the television itself.If moving the television on a cart, move the unit with care as sudden stops and starts may cause the television to overturn.
Do not place this television near water, for example near a bathtub, wash bowl, kitchen sink, laundry tub, swimming pool or in a damp basement etc..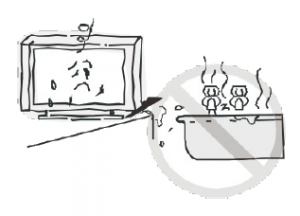 Do not place this television near water, for example near a bathtub, wash bowl, kitchen sink, laundry tub, swimming pool or in a damp basement etc..
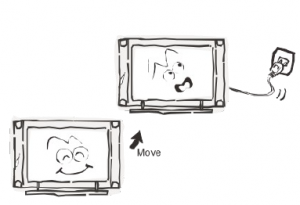 When moving the television to a warm location from a cold location, allow some time for any dew or condensation inside the television to evaporate fully before you turn the unit on.
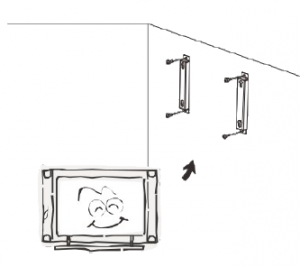
To prevent injury, the television must be securely attached to the floor/wall in accordance to the supplied installation instructions.
Cleaning
Unplug the television from the power supply before cleaning. Do not use any liquid cleaners or harsh chemicals. Use a soft, damp cloth.
General Description
- Zero X radiation complies to green environment protection requirements.
- Auto tuning and fine tuning.
- One PC VGA input socket.
- One YpbPr input socket.
- Three HDMI input sockets (HDMI 1.4)
- One composite video input socket.
- One audio input socket.
- USB support.
- Headphone support
Specifications & Accessories
Specifications
| Model | KALED65XXXZA |
| Display Screen Size | 65”Diagonal |
| Maximum Resolution | 1920×1080 |
| Power Supply | AC10-240V~50/60Hz |
| TV Receive System | PAL/SECAM:BG,DK,IDVB-T |
| Frequency Range | DTV:VHF(174MHz-230MHz) UHF(474MHz-862MHz) |
| Video In | PAL/NTSC |
| Antena Input Impedance | 75ohm |
| Sound Output | 2x8W |
| Remote Power Input | DC3V (TwoAAA bateries) |
| Power Consumption | 180W |
| Operating Temperatures | 0°C~40°C |
Accessories
Remote Control
Overview
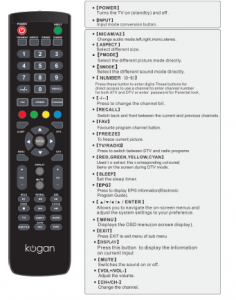
The buttons on the lower-right panel control your TVs basic features, including the on-screen menu. To use the televisions more advanced features, you must use the remote control.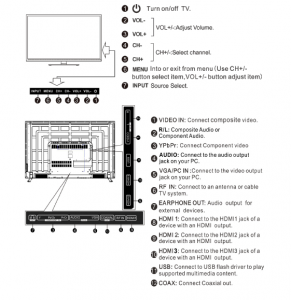
Remote Control

Basic Operation
Changing the Input SourcePress INPUT to select the input source.Press to cycle through the ▲▼ input sources, and press ENTER to confirm your selection.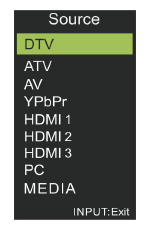
Before using the TV, follow the steps below to learn how to navigate the menu in order to select and adjust different functions. The access steps may differdepending on the menu you are in at the time.
- Press MENU to display the main menu.
- Press ◀ ▶ to cycle through the main menu.
- Press ▲ ▼ to select the desired sub item.
- Press ENTER to access the submenu.
- Press ▲ ▼ ◀ ▶ to select the desired value. The adjustment in the OSD may differ depending on the selected menu.
- Press MENU to return to the previous menu.
- Press EXIT to exit from the menu.
Notes:
- When an item in the MENU is displayed in grey, it means the item is not available or cannot be adjusted in the current menu or submenu.
- Buttons on the TV have the same function as the corresponding buttons on the remote control. This manual will focus on the operations using the remote control. Menu Operation
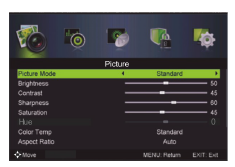
Select the type of sound to suit your viewing requirements. You can change the values of Treble, Bass and Balance. You can change the status of Sound Mode, Surround Sound,EQ Setting, AVL, SPDIF, Audio Description and Sound Type.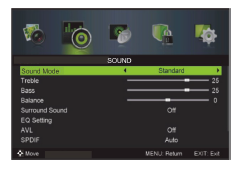
Make changes to the channels to suit your viewing requirements. You can edit Auto Scan, Manual Tuning, Auto Channel Update, Channel Edit, Favourites and Signal Information.Note: some adjustment options are only available in DTV mode.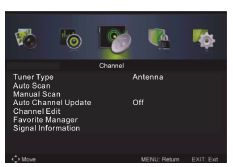
Select the type of lock to suit your viewing requirements. You can change the status of Enable, Channel Locks, Parental Ratings, Lock Keypad, New Password and Clear Lock.Default password: 0000
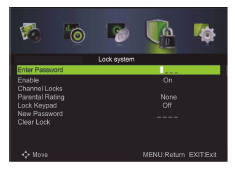
Select the type of setup to suit your viewing requirements. You can change the status of OSD Language, Audio Languages, Subtitle, Teletext, Blue Screen, Mode Settings, Time Settings,PVR Settings, First Time setup, OAD, Reset and Software Update (USB).Note: some adjustment options are only available in DTV mode.
Media Operating Interface
This screen is available in menu mode. You can access PHOTO, MUSIC, MOVIE and TEXT modes.
PVR
Personal Video Recorder File SystemWARNING
- Before connecting your USB device to the TV, please back up all of thefiles on it to prevent them from being corrupted or lost.
- A USB disk must be formatted when first used for PVR. Any existing data on the disk will be lost during the formatting process. Please back up the disk if you do not want to lose the data on it. We recommend you use a dedicated storage device for PVR storage. Do not remove or disconnect the disk during formatting or during reading/writing.
- Do not modify the PVR files on a PC.
Note: make sure the USB device is compatible with the TV and is capable of supporting PVR recording.
Formatting the USB
Press the LIST button to enter the PVR setting menu, then press ◀ ▶ to select the Device list. Press ENTER to enter the submenu.
In the Device list menu, press ▲ ▼ to select the USB drive where you want to use for the PVR service, then press the RED button to start the formatting.
Note: the disk must be formatted when first used for PVR. Do not disconnect the disk or turn the power off during the formatting. The larger your device, the longer the format process will take. The formatting may take quite a few minutes to perform. This is not a malfunction. Please wait for the process to finish.
PVR Guide
If the disk for the PVR is ready, the programs can be recorded inDTV mode.Time Shift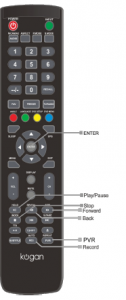 In DTV mode, press “T.Shift” to pause the DTV program, then press it again to resume play. The length of time a program can be paused depends upon the setting in the PVR File System. Press ◼ to stop the Time Shift. Press the PLAY button to continue playing the program from the point where it was paused.Note: Time Shift will stop if you change channels, change inputs or go into standby mode while in Time Shift mode.
Instant Recording
- Select the desired channel then press the REC button on the remote control to start recording the current broadcast. A progress bar will be shown at the bottom of the screen.
- Recording stops when you press the ◼ button. The recorded file will bestored on the external USB device automatically.
Note: You can only watch channels on the same frequency as the program being recorded. If you try to change to another channel or exit to the main interface, a message will appear prompting you to continue or to stop the recording.
DTV EPG (Electronic Program Guide)
In DTV mode, press EPG to enter the Electronic Program Guide. In the Guide menu, press REC to set a recording.
In the Guide menu, press BLUE to enter the “Reminder” menu.Press the buttons to adjust ◀▶▲▼ the scheduled time, then press ENTER to save the setting.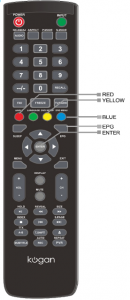
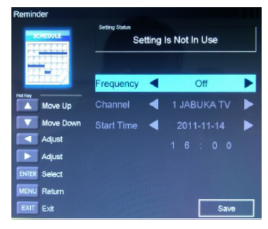
In the Guide menu, press YELLOW to enter the “Schedule” menu.Press the ◀ ▶ ▲ ▼ buttons to adjust the scheduled time, then press ENTER to save the setting.
Troubleshooting
If you have any problems with your television, please check the suggested solutions below, as these issues may be caused by improper adjustment/setup rather than a malfunction with the unit. If the problem persists, please contact the Kogan customer support team.
Problem |
Possible Solution |
| Poor picture and sound quality | • Try a different channel• Adjust the antenna• Check all connections |
| No picture or sound in TV status | • Try another channel• Press the TV/AV button• Make sure TV is plugged in• Check the antenna connection |
| No sound, or sound is too low at maximumvolume | • Check the volume settings on any external speakers connected to yourtelevision• Adjust the TV volume accordingly• Check that MUTE hasn’t been turned on |
| No colour, wrong colour or tints | • Make sure the program itself is broadcast in colour• Select the picture menu, then adjust the colour and tint submenus |
| Blurred or snowy picture, distorted sound | • Check direction, location and connections to your antenna• Issues may be caused by use of an indoor antenna |
| Remote control malfunctions | • Replace remote control batteries• Check battery terminals• Remote is out of range, move closer to TV• Confirm there is no obstructions between remote and TV• Make sure power cord is plugged in |
| Image is not centered on the screen | • Adjust the horizontal and vertical position |
Read More About This Manual & Download PDF:
[xyz-ips snippet=”download-snippet”]


 Sound Menu