![]()
 USER GUIDE
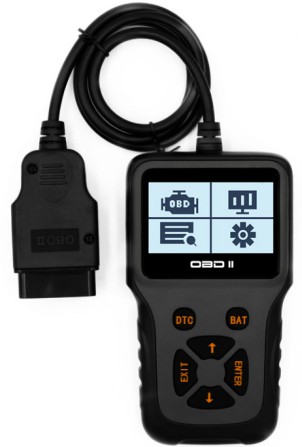
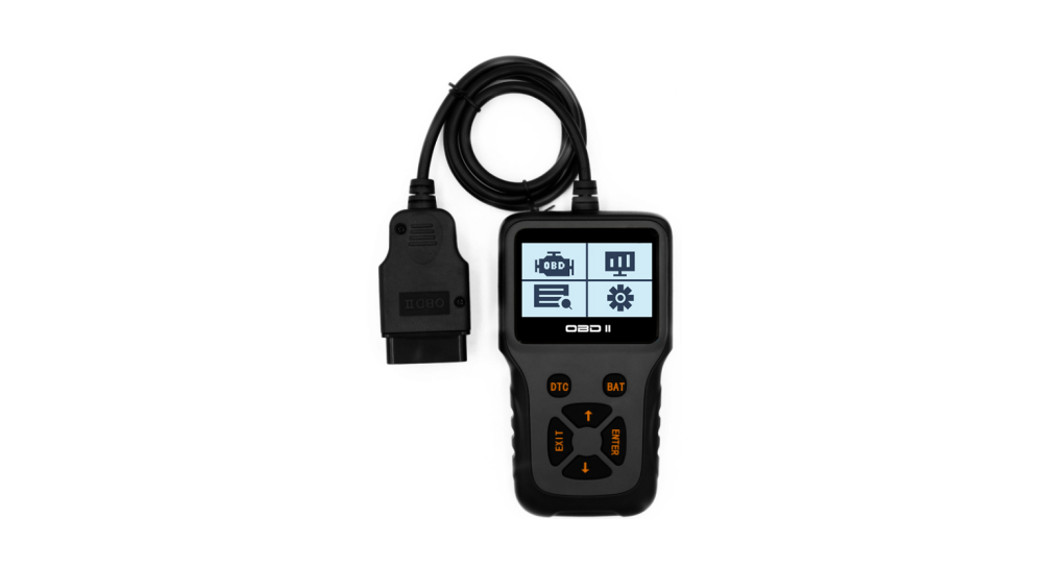
UNIVERSAL OBD II SCANNER CARENGINE FAULT CODE READERDIAGNOSTIC TOOLCTUNIOBDIIA
SAFETY & WARNINGS
To prevent injuries or possible damage to the vehicles and decoder, read all safety instructions before operation. Retain this user guide for future reference.
- Always use this product in a safe environment.
- Always wear proper protective clothing and equipment when working on a vehicle.
- Operate the vehicle in a well-ventilated area. Vehicle emissions are harmful to the human body.
- Place a block plate in front of the drive wheel during operation.
- Be careful when operating near the ignition wire and spark plug of the ignition coil distributor cover. These components generate a dangerous voltage when the engine is running.
- Place the gearbox in PARK (automatic gearbox) or NEUTRAL (manual gearbox) and make sure the parking brake is enabled.
- Do not connect or disconnect any test equipment when the ignition is on or the engine is running.
- Always keep the code reader clean and dry. Wipe the code reader with a soft clean if necessary.
OVERVIEW
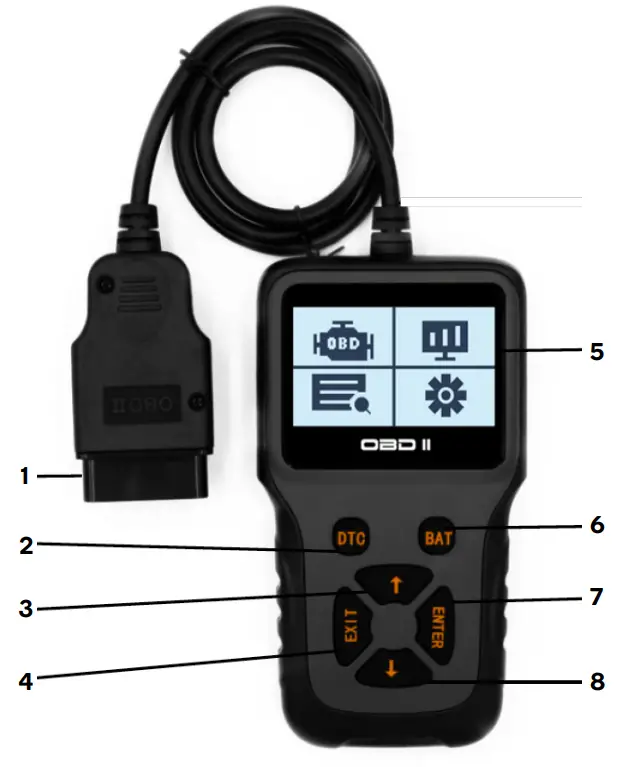
| 1 OBDII Connector2 Diagnostic Code3 Up4 Exit (return) | 5 Display6 Battery Voltage7 Enter (confirm)8 Down |
DTC Trouble Code Search
OBD-II search powered by dot.report
OPERATION
Connecting to VehicleVehicle data link cable (DLC) supplies the power to the code reader. Open the decoder by the following steps
- Connect OBD II wire to the code reader.
- Takedown DLC cover plate from the vehicle Some vehicles have the plastic coverplate, need to take down it before inserting the OBD2 cable.
- Insert OBD II wire to vehicle DLC.
Button Functions
| OBDII Connector | Connects the code reader to the vehicle’s on-board diagnostic (OBDII) port |
| DlagnosUc Code | Displays the diagnostic code. |
| Up | Used to navigate up in the menus. |
| Exit (return) | Short press: Cancels the selection (or operation) in the menu or returns to the menu.Press and hold for 3 seconds: Used to set the unit |
| Display | Displays the vehicle information and menus. |
| BatteryVoltage | Displays the battery voltage. |
| Enter (confirm) | Confirms the selection (or operation) in the menu. |
| Down | Used to navigate down in the menus. |
Getting StartedCarry out the following adjustments and settings before using or the code reader for the first time:
- Language: Select the required language.
- Measurement unit: Set the measurement unit as imperial or metric units.
- Contrast adjustment: Adjust the contrast of the LCD display screen.
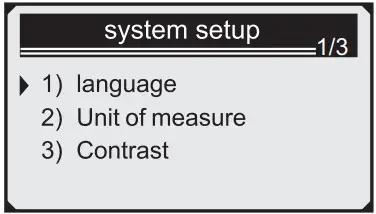
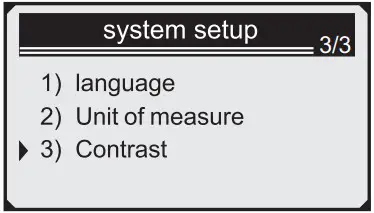
Enter setting menuPress the Up/Down button to enter the system setting menu. 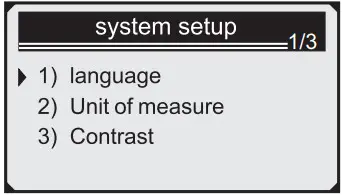
Note: The “1/X” on the upper right corner of the screen shows the total number of items under the menu and the serial number of the currently selected item.
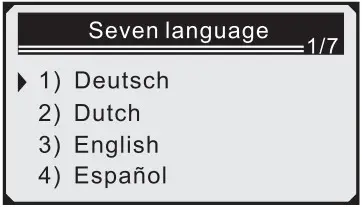
Language:
- In the system setting menu, press the Up/Down button to select the language and then press Enter.
- Press the Up/Down button to select the required language, press Enter button to save the selection, and return to the previous menu.
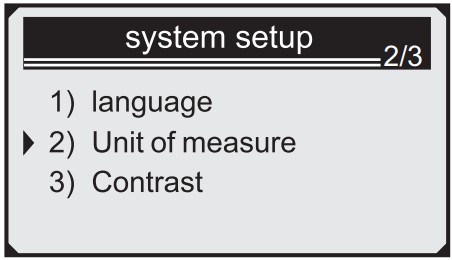
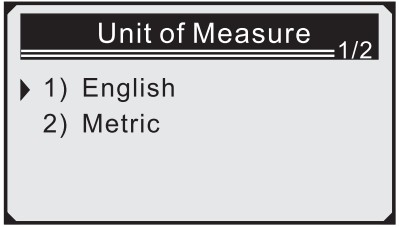
Measurement unit: A measurement unit is a metric unit by default
- In the system setting menu, press the Up/Down button to select the measurement and then press Enter.
- Press the Up/Down button to select the required measurement unit, press Enter button to save the selection, and return to the previous menu.
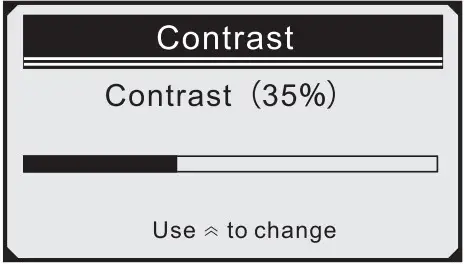
Contrast adjustment
- In the system setting menu, press the Up/Down button to select the contrast and then press Enter.
- Press the Up/Down button to adjust the contrast then press Enter button to save the selection and return to the previous menu.
Exit the system settingPress the Exit button to return to the start menu.
Application range of vehicle
This OBD II code reader is designed for all the vehicles that accord with the OBD II standards. All the vehicles selling in the USA as required by the United States Environmental Protection Agency and 1996 newer (automobile) light trucks must be accorded with OBD II standard. Including all the domestic, Asian, and European vehicles. A small amount of 1994 and 1995 petrol vehicles are in accord with OBD II standards. If you need to verify if a 1994-1995 vehicle complies, please check the vehicle emission control information (VECI) label. If the vehicle is compatible, then its label is marked with “OBD II certification”. In addition, the government laws and regulations require all the vehicles that are accorded with OBD II standard must-have a “General” 16 pin data link connector (DLC).OBD II diagnosisWhen the code reader detects multiple vehicle control modules, the system will prompt you to select the module that can retrieve the data. Power assembly control module [PCM] and gearbox control module [TCM] are the two most common options.WARNING: Do not connect or disconnect any test equipment when the vehicle ignition is on or the engine is running.
- Turn off the ignition switch.
- Find the vehicle 16 pin data link connector (DLC)
- Connect OBD II cable to vehicle DLC.
- Turn on ignition.
- Press Enter button to enter diagnostic menu. A series of OBD II protocol information will be displayed on the display screen until the vehicle protocol is detected.
- If the code reader cannot communicate with the vehicle ECU (engine control unit), “Connection error!” will be displayed on the display screen.•Confirm ignition switch is turned on.•Check if the OBD II connector of the decoder is connected to vehicle DLC;•Confirm the vehicle is accorded with OBD2 standard;•Turn off the ignition switch and wait for 10 seconds. Turn on the ignition switch again, repeat the steps in 5.
- If “Connection error” information still appears and then it may a communication issue between the coder reader and the vehicle. Please cease use and contact help.Kogan.com for support.
- After the system status (Diagnostic indicator state, diagnostic code counting, monitor state) is displayed, wait for several seconds or press any key to display the diagnosticmenu.
Reading error codes
- Press the Up/Down button to select the read code from the diagnostic menu and then press Enter button.
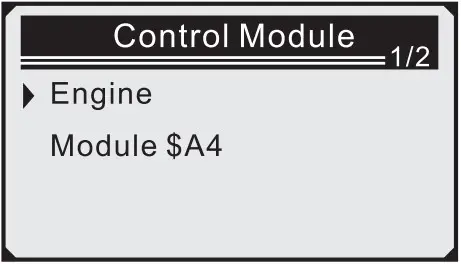
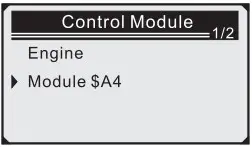
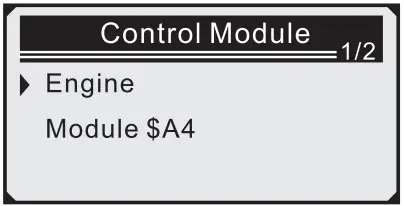
- If multiple modules are detected, the system will prompt you to select the module before testing.
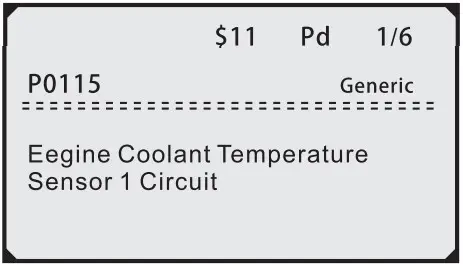
- The code reader will display the error code and a description of the issue.Note: The diagnostic code order, total numbers of code to be detected, and types of code (general or specified by the manufacturer, storage or code to be processed) will be isplayed on the upper right corner of the screen.
- f multiple error codes are detected press the Up/Down buttons until all codes are displayed.
- If no errors are detected, “Code is not stored in module!” is displayed on the screen.
- If the retrieved DTC contains any code specified by the manufacturer or the enhanced codes and then “Controlled by manufacturer” is displayed on the screen.
- Press the Exit button to return to the previous menu.
Deleting an error codeCaution: Deleting the diagnostic code on the code reader may not only delete the code on the vehicle ECU but also “Freeze Frame” data and the enhanced data of the manufacturer. Do not delete the code before a vehicle technician checks the system completely.
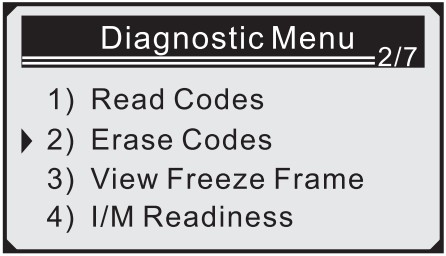
- To delete the diagnostic code, please press the Up/Down button to select“Delete the code” from the Diagnostic menu and then press Enter.
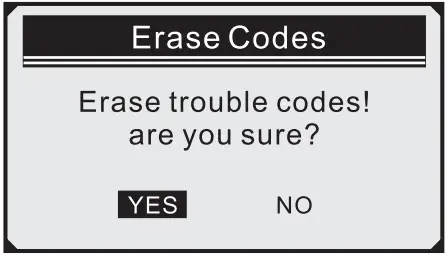
- A warning message appears, select “YES” then press Enter to confirm.
- If the code is deleted successfully, “Delete is finished!” is displayed on the screen.
- If the code is not deleted, then “Delete is failed” is displaced. Wait a few seconds or press any button to return to the Diagnostic Menu.
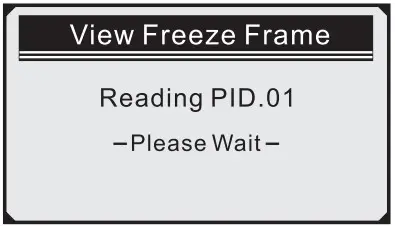
Reading Freeze Frame data
- I need to read Freeze Frame data, press the Up/Down button to select the Freeze Frame diagnostic menu, and then press Enter.
- If multiple error codes are detected Press the Up/Down buttons until all codes are displayed.
- Press the Up/Down button to select a module and then Enter.
- Wait for several seconds, until the decoder PID mapping is verified.
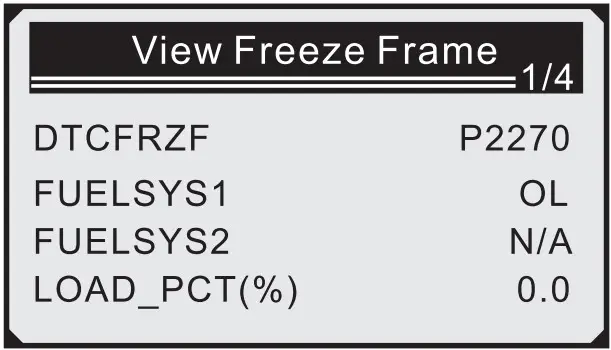
- If the retrieved information covers multiple screens and then needs to press the “Up/Down” button until all the data is displayed.
- If no available Freeze Frame data is available, “Freeze Frame is not stored” information will be displayed on the screen.
- Press Exit to return to Diagnostic menu

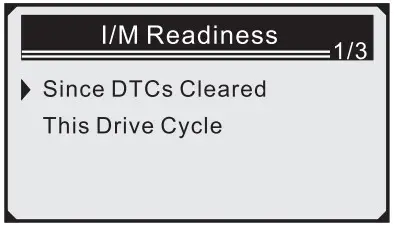
Retrieve I/M ready stateI/M ready function is used to check the operating status of the vehicle’s emission system.Some newest vehicles models may support two types of I/M ready tests:
- DTC has been deleted – Displays the status since the error code was deleted.
- This Drive Cycle – Monitors the status since the current drive cycle has started.
- If the code reader displays “No”, it cannot pass the state I/M check.
- “Confirm” – This shows the diagnostic test for the special monitor being checked has been finished.
- “INC” – This shows the diagnostic test for the special monitor being checked has not been finished.
- “Not applicable” – The vehicle doesn’t support the monitor.
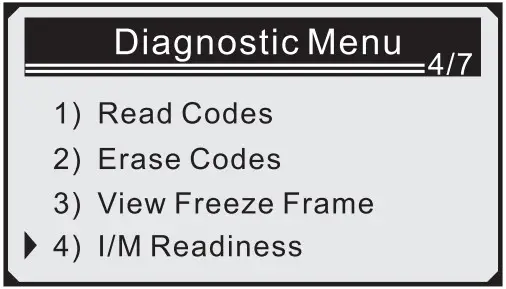
- Press the Up/Down button to select I/M ready from the Diagnostic menu and then press Enter.
- If multiple modules are detected, the system will prompt you to select the module before testing.
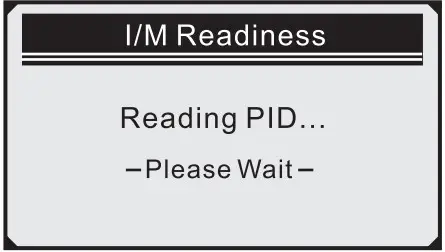
- Press the Up/Down button to select a module and then press Enter button.
- Wait for several seconds, until the decoder PID mapping is verified.
- If the vehicle supports two types of test. Two types are displayed on the screen for selection.
- Press Up/Down button to read MIL light status (“ON” or “OFF”) and the following monitors.• Misfire monitor— Misfire monitor• Fuel System Mon— Fuel system monitor• Component— Comprehensive component monitor• EGR— EGR system monitor• Oxygen Sens Mon– Oxygen sensor monitor• Catalyst Mon— Catalyst monitor• EVAP System Mon— Evaporation system monitor• Oxygen Sens htr — Oxygen sensor heater monitor• Sec Air System— Secondary air monitor• Htd Catalyst— Heating catalyst monitor• A-C Refrig Mon—A / C system monitor
- If the vehicle supports the “This Drive Cycle” ready test, the following information will be displayed on the screen:

 • Misfire monitor— Misfire monitor• Fuel System Mon— Fuel system monitor• Component— Comprehensive component monitor• EGR— EGR system monitor• Oxygen Sens Mon– Oxygen sensor monitor• Catalyst Mon— Catalyst monitor• EVAP System Mon— Evaporation system monitor• Oxygen Sens htr — Oxygen sensor heater monitor• Sec Air System— Secondary air monitor• Htd Catalyst— Heating catalyst monitor• A-C Refrig Mon—A / C system monitor
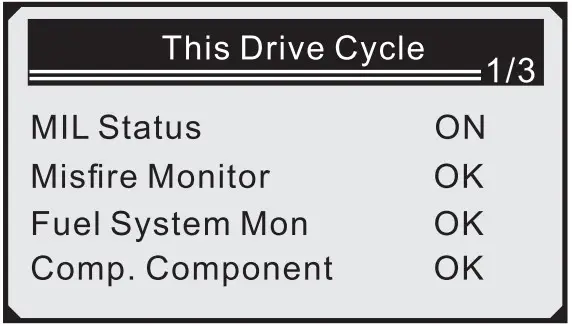
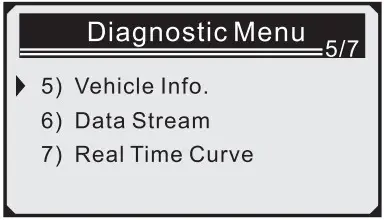
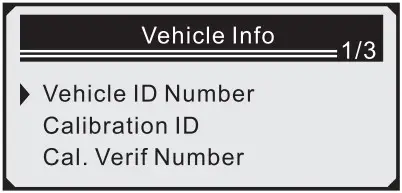
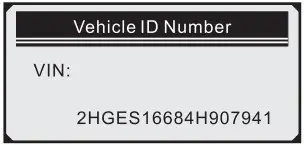
Read the vehicle information
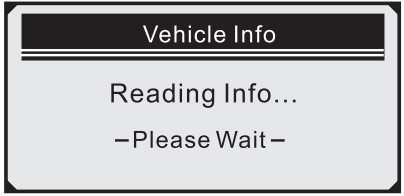
- In the Diagnostic menu, press the Up/Down button to select the vehicle information. Enter button.
- Wait for several seconds or press the Return/Confirm button to go on.Note: If the vehicle doesn’t support this model. “The selected mode is not supported!” information is isplayed on the screen.
- If multiple modules are detected, the system will prompt you to select the module before testing.
- Press the Up/Down button to select a module and then press Enter.
- When the code reader is reading the vehicle information, please wait for several seconds.
- In-vehicle information menu, press the Up/Down button to select the available items you want and then press Enter.
- Read the retrieved vehicle information on the screen.
- Press the Exit button to return to the previous menu.

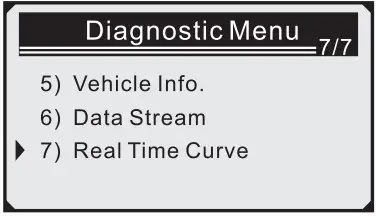
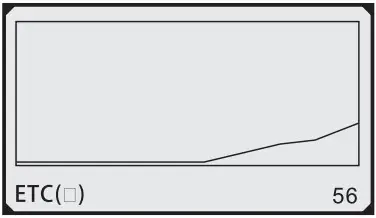
Diagnostic menu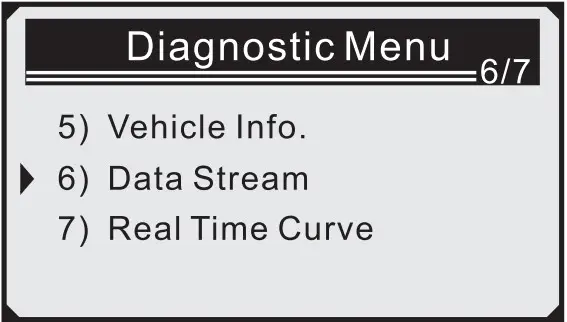 Press the “Confirm” button to enter the diagnosis interface
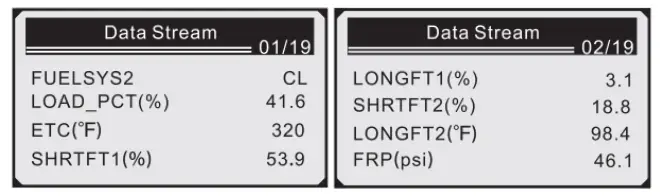 Waveform display
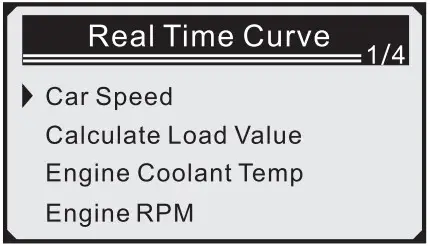
- Press Enter button to enter the real-time waveform interface.
- Press the “Confirm” button to read speed waveform display.
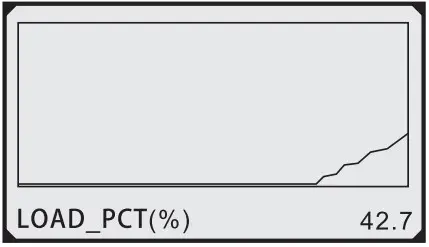
- Press the “Confirm” button to enter calculate load value interface.
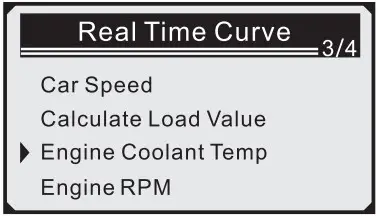
- Press Enter button to enter the engine cooling liquid temperature waveform display interface.
- Press Enter button to enter the engine rotation speed waveform display interface.
- Press the Exit button to quickly exit the waveform display interface.


Diagnostic code query
- Press “ ” to adjust the next code
- Press “ ” to adjust the current code
- Press Confirm to query after input the code.

SPECIFICATIONS
| Display | 128 x 64-pixel |
| Working temperature | 0~60°C (32~140°C) |
| Storage temperature | -20~70°C (-4~ 158°C) |
| External power supply | Vehicle batteries supply 9.0 – 16.0V |
| Dimensions (LxWxH) | 156 x 88 x 24mm |
NOTES
___________________________
___________________________
Need more information?We hope that this user guide has given you the assistance needed for a simple setup.For the most up-to-date guide for your product, as well as any additional assistance you may require,head online to help.kogan.com
![]()
[xyz-ips snippet=”download-snippet”]