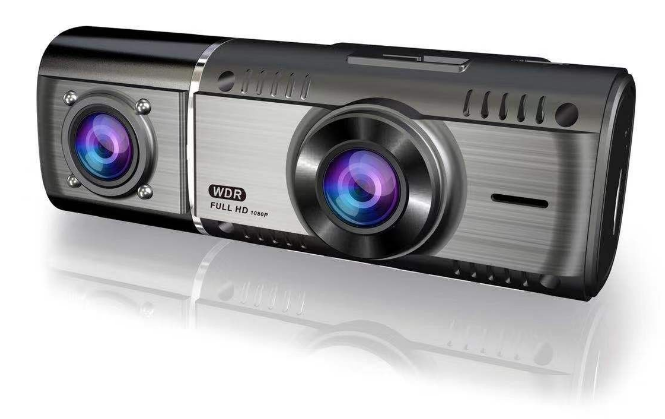
D6 Dual Lens Dash Camera Recorder

Read this manual carefully before using this product. Retain for future reference.
Key function descriptions
Power key |
|
|
Function 1: Switch machine function |
In the shutdown state, press and hold the “power” key for 2 seconds to turn on and the machine will start to work automatically. During the power-on state, long-press the “power” button for 2 seconds, the machine automatically saves the video file and shuts down. |
|
Function 2: Turn off the screen |
In the power-on state, short press “power” key to turn off / wake up the display. |
OK key |
|
|
Function 1: Activate / deactivate the recording function |
In the recording mode, short press “Enter” to start recording and short press “Enter” again to stop recording. |
|
Function 2: Camera button |
In the photo mode, short press the “Enter” key to take a photo. |
|
Function 3: File playback |
In the file browsing mode, short press “Enter” to play the video. |
|
Function 4: Confirm key |
Under the state of standby recording mode / photographing mode / playback mode; short press “Menu” key to enter the menu mode, short press “Up key / Down” key to browse and short press “Enter” key to confirm. |
Up key / Back / Camera switch |
|
|
Function 1: page up function: |
Page up function in menu setting and playback mode. |
|
Function 2: Quick Back: |
In playback mode, short press “Up” to rewind. |
|
Function 3: camera switching function: |
After connecting the external rear camera, the dual camera will be displayed automatically. In the video mode, short press “Up” key to switch between multiple display modes of the front camera, picture-in- picture and rear camera display; in photo mode, short press “Up” key to switch between front camera and rear camera. In playback mode, long-press the up button to switch between front and back camera. |
Recording / Down key / Fast forward / Short mode switch |
|
|
Function 1: page down function: |
Page down function in menu setting and playback mode. |
|
Function 2: Fast forward |
In the playback mode, short press “Down” to fast forward. |
|
Function 3: Quick switch for parking mode |
Press and hold the key in standby mode to turn the parking mode on and off. |
|
|
|
|
Function 1: Menu |
In standby mode, short press “Menu” key to enter the main menu function setting table, short press “Up” key or “Down” key, select the option to be set and short press “OK” to confirm. After setting, press “menu” key shortly to exit the menu setting function. (The menu setting method is the same in the video mode, photo mode and playback mode) |
|
Function 2: Mode function |
In standby mode, press and hold the “Menu” key for 2 seconds to switch between different modes (recording / photographing / playback). |
|
Function 3: Emergency lock function: |
In the recording mode, if you want to protect the current video from being overwritten, short press “emergency video lock” key to activate the emergency lock function. At this time, the lock file icon appears on the upper left of the screen and the current whole paragraph at the time of the accident is saved as a special image, this image will not be overwritten. |
Factory Reset
In case that the machine crashes and cannot be switched on and off, poke the reset hole right next to the SD card slot, it will restart to work.
INSTALLATION
- Begin with the car parked, with the ignition off.
- Insert the MicroSD card into the recorder slot.Note: Please use a high-speed MicroSD card (Class 10 or above) with capacity no less than512MB. The device supports microSD cards up to 64GB.
- Fix the recorder near the original mirror of the car or on the centre of the windshield.
- Insert the car charger into the car cigarette lighter.
- Connect the USB port of the recorder to the car charger with a charging extension cable.Note: When wiring, the charging extension line can be laid along the edge of the car windshield.
- Install the rear camera on the rear windshield or under licence plate. Pay attention to the direction when installing. The wiring can be laid along the roof of the vehicle. After the installation is complete, connect the rear plug to the recorder’s rear camera interface.
- Adjust the position of the lens to ensure that the lens is level with the ground.
- Start the engine and check whether the machine has been installed correctly.
Note: When the recorder is installed correctly, the “system working” indicator lights up, the machine begins recording, and the “recording” indicator flashes.
OPERATION
Use automatic recording
- Upon starting the car engine, the recorder will automatically start and begin the recording function. The charging indicator and recording indicator lights will flash.
- Upon turning off the car engine, the recorder will automatically save the recorded content and then shut down.
- The recorded images are stored in segments on the MicroSD card. When the MicroSD card is full, the recorder will overwrite the images recorded earlier.
- The recording segment length can be set in the menu, selecting from 1 minute, 3 minutes, or 5 minutes. Selecting “Close” from the list will set the length to 3 minutes and not overwrite old footage when the card is full – on this setting, when no space is available, recording will not continue.
Note:
- If you select any one of the three files of “1/3/5” minutes, the recorder will overwrite the footage recorded earlier when the MicroSD card is full, unless marked as “locked”. Refer to One-Key Lock Function in this guide for more information.
- If you select “Close”, a file will be saved in 3 minutes. When the card is full, the recording will not continue.
- The recordings of the front and rear cameras are stored in the “1” and “2” folders in the folder DCIM of the MicroSD card.
Use manual recording
- Press the recorder “Power” key, after the recorder starts, press the confirm button to start recording. The recording indicator flashes and displays the recording duration. If you need to shut down, press and hold the “Power” button for 2 seconds, and the recorder will automatically save and shut down.
Photographing
- When the recorder is on, long-press the “Menu” key to enter the photographing mode. Press “OK” to take the picture. To switch back to the recording mode, longpress the “Mode” key twice.
Collision sensing function
- The recorder has a built-in collision sensor (G-sensor). In the event of a serious vehicle collision, the recorder will lock the broken video at the time of the accident and save it as a special image. The lock icon is displayed in the upper left corner of the display. The locked image will not be overwritten by the cycle.
- The locked recording filename begins with “SOS”, while ordinary recording filenames begin with “REC”.
- The collision sensor (G-sensor) supports sensitivity adjustment. This can be changed in the setting menu.
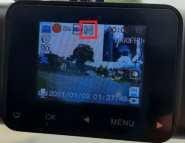
- When the G-sensor function is enabled, the icon will be displayed on the screen as shown below:
One-key lock function
- The recorder has a lock function, which can lock the images that need to be retained without being overwritten by the cycle. In the recording mode, short press “menu” key; the recorder will lock the current file.
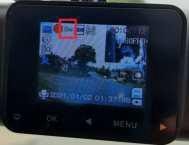
- The “lock’ icon will be displayed when one-key lock or emergency lock are enabled, as shown below:
Date and time setting
- In standby mode, short press “Menu” key to enter the system setting menu, short press “Up” and “Down” keys to navigate to Date option and short press “OK” key to enter. Press the up and down keys to adjust the date and time and press the mode key to switch the year, month, day and time cursors.
Note: To effectively record the date and time of the certification of driving safety accidents, please set the correct time before using the device.
One-key mute function
- While the device is on, short press “Down” key; the microphone at the upper left of the screen will be crossed out, indicating that the video recording function has been turned off. At this time, the recorder only records images but not sound. When you press the “Down” key again, the crossed-out microphone icon changes back to the recording icon.
- Hint: The settings will be saved automatically and there is no need to set the mute function after turning on again.
U disk mode
- Connect the recorder to the computer USB interface through the data cable; the screen displays the disk, camera, and video modes. Use “Up” key and “Down” keys to select the disk option, then short press “Confirm” key to enter the U disk mode.
Shooting file playback
- While the device is on, short press “Mode” key twice to switch to playback mode. Short press “Up” key / “Down” key to find the file to be played back, short press “Confirm” key to play. To exit playback mode, short press “Mode” key again.
Parking monitoring
- When the parking monitoring function is turned on, if the car has a slight vibration while turned off, then the recorder will automatically start recording. It will record for 30 seconds and then shut down.
SPECIFICATIONS
|
Display |
1.5-inch LCD resolution 320×240 |
|
Front camera |
1080p |
|
Inner camera |
720p |
|
Lens Sensor |
2 million pixels |
|
Wide view angle |
146 degree |
|
Video resolution |
Front cam: Inner cam: |
|
Segment length |
5M/3M/1M |
|
Encoding |
MJPEG |
|
Video format |
MOV |
|
Photo format |
JPEG |
|
Storage temperature |
-20°C ~70°C |
|
Operating temperature |
-10°C ~60°C |
|
Operating humidity |
15-65%RH |
|
Storage |
Up to 64GB, Glass 10 or above SD card |
|
Power supply |
DC5V, 1.5A |
|
Battery |
150mAh lithium battery |
|
Interface |
Mini USB |
|
Colour |
Black |
Need more information?
We hope that this user guide has given you the assistance needed for a simple set-up.For the most up-to-date guide for your product, as well as any additional assistance you may require, head online to help.kogan.com
[xyz-ips snippet=”download-snippet”]