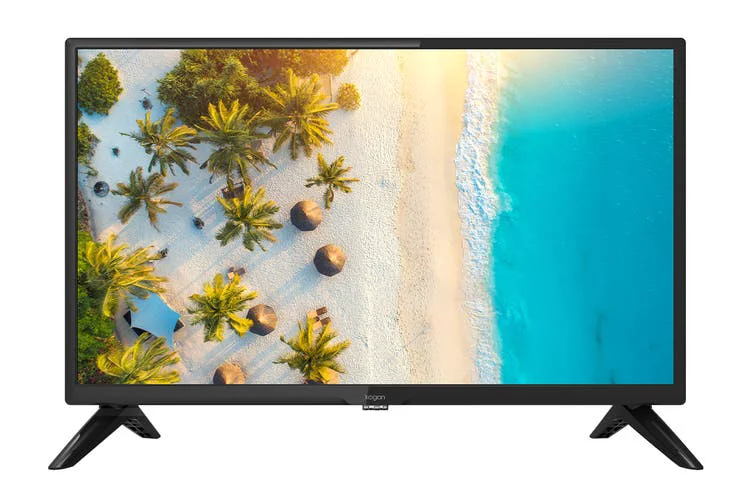
kogan EH6200 6 Series 24″ HD LED TV
COMPONENTS
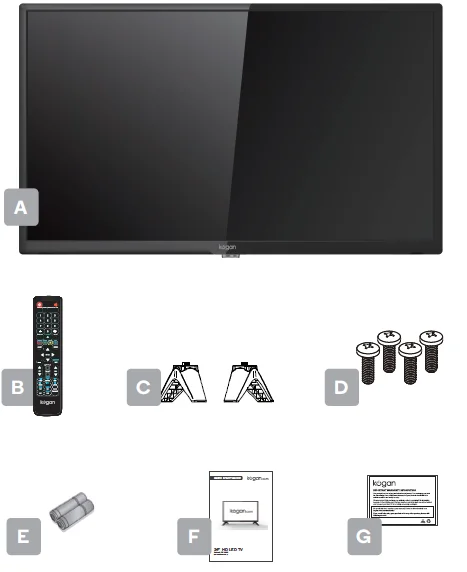
A. Kogan 24”HD LED TVB. Remote controlC. Stand (x2)D. B4 x 20mm screw (x4)E. AAA battery (x2)F. Quick-start guideG. Warranty card
NOT INCLUDED: Phillips head screwdriver, antenna cable, broadband internet connection.
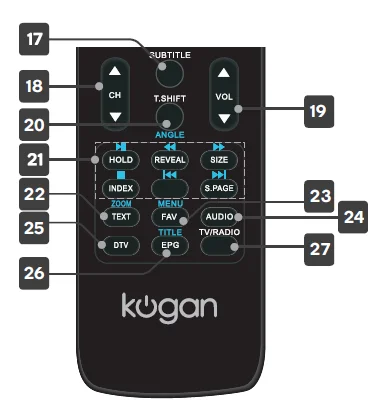
Remote Control Overview
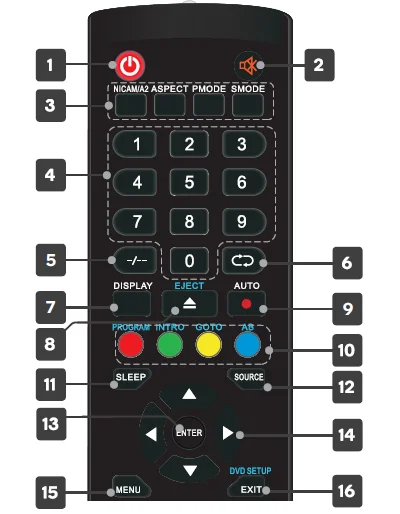
- Power, press to enter or exit standby mode
- Mute to toggle sound On/ Off
- Mode control buttons including select the stereo mode, picture ratio, picture and sound mode.
- Number buttons, press to select channels or input passwords
- to switch the program number.
- to switch back and forth between the current and previous channels.
- DISPLAY, display TV information
- EJECT , eject the DVD-DISC in DVD mode
- to start to record Auto Adjust the picture automatically in pc mode.
- PROGRAM to select the disc program. INTRO to display the time of chapter. GOTO to jump to the appointed chapter or title AB to select the segment to repeat PROGROM INTRO GOTO AB areused for models with DVD function only. Colour buttons for navigational use within apps.
- Sleep to set the sleep timer.
- SOURCE displays the list of input source channels.
- ENTER selected option or execute the selected operation.
- Direction buttons for navigating menus and settings.
- MENU to open the quick menu
- EXIT to quit the current interface.
- SUBTITLE to toggle subtitles on/off
- + CH – to scroll channels
- + VOL – to scroll channels
- T.SHIFT Start / Stop time shift recording ANGLE to select the angle in DVD model
- Media control buttons including play, pause, backward, forward and skip to previous and next chapter for use in Media modeHOLD to freeze a multi-page passage in Teletext modeREVEVL to reveal or hide the hidden information in Teletext modeSIZE to display the top, button or all of page in Teletext modeINDEX to go to the index page in Teletext modeS.PAGE to carry out the function of SUBCODE in the text
- TEXT for Teletext options. Not available in Australia.ZOOM to select the zoom picture
- FAV set the ” Favorite List”MENU to return the root menu or exit the DVD main menu
- AUDIO select the DTV audio
- DTV switch to DTV (Digital TV) mode
- EPG Enter electronic program guide
- TV/RADIO: Switch between TV and RADIO
ASSEMBLY AND INSTALLATION
BEFORE YOU GET STARTEDSpread cushioning flat to lay the TV on. This will help to prevent damage.
- Stand assembly
- Attach stands to base of TV.
- Insert two 20mm screws for each stand and use Phillips head screwdriver (not supplied) to tighten.
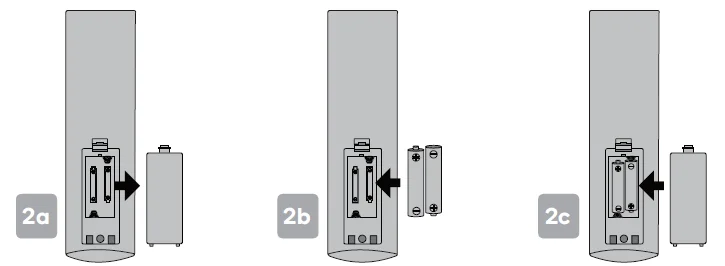
- Remote control assembly
- Open the battery compartment cover on the back side.
- Insert two 1.5V AAA size batteries, making sure to match the polarity markings (+ / -) of the batteries with the diagram inside the compartment.
- Replace battery compartment cover.
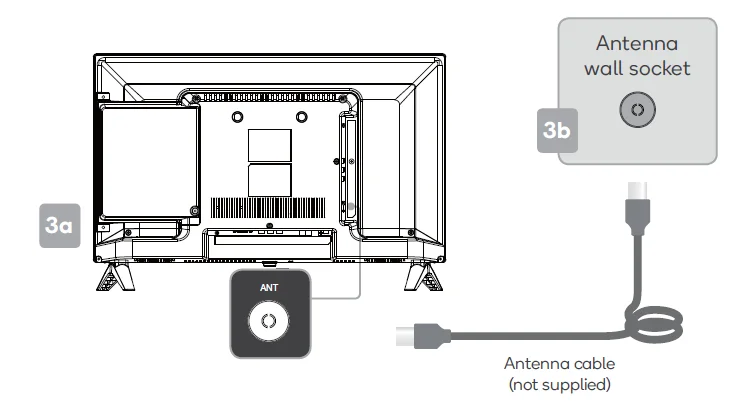
- Connect to antenna
- Connect an antenna cable (not supplied) via the ‘ANT’ input port at the back of the TV.
- Ensure the antenna cable is also connected to a working antenna, either via an antenna wall socket in your home, or directly.
- Turning TV onPlug the power cord into a suitable power outlet, then press the POWER ( ) button on the remote control, making sure to aim it at the sensor at the front of the TV. Alternatively, you can press the power button on the lower side of the back panel on the TV.

TURNING TV OFFPress the POWER ( ) button on the remote control to enter standby mode. To power down the TV completely, unplug the power cord from the power outlet. Do not leave your set in standby mode for long periods of time. If you will not use the TV for a long time, it is recommended to unplug the set from both the power outlet and aerial.
FIRST TIME SETUP
You will now be welcomed with the initial set-up screen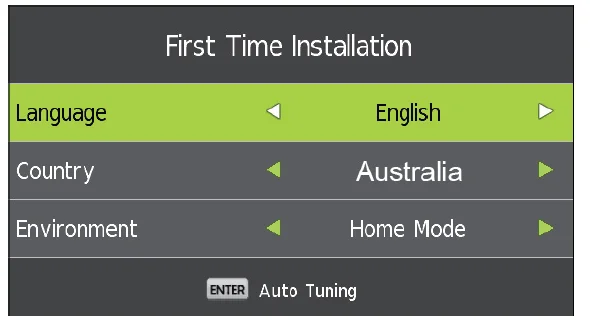
You can press left/right button to select Language, Country, Time Zone and Tune Type. Press ENTER button to enter the Auto Tuning. Press MENU key to exit.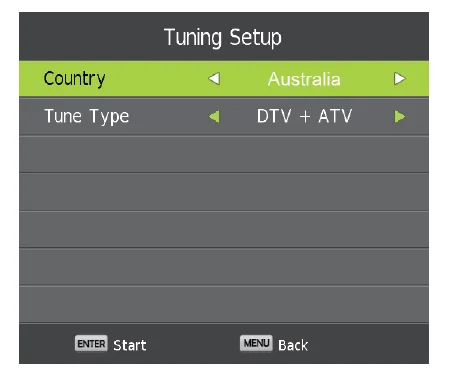
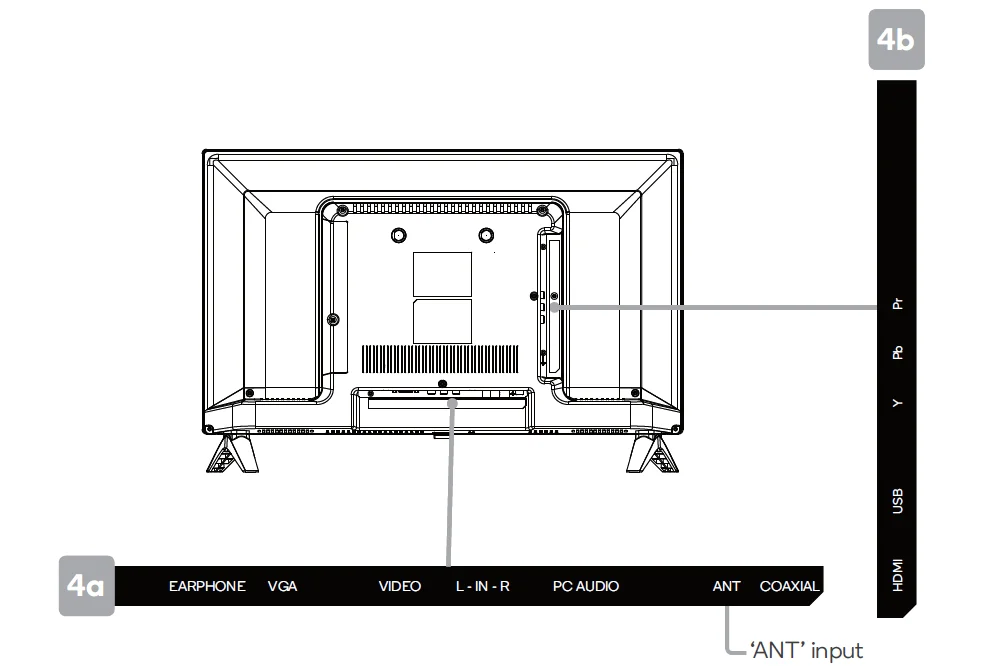
Following these options, the Auto Tuning screen will appear. Ensure you have an antenna cable connected to the ‘ANT’ input port at the back of the TV (4a). The auto tuning function will search for and save all available free-to-air TV channels. After confirming your settings (the default will be set for Australia), the process will automatically begin. The number of searched channels will be displayed on the screen.
INPUT SOURCE
Press SOURCE to open the input source list, then press to highlight an input and press OK to switch.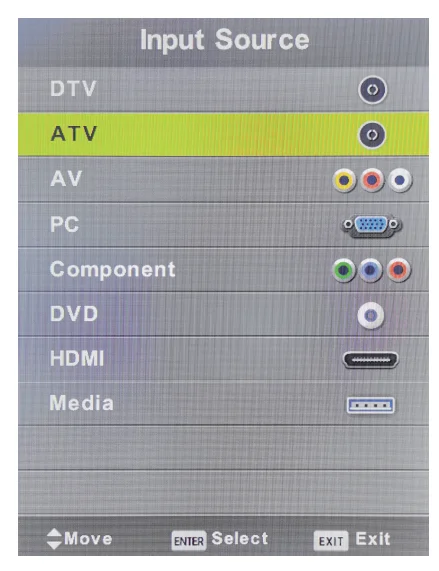
BASIC TROUBLESHOOTING
Poor picture and sound quality
- Try a different channel
- Adjust the antenna
- Check all connections
No picture or sound in TV status
- Try another channel
- Press the TV/AV button
- Make sure TV is plugged in
- Check the antenna connection
No sound or sound is too low at maximum volume
- Check the volume settings on any external speakers connected to your television
- Adjust the TV volume accordingly
- Check another channel or input
- Check that MUTE hasn’t been turned on
No colour, wrong colour or tints
- Make sure the program itself is broadcast in colour
- Select the picture menu, then adjust the colour and tint submenus
Picture rolls vertically
- Check all connections
Blurred or snowy picture, distorted sound
- Check direction, location and connections to your antenna
- Issues may be caused by the use of an indoor antenna (poor signal)
Remote control malfunctions
- Replace remote control batteries
- Check battery terminals
- Remote is out of range, move closer to TV
- Remove any obstructions between remote and IR sensor of TV
- Make sure the power cord to your TV is plugged in and turned on
Image is not centred on the screen
- Adjust the horizontal and vertical position
“No Signal” on HDMI source
- Test the device with a different HDMI cable
- Plug the device into another HDMI port
- Try a different device connected to the same cable and port
- Perform a factory reset on your TV.
For our full TV troubleshooting guide and extended User Manual for this TV, head online to help.kogan.com![]()
[xyz-ips snippet=”download-snippet”]