
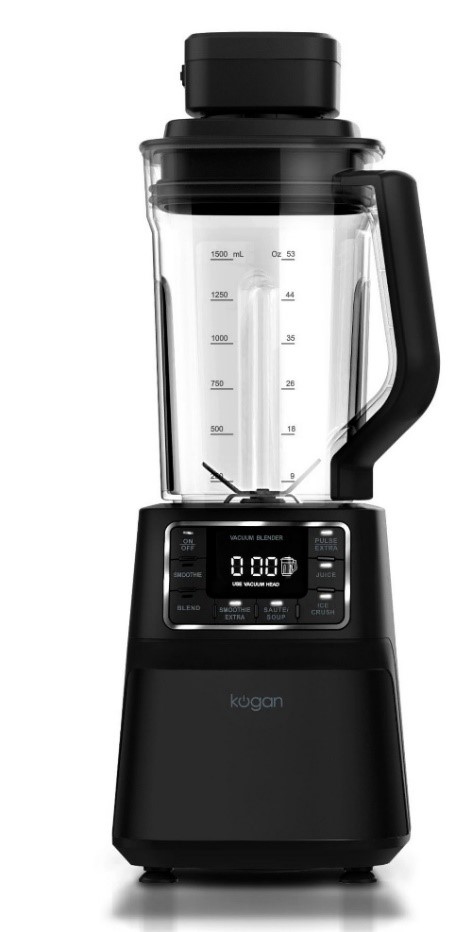
kogan KA15VCBLNDB 1500W Vacuum Blender Pro
SAFETY AND WARNINGS
Read Carefully
- This appliance may be used by children 8 years of age and older, by persons with physical or mental impairments or by inexperienced persons if they are properly supervised or have been informed about how to use the product in a safe manner and understands the potential dangers.
- Children must not play with the appliance. Cleaning and maintenance must be performed by the user and must not be performed by unsupervised children. If the power cord is damaged, have it replaced at a professional service centre or by a similarly qualified person to avoid any possible electrical hazards. Do not use the appliance if it has a damaged power cord.
- This appliance is intended for home use. It is not intended for use in locations such as:
- Staff kitchens in stores, offices and other workplaces;
- Agricultural farms;
- Hotel or motel rooms and other living areas;
- Bed and breakfast establishments.
- This appliance is designed for blending food. Do not use it for any purposes other than those intended.
Warning:
Incorrect use may lead to injuries.
- Do not use the appliance in an industrial environment or outdoors. Do not place the appliance near electrical or gas outlets. Only place the appliance on an even, dry and stable surface.
- Before connecting this appliance to a power socket, make sure that the voltage stated on its rating label corresponds to the voltage in your power socket.
- Only use the appliance with the original accessories that came with it. Do not fill the blender jug past its maximum nominal capacity.
- Make sure that the appliance is correctly assembled before use. The appliance is equipped with a safety mechanism that will prevent it from being started unless the removable accessories are seated correctly on the motor unit.
- Do not turn on the appliance when it is empty. Incorrect use of the appliance may negatively affect its lifetime.
- Do not use this appliance with a timer switch or any other device that turns on the appliance automatically.
- Always observe the maximum mark when filling the jug with ingredients. If you process liquids in the blender jug, the maximum volume is 1.5L. If you process liquids in the storage bottle, the maximum volume is 0.7L. Do not exceed the maximum volume indications, especially when you process ingredients that tend to foam.
- Pay increased attention when handling hot liquids, as they may release steam, or could spray and cause burns. Allow hot liquids to cool down to a safely manageable temperature (at least 40°C) before pouring them into the blender jug.
- Do not leave the appliance in continuous operation for longer than 3 minutes. Before turning it on again, allow it to cool down for at least 10 minutes. When processing harder foods or thick liquids, do not leave the appliance in continuous operation for longer than 1 minute. The appliance is equipped with a thermal fuse protecting the motor from damage in case of overload. If the appliance shuts off because of the motor being overloaded, disconnect it from the power socket and allow it cool for at least 30 minutes before operating it again.
- If ingredients stick to the blade assembly or the inside walls of the blender jug, turn the appliance off and unplug it from the power supply. Make sure that the blade assembly has stopped rotating. Remove the blending jug assembly from the motor unit and turn it over so that the blade assembly points upwards. Remove the blade assembly and clean the removed parts using a plastic spatula. Assemble the appliance, plug the power cord into a power socket and continue blending.
- When handling the blade assembly, be very careful not to injure yourself on its sharp cutting edge. This applies especially when removing the blade assembly from the blending jug, when emptying the jug and when cleaning.
- While the appliance is running, prevent fingers, hands or other objects from contacting with the blade assembly.
- The included blending jugs are not intended for heating food in a microwave oven.
- Always turn off the appliance and disconnect it from the power socket if you will not be using it and if you will be leaving it without supervision, before assembly, disassembly, when replacing accessories and before cleaning or moving it.
- Check that the motor unit is turned off, disconnected from the power socket and that the rotating parts have come to a complete stop before removing the blending jug assembly from the motor unit.
- Clean the unit according to the instructions in the Cleaning and Care section of the manual. Do not submerge the motor unit or its power cord in water or any other liquid or wash these parts under running water.
- Do not place heavy items on the power cord. Make sure that the power cord does not hang over an edge, or that it is not touching a hot surface.
- Disconnect the appliance from the power socket by pulling the plug; never pull the power cord. Otherwise, this could damage the power cord or the socket.
- Do not use the appliance when it is not functioning properly or showing any signs of damage. In order to prevent a hazardous situation arising, do not repair the appliance yourself or modify it in any way. Have all repairs performed at an authorised service centre.Notes:
- Prior to using this appliance, please read the user’s manual thoroughly, even in cases when one has already familiarised themselves with previous use of similar types of appliances. Only use the appliance in the manner described in the user’s manual. Keep the user’s manual in a safe place where it can be easily retrieved for future reference.
- It is recommended to save the original cardboard box, packaging material, purchase receipt and responsibility statement of the vendor or warranty card for at least the duration of the legal liability for unsatisfactory performance or quality. In the event of transportation, it is recommended that you pack the appliance in the original box from the manufacturer.
OVERVIEW

Part List
| A1 | Inner lid (also serves as a measuring cup) | A8 | USB cable |
| A2 | Vacuum inner lid | A9 | Storage bottle lid |
| A3 | Blender jug lid | A10 | 0.7L storage bottle |
| A4 | Large 1.5L blender jug | A11 | Storage bottle vacuum lid |
| A5 | Blade assembly | A12 | Control panel |
| A6 | Motor unit | A13 | Vacuum unit cover |
| A7 | Vacuum unit |

Part List
| B1 | Display | B7 | SMOOTHIE EXTRA button |
| B2 | PULSE/EXTRA button | B8 | BLEND button |
| B3 | Large blender jug icon | B9 | SMOOTHIE button |
| B4 | JUICE button | B10 | Storage bottle icon |
| B5 | ICE CRUSH button | B11 | ON/OFF button |
| B6 | SAUTÉ/SOUP button |
ASSEMBLY
Automatic vacuum super blender is delivered with accessories that will help you process your favourite ingredients. You can assemble your vacuum blender either with the large blender jug (A4) or the storage bottle (A10).A. Assembling the blender with the large blender jug
- Before assembling and disassembling the blender, make sure that the motor unit (A6) is turned off and disconnected from the power socket, and that the rotating parts are not in motion.
- Place the motor unit (A6) on a stable, even and dry surface, such as a kitchen counter.
- Screw the blade assembly (A5) to the bottom of the blender jug (A4). Make sure that it is firmly and correctly assembled in order to avoid spilling liquid from the jug.
- Put the ingredients you want to process into the blender jug (A4). Do not exceed the maximum level mark (1500ml).
- Place the lid (A3) on the blender jug.
- If you use the blender without the vacuum unit (A7), insert the inner lid (A1) into the hole in the lid (A3).
- If you use the blender with the vacuum unit (A7), insert the vacuum inner lid (A2) into the hole in the lid (A3).
- To place the blender jug (A4) on the motor unit (A6), align the handle of the blender jug (A4) with the arrow symbol on the motor unit (A6) and turn clockwise until you feel resistance.
- If you used the vacuum inner lid (A2), place the vacuum unit (A7) on it. Insert the power cord plug into the power socket and the blender is ready to use.Note: Before each use of the vacuum unit (A7), remove the vacuum unit cover (A13) from the vacuum unit (A7). After each use of the vacuum unit (A7), return the vacuum unit cover (A13) to its original location on the vacuum unit (A7). To disassemble the unit, follow the assembly steps in reverse order.
B. Assembling the blender with the storage bottle
- Before assembling and disassembling the blender, make sure that the motor unit (A6) is turned off and disconnected from the power socket, and that the rotating parts are not in motion.
- Place the motor unit (A6) on a stable, even and dry surface, such as a kitchen counter.
- Put the ingredients you want to process into the storage bottle (A10). Do not exceed the maximum level mark (700ml).
- Screw the blade assembly (A5) to the bottom of the storage bottle (A10). Make sure that it is firmly and correctly assembled in order to avoid spilling liquid from the jug.
- Turn the storage bottle (A10) upside down and place it on the motor unit (A6). The protrusions on the storage bottle (A10) must fit onto the holes in the motor unit (A6). Turn the storage bottle (A10) clockwise until you feel resistance.
- Insert the power cord plug into the power socket and the blender is ready to use.
Note: To disassemble the unit, follow these steps in reverse order.Note: The blender is provided by a safety lock that ensures you can only switch on the appliance if it is correctly assembled.
OPERATION
Before first use
- Before first use, take the appliance and its accessories out of the packaging material and remove all promotional labels and stickers from it. Check that neither the appliance nor any of its parts is damaged.
- All parts (inner lid A1, vacuum inner lid A2, blender jug lid A3, large blender jug A4, blade assembly A5, storage bottle lid A9, storage bottle A10 and storage bottle vacuum lid A11) that are intended to be in contact with food must be cleaned with warm water with the addition of a small amount of neutral dishwashing detergent. Thoroughly rinse them using clean water, then dry with a soft cloth.Warning: When cleaning the blade assembly (A5), be extra careful not to get injured by the blade edges.
- Wipe the motor unit (A6) and vacuum unit (A7) with a sponge lightly dampened in warm water, then dry with a clean cloth.
Processing ingredients in vacuum
- Processing ingredients in vacuum allows you to prepare drinks and smoothies from fruits, vegetables and water or other liquids without undesirable oxidation.
- Assemble the blender as described in section “A. Assembling the blender with the large blender jug”
- After inserting the power cord plug into the power socket, the large blender jug icon (B3) will be illuminated on the display (B1) and the control lights of buttons ON/OFF(B11), PULSE/EXTRA (B2), JUICE (B4), ICE CRUSH (B5), SAUTE/SOUP (B6), SMOOTHIE EXTRA (B7) will be illuminated at the same time.
Note: Buttons BLEND (B8) and SMOOTHIE (B9) will not be active if you assemble the blender with the large blender jug (A4).
- Ensure that you have inserted the vacuum inner lid (A2) to the hole in the lid (A3) and place the vacuum unit (A7) atop it. Press the button on the vacuum unit (A7). This will automatically connect the vacuum unit (A7) to the lid (A2), and the vacuuming process will commence. During this process, the edge of the vacuum unit (A7) will be illuminated. Once the jug is fully vacuumed, the vacuum unit (A7) will automatically power off.Note: If you need to stop the vacuuming process, press the button on the vacuum unit (A7) again.
- If the vacuum unit (A7) is not placed properly, the vacuuming process will start, but after 70 seconds it will stop automatically. If this occurs, re-seat the vacuum unit (A7) correctly and start the vacuuming process again.Warning: Never place the vacuum unit (A7) on the lid (A3) if you have inserted the inner lid (A1) to the hole in the lid (A3). This can damage both the inner lid (A1) and the vacuum unit (A7)
- Press the ON/OFF (B11) button to power on the unit. Press the processing button: JUICE (B4), ICE CRUSH (B5), SAUTE/SOUP (B6), SMOOTHIE EXTRA (B7); or use the PULSE/EXTRA (B2) button for short pulse processing at maximum power.
- Once the ingredients are processed, press the ON/OFF (B11) and disconnect the power cord plug from the power socket.
- To remove the blender jug (A4) from the motor unit (A6), turn the blender jug (A4) anti-clockwise until the handle of the blender jug (A4) is aligned with the arrow symbol, then pull upwards.
- Remove the vacuum unit (A7) from the vacuum inner lid (A2).
- To release the pressure in the blender jug (A4) and to remove the lid (A3) from the blender jug (A4), the vacuum inner lid (A2) is equipped with a silicone valve. Carefully lift the silicone valve and wait until the pressure inside the blender jug (A4) equalises to the pressure in the room. The lid (A3) will be released from the edge of the blender jug (A4).
Processing ingredients without vacuuming
- Assemble the blender as described under A. Assembling the blender with the large blender jug or under B. Assembling the blender with the storage bottle, depending on the intended use.
- When you have assembled with the large blender jug (A4), after inserting the power cord plug into the power socket, the large blender jug icon (B3) will be illuminated on the display (B1) and the control lights of buttons ON/OFF (B11), PULSE/EXTRA (B2), JUICE (B4), ICE CRUSH (B5), SAUTE/SOUP (B6), SMOOTHIE EXTRA (B7) will be illuminated at the same time.
- When you have assembled with the storage bottle (A10), after inserting the power cord plug into the power socket, the storage bottle icon (B10) will be illuminated on the display (B1) and the control lights of buttons ON/OFF (B11), BLEND (B8) and SMOOTHIE (B9) will be illuminated at the same time.
- Press shortly the ON/OFF (B11) button. Press the desired processing button or use the PULSE/EXTRA (B2) button for short pulse processing at maximum power.
- Once the ingredients are processed, press the ON/OFF (B11) and disconnect the power cord plug from the power socket.
- When you have used the large blender jug (A4), to remove it from the motor unit (A6), turn the blender jug (A4) anti-clockwise until the handle of the blender jug (A4) is aligned with the arrow symbol, then pull upwards.
- When you have used the storage bottle (A10), to remove it from the motor unit (A6), turn the storage bottle (A10) anti-clockwise and then pull it up.
Vacuuming the storage bottle
- You can vacuum the storage bottle (A10) after having processed the ingredients.
- Unscrew the blade assembly (A5) from the storage bottle (A10) and attach the vacuum inner lid (A2).
- Press the centre point of the vacuum inner lid (A2) and then place the vacuum unit (A7) atop it.
- Press the button on the vacuum unit (A7) to automatically connect the vacuum unit (A7) to the lid (A2) and commence the vacuuming process. During this process, the edge of the vacuum unit (A7) will be illuminated. Once the bottle is fully vacuumed, the process automatically stops.
- Remove the vacuum unit (A7) from the vacuum inner lid (A2).
- You will need to release the pressure from the storage bottle (A10) to be able to remove the vacuum inner lid (A2). Carefully lift the silicone valve inside the inner lid (A2) and wait until the pressure inside the storage bottle (A10) equalises to the pressure in the room.
Processing table
| Program | Duration | Suitable for | Container | Note |
|
SMOOTHIE |
50 Sec. |
Drinks and smoothie preparation |
Storage bottle A10 |
Blender will run at maximum power at regular intervals. |
|
SMOOTHIE EXTRA |
60 Sec. |
Drinks and smoothie preparation |
Large blender jug A4 |
Blender will run at maximum power at regular intervals. |
|
JUICE |
70 Sec. |
Drinks preparation |
Large blender jug A4 |
Blender will run at maximum power at regular intervals. |
|
SAUTE/SOUP |
140 Sec. |
Mixing soups and sauces |
Large blender jug A4 |
Blender will run at maximum power at regular intervals. |
|
BLEND |
70 Sec. |
Thorough processing of ingredients |
Storage bottle A10 |
Blender will run at maximum power at regular intervals. |
|
ICE CRUSH |
110 Sec. |
Ice crush |
Large blender jug A4 |
Blender will run at maximum power at regular intervals. |
|
PULSE / EXTRA |
Processing ingredients at maximum power with short pulses |
Large blender jug A4
Storage bottle A10 |
Blender is on only if you press PULSE/EXTRA (B2) |
Charging the vacuum unitThe vacuum unit (A7) is equipped with rechargeable battery. To charge it, you will need the supplied USB cable (A8).
- Place the large blender jug (A4) or the storage bottle (A10) on the motor unit (A6).
- Insert the vacuum unit (A7) into the space at the back of the motor unit (A6), Ensure the port on the vacuum unit (A7) is facing to the left.
- Connect the vacuum unit (A7) with the motor unit (A6) using the USB cable (A8).
- Insert the power cord plug into the power socket; the edge of the vacuum unit (A7) will flash while the unit is charging.
- Once the edge of the vacuum unit (A7) stops flashing, the vacuum unit (A7) is charged. Disconnect the power cord plug from the power outlet and disconnect the USB cable (A8).
Warning
- The vacuum sealer unit must be fully recharged at least once every three months, otherwise the lifetime of the internal components will be negatively affected.
- The rechargeable battery is intended only for charging this vacuum sealer unit. Do not use it for any other purpose.
- When the vacuum unit is in power charging, do not run the blender or vacuum unit.
Built-In Thermal FuseThe thermal fuse protects the motor against overheating. If the appliance automatically turns off during operation, unplug the power cord from the power socket. Take the blending jug (A4) or the storage bottle (A10) off the motor unit (A6) and check that the blade assembly (A5) is not blocked by ingredients. Wait approximately 30 minutes until the motor unit (A6) cools down before using the blender again.
Safety LockThe safety lock protects the appliance from being turned on if it is not properly assembled, especially the large blender jug (A4) or storage bottle (A10).
Tips and Advice
- Cut the ingredients into equal cubes, approximately 1.5cm.
- Do not process dry ingredients (e.g. pepper, beans, corn, etc.) with liquid.
- If the ingredients become too thick in the jug, add more liquid.
- If you are processing a large quantity of ingredients, divide them into small batches and process food in shorter intervals.
- If you process ingredients more than 3 minutes continuously, the appliance will automatically turn off; this is a safety feature to prevent damage to the product. Disconnect the power cord plug from the power outlet and let the appliance cool down before using it again.
- Do not pour hot or warm ingredients into the large blender (A4) or storage bottle (A10). Make sure that the temperature of processed ingredients does not exceed maximum 40°C.
- If your processed ingredients exceed the volume of 1500ml of blender jug (A4) or 700ml for storage bottle (A10), immediately turn the appliance off.
- If you process ingredients that can foam, such as milk or soya milk, do not process more than 800ml in blender jug (A4) or 300ml in storage bottle (A10).
CLEANING AND CARE
- Before cleaning, disconnect the power cord plug from the power outlet and let the appliance cool down.
- Please clean the large blender jug (A4) and storage bottle (A10) immediately after use.
- For cleaning, do not use cleaning product with an abrasive effect, solvents, etc. that could damage the appliance. No part of this appliance is intended for washing in a dishwasher.
Warning: To prevent the risk of injury by electrical shock, do not submerge the appliance, power cord or power plug into water or another liquid.
Quick cleaning of the blender jug
- It is recommended to perform a quick clean of the blender jug (A4) immediately after use.
- Pour clean, cold water into the blender jug (A4) up to the maximum level mark. Add a small amount of neutral dishwashing detergent and place the lid (A3) atop with the inner lid (A1) inserted.
- Place the blender jug (A4) on the motor unit (A6), connect the power cord plug into the power socket.
- Press and hold the PULSE/EXTRA (B2) button for approximately 3 seconds, then release the button. Repeat the process several times to remove ingredients from the blade assembly (A5) and blender walls using short pulses.
- Disconnect the power cord plug from the power socket and remove the blender jug (A4) from the motor unit (A6).
- Pour out the content of the blender jug (A4).
Cleaning the blender jug and lid
- After performing a quick clean as above, unscrew the blade assembly (A5).
- Wash the blender jug (A4), lid (A3), inner lid (A1), vacuum inner lid (A2) and blade assembly (A5) in warm water with a small amount of neutral dishwashing detergent using a soft sponge. Rinse and dry thoroughly.
- You can wash these parts except for (A5) in upper basket of the dishwasher.
Warning: Be extremely careful when handling the blade assembly (A5) as the edges are very sharp.
Cleaning the storage bottle and lid
- Wash storage bottle (A10) and lid (A9) in warm water with a small amount of neutral dishwashing detergent using a soft sponge. Rinse and dry thoroughly.
- You can wash these parts in the upper basket of a dishwasher.
Cleaning the vacuum unit and motor unitWipe the motor unit (A6) and vacuum unit (A7) with a sponge lightly dampened in warm water. Dry with a clean cloth.Warning: Before removing the large blender jug (A4) or storage bottle (A10), always make sure that the blade assembly (A5) has completely ceased movement.
Storage
- When not using the appliance for an extended period, disconnect the power cord plug from the power socket, allow the appliance to cool down and clean it according to the instructions above.
- Before storing it, ensure that the appliance and all its accessories are thoroughly clean and dry.
- Store the appliance in a dry, clean and well-ventilated location protected from extreme temperatures and out of reach of children or pets.
SPECIFICATIONS
| Rated voltage range | 220-240V |
| Rated frequency | 50-60Hz |
| Rated input | 1500W |
| Noise level | 85dB(A) |
Note: The declared noise emission level of the appliance is 85dB (A), which represents level A of acoustic power with respect to a reference acoustic power of 1PW.Safety Class for Electrical Shock Protection:Class II-Electrical shock protection is provided by double or heavy-duty insulation. Instructions and Information Regarding the Disposal of Used Packaging Materials Dispose of used packaging material at a site designated for waste in your municipality.
DisposalThis marking indicates that this appliance should not be disposed with other house-hold wastes. To prevent possible harm to the environment or human health from uncontrolled waste disposal, recycle it responsibly to promote the sustainable reuse of material resources.
Need more information?This is a Quick Start Guide, and we hope that this has given you the assistance needed for a simple set-up. For the most up-to-date guide for your product, as well as any additional assistance you may require, head online to help.kogan.com![]()
[xyz-ips snippet=”download-snippet”]