WIDE ANGLE 4K GALAXYDRONEKA4KGLXDRNAUSER GUIDE
SAFETY & WARNINGS
- Read these instructions thoroughly before use.
- Do not discard of these instructions.
- Improper operation may cause serious personal injury or property damage.
- The product is not suitable for children below 14 years of age. It is not a toy.
- Ensure the device is operated with care at all times and used only as directed in these instructions.
- The flight site must be a legal remote control model flight site. Check the rules and regulations for your local area before operating this device.
- Do not operate near crowds of people.
- Assess all potential obstacles prior to operation. This includes, but is not limited to, high-rise buildings, power lines, traffic, etc.
- Do not operate in extreme heat or cold weather. Suited only for use in 0° – 40° C temperatures.
- Do not use it during high wind or rain. Check weather conditions prior to operation.
- Do not operate around bodies of water (lakes, creeks, etc) or damp ground. Water damage to the device may cause component failure, resulting in safety risk. Keep the device dry at all times.
- Do not touch the high-speed rotating parts (propellers) while in use.
- Do not operate the device if it is damaged. In the event of damage, discontinue use immediately and contact help.Kogan.com for assistance.
Battery Safety
This device contains a Lithium Polymer (Li-Po) battery. As such, extra care should be taken to avoid the risk of property damage or personal injury.
- Do not operate while charging the battery.
- Remove the battery when not used for long periods of time.
- Do not leave the battery in the device when fully charged or above 50%.
 If disposing of this product, take care to dispose of the battery correctly. Do not throw the battery in general waste. Please take the device to a recycling center and ensure the battery is recycled separately. For further information, please contact your local council office or waste disposal service.
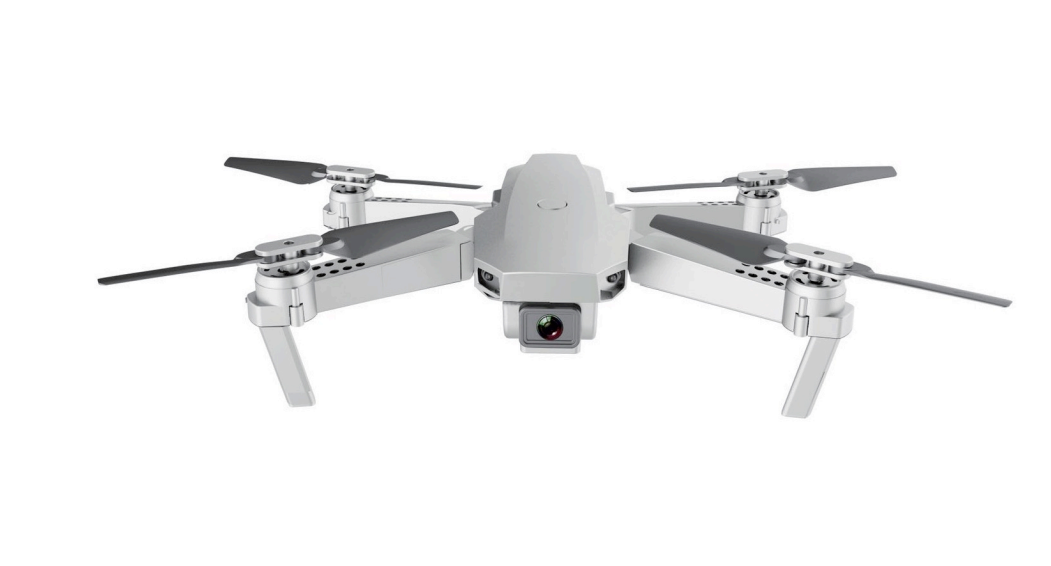
OVERVIEW
INSTALLATION
Remote Battery InstallationInsert x3 AA batteries, paying careful attention to the polarity symbols (+ / -).
Drone Battery
- Connect the USB cable to a USB outlet:To charge the device, connect the battery plug to the USB charging cable, and insert it into a computer or compatible USB adapter. The indicator light will be on when charging, and off once full. Do not leave on charge when full. The charging time is 100-120mins.

-
Connecting the drone power supply:Put the charged battery into the battery holder on the drone and then place the battery plug into the drone’s power supply. Once connected, the drone lights will turn on.

Drone
- Folding function:To fold the drone, please first fold the back arms and then fold the front arms. To unfold do the same process in reverse order.
- Drone fan installation:The ‘A’ arms should be installed to the upper left and the lower right corners of the drone. The ‘B’ arms should be mounted to the upper right and the lower left corners of the drone.At the corner of each arm, install the propellers.
-
Drone protection rack installation:Position the protective frame at the drone’s arm and install fastening, as per the below image. Repeat these steps for all four arms.Please note, the drone will not lift off if the protective frames are not securely attached. Ensure they are tightly installed before operating the device.
APP INSTALLATION
- Install the app on Your Mobile Phone:Please scan the below QR code to download the app according to your phone’s system.https://itunes.apple.com/cn/app/hf-ufo/id1412628377?mt=8https://play.google.com/store/apps/details?id=com.hfufo.rxdrone
- Connect Devices:Enter the Settings, open the Wi-Fi option and find the device Wi-Fi hotspot name “M8_XX_***/HF_XX***/ WIFI-XX-1” and connect. After successful connection, return to the desktop, open the downloaded app and enter the program.
- First Interface:1) Connection to the WIFI hotspot2) WIFI settings3) Settings4) Start
- Start Interface:
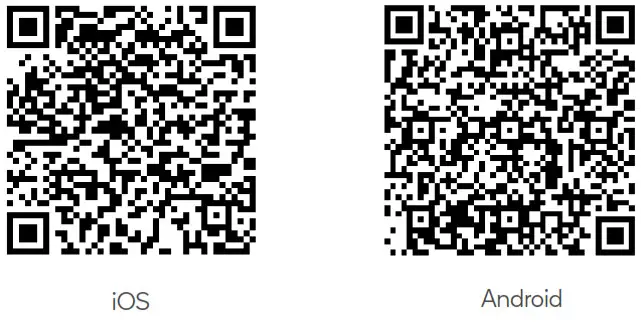 https://itunes.apple.com/cn/app/hf-ufo/id1412628377?mt=8
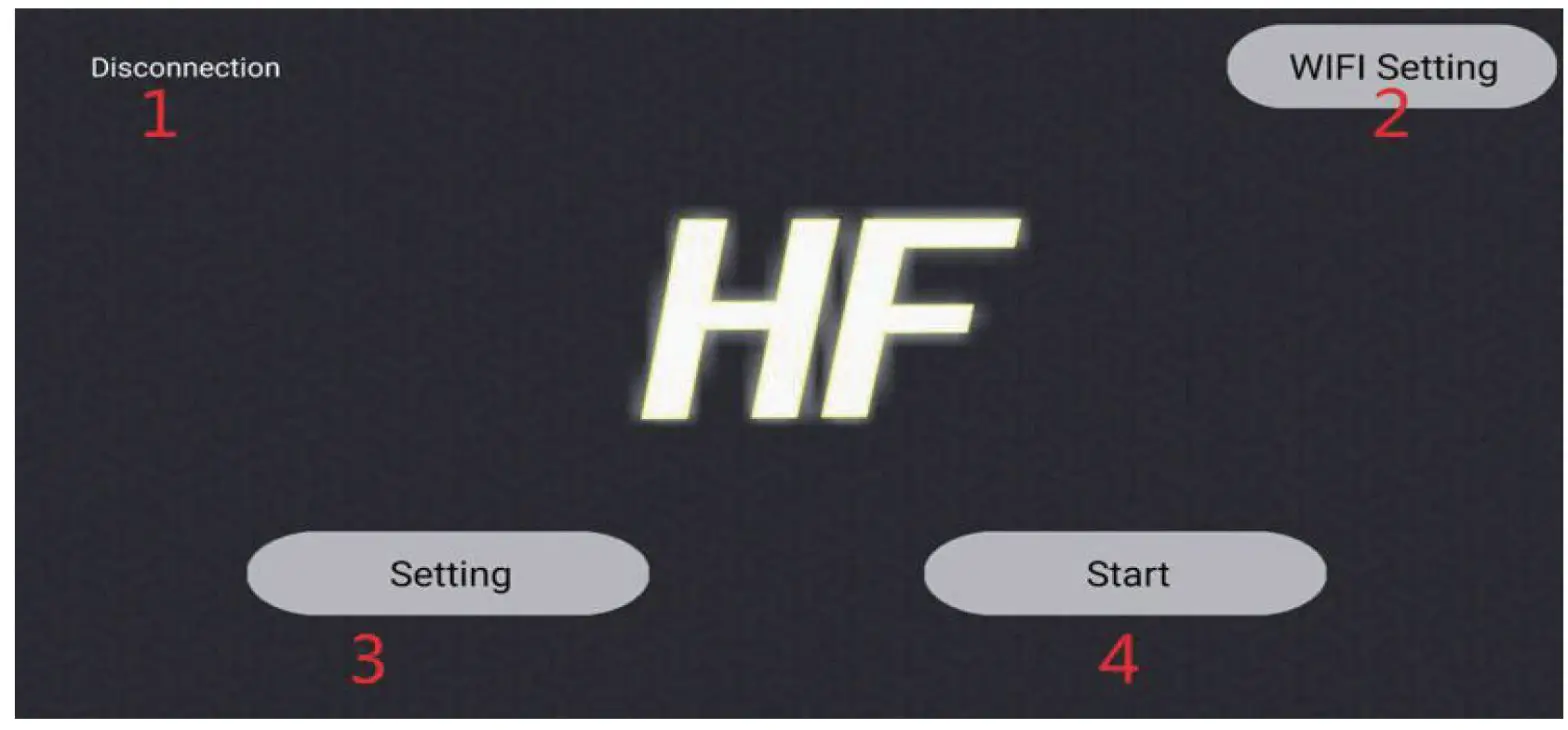 1) Connection to the WIFI hotspot2) WIFI settings3) Settings4) Start

Functions:
| 1 Exit2 Gravity mode3 Roll4Gesture control (take a picture; |
10 Split screen11 Headless mode12 Flip13 Flip preview14 Menu15 Calibration16 Speed17 Album | 18 Take photo19 Entertainment20 Video21 Left remote22 Right remote23 Take-off and landing25 Rocker open26 Virtual head control |
Note:Some functions of different UAV models cannot be used or displayed in-app. When the app is operated and used, it will prompt that the device does not support this function.When closing the rocker: ![]() pinch the blank to zoom.
pinch the blank to zoom.
Palm Control Flight
Click the palm control button, then raise the palm vertically, aiming at the camera of the drone, the video will be automatically recognized to the palm and when a red frame appears, the palm control mode is entered;
- Facing the camera of the drone, one-handedly
- When the palm is in the red box of the app, move the palm gently
- At this point, the drone will follow the palm up and down
- The best distance between the palm and the camera is about 1.2m.
Gesture ModeClick the gesture button, the system will automatically recognize different gestures to take pics or videos. Gesture as below:
| Gesture | Description |
|
Will take photos, in the range of lm-4mm in front of the camera of the drone, one-handed flat. After the gesture is successfully recognized, the countdown will start at 3, 2, 1, and begin to take pictures. |
|
Will record video. Within the range of lm-4mm in front of the camera of the drone, the five fingers are separated by one hand; after the gesture is successfully recognized, the video recording will start. To end, the recording repeats the gesture. |
|
Will record video. Within the range of lm-4mm in front of the camera of the drone, the five fingers are separated by one hand; after the gesture is successfully recognized, the video recording will start. To end the recording repeat the gesture. |
Picture in Picture Mode:
- In picture-in-picture mode, you can view live video images of the lens below the drone in real-time.
- On the control page, click on the PIP switch to display the video footage captured by the lens. You can freely switch the size of the preview image of the two lenses.
Entertainment Mode:Click on the Entertainment Mode button and you will be taken to the following function: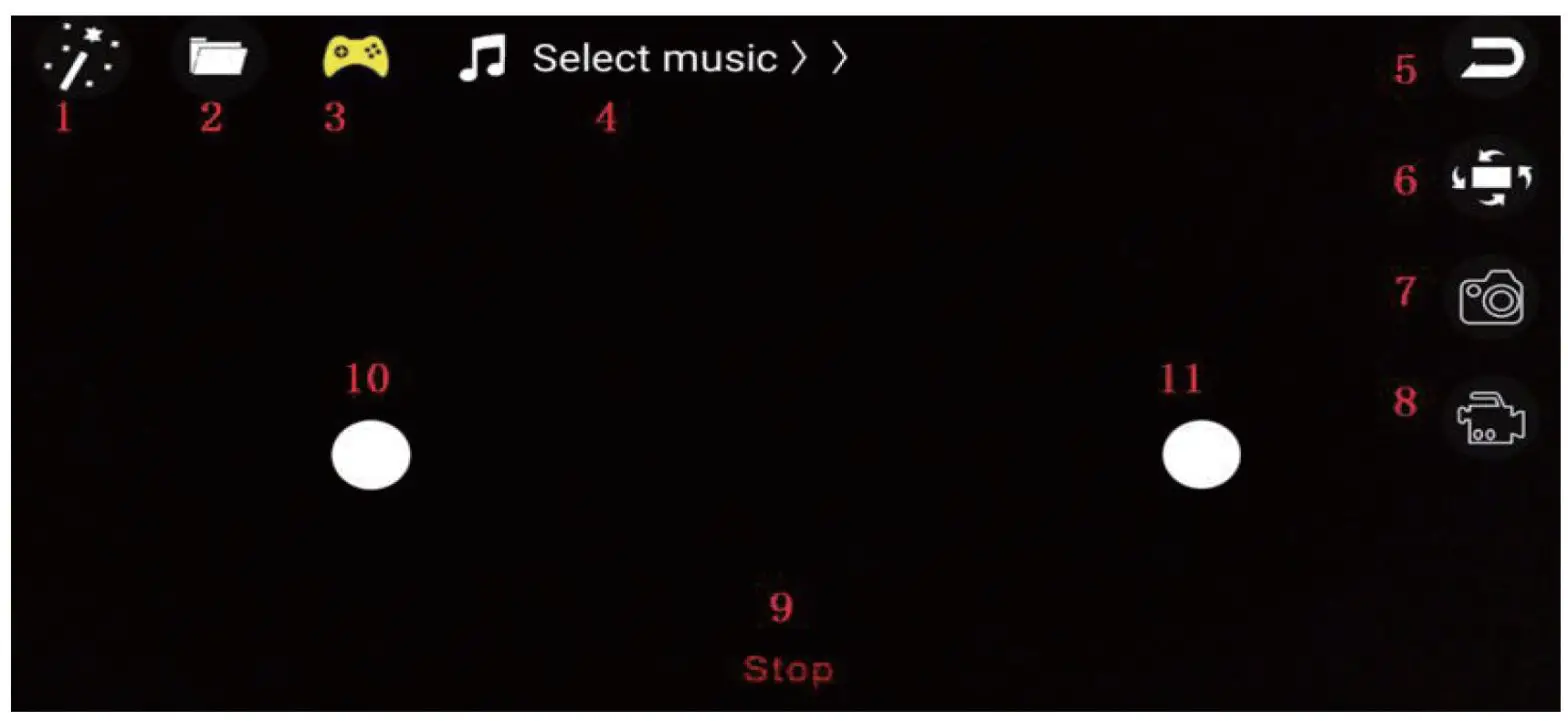
| 1 Camera lens filter | 5 Return | 9 Emergency stop |
| 2 Album | 6 Rotating | 10 Left remote |
| 3 Rocker open | 7 Ta k i n g pics | 11 Right remote |
| 4 Select music | 8 Video | 1 |
Follow Mode:
- Click the follow button on the main interface to enter the tracking interface. This feature can recognize and follow a human figure.
- The human figure will be recognized by the green box on the screen. You can track it by tapping the target person with your finger. If there are multiple people on the screen, you can select one. When the tracking target person is not on the screen, the system will enter the waiting mode and the system will automatically re-enter the tracking mode when there is another tracking target on the screen.
Recommended Devices: iPhone 7 and above or Android 7.0 mobile devices.
OPERATION
Remote Control
- Mobile phone grip:Pull out the remote-control lower grip, clamp the phone securely in place.
- 2.4G frequency:Turn on the remote control, push the throttle joystick to the highest and the pull to the lowest. You will hear a “tick” sound. The drone indicator light is on, match the right frequency to complete (2.4G frequency), then you can take off.If unable to take off, ensure that the installation and assembly steps have been completed as specified in this guide. Check that the protective frame is tightly secured to each arm.
-
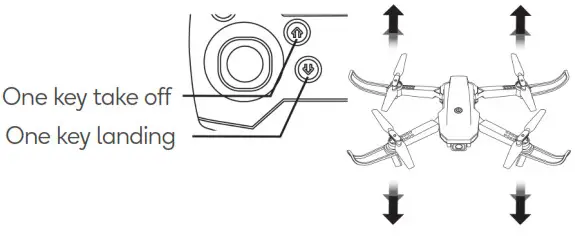
One key take off and one key landing:This feature is determined by the barometer and a variety of other environmental factors. The drone will automatically go into one key landing when flying if the battery gets low. Changes to the drone’s flying height are normal.
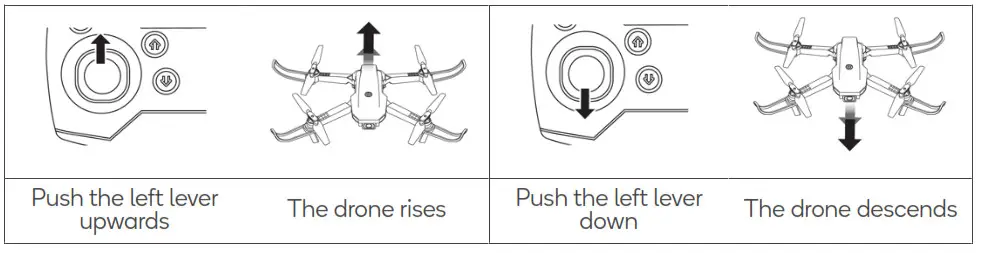
- Flight control:Throttle (left lever)Forward and backward (right lever) (with camera front side)Left and right-side flyTurn left and right (with came rafront side)
- Fine-tuning controls (with camera front side:Forward and backward fine-tuningRotating fine-tuning
 Forward and backward (right lever) (with camera front side)
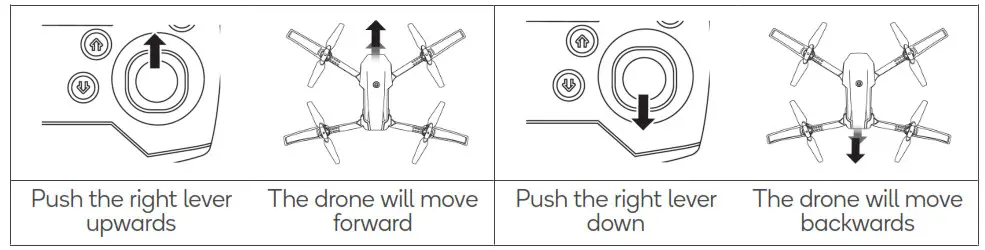 Left and right-side fly
Headless mode
When switching to headless mode, the drone will override its front and rear azimuths and reposition the front and rear using the remote control as a reference point. Such as: when the right lever is pushed forward, the drone will fly away from the remote control; when the right lever to pull back, the drone will fly towards the remote control (camera front side).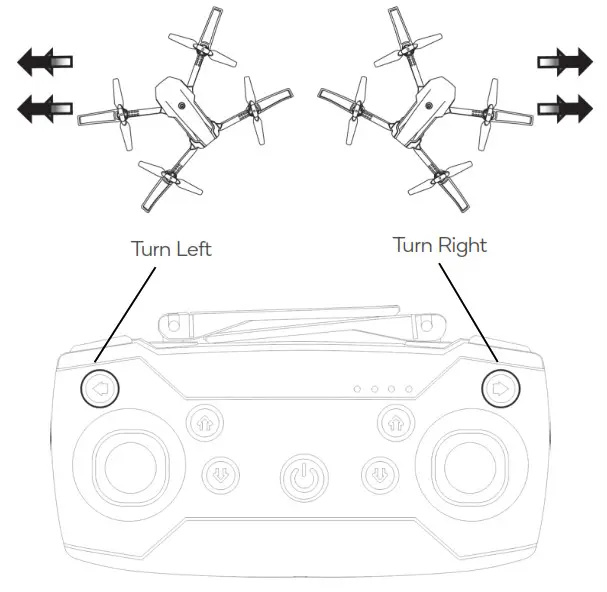
- The drone must be positioned with the camera facing you and the remote control directly in line with the drone. Short press the top left button and you will activate the headless mode.
- When the headless mode is active of the remote control will sound “Di Di Di…” and the drone lights will. Short pressing the top left button again will deactivate headless mode and the remote control will play a “flute” sound.
One key returnPress and hold the top left button to activate the one key return feature. The drone will override the current front and rear left and right directions, automatically defined by the headless mode, and move towards the remote control. Touching the right lever will stop this function.
Speed selectionShort press the top right button to cycle through the drone speeds;
- Slow – drone plays “flute” sound
- Medium – drone plays “flute” sound twice
- Fast – drone plays “flute” sound twice (Recommended beginners start with slow speed).
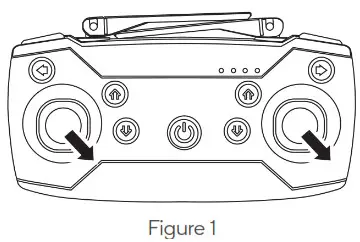
Reset settings
- To reset the drone, push the sticks (Figure 1), 2 seconds after the remote control will play the “flute” sound. The drone’s lights will quickly flash a few times if the reset was successful.
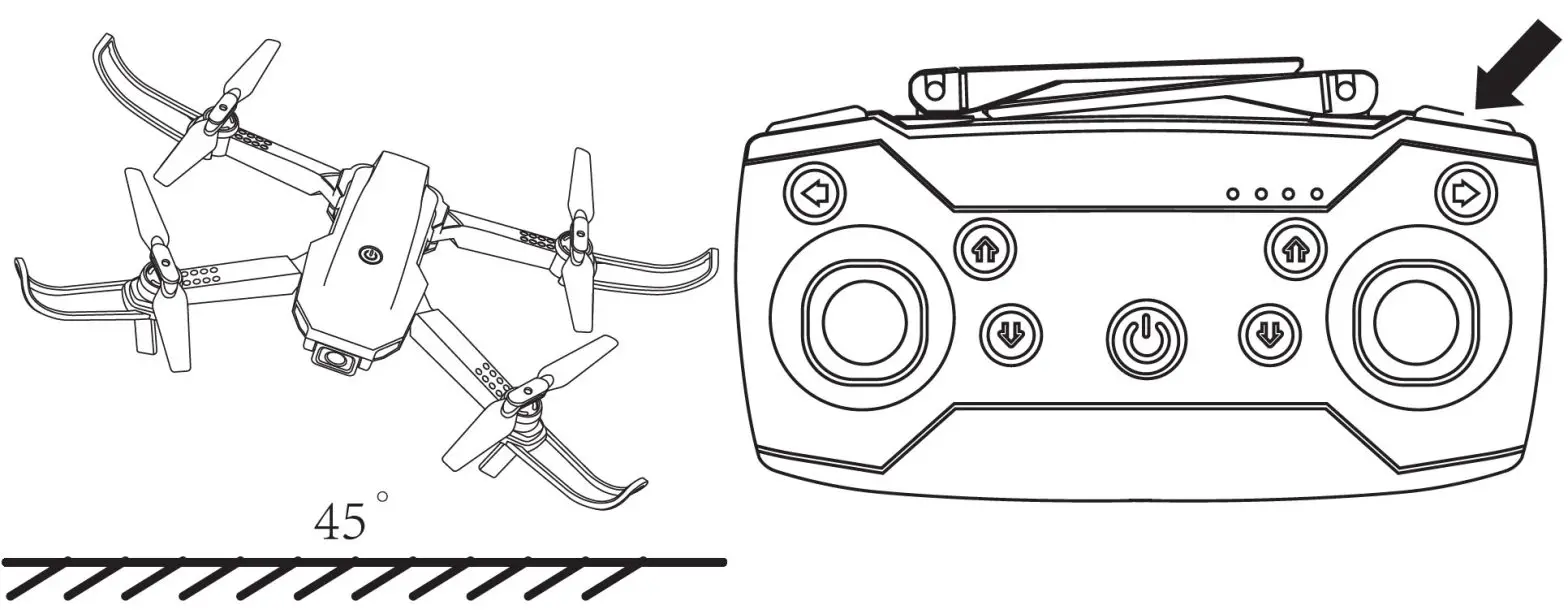
Emergency landing
- During the operation of the drone, if need to urgently stop. Press and hold the top left button. The drone will stop flying and land. (Please do not attempt this operation while flying at high altitudes)
- When the drone leans over 45 degrees, it will stop to protect the engines.
- When using the app to control the drone, slide the throttle down, and press the one key take-off button, it will perform an emergency landing.
TROUBLESHOOTING
| Problem | Cause / Issue | Solution |
| The drone batteries are inserted and the five indicator lights are flickering. | Remote control and drone connection are not successful | Please re-perform the remote control and the flying drone connection |
| The drone batteries are inserted and the five indicator lights stop flickering. The drone has no response. | Check if the remote control and the flying drone are powered on.Check whether the remote control and the drone battery are in a low power state.Is the battery positive and negative terminal or placed correspondingly. | Turn on the remote control and insert the drone battery.Use the full-charged battery.Reinsert the battery and confirm that the battery positive and negative pole piece of contact is normal |
| When the throttle lever is used, the motor does not turn and the drone does not fly. The indicator light on the disc starts flashing. | Lithium battery power shortage. | Charge the battery or replace it with another fully charged battery. |
| The drone’s main rotor continues to run but cannot take off. | The main rotor deformation. Drone battery power shortage. | Replace the main rotor.Charge or replace the battery with another battery. |
| The drone is not level. | The main rotor deformation. | Replace the main rotor. |
| The flying drone will still go on or on aftermoving. | The gyroscope is not at all right Drone engine malfunctioned. | The remote control can be automatically corrected or restart the re-frequency.Ensure that the drone is placed on a flat ground surface before take-off. Do not launch the drone from an incline or from hand. |
| The drone was not stable and fell. | ||
| The drone will not take off. | The protective frame is not secured tightly. | Re-perform assembly and installation steps. ensuring the protective frame is secured. |
NOTES
_______________________________
Need more information?We hope that this user guide has given youthe assistance needed for a simple setup.For the most up-to-date guide for your product,as well as any additional assistance you may require,head online to help.kogan.com
 report this ad
[xyz-ips snippet=”download-snippet”]