![]() USER GUIDEkogan.com
USER GUIDEkogan.com
![]()
8KG CONDENSER DRYERKAGDRYCD80A
SAFETY & WARNINGS
Read this manual thoroughly before first use, the safety precautions enclosed herein are the risk of fire, electric shock, and injury when correctly adhered to. Retain this user guide for future reference. If applicable, pass these instructions on to the next owner.
WARNING
- The appliance can be used by children aged 8 years and above and persons with reduced physical, sensory or mental capabilities or lack of experience and knowledge if they have been given supervision or instruction concerning use of the appliance in a safe way and understand the hazards involved.
- Children shall not play with the appliance. Cleaning and user maintenance shall not be performed by children without supervision.
- Children of less than 3 years should be kept away unless continuously supervised.
- The rear surface of the appliance must be placed against a wall.
- The appliance must not be supplied through an external switching device, such as a timer or connected to a circuit that is regularly switched on and off by a utility.
Risk of electric shock
- Do not attempt to repair this product yourself. If the product or its power supply experiences any malfunction or damage, cease use immediately and contact Kogan.com for support.
- The household electrical supply system (the current, the voltage, and the cable) such as a fuse with suitable specifications should be provided and should meet the requirements of the dryer under normal load and safety devices.
- The power plug must be connected to a three-core socket with an earth wire and must be grounded properly and reliably.
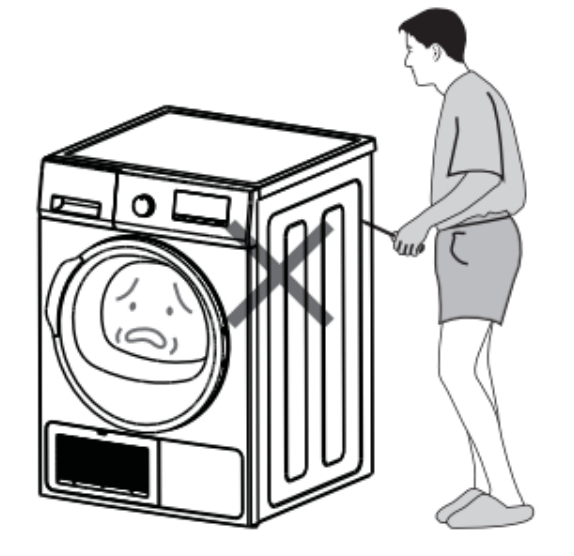
- Do not disconnect the dryer by pulling the power cord. Hold the power plug with your hand.
- Ensure the power plug is clean and dry and do not touch it with wet hands.
- Do not over-bend the supply cord or place it under heavyweight.
- Ensure the appliance is not standing on the power cord.
- Any electrical work required to install this appliance should be carried out by a qualified electrician
- Do not attempt to dry clothes that have been soiled with flammable liquids inside the dryer without washing them thoroughly by hand beforehand. Do not allow flammable or combustible materials such as gas, petrol, alcohol or lacquer in the appliance.
- If clothes that are dirtied in this way need to be dried, the hazard can be mitigated but not eliminated by washing first in hot water with extra detergent.
- Do not connect or disconnect the power plug in the event of a gas leak.

Risk of fire/short circuit or electric leakage
- Do not install the appliance close to an open fire or other sources of heat.
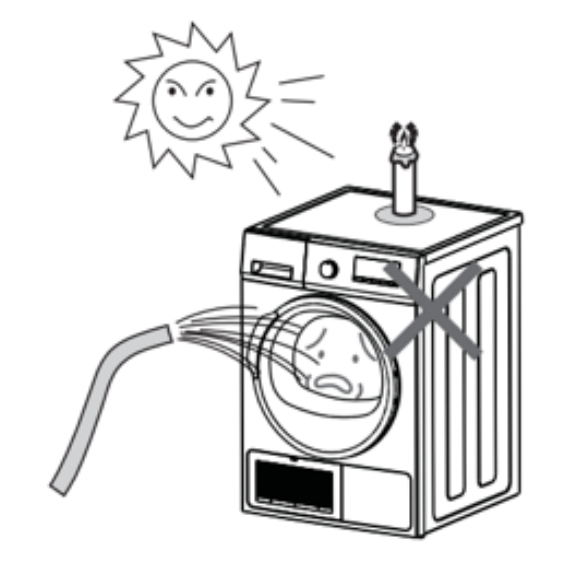
- Do not place any burning candles or lit cigarettes on the appliance.
- Do not install the appliance in areas prone to damp or water ingress as water on the electrical components can damage the appliance and/or pose a hazard.
- Do not install the dryer in areas exposed to direct sunshine or the plastic components and rubber components may become aged.
- Do not use pressurised water on the appliance when cleaning it.
- Do not use the appliance to dry cushions, quilts and the like, as these items accumulate heat and can pose a fire hazard.
- When using stain remover on your laundry, ensure you run an extra rinse cycle prior to loading the tumble dryer.
- Ensure all pockets are empty prior to loading laundry into the tumble dryer.
- Items that have been soiled with substances such as cooking oil, acetone, alcohol, petrol, kerosene, spot removers, turpentine, waxes and wax removers should be washed in hot water with an extra amount of detergent before being dried in the tumble dryer.
- Ensure the openings in the base are not obstructed by carpets.
- Exhaust air must not be discharged into a flue which is used for exhausting fumes from appliances burning gas or other fuels.
Risk of personal injury
- This machine is not intended for use by persons, including children with reduced physical, sensory or mental capabilities or lack of experience and knowledge unless they have been given supervision or instruction concerning use of the appliance by a person responsible for their safety.
- Children shall not play with the appliance. Cleaning and user maintenance should not be performed by children without supervision.
- To avoid danger to children, ensure all packaging is disposed of safely.
- Ensure children under 3 years of age and pets are supervised at all times when they are near the appliance. Always check the drum before closing the door.
- Wait until the drum has stopped completely prior to removing laundry from the dryer.
- Never stop a tumble dry before the end of the drying cycle unless all items are quickly removed and spread out so that the heat is dissipated.
Other instructions
- This appliance is designed for domestic use. It must not be used for purposes other than those for which it was designed.
- Only wash fabrics that are designed to be machine dried. Follow the instructions on each garment label.
- If the machine is situated on a carpeted floor, adjust the feet in order to allow air to circulate freely under the appliance.
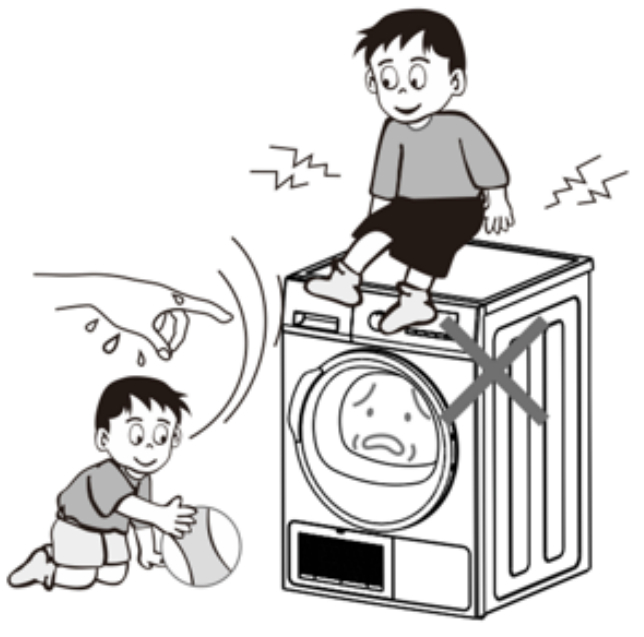
- Do not climb onto the dryer or rest heavy objects/heating devices or items with water or liquid leakage on the dryer.
- Objects such as coins, safety pins, nails, screws, stones or any other hard, sharp material can cause extensive damage and must not be placed into the machine.
- After having installed the appliance, check that it is not pressing or standing on its electrical supply cable or vent hose.
- Items such as foam rubber (latex foam), shower caps, waterproof textiles, rubber-backed articles and clothes and pillows fitted with foam rubber pads should not be dried in the tumble dryer.
- Always unplug the appliance after use, and before performing cleaning and maintenance.
- Do not overload the appliance.
- Clothes that are dripping wet should not be placed in the dryer.
- Garments which have been in contact with petroleum products should not be machine dried. If volatile cleaning fluids are used, care should be taken to ensure that the fluid is removed from the garment before placing in the machine.
- Never use the tumble dryer if the power supply cable, the control panel, the working surface or the base are damaged so that the inside of the tumble dryer is accessible.
- The dryer must not be used if industrial chemicals have been used for cleaning.
- Lint must not to be allowed to accumulate around the dryer.
- Do not dry unwashed items in the tumble dryer.
- Fabric softeners or similar products should be used as specified by the fabric softener instructions.
- The final part of a tumble dryer cycle occurs without heat (cool down cycle) to ensure that the items are left at a temperature that ensures that the items will not be damaged.
- The appliance must not be installed behind a lockable door, a sliding door, or a door with a hinge on the opposite side to hat of the tumble dryer, in such a way that a full opening of the tumble dryer door is restricted.
- The lint trap must be cleaned frequently.
- Adequate ventilation has to be provided to avoid the backflow of gases into the room from appliances burning other fuels, including open fires.
- Before switching on, ensure the supply voltage is the same as that indicated on the appliance’s rating plate.
- Should the plug need to be replaced for any reason, ensure a licensed electrician carries out any electrical work. The wires in the mains lead are colored in accordance with the following code:– Green and Yellow-Earth– Blue-Neutral– Brown-Live
- The wire colored green and yellow must be connected to the terminal marked with the earth symbol or colored green and yellow.
- Should the appliance need to be moved, it must be transported vertically.
OVERVIEW
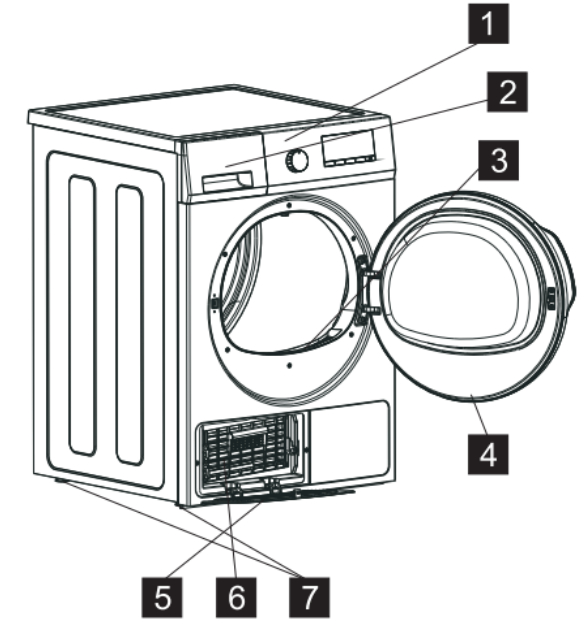
| 1 Control panel | 4 Door |
| 2 Water tank | 5 Condenser cover |
| 3 Lint filter | 6 Condenser |
| 7 Adjustment leg |
Control panel

| 1 Program selection dial | 5 Anti-crease |
| 2 Time | 6 Buzzer |
| 3 Child lock | 7 Delay start |
| 4 Dry level | 8 Start/Pause |
| 9 Indicator lights:– Lint filer– Drainage con |
INSTALLATION
The hot air emitted by the tumble dryer can reach temperatures of up to 60°C. Therefore, the appliance must not be installed on floors that are not resistant to high temperatures.
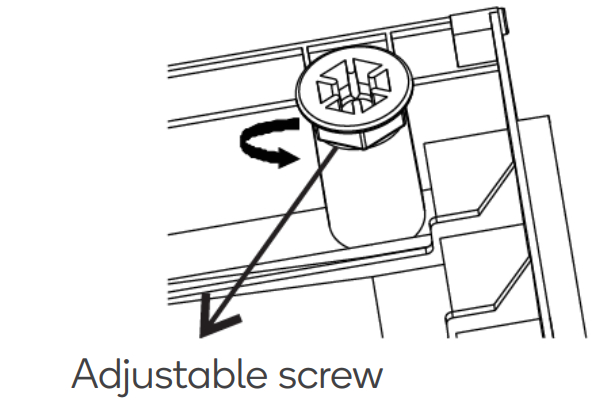
Level adjustmentWhen pushing down on the edges of the dryer’s top plate, the machine should not move at all. If the machine rocks, adjust the feet.
 Loosen the locknuts.
- Rotate the adjustable feet clockwise to lower the dyer.
- Rotate the feet counter-clockwise to raise the dryer.
- Tighten the locknuts after ensuring the dryer is level.
 Loosen the locknuts.
Note:The locknuts must be tightened after adjustment. Any looseness can cause vibration and noise.The feet must never be removed. Do not place the dryer on deep pile carpets, strips of wood or similar. This may cause heat build-up and interfere with the operation of the appliance.
Before First Use
- Ensure that the electrical connections comply with the installation instructions.
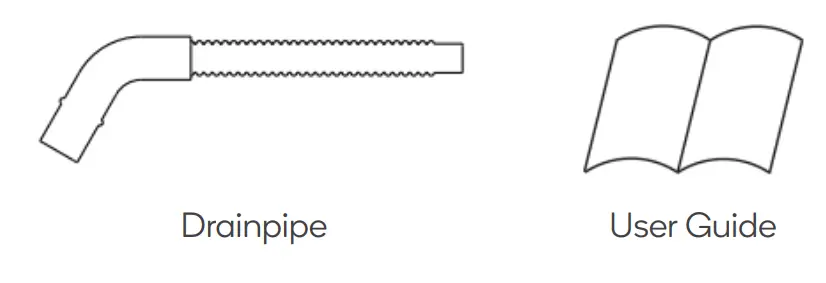
- Open the accessory bag and ensure all accessories are present:
- Remove the polystyrene block and any material from the drum:o, Open the door.o, Pull off the adhesive strips from the inside of the dryer.o, Remove the packaging foam from the dryer.

Before using your dryer for the first time, it is recommended to place a few damp cloths inside the appliance and tumble dry for 30 minutes as there may be dust inside a brand-new dryer.
OPERATION
- Connect the appliance to a power outlet.
- Open the door.
- Place the laundry in the drum, one item at a time, shaking them out as much as possible.
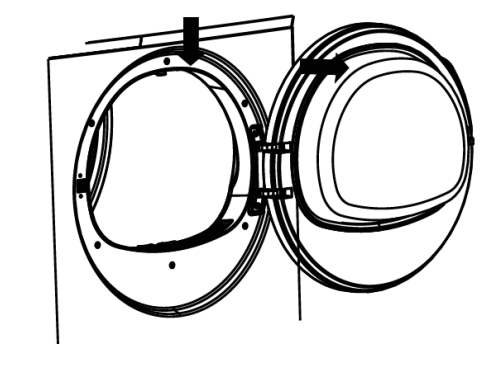
- Close the door. Ensure the laundry does not get caught between the doors and filter.
- To cancel a program while the dryer is running, turn the program selector dial to “off”.
- At the end of drying, turn the selector dial to “off” to switch the machine off before removing the laundry.
Note:Ensure the lint filter is cleaned after every cycle and whenever prompted by the dryer.
 Program SelectionTu r n t h e program selector dial to the desired program. The corresponding function lights will turn on. The program will be switched off if there is no user input for 10 minutes.

Note:
- The standard program is suitable to dry normal wet cotton laundry. It is the most energy-efficient program.
- Some thick clothes such as jeans and large towels take longer to dry due to the characteristics of the material. If you find that they are not completely dry at the end of the program, it is recommended to use the “Time” program to dry again.
Automatic Drying
- The device comes with a sensor to sense the moisture in order to automatically adjust the drying time for optimal drying.
- This automatic control system is suitable for most programs except Warm air, Refresh and Time.
TimeTurn the knob to the Time option and press the Time button to add to the drying time.Program OptionsDepending on the program, different functions can be combined. These must be selected after choosing the desired program and before pressing the Start/Pause button. When these buttons are pressed, the corresponding indicator lights will illuminate. When they are pressed again, the lights go out.
BuzzerPress and hold “Anti Crease” and “Delay Start” buttons for 5 seconds to enable or disable the buzzer feature.

When the buzzer is enabled, it will play a sound in the following cases:
- If the door is opened during operation.
- When the water container is full.
- At the end of a program after the cooling phase.
Dry Level
- Before you start the machine, you can choose the dry level. The dry level is divided into three grades: (Heavy) (Strong) and (Normal).
- This option is only applicable to the following programs: Daily, Cotton, Synthetic, Bulky item and Towel.
Anti-CreaseAnti-Crease is a default setting at the end of each program (except the Cotton![]() program). A longer Anti-Crease function can be selected while the program is in standby or running.
program). A longer Anti-Crease function can be selected while the program is in standby or running.
Select Delay startThis button allows you to delay the start of the program by up to 24 hours in intervals of 1 hour. This option must be selected after setting the program and before pressing Start/Pause.When Start/Pause is pressed, the corresponding indicator lights will flash. Other indicator lights will be off except for the Delay Start light.

DisplayAlong with the program time countdown, the following items are displayed:
- Delayed start: If you have selected a delay time by means of the relevant button, the display shows it, the countdown is displayed hour by hour. Once you press the “Start/Pause” button, the appliance will start the countdown. If you want to check the selected program. Press the ‘Delay Start’ button again. It shows the duration of the previously selected program.
- Incorrect option selection: If you select an option that is not compatible with the program you have selected, the display shows ErS (error). If you select another program because of incorrect operation while the program is running, the display shows ErS (error).
Start/PausePress this button to start the dryer after having selected the program and the options. If the door of the appliance is opened while the program is running, this button must be pressed again after closing the door in order to restart the program from the point at which it was interrupted. In this case, the light of the Start/Pause button flashes to remind you that the start button needs to be pressed again.
Indicator lights
| Drying light: Indicates that the appliance is in the drying phase. | |
| Cooling light: This indicates that the appliance is in the cooling phase. | |
| End of program light: Indicates the cooling phase is complete. | |
| Anti-creasing light: Indicates the appliance is in the anti-crease phase. | |
| Filter light: This comes on during every cycle to remind you that the filter must be cleaned at the end of the program. | |
| Child lock light: Indicates that the appliance is locked. | |
| Buzzer light: Indicates that the buzzer is enabled. | |
| Delay start light: Indicates that the delay start program is selected. | |
| rying type light: The light for the appropriate set drying intensity will be | |
| Tank full light Comes on after each program and also when the water tank is full, reminding you to empty the water container. |
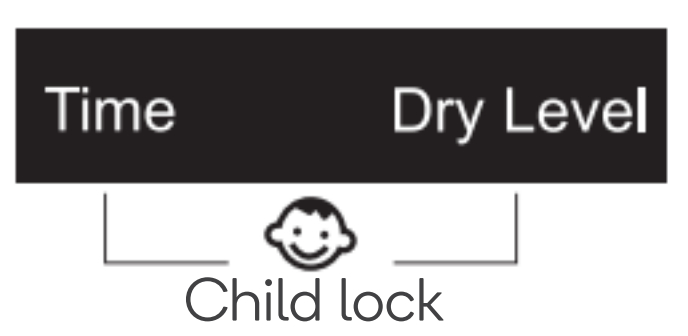
Program EndAll drying programs (except the Cotton program) end with a 10-minute cooling phase. If the laundry is not removed at the end of the cycle, the dryer enters the anti-creasing phase (duration: 30 minutes maximum).If you don’t remove the laundry, the machine will stop automatically at the end of the anti-creasing phase. The display will show “End” and the buzzer will sounds for 15 seconds if enabled. To finish, turn the program selector dial to off.Child Lock FunctionPress and hold “Time” and “Dry Level” together to toggle the child lock function on or off. With the child lock active, only the Off button will function.The function will be canceled if the door is opened during operation, if the filter drawer is removed during operation or if the water tank becomes full.
After Use
- If the drying program has to be stopped before it reaches the end, it is recommended to run the cooling phase before removing the laundry so excess heat can dissipate.
- Turn the dial to “Off” and then to “Refresh” before pressing the “Start” button.
- Ensure the filter is cleaned after every cycle.
Modifying the ProgramTo change a program while the dryer is running, first cancel it by turning the program selector dial to “Off”, then select the new program and press the “Start button.
Before Loading LaundryNever tumble dry particularly delicate items such as net curtains, woolen, silk, and fabrics with metal trim, nylon tights, bulky materials such as anoraks, blankets, eiderdowns, sleeping bags, feather quilts, and other items containing rubber foam or materials similar to rubber foam.
Always follow the instructions on garment labels:
| May be tumble dried | Delicate drying (lowtemperature) | ||
| Normal drying (hightemperature) | Do not tumble dry |
- Close pillowcases and covers with fasteners to prevent small laundry items getting tangled inside them.
- Close press studs, zips, hooks, tie belts and apron strings. Sort laundry according to type and degree of drying required.
- Avoid drying dark garments with light-coloured items such as towels as they could attract lint.
- The laundry must be thoroughly spun before drying.
- Knitted wool may shrink a little: take care to not over-dry items of this type.
- • Starched items can be placed in your dryer; the program “Iron dry” should be run. To remove starch residue, wipe out the internal drum after drying with a moist clothand then rub it dry.• To avoid a static charge when drying is completed, use either a fabric softener when you washing or a fabric conditioner specifically for tumble dryers.
Ensure no metal objects, such as hair clips, pins, etc., are left in the laundry.
- For button-up pillowcases, close zip fasteners, hooks and poppers, tie any belt or long tape to avoid the laundry becoming tangled.
- For zips, button up duvet covers, tie loose ties or ribbons (e.g. of aprons).
- Turn items with double -layered fabrics inside out.
Maximum LoadRecommended loads are indicated in the program chart below. For general reference:
- Cotton, linen: Drum full but not too tightly packed
- Synthetics: Drum no more than half full
- Delicate fabrics and wools: Drum not more than quarter full
Tr y to load the maximum capacity of the machine as small loads are uneconomical.
| Program | Maximum load |
Description of program |
| Standard | 8kg | A regular load. Different drying strengths can be selected. |
| Cotton | 8kg | Cotton products, etc. Different drying strengths can be selected. |
| Synthetic | 4kg | Synthetic fibre products, etc. Different drying strengths can be selected. |
| Bulky Item | 2kg | Large items such as bed sheets and quilt covers. Different drying strengths can be selected. |
| Towel | 4kg | Towels, etc. Different drying strengths can be selected. |
| Wool | 1kg | Knitted products, etc. |
| Duvet | 3.5kg | Duvets, down jackets, etc. |
| Baby Care | 3kg | Baby clothes, etc. |
| Warm Air | – | Used for drying delicate material loads, such as silk, etc. The machine dries depend on the display time, regardless of the drying level. |
| Refresh | – | Allows the laundry to cool and deodorise. |
| Time | – | Drying thick or multi-layered textiles. |
| Underwear | 2kg | Underwear, etc. |
| Denim | 4kg | Denim, etc. |
| Shirts | 2kg | Shirts, etc. |
| Sportswear | 2kg | Sportswear, etc. |
Note: When drying bathrobes and towels, the maximum load should not exceed 6kg.Laundry WeightThe following weights are Indicative:
| Bathrobe | 1600g | Nightdress | 265g |
| Napkin | 130g | Ladies’ underwear | 130g |
| Quilt cover | 930g | Button up shirt | 800g |
| Sheet | 665g | T-shirt | 265g |
| Pillowcase | 266g | Pyjamas | 130g |
| Tablecloth | 330g | Blouse | 665g |
| Towel | 265g | Men’s underwear | 130g |
| Tea towel | 130g |
CLEANING & CARE
- Disconnect the appliance from the power outlet before you perform any cleaning or maintenance.
- Do not clean the dryer by directly spraying water onto it.
- Do not use clean using benzene, thinner, alcohol or acetone as this may cause discoloration, deformation, damage, electric shock or fire.
- During the drying cycle, the control panel or the door may accumulate moisture.
Control Panel
- Clean using a soft, slightly damp cloth. Do not use abrasive cleaners or hard detergents.
- Do not spray cleaners directly onto the panel.
- The control panel finish may be damaged by some laundry pre-wash and stain remover products. Apply such products away from your dryer and wipe up any spills or overspray immediately.
Drum
- To clean the drum, use a damp cloth with a mild, non-abrasive cleaner that is suitable for stainless steel surfaces.
- Remove the cleaner residue and dry with a clean cloth.
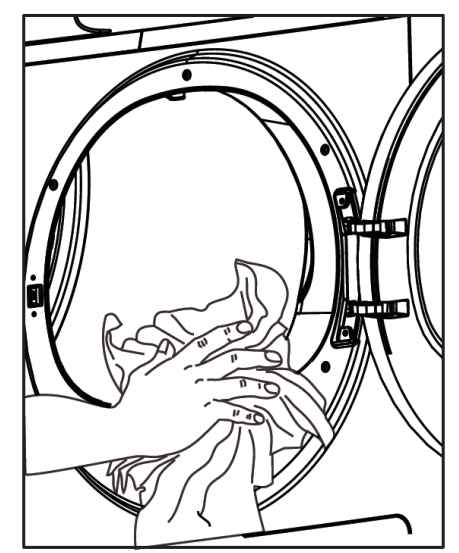
DoorThe door will need to be periodically cleaned to ensure the dryer is operating efficiently. Remove any lint build up and wipe down the door glass using a soft cloth.
Dryer Exterior
- The dryer exterior has a high-gloss finish. Clean using a soft, damp cloth. Do notuse abrasive cleaners.
- Protect the surface from sharp objects as they may scratch or damage the finish.
- Do not place any heavy or sharp objects or detergent boxes on the dryer. Keepthem in a separate storage box.
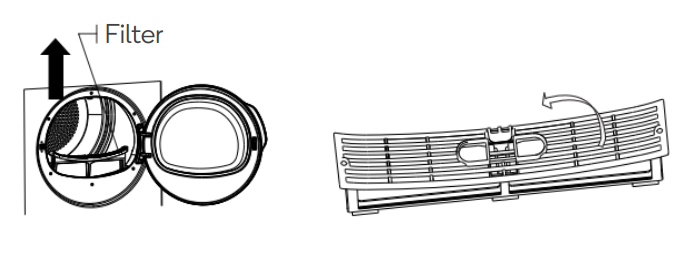
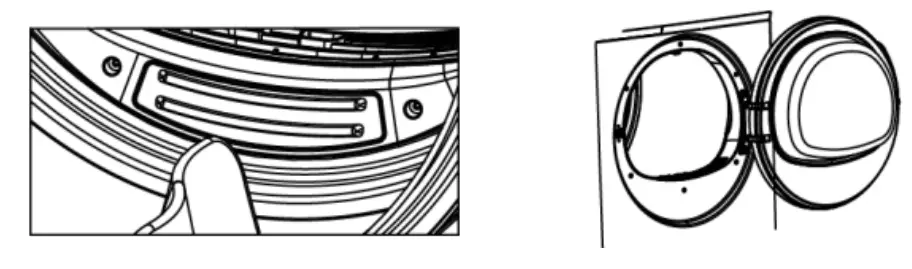
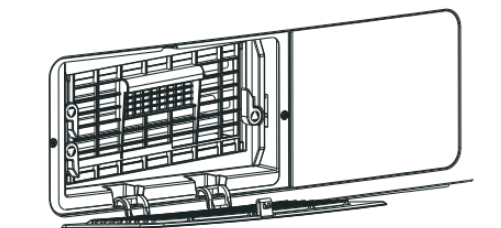
Cleaning the Filter
- Open the loading door.
- Pull lint filter upwards and out.
- Clean lint, fibre and cotton ravelling by hand or with a soft piece of cloth.
- Close the lint filter and place it back into its housing.
Note:Ensure the lint filter is cleaned after every cycle and whenever prompted by the dryer. Always clean the inner surface of the door after drying process.
After continued use, a layer can build up on the filter pores and cause the filter to clog. Wash with warm water to remove this layer. Ensure the lint filter is completely dry before reinstalling it.
WARNING: Never use the appliance without the filter installed.
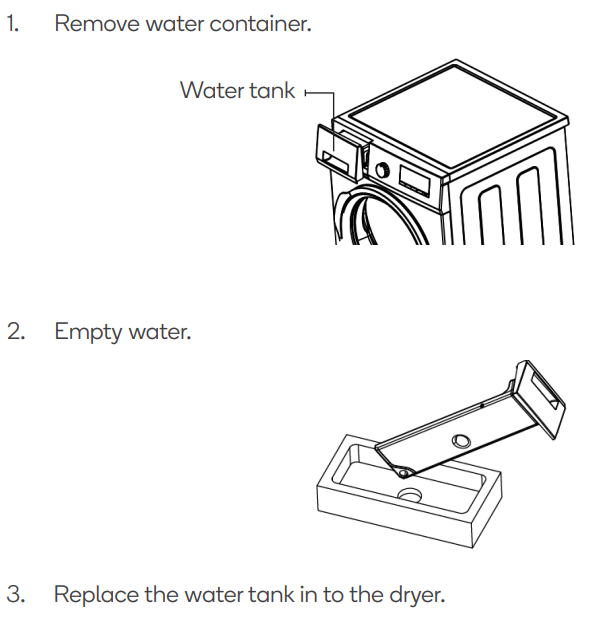
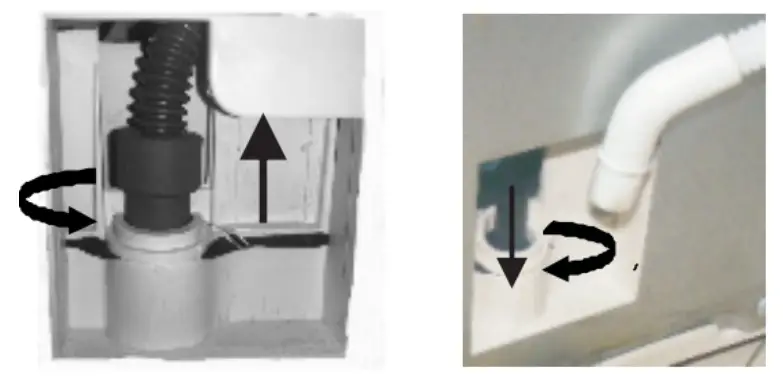
Water Hose DrainageThe water tank can be filled and emptied, or the drainpipe can be connected to drain it automatically.Remove the hose and insert the drainpipe as shown below. Pilers can be used if it is difficult to do so.
Humidity sensorCalcium oxide build-up on the sensor surface should be cleaned off periodically.
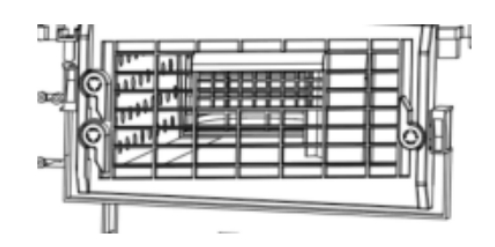
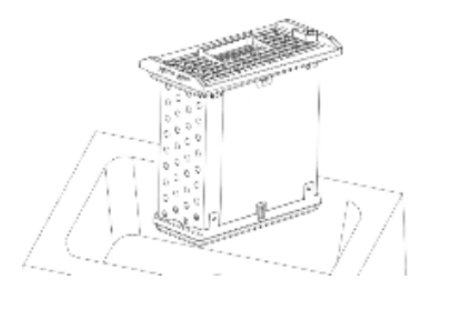
Cleaning the condenserThe condenser is vital to ensure effective drying. It is recommended to clean the condenser at least three or four times a year.
- Open condenser cover.
- Release the 3 locking tabs and pull out the condenser.
- Thoroughly rinse the condenser under a tap to clean the condenser.
- Ensure the condenser is dry before replacing it in the dryer.
SPECIFICATIONS
| Dryer capacity | 8.0kg |
| Power | 220-240V AC / 50Hz |
| Rated power | 2150W |
| Weight | 40kg |
| Power (left-on mode) (W) | 0.48W |
| Power (off mode) (W) | 0.48W |
| Energy consumption at full load | 6.88kWh |
| Program time at full load | 230 minutes |
| Dimensions (W x D x H) (mm) | 595 x 630 x 850mm |
| Ambient temperature range | 5 – 35°C |
Note:The above data in the table is based on using the “Cotton ” program which has been tested according to AS/NZS 2442.2:2000 + A1: 2006 + A2: 2007 standards. This data may vary based on different laundry types, residual moisture, environmental conditions and voltage fluctuation.
TROUBLESHOOTING
Most common problems are due to lack of simple maintenance or oversights, which can be solved easily. Before contacting support, please carry out the checks listed below.
During operation the Start/Pause light flashes to indicate that the machine has encountered a problem. Once the problem has been eliminated, press the Start/Pause button to restart the program. If after all checks, the problem persists, contact help.Kogan.com for support.
| Issue | Possible cause | Solution |
|
Dryer not turning on |
·Plug is not plugged in.·Loading door is open.·Have you pressed the button? | ·Plug dryer into a power outlet.· Close loading door.· Press the button gain. |
| Drying results unsatisfactory |
·Wrong program selected.·Filter clogged.·Incorrect volume of laundry.·Sediment on humidity sensor. |
·Select a different program the next time you dry.·Clean lint filter.·Observe recommended loading volumes.·Clean humidity sensor. |
| Drying cycle ends shortly after program starts. “END” light illuminated. | ·Washing loaded is not enough or washing load is too dry for selected program. | · Select high drying level (e.g. Heavy instead of Strong). |
| Drum light does not turn on (option). | · Light bulb is defective. | ·Replace light bulb. |
| Drying cycle lasts for an unusually long time | ·Load volume is too heavy. | · Reduce load volume. |
NOTES
Need more information?We hope that this user guide has given you the assistance needed for a simple set-up.For the most up-to-date guide for your product, as well as any additional assistance you may require,head online to help.kogan.comkogan.com
[xyz-ips snippet=”download-snippet”]