Safety & Warnings
Handle with care and inspect regularly to ensure product is in good working order.If this product, power supply cord or plug shows any signs of damage: stop use, unplug the product and contact Kogan.com support.
- Read all instructions before using the appliance and retain for reference.
- This appliance is not intended for use by persons (including children) with reduced physical, sensory or mental capabilities, or lack of experience and knowledge, unless they have been given supervision or instruction concerning use of the appliance by a person responsible for their safety.
- This appliance is not a toy: do not allow children to play with the appliance.
- This appliance is designed for consumer use: follow directions and use only as described.
- Do not use with an extension cord unless necessary, and if so, ensure it is suitably rated and it is handled safely as is the product’s own power cord:
- Do not allow the power cord to be exposed to water, heat, direct sunlight or overhang where it can be pulled or otherwise be damaged or pose a hazard.
- Keep it away from sources of heat, direct sunlight, humidity (never dip it into any liquid) and sharp edges. Do not use the appliance with wet hands. If the appliance is humid or wet, unplug it immediately.
- Do not allow the appliance to operate without supervision. If you leave the workplace, always switch the machine off or remove the plug from the socket.
- Switch off the appliance and disconnect from supply before cleaning, changing accessories or touching any moving parts.
- Do not supply this device through an external switching device such as a timer or connect it to a circuit that is regularly switched on and off by the utility.
- Do not interfere with any safety switches.
- Do not insert anything into the rotating hooks while the machine is in operation.
- Install and use the machine only on a smooth, flat and stable working surface.
- CAUTION: Ensure that the blender is switched off before removing it from the stand.
- Take care when handling the sharp cutting blades, emptying the bowl and during cleaning. Ensure the Cleaning & Care section is read in full before cleaning the product or its accessories.
- This appliance contains no user-serviceable parts. If it suffers any failure or damage, cease usage and contact Kogan Support after consulting the Troubleshooting section of this manual.
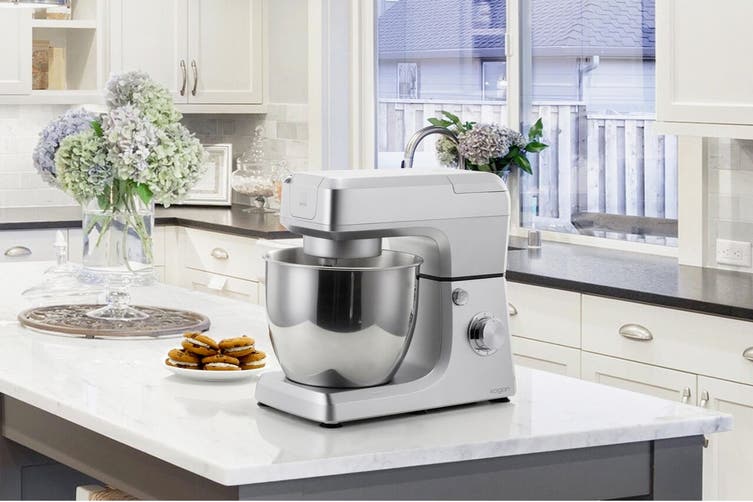
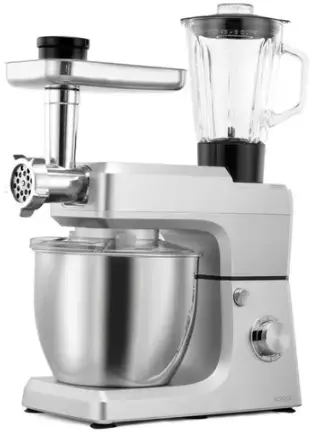
Overview
Appliance Diagram & Part List
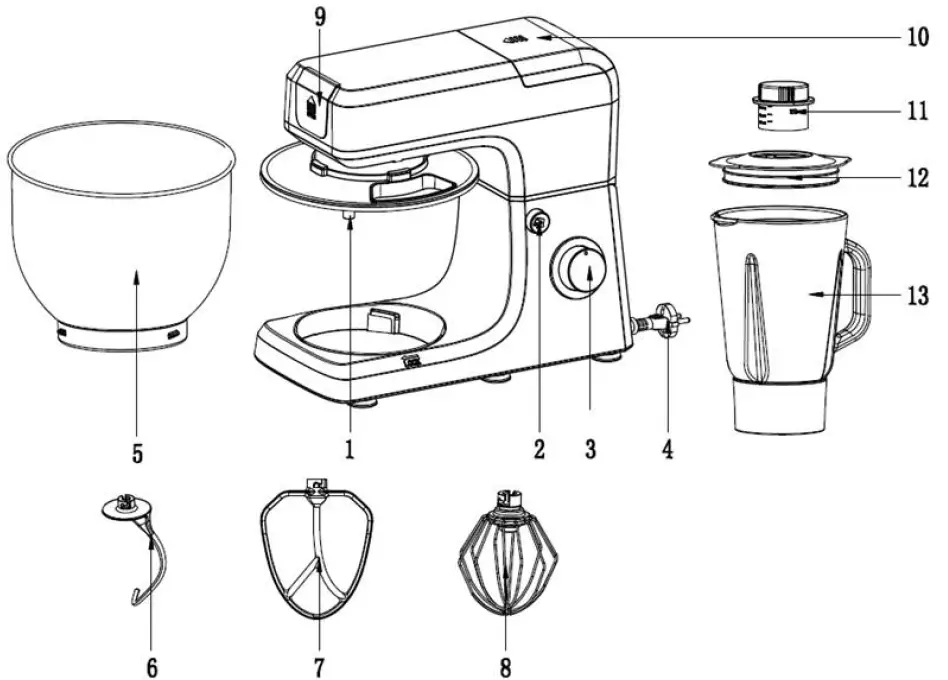

| 1 | Output shaft | 11 | Measuring cup |
| 2 | Rise knob | 12 | Jar lid |
| 3 | Speed knob | 13 | Glass cup |
| 4 | Power Cord | 14 | Spiral section housing |
| 5 | Mixing bowl | 15 | Spiral section |
| 6 | Dough hook | 16 | Blade |
| 7 | Beater | 17 | Sieve |
| 8 | Whisk | 18 | Lock |
| 9 | Front cover | 19 | Meat mincer/presser |
| 10 | Rear cover | 20 | Filling tray |
Operation
Mixing Bowl
- Press the rise knob (2) to lift the arm. (FIG1)
- Place the pot cover into the body and turn the pot cover until it locks into place. (FIG2)
- Place the mixing bowl into the device (Step①) and turn the bowl clockwise until it locks into place (Step②). (FIG3)
- Mount the Dough hook, Beater or Whisk by inserting the top into the output shaft and turning anti-clockwise until it locks into place. (FIG4&FIG5)
- Add ingredients, taking care not to overfill the maximum quantity of 2kg.
- Lower the arm using the rise knob (2). (FIG6)
- Insert the power plug into a properly-installed 220-240V 50 Hz safety power socket.
- Set the speed knob to an appropriate speed for the mixture. Turn the switch to PULSE for pulse operation; it will return to 0 once the switch is released.
- Turn the speed knob (3) back to the 0 once the mixture has formed a ball and unplug from power.
- Press the rise knob (2) to lift the arm.
- Extract the mixture with the aid of a spatula.
- Remove the mixing bowl.
- Clean the appliance (see Cleaning & Care).
NOTE: With heavy mixtures, after five minutes’ use, allow it to cool down for ten minutes.
Accessory & Speed Levels
| Appliance | Picture | Levels | Time (Min) | Maximum | Note |
| Dough hook | 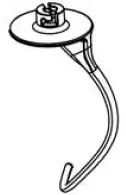 |
1-3 | 3 | 1250g flour and 750g water | Heavy mixtures (e.g. bread or short pastry) |
| Beater | 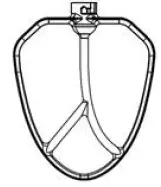 |
2-4 | 4 | 660g flour and 840g water | Medium-heavy mixtures
(e.g. crêpe or sponge mixture) |
| Whisk | 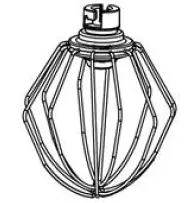 |
5-6 | 3 | 3 egg whites (Minimum) | Light mixtures (e.g. cream, egg
whites, blancmange) |
Note: Do not overfill the maximum quantity of 2kg.
Blender
For fine pureeing and blending: soups, sauces, milkshakes, baby food, vegetables, fruit puree, etc. If necessary, cut large ingredients into smaller pieces before you put them in the blender.
- Remove the rear cover. (FIG.1)
- Place the ingredients into the jar.
- Press the jar lid securely into place. (FIG.2)
- Place the blender measuring cup into the jar lid and turn clockwise to lock. (FIG.3)
- Take the blender jar onto the attaching hole and turn it anticlockwise to lock. (FIG.4)
- Set the speed control to position 6.

NOTE
- Ingredients can be added during operation by removing the measuring cup from the jar lid.
- It may be necessary to switch off the appliance from time to time to remove pieces of food slicking to the inside of the blender jar.
Important:
- Do not connect the power plug until you have assembled the blender jar and the jar lid.
- Unplug the appliance before removing the blender jar from the housing.
- Do not fill the blender jar with contents hotter than 80°C.
- Do not place more than 1.5ls of liquid in the blender jar.
- Never remove the jar lid while the blender is running.
- Always cover the blender lid before installing or removing the blender jar.
- Do not operate the blender attachment for more than 3 minutes consecutively.
Mincer
- To assemble, place the blade (16) on the end of the spiral section (15) and then a sieve (17) of your choice. Screw the lock (18) on by hand. (FIG.1)
- Remove the front cover (FIG.2) from the appliance.
- Press the fixed button then place the spiral section housing into the machine and turn anticlockwise to lock (FIG.3)
- Place the filling tray (FIG.4) on the filler neck.
- Place a tray or container under the mouth.
- Connect to power and then set the speed control to position 3.Put the pieces of meat on to the filling tray (20) and into the filler neck. If necessary push the meat with the presser (19). Do not use your fingers to push the meat!
- After use, switch off the appliance and unplug it.

NOTE:
- Cut the meat into pieces of about 2.5 cm. Take care that the meat does not contain any bones or sinew.
- After use, ensure all accessories are cleaned following the guidelines in the Cleaning & Care page of this user guide. Do not use a dishwasher for the flat beater, dough hook, whisk or mincer.
Cleaning & Care
- Before cleaning, unplug from the wall outlet.
- Never submerge the housing with motor in water
- Do not use any sharp or abrasive detergents
Motor HousingUse only a damp cloth to clean the outside of the housing. Do not submerge in water.
Mixing Bowl & EquipmentCAUTION: The components and accessories are not suitable for cleaning in a dishwasher. If exposed to heat or caustic cleaners, they could become misshapen or discoloured.
- Components that have come into contact with food can be cleaned in soapy water.
- Allow the parts to dry thoroughly before reassembling the device.
- Apply a small quantity of vegetable oil to the screens after they have dried.
Troubleshooting
| Issue | Solution |
| Not turning on | • Ensure plug is in good contact with the socket
• Ensure rise button has returned to position • Allow motor to cool after 5 minutes of continuous use |
| Accessory scraping mixing bowl | • Ensure mixing bowl is properly installed
• Ensure accessory is properly installed |
| Pot cover not fitting mixing bowl properly | • Ensure pot cover is properly installed
• Ensure mixing bowl is properly installed and locked |
| Not working on particular speed | • Turn appliance off and on
• Turn speed knob to 0 and re-check |
| Stopping during operation | • Ensure the anti-slip feet are attached
• Ensure appliance is placed on a smooth and flat surface |
| Rise knob does not return to position after installing mixing bowl and pot cover | • Ensure pot cover is properly installed
• Ensure mixing bowl is properly installed and locked |
| Accessories becoming discoloured | • The components and accessories are not suitable for cleaning in a dishwasher. If exposed to heat or caustic cleaners, they could become misshapen or discoloured.
• Only clean components and accessories in soapy water. |
User manual is subject to change without notice. For the latest version of your user manual, please visit www.kogan.com
Recipes
Sponge Mixture (Basic Recipe), Level 1-4Ingredients:200g soft butter or margarine, 200g sugar, 1 packet vanilla sugar, 1 pinch of salt, 4 eggs, 400g wheat flour, 1 packet baking powder, approx. 1/8l milk.100g of raisins, nuts, grated chocolate or other could
Preparation:Transfer the wheat flour and the remaining ingredients to the mixing bowl, stir with the beater for 3 seconds on level 1, then for approximately 3 minutes on level 2. Line a tin or cover with baking paper. Fill in the mixture and bake. Before the cake is removed from the oven, test to see if it is done. Pierce the centre of the cake with a wooden skewer. If no mixture sticks to it, the cake is cooked. Turn the cake on to a cooling rack and allow to cool.
Traditional OvenInsertion height: 2Heating: electric oven, top and bottom heat 175-200°C; gas oven: level 2-3Baking time: 50-60 minutes
Linseed Bread Rolls, Level 1-4Ingredients:500-550g wheat flour, 50g linseed, 3/8l water, 1 cube of yeast (40g), 100g low-fat curds, well drained, 1 tsp salt. For coating: 2 tbsp of water.
Preparation:Soak the linseed in 1/8l of warm water. Transfer the remaining warm water (1/4l) into the mixing bowl, crumble in the yeast, add the curds and mix with the dough hook on level 2. The yeast must be completely dissolved. Put the flour with the soaked linseed and the salt into the mixing bowl. Knead thoroughly on level 1, then switch to level 3 and continue kneading for 3-5 minutes. Cover the mixture and allow to rise in a warm place for 45-60 minutes. Knead thoroughly again, remove from the bowl and form sixteen rolls. Cover the baking tin with wet baking paper. Place the rolls on this and allow to rise for 15 minutes. Coat with warm water and bake.
Traditional Oven:Insertion height: 2Heating: electric oven: top and bottom heat 200-220°C (preheated 5 minutes), gas oven level 2-3Baking time: 30-40 minutes
Chocolate Cream, Level 5-6Ingredients:200ml sweet cream, 150g semi-bitter chocolate, 3 eggs, 50-60g sugar, 1 pinch of salt, 1 packet of vanilla sugar, 1tbs cognac or rum, chocolate flakes.
Preparation:Beat the cream in the mixing bowl with the whisk until stiff. Remove from the bowl and allow to cool. Melt the chocolate either as per the instructions on the packet or in the microwave at low power so that it does not burn. In the meantime, beat the eggs, sugar, vanilla sugar, cognac or rum and salt in the mixing bowl with the whisk on speed 2 so that it forms a foam. Add the melted chocolate and stir in evenly on speed 5-6. Leave a little of the cream for decoration. Add the remaining cream to the mixture and stir in briefly using the pulse function. Decorate the chocolate cream and serve well cooled.
Pizza Dough, Level 1-4Ingredients400g plain flour, 250ml warm water, 1/2 tsp sugar, 1sacher active dried yeast (about 2-1/2 tsp), 1-1/2 tsp olive oil and 1 tsp salt.
Preparation:Put the flour in the bowl. Mix the remaining ingredients in a bowl or jug. Run the mixer at speed 1-2, and gradually add the liquid. Increase the speed to 3-4 once the mixture thickens and knead for a 1-2 minutes, until the dough becomes smooth. Remove from the bowl and split into 2-4 pieces. Roll into pizza bases on a floured surface and lay them on a baking sheet or pizza tray. Spread the pizza bases with tomato purée and add preferred toppings – mushrooms, ham, olives, sun dried tomatoes, spinach, artichoke, etc. Top with dried herbs, pieces of mozzarella, and a drizzle of olive oil. Bake in a preheated oven at 200°C/400°F/gas 6 for 15-20 minutes, until the toppings are bubbling and golden brown.
Basic White Bread, Level 3-6Ingredients:600g strong white bread flour, 1 sachet / 2½ tsp active dried yeast, 345ml warm water, 1 tbsp sunflower oil or butter, 1 tsp sugar, 2 tsp salt
Preparation:Use the mixing instructions for pizza dough, then put the dough in a bowl, cover and leave in a warm place until it’s doubled in size (30-40 minutes). Remove the dough and punch down to remove air. Knead lightly on a floured board, shape it into a loaf, or put it in a tin, cover, and leave in a warm place to rise for another 30 minutes. Bake in a preheated oven at 200°C / gas level 6 for 25-30 minutes, until golden brown and hollow sounding on the bottom.
Soft Poppy Seed Rolls, Level 1-3Ingredients:600g strong white bread flour, 1 sachet / 2½ tsp active dried yeast, 300ml milk (warmed slightly), 2eggs (room temperature), 1 tbsp sunflower oil, 1½ tsp sugar, 2 tsp salt, 75g poppy seeds
Preparation:Mix the milk, eggs, oil, sugar, salt and yeast in a jug or bowl and allow to stand for 5 minutes. Put the flour and poppy seeds in the bowl, and mix at speed 1, gradually adding the liquid, then increase the speed to 2 and mix for five minutes. Remove the dough to a floured surface, cut into 8-10 pieces, roll into shape, then put on a greaseproof baking sheet. Leave in a warm place until doubled in size. Brush with a little egg or milk, and bake in a preheated oven at 220°C / gas 7 for 20-25 minutes until golden brown and hollow sounding on the base.
Italian Herb BreadIngredients:575g strong white bread flour, 1 sachet active dried yeast (about 2½ tsp) ,290ml water 2 tbsp olive oil, 2 tsp sugar 2 tsp salt, 4 tbsp mixed dried herbs
Preparation:Mix the water, oil, sugar, salt and yeast in a jug or bowl, and leave for 5 minutes. Put the flour and dried herbs in the bowl, and mix at speed 1, gradually adding the liquid, then increase the speed to 2, and mix for 5 minutes. Put the dough in a bowl, cover and leave in a warm place until doubled in size (20-30 minutes). Put on a floured surface, knead gently to knock out the air, then shape, put on a baking sheet, and leave in the warm h doubled in size. Bake in a preheated oven at 200°C/400°F/gas 6 for 25 minutes or until golden brown and hollow sounding on the bottom.
Coffee & Brandy Ice Cream, Level 5-6Ingredients:3 eggs, 75g caster sugar, 300ml cream, 2 tbsp instant coffee, 300ml thickened cream, 2½ tbsp brandy
Preparation:Add the sugar and eggs to the bowl and process at speed 6 until smooth. In a saucepan, bring the cream and coffee to simmer and stir in the egg and sugar mixture. Put in a heatproof bowl over a simmering pan of water and cook gently, stirring well, until thick enough to coat the back of a spoon. Strain into a bowl and leave to cool. Whip the double cream at speed 6 until soft peaks form, then fold into the cold egg and sugar mixture with the brandy. Pour into a container, cover,and freeze for 2½-3 hours, until partially frozen. Remove, stir well and then freeze again, until the desired texture is achieved.
Basic Meringues, Level 5-6Ingredients:4 egg whites, 100g caster sugar, 100g icing sugar
Preparation:Put the egg whites in the bowl and process at speed 5 or 6 until fairly stiff. Add half the sugar and whisk again until the mixture is smooth and stiff peaks have formed. Remove the bowl and lightly fold in the remaining sugar with a metal spoon. Line a baking sheet and spoon or pipe the meringue mixture into ovals. Sprinkle with the remaining sugar A and put on the lowest shelf of a cool oven(120°C / gas ½) for 1½ hours. Cool on a wire rack. Top with soft fruits, chocolate, and sweetened cream.
 report this ad
![]()
[xyz-ips snippet=”download-snippet”]