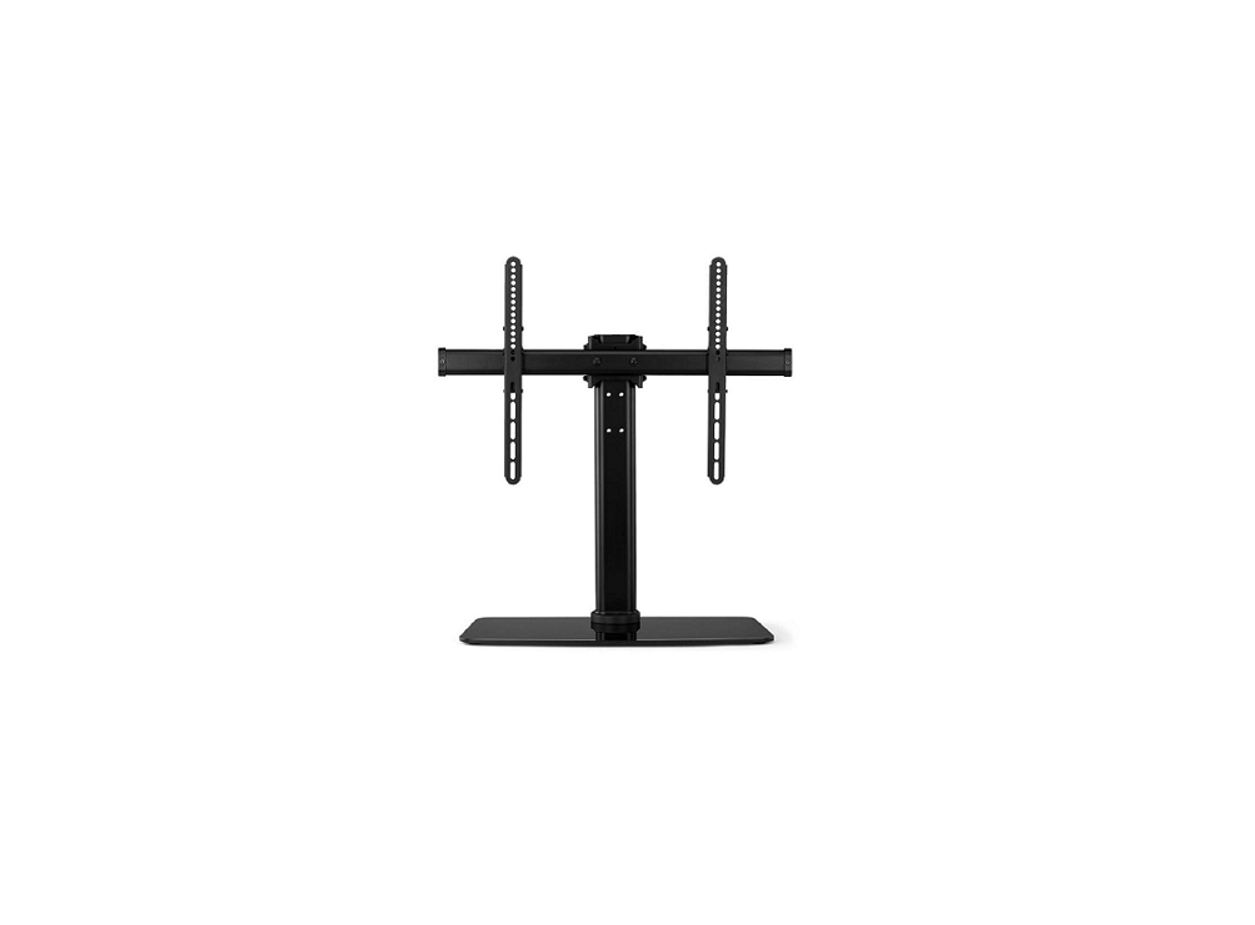
kogan KATVBKSTNDA Swivel Tabletop Stand With Glass Base User Guide![]()
 SAFETY & WARNINGS
- Read all instructions before use, and retain this user guide for future reference.
- Ensure you have located all components before disposing of any packaging materials.
- This unit is not intended for use by persons (including children) with reduced physical, sensory or mental capabilities or lack of experience and knowledge, unless they have been given supervision or instructions concerning use of the appliance by a person responsible for their safety.
- This product contains small parts which could pose a choking hazard if swallowed. Keep away from children.
- Maximum weight capacity for this stand is 40kg.
- Pay close attention to the weight limits, ensure all connections are secure and ensure the screws, brackets and mounting points on any monitors are in good condition.
- Safety gear and proper tools must be used. This product should only be installed by professionals.
- This product is for indoor use only. Use outdoors may result in product failure, product damage and/or personal injury.
- Note the following icon when lifting or moving this product: Lifting with two people is recommended at all times.
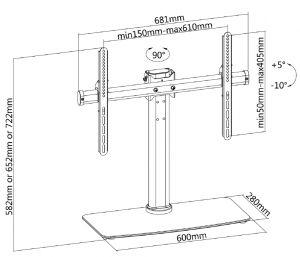
DIMENSIONS
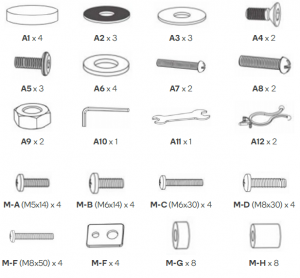
COMPONENTS
Parts:

Hardware:

ASSEMBLY
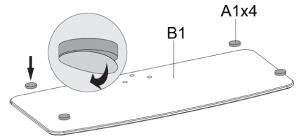
Step 1:
Add adhesive feet (A1) to the main base (B1).
Step 2:
Fit end piece (B5) to the stand (B2).

Step 3:
Align the swivel base (B6) with the stand (B2) and fit with x2 A4 screws, using the Allen key (A10) to tighten the screws.

Step 4:
Next, fit the main base (B1) to the swivel base (B6), using the x3 A2 and A3 washers and x3 A5 screws. Use the Allen key to tighten. Ensure to not overtighten the screws.

Step 5:
Use the Allen key (A10) to loosen the screws from the stand’s mounting fixture. This will allow it to be set at your ideal TV height. Once determined, refit the mounting fixture with the same screws. Use the spanner (A11) to fit the A9 nuts, and a Phillips head screwdriver (not supplied) to fit the A7 screws with A6 washers.

Step 6:
Using a Phillips head screwdriver, fit the support beam (B3) to the mounting fixture with the A8 screws and A6 washers.

Step 7:
Use a Phillips head screwdriver to remove the locking screws from the x2 mounting rails (B4). Keep these screws nearby, as they will be required at a later step.
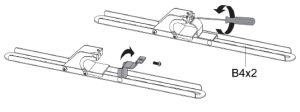
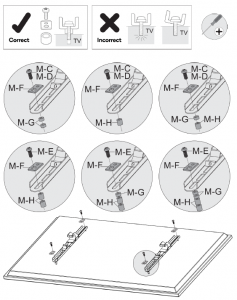
Note: Refer to either Step 8a or Step 8b depending on your TV. Ensure the screws fixing the mounting rails to your TV fit correctly. If spacers (M-G, M-H) are required for a proper fit, follow Step 8b.
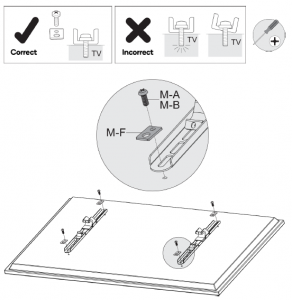
Step 8a:
Step 8b:
Step 9:
Once the mounting rails are securely fitted to your TV, lift your TV (Lifting with two people is recommended at all times) and align the opening of the mounting rails with the support beam.Fit the x2 cable management clips (A12) to the stand.


Step 10:
With the TV mounted to the stand, use a Phillips head screwdriver to replace the locking screws from the mounting rails (see Step 7) to secure the TV. Use the spanner to adjust the angle of the mounting fixture.Use the cable management clips (A12) to secure any cords or cables on your TV.

Need more information?We hope that this user guide has given you the assistance needed for a simple set-up. For the most up-to-date guide for your product, as well as any additional assistance you may require, head online to help.kogan.com
Read More About This Manual & Download PDF:
[xyz-ips snippet=”download-snippet”]