
kogan KAVIPRDRONA Viper-X Drone With VR Headset User Guide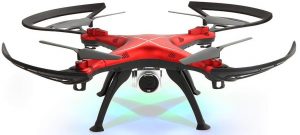
SAFETY & WARNINGS
Read all instructions in this guide before using this product. Retain this guide for future reference. Do not skip, substitute or modify any steps or procedures in this guide, doing so may result in personal injury or product damage.
Important Notes
- Do not attempt to touch the drone whilst it is operating under any circumstances.
- This product is not a toy and can be dangerous when used incorrectly. Please follow all instructions while operating. Disassembling or modifying the dronearbitrarily, operating improperly or being unfamiliar with this product may lead to an accident and possible injuries.
- This product is intended for use by persons aged 14 years or older. It is recommended that people between 14-18 years operate the drone under supervision.
- Ensure the product is operated in a safe environment.
- It is recommended that you seek the assistance of an experienced drone pilotbefore attempting to fly the drone for the first time. A local expert is the best way to properly assemble, setup and fly your drone for the first time. It requires a certain degree of skill to operate and is an item subject to normal wear and tear. Any damage or dissatisfaction as a result of accidents or modifications are not covered under warranty.
Safety Notes
- Always operate the drone in a safe environment. Do not operate drones within the vicinity of people. Aircrafts are prone to accidents and failures when piloted incorrectly. Pilots are responsible for their actions as well as any damage or injury caused by pilot error and radio interference.
- This product is suitable for indoor and outdoor use. Always fly in a place clear of obstacles and keep a safe distance from people and pets.
- Do not operate the drone in unsafe conditions and keep clear of heat sources, wires or electric power sources.
- This product contains precision electrical components. Always keep this product away from water and other liquids. Exposure to water or moisture in any form can cause this product to malfunction resulting in a crash.
- To avoid a potential fire hazard, do not short, reverse polarity or puncture batteries. Battery charging must be done under supervision and in a location out of reach of children.
- Ensure that the orientation of the batteries is installed correctly based on polarity, as indicated in the battery compartment. Do not mix batteries of different chemistry/specification.
- Remove the batteries if you are not going to use this product for an extendedperiod. Always dispose of old batteries according to your local environmental authority.
- Li-Polymer batteries pose higher operational risks compared to other battery types, thus it is imperative to follow its usage instructions.
- Avoid contact between the battery and metallic objects.
- If there is an increase in battery temperature after operation, cease useimmediately and allow it to cool down. Continuous use of this battery may cause it to expand, deform, explode or result in potential fire hazards.
- Do not store this product near any sources of heat such as an oven or heater. It is recommended to store indoors, in a cool, dry environment.
- Drones are not to be flown within 5km of airports. Many locations are considered no fly zones and you must ensure that you fly in areas that align with your local laws and ordinances.
- Please do not place heavy objects directly onto the drone or any of its components.
VR Headset
- Do not use the VR headset while the phone is charging.
- During use, if you feel dizzy or sick, take a break before continuing operation.
- Pregnant women, people with high blood-pressure and people with a fear of heights should not use the VR headset.
COMPONENTS
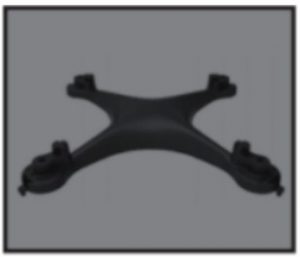
- Upper Body

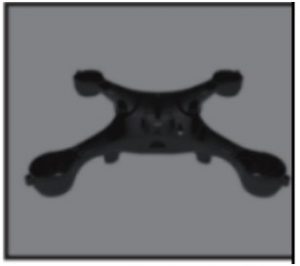
- Lower Body
- Propellers (x4)
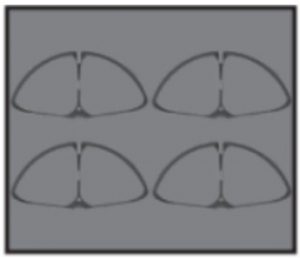
- Protecting Frames (x4)
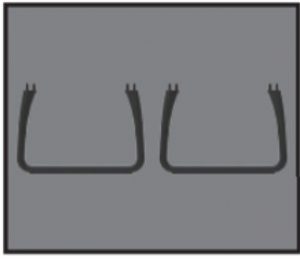
- Landing Skids (x2)
- Motor (x4)
- LED Lights (x2)
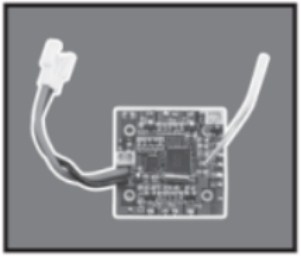
- Receiver Board
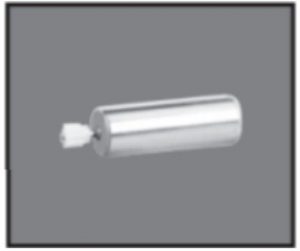
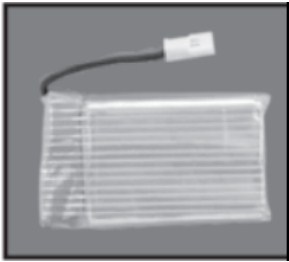
- Battery
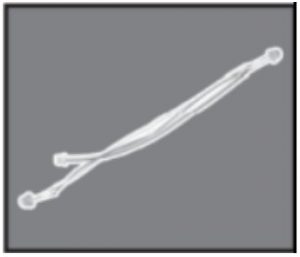
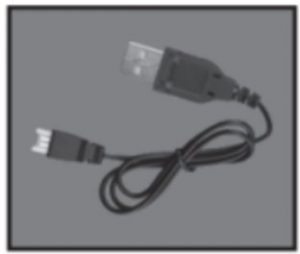
- USB Charging Cable
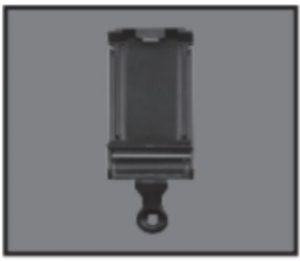
- Phone Holder
- Remote Control
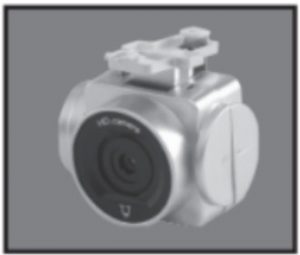
- Camera


OVERVIEW
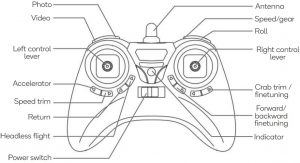
Remote Control:
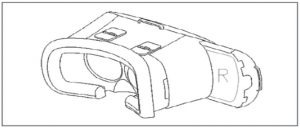
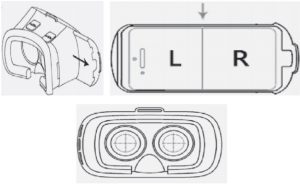
VR Headset:

| 1 | Focus slide | Adjusts the focal distance |
| 2 | IPD slider | Adjusts interpupillary distance (IPD |
| 3 | Left headphone jack | Left hand side headphone input |
| 4 | Sliding panel | Slides to expose the phone’s camera |
| 5 | Phone holder | Open to insert phone into headset |
| 6 | Right headphone jack | Right hand side headphone input |
ASSEMBLY
Remote Battery Installation:
- Remove the battery compartment cover.
- Install x4 AA batteries (not included) into the battery compartment. Pay attention to the orientation of the polarity symbols.
Drone:
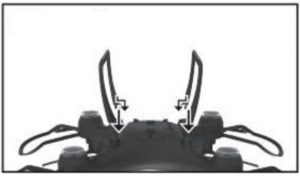
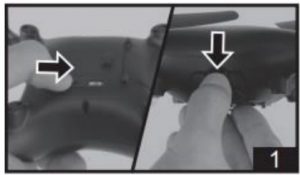
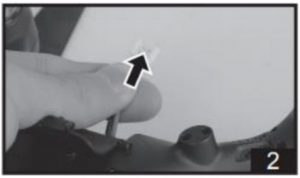
- Install the 2 landing skids on the underside of the drone (Figure 1).
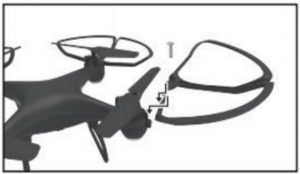
- Attach a protecting frame onto each corner of the drone and secure it in place using the screws (Figure 2).
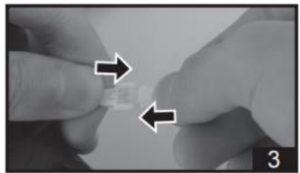
Phone Holder Installation:
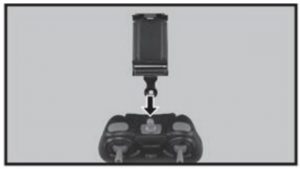
- Attach the phone holder to the remote control in the position shown (Figure 3).
- Secure the phone in place using the screw (Figure 4).

To avoid accidentally engaging the buttons on your mobile phone, you can install the supplied rubber pads onto the phone holder.
Attach the rubber pads to the phone holder according to the position of your phone buttons. (Figure 5).

VR Headset:
- Download the “Veer VR” app from the Play Store (Android) or App Store (iOS).
- In the VR app settings, switch to side-by-side mode.
- Slide open the phone holder and insert the phone into the VR headset.
OPERATION
Charging the Drone Battery
- Place the drone’s power switch in the OFF position and then open the batterycompartment.
- Disconnect the battery wire from the power port.
- Connect the battery wire to the USB charging cable and plug it into a USB power adapter (mobile phone charger). Ensure the cable is plugged in firmly and in the correct orientation.
- Charging time is approximately 70-90 minutes.
- Once the battery is fully charged, reconnect the battery wire to the power port and close the battery compartment.

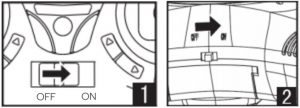
Turning on the Drone
- Slide the power switch on the remote control and the drone to the ON position.
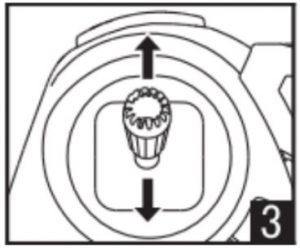
- Push the Left control lever (throttle) up to the highest position and then pull it back to the lowest position. The remote control will emit a sound, indicating that the drone is ready to fly.

Factory Reset
In the event the drone displays unusual flight characteristics, you can reset it back to factory default settings by following the steps below:
Step 1:
Slide the power switch on the remote control and the drone to the ON position.
Step 2:
When the drone’s indicator changes from flashing rapidly to flashing slowly, push the left control (throttle) lever to the highest position and then pull it back to the lowest position. The indicator will then change from flashing slowly to a solid light.
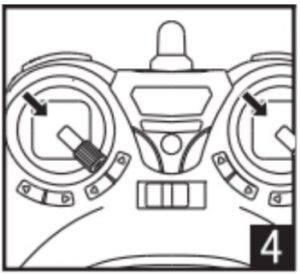
Step 3:
Place the drone on a horizontal, flat surface, then push both left and right control levers to the bottom right corner for approximately 2-3 seconds. The indicator will change from solid to flashing rapidly. After 2-3 seconds, the indicator will change to solid. The drone has been successfully reset.
Flying the Drone
- Push the left control lever left or right to rotate the drone in the respective direction.
- Push the right control lever left or right to fly the drone in the respective direction.
- The forward/backward buttons can be used to fine tune the direction of the drone.
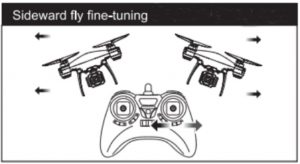
- Press the crab trim buttons to fine tune the drone flight left and right.


Drone Functions
Low-voltage protection:
When the drone’s battery is low, the indicator will flash and the rotors will slow down and stop.
Over-current protection:
If the drone’s propellers become jammed, the control system will stop supplying power to the rotors automatically. Cease use and turn off the drone and remote control. Inspect the propellers and replace/repair is necessary.
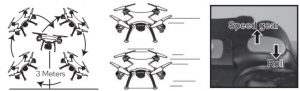
Acrobatic flight:
When you are confident with the basic operation and controls, you can attempt tricks and stunts.
Fly the aircraft to a height of more than 3 meters. Press the roll button on the remote control, then push the right control lever (in any direction) to perform a 360° flip.
Note: When the drone is used with the camera, acrobatics will not be possible.
Headless mode:
Press the headless flight mode button to enable headless mode. The indicator will begin flashing slowly. In this mode, the drone will override its front and rear azimuths and reposition the front and rear using the remote control as a reference point.
Such as: when the right control lever is pushed forward, the drone will fly away from the remote control; when the right control lever to pull back, the drone will fly towards the remote control (camera front side).
Pressing the headless flight mode button again will disable the headless flight mode.

Return key:
- If the drone leaves your field of view, press the return key. The drone will fly backwards to the remote control.
- When the drone comes back into your field of view, touching the right lever will cancel this function.
Camera
- Connect the 3-pin connector from the camera to the drone.
- Place the drone’s power switch in the ON position. The indicator will turn solid GREEN if the camera has successfully connected and operating normally.
- If the indicator is RED, an SD card has not been inserted in the camera.
- Insert an SD card into the camera, the RED indicator will stop flashing.
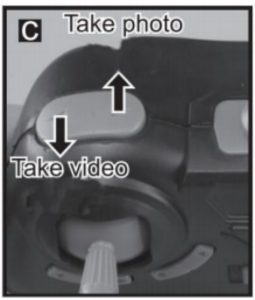
Capturing photos and video:
- Press the take photo button, the camera will capture a photo, the remote control will emit a beep and the GREEN indicator on the camera will turn RED and begin flashing.
- To capture video, press the take video button, the camera will begin recording, the remote control will emit a beep and the GREEN indicator on the camera will turn RED and begin flashing.
- Pressing the take video button again will stop the recording. The remote control will emit a beep and the camera indicator will turn solid GREEN.
VR Headset
Step 1:
- Launch the “Veer VR” app and connect to the drone’s camera.
- Ensure the app is running in split-screen mode (side-by-side mode).
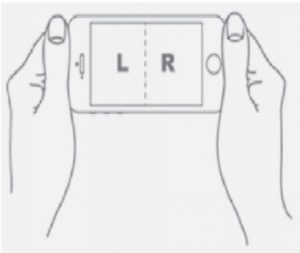
Step 2:
- Insert your phone into the VR headset.
- Align the middle line on the phone with the middle of the VR headset.
- Adjust the IPD and focus sliders.
Step 3:
- Control your viewing angle by moving your head.

Customer Support
Need more information?
We hope that this user guide has given you the assistance needed for a simple set-up.For the most up-to-date guide for your product, as well as any additional assistance you may require, head online to help.kogan.com
[xyz-ips snippet=”download-snippet”]