![]() Smart Wash & Dry Electric Toilet SeatKAWNDBIDETAQuick Start Guide
Smart Wash & Dry Electric Toilet SeatKAWNDBIDETAQuick Start Guide
Safety & Warnings
- Do not disassemble, repair or modify the product.
- Do not immerse the product in water.
- Avoid installing the product in a high humidity location.
- Do not touch any of the power electronics with wet hands.
- Ensure the product is plugged into a power outlet that uses a grounding wire.
- Only connect to a 240V power outlet.
- Do not use the product if the power cable has been damaged in any way.
- Do not stand on the toilet seat cover, seat or any of the accessories.
- Do not open or close the toilet lid roughly.
- Do not drag or bend the water pipe.
- Avoid installing the product in an area where it may experience freezing temperatures.
- Freezing water can expand and damage the internal plumbing of the product.
- Do not leave the seat warmer function on for long periods of time.
- This product is not intended for use by persons (including children) with reduced physical, sensory or mental capabilities, or lack of experience or knowledge unless they have been given supervision or instruction concerning the use of the product by a person responsible for their safety.
- Children should be supervised to ensure they do not play with the product.
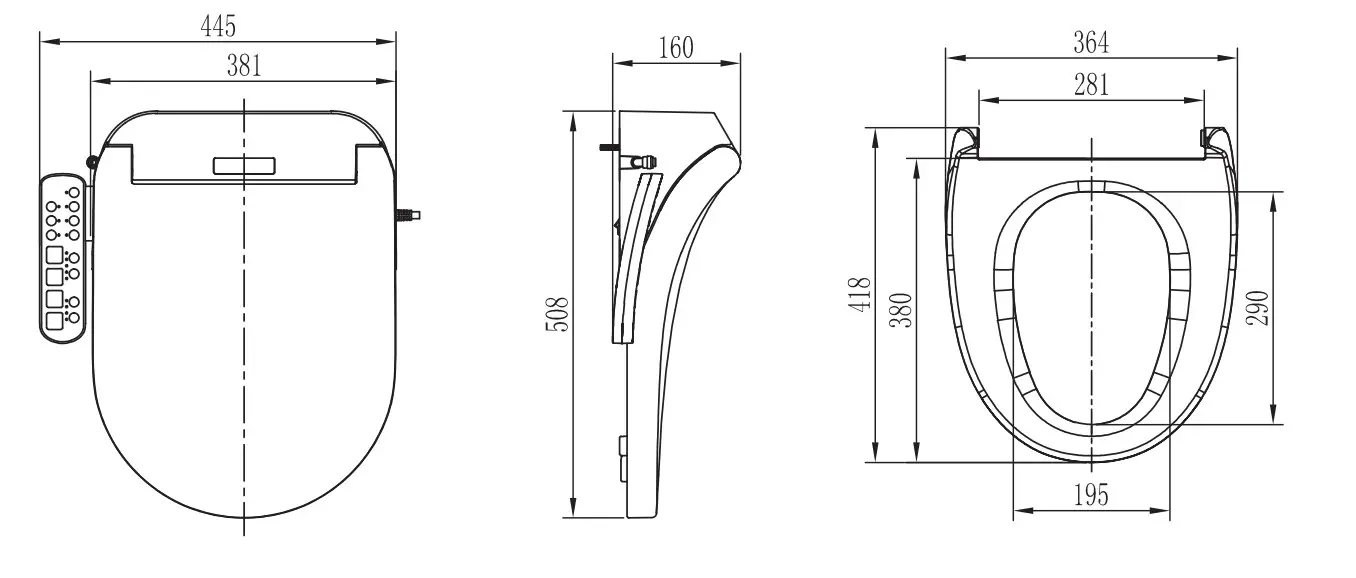
Dimension
In the Box
|
|
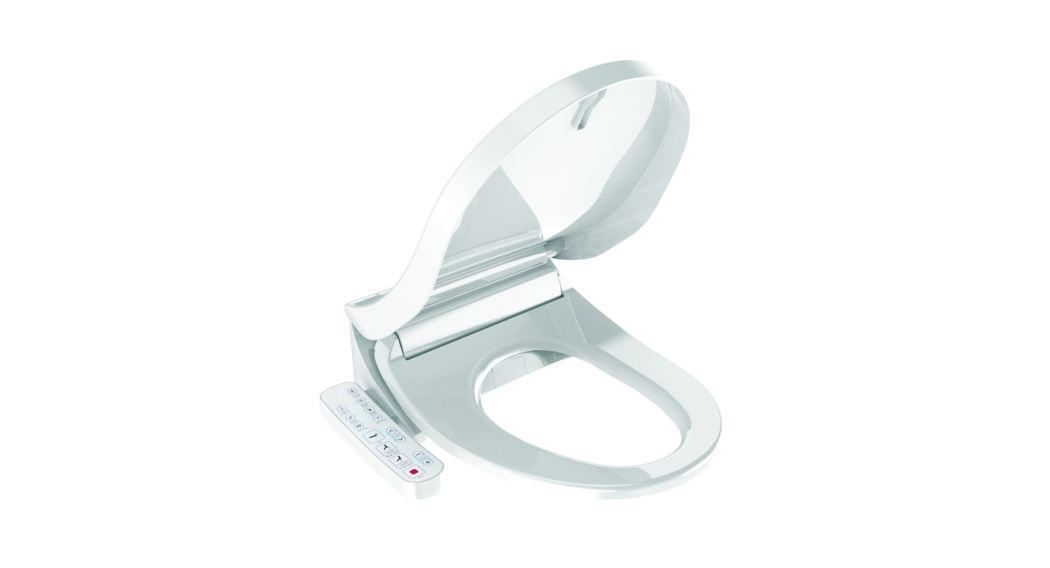
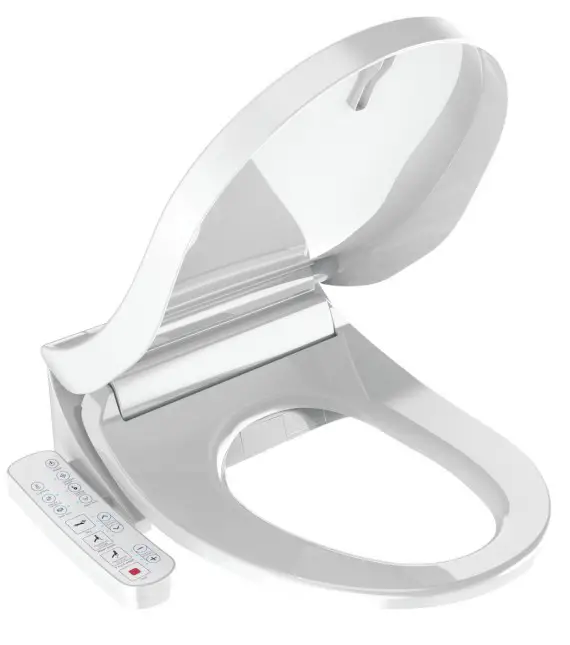
Product Overview
|
|
Attention:The specification, design, and color of the instruction may differ from the end-product you bought. ln the case, you d better refer to the end-product about the assemblies.
Installation
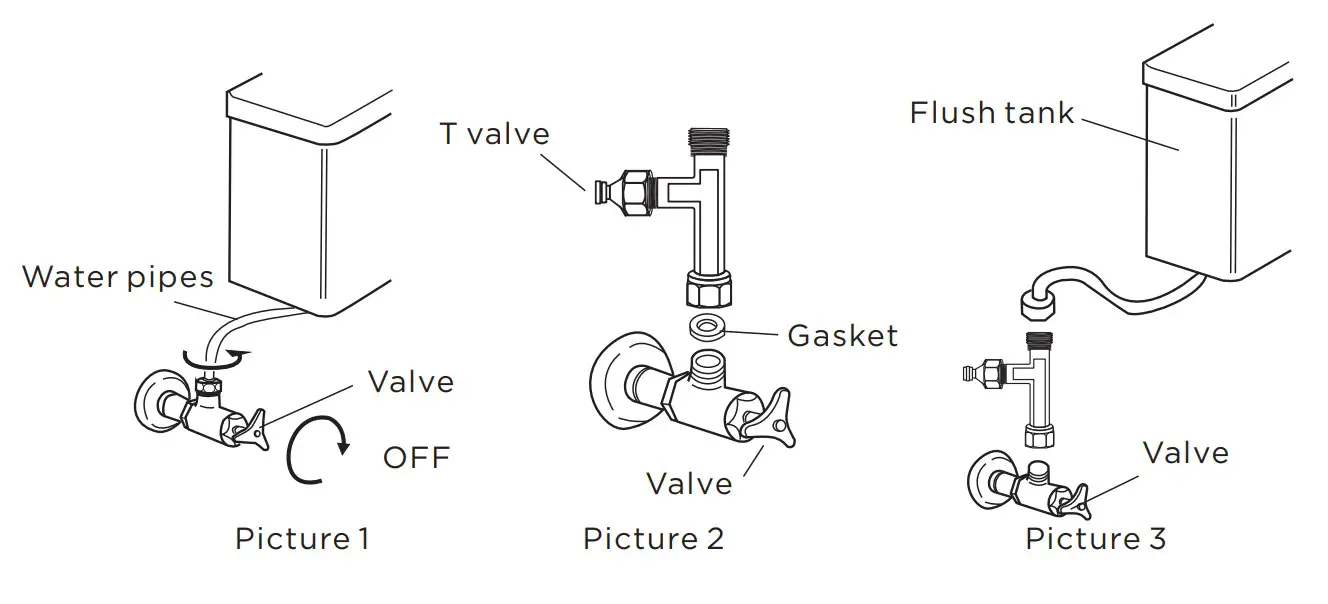
Before installation makes sure there is a clean water outlet and 240V power socket near the toilet for the product to be connected to. Please connect water first, then connect electric power.Install T valve
- Shut off the water to the toilet flush tank and unscrew the inlet pipe. (Picture 1)
- Connect the T valve with the gasket to the water pipe. (Picture 2)
Reconnect the toilet flush tank inlet pipe to the top of the T valve. (Picture 3). Do not turn the water back on yet.
Remove the Original SeatRemove the original toilet seat. Loosen the nut and remove the seat.

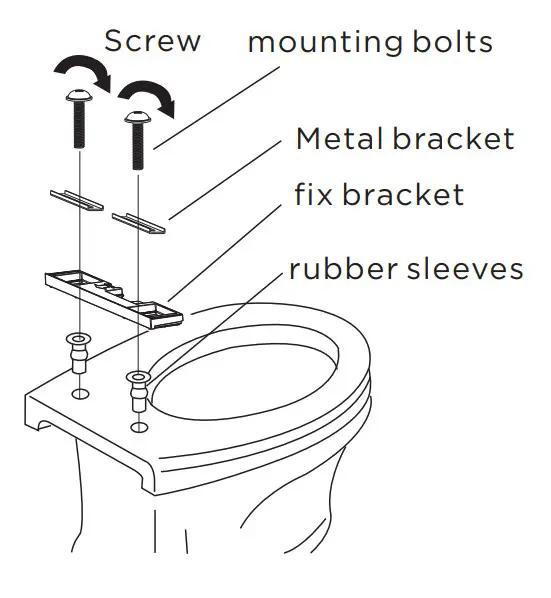
Install the Fix Bracket
- Place the rubber sleeves into the seat installation holes of the toilet base.
- Place the fixing bracket in place and install it with the metal brackets and mounting bolts
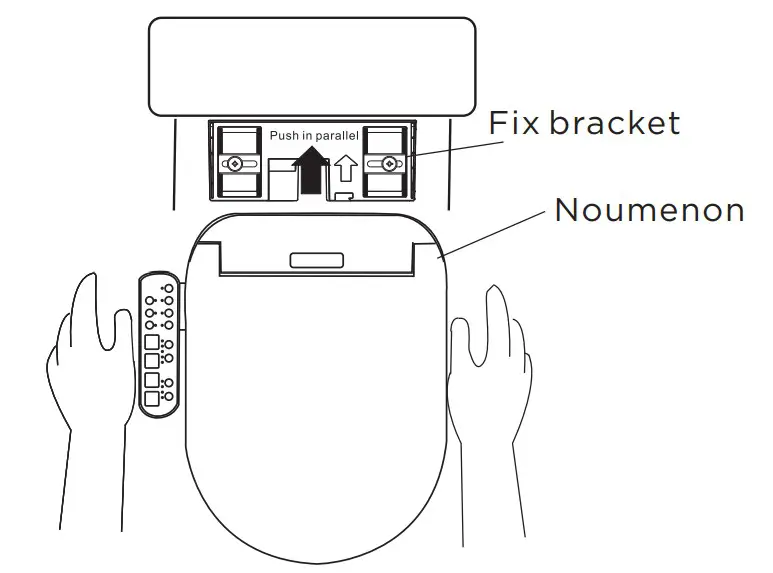
Install the Bidet
- Push the bidet toilet seat into the fixed bracket.
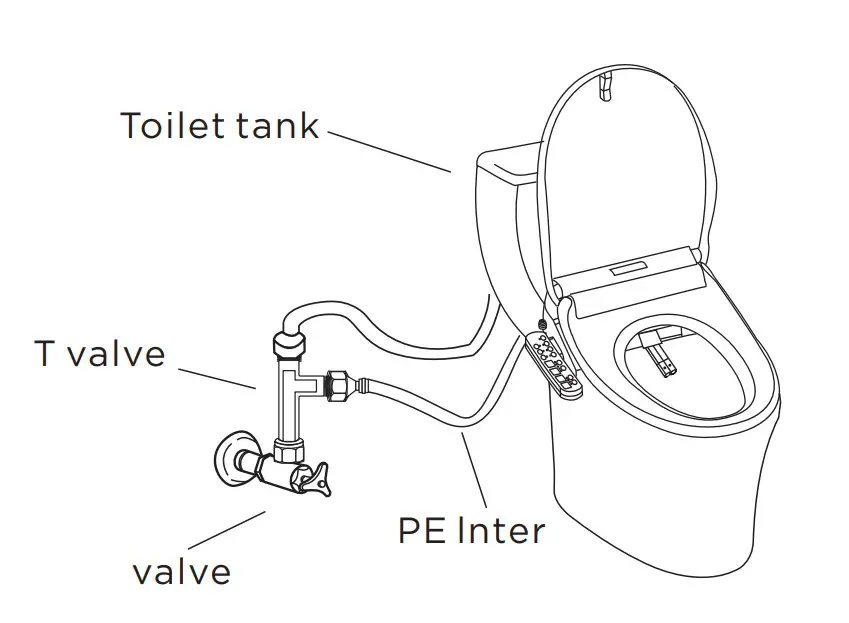
Connect Water Inlet Pipe
- Push the PE inter into the T valve connector.
- Push the PE inter into the bidet connector.
Prep and Test
- Plug the bidet into a power socket
- Turn the water back on by opening the valve.
- All indicator lights should turn on and water will start flowing into the inner water tank of the bidet. This process should take about 11 seconds. Indicators lights will turn off when done.
- Press the power button on the bidet controls. The power indicator light should turn on, indicating the bidet is ready for operation.
- Adjust the water and seat temperature as desired.
- Following operating instructions and test every function.

Operation
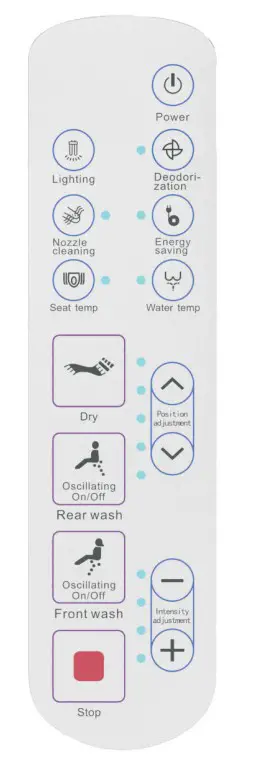
Button FunctionsRear Wash – Rear cleansingFront Wash – Front feminine CleansingIntensity Adjustment – Adjust the pressure of the water through 4 different levels indicated by the LEDs next to the button.Stop – Manually stop the rear wash, front wash, or dryer function. (Automatically turns off after 2 minutes)Position Adjustment – Adjust the position of the water jet of the front and rear washers whilst in use. Steps through 5 positions indicated by the LEDs next to the button.Dry – Activate the drier function. The dryer level can be adjusted with the intensity buttons during use.Nozzle Cleaning – Activate self-cleaning nozzle function. Only available when no one is sitting on the toilet. The nozzle also automatically self-cleanses before front and rear wash functions.Deodorization – Turn on deodorization. Automatically activates when someone sits on the seat.Water Temp. – Press the button and adjust the water temperature using the intensity buttons.Seat Temp. – Press the button and adjust the seat temperature using the intensity buttons.Lighting – Active the toilet light.Energy Saving – Active power-saving mode. Bidet enters power-saving mode 1.5 minutes after the button is pressed.Buzzer IndicatorsBuzzes Once: Receives instruction from the controller.Buzzes Twice: Auto operation when the user stands up.Buzzes Three or More Times: Indication of malfunction.Light IndicatorsPower Indicator: Active when the bidet is powered on. Flashing during a malfunction.Seat Temperature Indicator: Active when the seat is heating. Flashing if the seat is overheated.Water Temperature Indicator: Active when the water is heating. Flashing if the water is over heated.Seat Indicator: Active when a user is seated. Flashing when the water level is low.Energy Saver Indicator: Active when the bidet enters energy-saving mode.
Cleaning and Maintenance
- Do not use corrosive solvents to clean the outside of the toilet seat.
- Do not use water to rinse any of the electrical equipment.
- Pull out the plug before cleaning as a precaution.
- Clean the toilet seat with a damp cloth.
Daily Clean
- Unplug the bidet from the power socket
- Turn off the water inlet valve.
- Grip the bidet and pull away from the fixing bracket to remove it from the toilet.
- Cleaner the surface of the bidet and the toilet.
- Reinstall the bidet ensuring it fits the bracket correctly.
- Plug the bidet back into power and turn on the water again.
Cleaning the NozzlesPress the nozzle cleaning button so water sprays out. Press it again to extend the rear cleaning nozzle, press it once more to extend the front cleaning nozzle as well.Clean the nozzles with a brush.
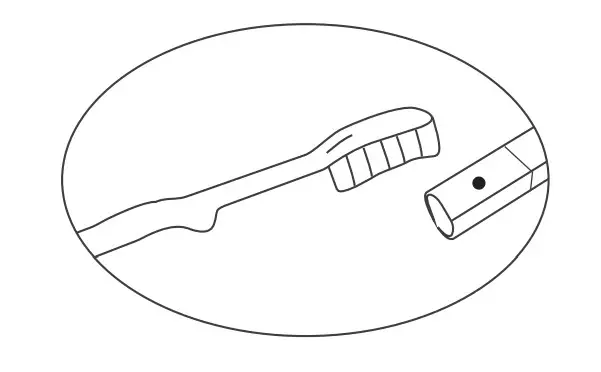
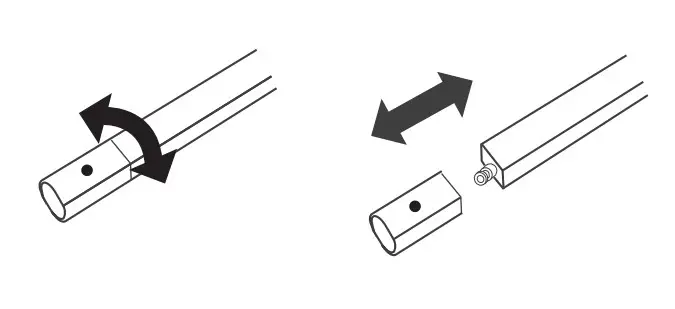
Replacing the NozzlesHold the front end of the nozzle tip and turn it counterclockwise so that it extends and pulls off.Replace it with a new nozzle and turn the nozzle tip clockwise.
 Cleaning the FilterThe filter can be cleaned when the water pressure is too low or insufficient.Close the shutoff valve of the water supply.
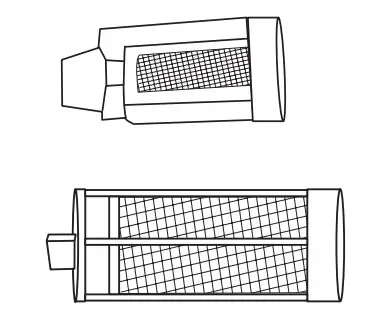
Disassemble the T valve and remove the filter
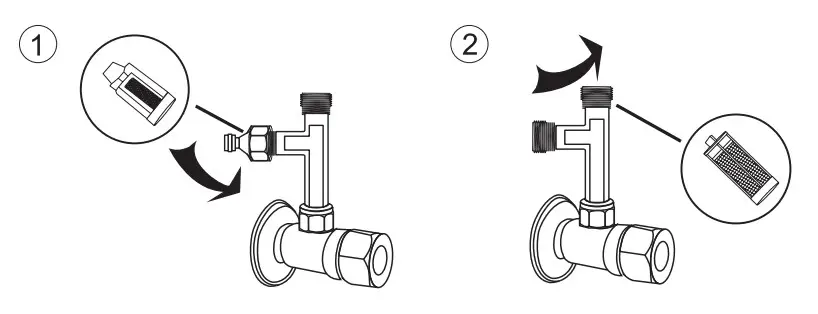
Clean the filter with water and a brush. Do not use detergent to clean the filter.
Reinstall the filter and plumbing. Check all connections are secure and turn the water back on.
Specifications
| Rated voltage | AC 220-240V. 50Hz |
| Power consumption | 1520W (When inlet water temp is 15 degrees and the outlet temp and pressure is set to maximum.) |
| Power cord length | 1.5m |
| Safety devices | Over-heating protection. water and electrical isolation. Temp reset switch. over-dried protection. |
| Water pressure range | 0.06MPa (dynamic)-0.75MPa (Static) |
| Water pressure adjustment | Adjustable in 4 levels |
| Cleansing outlet flow rates | 0.5-0.9L per minute |
| Seat heater power | 40W |
| Seat surface temp | 4 levels (33t. 36t.39t. Room Temp.) |
| Air dryer power | 200W |
| Air temp. | 4 paragraph adjustable:35t, 42t, 48t, 54t |
| Deodorizer method | Chemical absorption by deodorizer cartridge |
| Product size | 508x444x159mm |
report this adThe user manual is subject to change without notice. For the latest version of your user manual,please visit https://www.kogan.com/usermanuals/
[xyz-ips snippet=”download-snippet”]