Kogan Note Counter
BEFORE FIRST USE
Connect the machine to the power supplyConnect the power cord to a wall outlet or power supply (AC 220V ±10%, 50Hz). Note that this device must be operated under the required voltage and frequency.
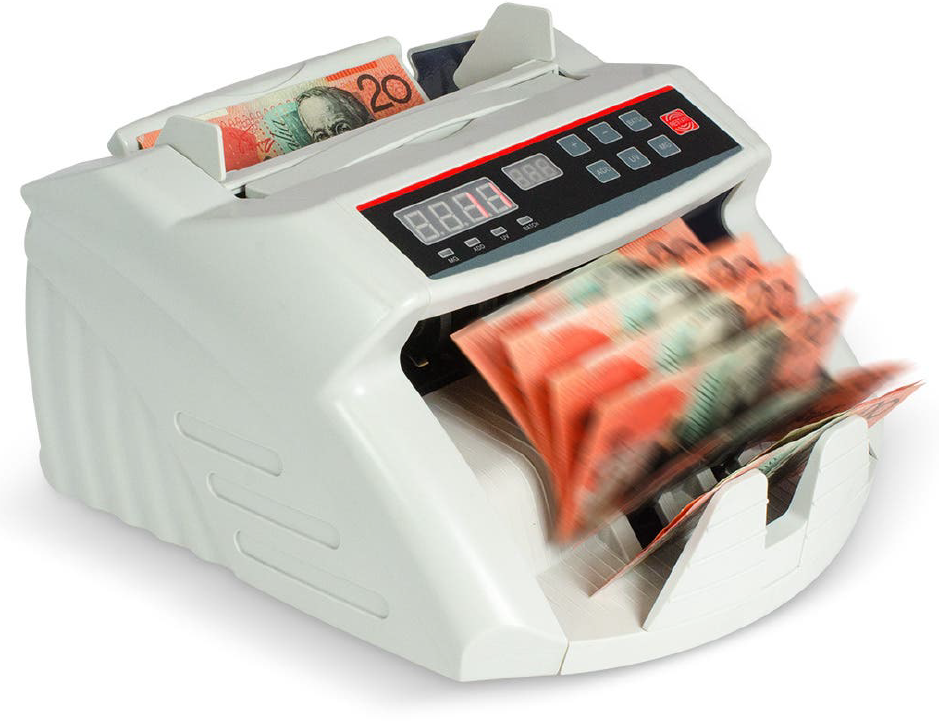
Prepare the deviceEnsure the device is set up on a secure, durable and level surface. Inclinations may lead to counting errors.Set the position of the note guide to be 2mm-to-3mm longer than the banknotes being counted.
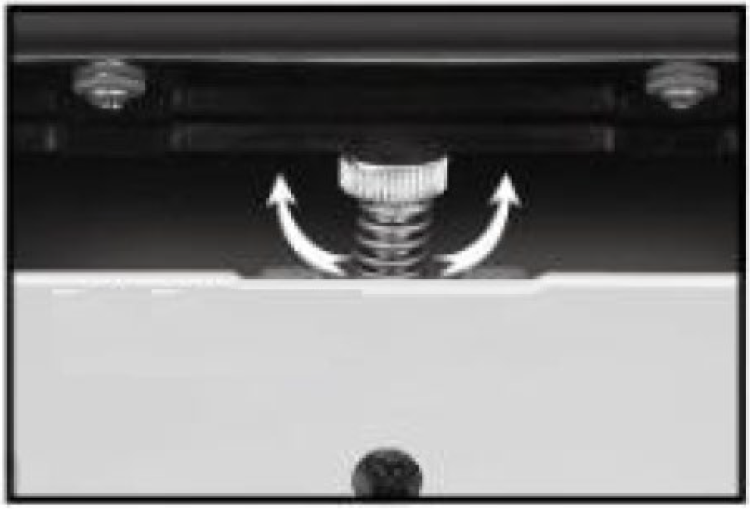
Verifying and adjustment of the Hopper PlateThe Hopper Plate ensures proper feeding of the banknotes for counting. It is secured to the back of the device with two pivoting points and a magnetic lock.To verify that the hopper plate is properly adjusted, press or lift the hopper plate and look for any displacement. If any displacement occurs, press or lift the hopper until the magnetic lock holds the piece in place.Adjust a proper gap between hopper and feeding roller by turning the adjustment screw. Turn it left to decrease the space and turn right to increase it.
Preparing the banknotesBefore starting to count the banknotes, please check whether there are clips, staples, elastic bands or coins in the banknotes. Remove all of these, as they may jam the device or result in counting errors.

Check for any wet, sticky or very dirty banknotes. Do not count these.Check for any deformed, folded or badly damaged banknotes. Do not place these notes on the feeding desk.

To avoid jamming or counting errors, ensure the notes are neatly arranged and on an even level before counting.

Before inserting, twist the stack of notes to create an even slope. Loosen and pat the stack before placing onto the feeding tray. Figures demonstrate incorrect procedure.

OPERATION
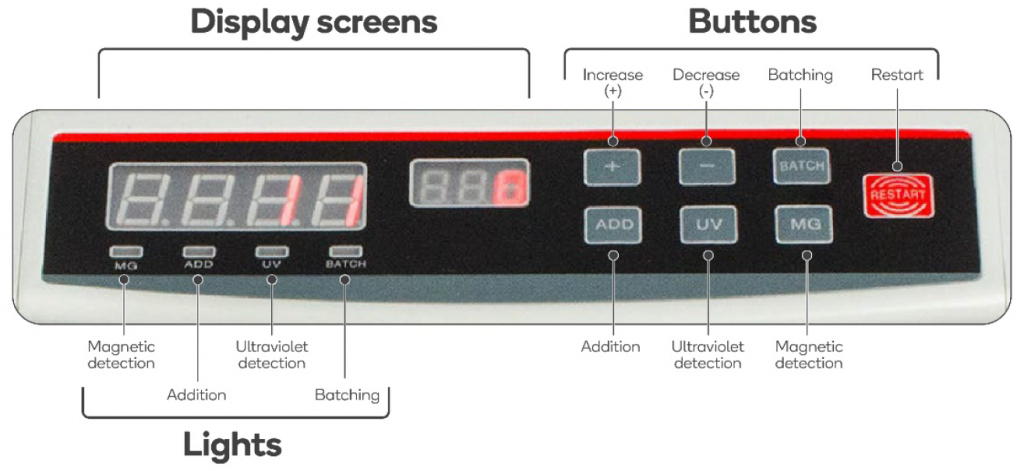
Control Panel Overview
Basic operation
Switch from Auto Mode to Manual Mode
- Upon start up, the device with begin in Auto mode as default.
- To switch to Manual mode, press and hold the ‘RESTART’ button for 3 seconds until the display screen reads ‘NO’. Press the ‘RESTART’ button again to confirm and save.
Ultraviolet Detection
- To turn on Ultraviolet Detection, press the ‘UV’ button until the UV light turns on.
- To turn Ultraviolet Detection off, simply press the ‘UV’ button once again. The light will turn off.
Magnetic Detection
- To turn on Magnetic Detection, press the ‘MG’ button until the MG light turns on.
- To turn Magnetic Detection off, simply press the ‘MG’ button once again. The light will turn off.
Addition Mode
- In Addition mode new inputs are added to the total counted, not resetting with each new input.
- To turn on Addition mode, press the ‘ADD’ button until the Addition light turns on.
- To turn Addition mode off, simply press the ‘ADD’ button once again. The light will turn off.
Batching mode
- In batching mode the counter can sort money together into preset values.
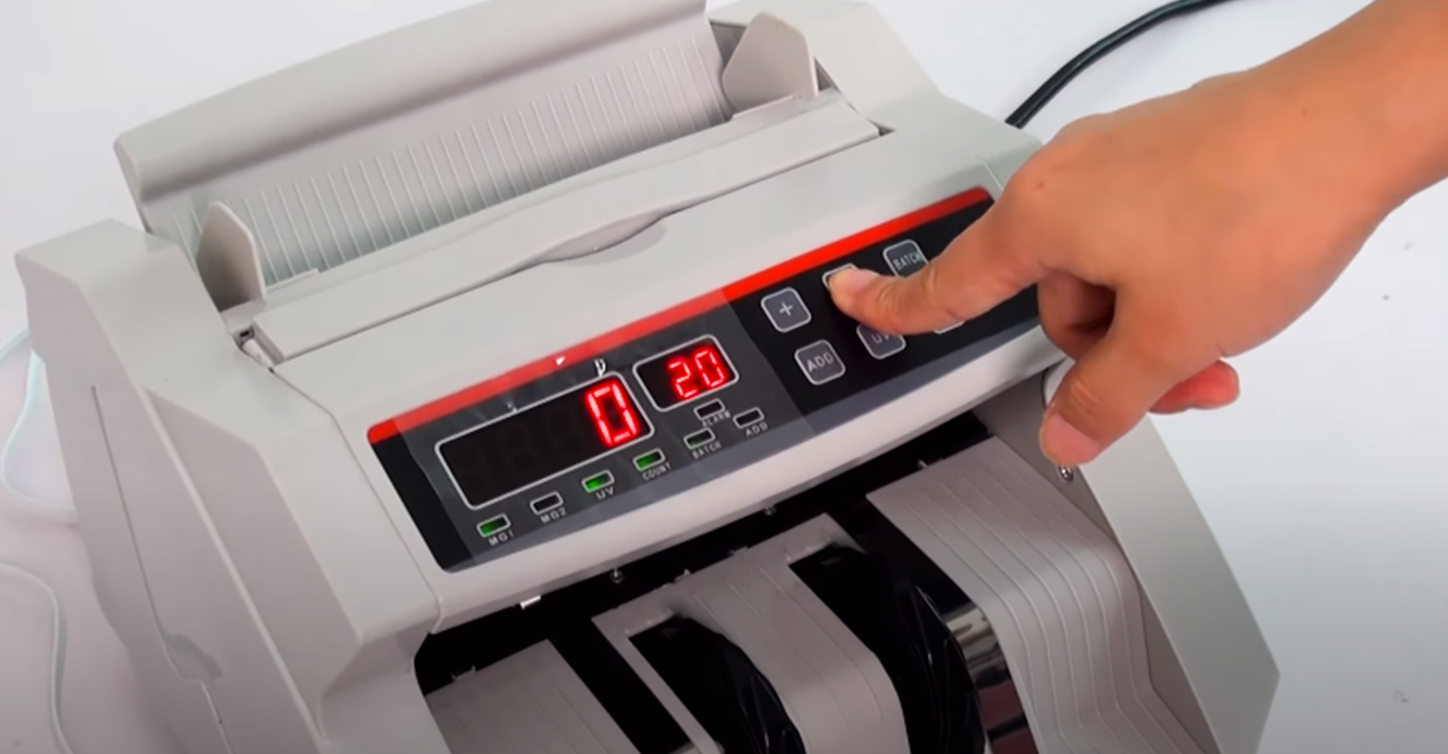
- Press the ‘BATCH’ button on the device, the display will show 100 / 50 / 20 / 10.
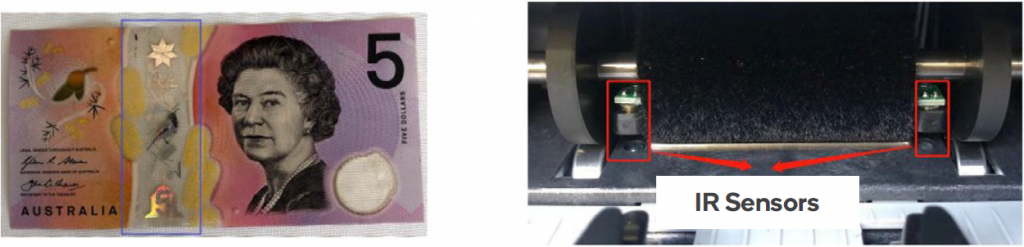
- For the latest Australian currency notes, ensure the transparent strip in the middle of the note (Fig 5) does not pass through the IR sensors of the unit (Fig 6), as this may cause the device to display error codes or an inaccurate note count.
Advanced Operation
Fake Note Counting
- To turn Fake Note Counting on, hold the Decrease (–) button for at least 3 seconds until the display screen shows ‘U-01’.
- To turn it off again, briefly press the Decrease (–) button again until the display screen shows U-00.
- Let the device run to save your changes.
Double Note Recognition
- Double-note recognition alerts when two bills have been fed simultaneously.
- To increase the sensitivity in detecting double-notes, hold the ‘BATCH’ button for at least 3 seconds until the display screen shows ‘E’ followed by a number (ie, ‘E-05’).
- The default sensitivity setting is E-05, however this can be adjusted by pressing the Increase (+) button or Decrease (–) button. The total range is E-00 to E-20. A higher number represents higher sensitivity for double-note detection.
- Press the ‘RESTART’ button to save your changes.
Chained Note Recognition
- Chained-note recognition alerts when a leading bill has pulled in a trailing bull prematurely.
- To increase the sensitivity in detecting chained-notes, hold the ‘ADD’ button for at least 3 seconds until the display screen shows ‘C’ followed by a number (ie, ‘C-05’).
- The default sensitivity setting is C-05, however this can be adjusted by pressing the Increase (+) button or Decrease (–) button. The total range is C-00 to C-10. A higher number represents higher sensitivity for chained-note detection.
- Press the ‘RESTART’ button to save your changes.
Ultraviolet Sensitivity
- The ultraviolet light sensitivity helps detect fake paper and plastic notes with fluorescence.
- To increase the sensitivity in detecting abnormalities, hold the ‘UV’ button for at least 3 seconds until the display screen shows ‘A’ followed by a number (ie, ‘A-10’).
- The default sensitivity setting is A-10, however this can be adjusted by pressing the Increase (+) button or Decrease (–) button. The total range is A-00 to A-20. A higher number represents higher sensitivity for detecting fake notes and plastic notes with fluorescence.
- Press the ‘RESTART’ button to save your changes.
Magnetic Sensitivity
- The magnetic sensitivity helps detect fake paper and plastic notes with magnetic components.
- To increase the sensitivity in detecting abnormalities, hold the ‘MG’ button for at least 3 seconds until the display screen shows ‘B’ followed by a number (ie, ‘B-05’).
- The default sensitivity setting is B-05, however this can be adjusted by pressing the Increase (+) button or Decrease (–) button. The total range is B-00 to B-20. A higher number represents higher sensitivity for fake paper and plastic notes with magnetic components.
- Press the ‘RESTART’ button to save your changes.
Factory Reset
- To perform a factory reset, first turn off the device, then hold the Increase (+) and Restart buttons simultaneously for at least 3 seconds until the display screen shows:
- Now turn the device on. The factory reset will be complete.
SPECIFICATIONS
- Rated voltage/Frequency – AC 220V±10%, 60Hz
- Rated current – 350mA (Max)Power consumption – 75W (Max)
- Counting speed – 1000pcs/min
- Feeding system – Roller Friction Type
TROUBLESHOOTING
Self-test Codes
|
Self-code |
Reason |
|
FE1 |
Start Sensor |
|
FE2 |
Left Counting Sensor |
|
FE3 |
Right Counting Sensor |
|
FE6 |
Clear Sensor |
|
FE7 |
Disc Code sensor |
|
FEA |
UV |
Error Codes
|
Code |
Reason |
|
A |
UV |
|
b |
MG |
|
C |
Chain Note |
|
E |
Double Note |
|
H |
Half Note/Cross Note |
Need more information?We hope that this user guide has given you the assistance needed for a simple set-up.For the most up-to-date guide for your product,as well as any additional assistance you may require, head online to help.kogan.com
![]()
[xyz-ips snippet=”download-snippet”]