KAPOILHT24A
Safety Warnings
When using electrical appliances, in order to reduce the risk of fire, electric shock and/or injury, the following basic precautions should always be followed:
- Read all instructions carefully, even if you feel you are familiar with similar appliances.
- Do not position this heater immediately below a power outlet.
- This heat can get extremely hot when in use. To avoid burns, do not let bare skin touch the hot surfaces. Let the heater cool down before moving it. Keep combustible items such as papers, clothing and a curtains at least 30cm from the sides of the heater. Do not drape laundry or other items over the heater.
- Ensure that the heater is placed at least 30cm away from walls when in use.
- This appliance is not intended for use by young children or infirm persons, unless they have been adequately supervised by a responsible person to ensure they can use the appliance safely.
- Young children should be supervised to ensure that they do not play with the appliance.
- Always unplug the heater when not in use.
- Do not operate any heater with a damaged cord or plug, or after the heater has malfunctioned, been dropper or is damaged in any manner. Contact the Kogan.com customer support team.
- Do not use the heater outdoors.
- This heater is not intended for use in bathrooms, laundry areas or similar moist indoor locations. Never locate the heater when it may fall into a bathtub or other water container.
- Do not use this heater in the immediate surroundings of a bath, shower or swimming pool.
- Do not run the power cord under carpeting, or cover the cord with throw rugs, runners or the like. Arrange the cord away from high traffic areas, placing it where it will not be tripped over.
- Do not place the cord over any part of the heater.
- Do not plug this heater into an extension lead, double adapter or power board.
- Do not operate unless the power cord has been fully uncoiled.
- Do not attempt to repair, disassemble or modify the appliance. There are no user serviceable parts.
- To disconnect the heater, set the controls to OFF, then remove the plug from the outlet.
- The heater has electrical parts inside. DO NOT use the heater in areas where fuel, paint or flammable liquids are used or stored.
- Use the heater only as described in this manual. Misuse may result in fire, shock or injury.
- Full remove the power cord from the cord tidy before use. Uncoil the power cord fully before use.
- This heater must always be used AND STORED in the upright position.
- Children from the age of 5 and under should be kept away from the heater unless they are being continuously supervised.
- Do not cover the heater.
- Do not dispose of electrical appliances with your household waste. Contact your local council for information regarding the correct disposal of such products.
- If the supply cord is damaged, it must be replaced by a Kogan.com technician.
- The heater is filled with a precise quantity of oil. Repairs requiring the opening of the oil container are only to be conducted by Kogan.com technicians. In the event of an oil leak, contact the Kogan.com customer support team.
Attention
Please handle this product with care and inspect it regularly to ensure it is in good working order.
If the product, power supply cord or plug shows any signs of damage: stop use, unplug and contact Kogan.com support.
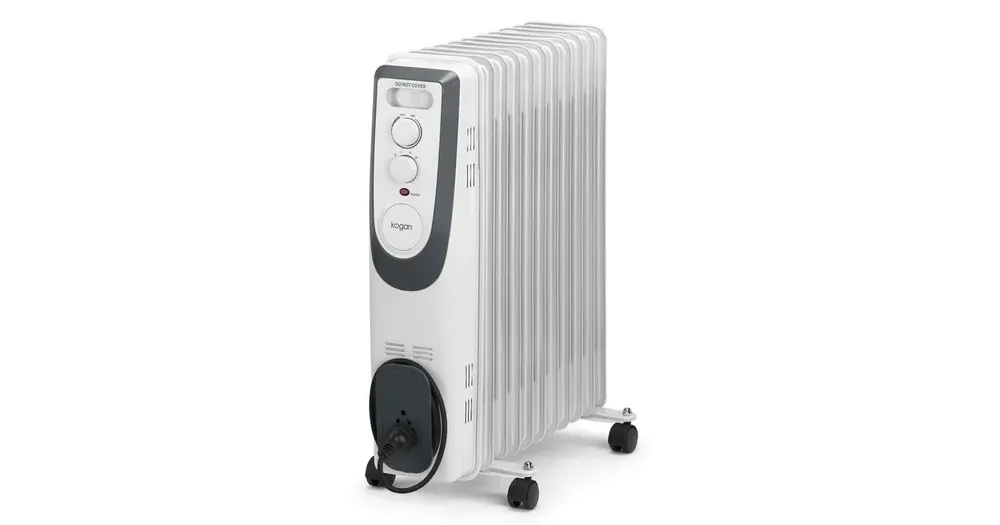
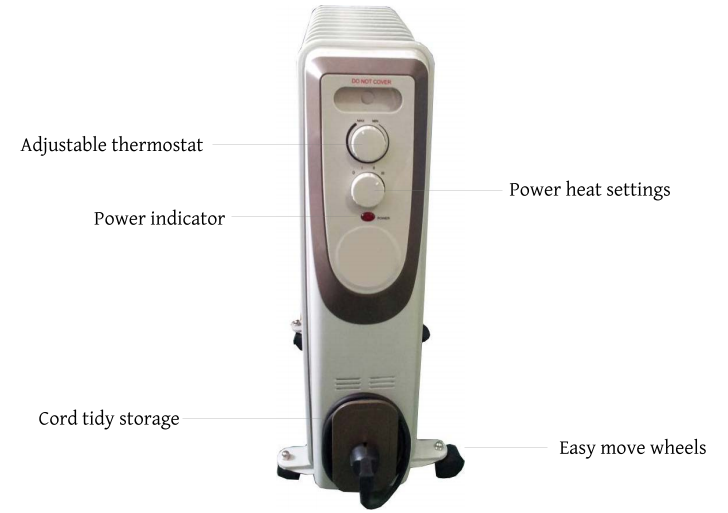
Product Layout
Before first using the heater, it is important that you read and follow the instructions in this user manual, even if you feel you are familiar with this type of appliance.
The oil heater is easy and safe to use. It has been designed to function quietly and safely under normal circumstances. Read all instructions to ensure safe and efficient use.
Heating
The columns or fins are filled with a special oil that conducts heat to the metal surfaces. These in turn warm the air around them, which will then gently and silently heat the room. Be aware that they work under pressure as the oil inside heats up.
Features & Operation
Castors
The oil filled heater is heavy, which is why castors are supplied with the product. To reduce packaging, they have been placed unassembled in the carton.
Firstly, attach the supplied wheels to the brackets by simply pushing the wheel thread through the holes provided, then tighten the nuts to secure each wheel. Refer to the diagram below, which shows how to securely attach the castor brackets to the oil heater, so it can be wheeled from room to room. The brackets are designed to prevent the fins from touching walls.
Attaching these brackets is the only time that you should ever turn the oil filled heater on its side or upside-down. After attaching the castor brackets, wait for at least 15 minutes (preferably 30 minutes) for the oil in each column to settle back into position. Place one of the two U-bolts supplied into the castor bracket (see Fig 1).

Position the castor bracket between the first and second columns, then slide the U-bolt through the middle (see Fig 2).

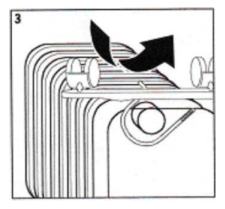
Turn the U-bolt so that the threaded end is pointing vertically into the air (see Fig 3).
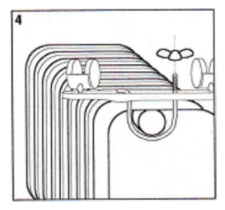
Ensure the castors are aligned horizontally, then tighten the wing nuts. The wing nuts can be tightened securely without the use of a tool (see Fig 4).
After attaching the castors and placing the heater back in the upright position, wait for at least 15 minutes for the oil to settle before using the heater.
Heat Setting
When you turn the heater on, you can set the heat switches to Low, Medium or High. You can then turn the thermostat up as high as it will go. This will set the oil heater to the highest performance setting, producing the maximum amount of heat possible and reducing the amount of time it takes to warm up a room.
Note that the indicator light will be stay on at all times unless the heater is unplugged or turned over during use.
As the room warms up, you may wish to decrease the heat level to maintain a comfortable room temperature. To do this, turn the thermostat down to a lower setting. The heater will cycle on and off to maintain the desired room temperature. Over time through experimentation, you will establish the settings required to comfortably heat your particular room or space.
Cord Tidy
When the heater is not in use, place the cord in the cord tidy. This will provide a safe and convenient storage solution. Always ensure the cord is completely removed from the cord tidy and uncoiled before the next use.
If you have any questions or concerns regarding the use of this product, please contact the Kogan.com customer support team.
[xyz-ips snippet=”download-snippet”]