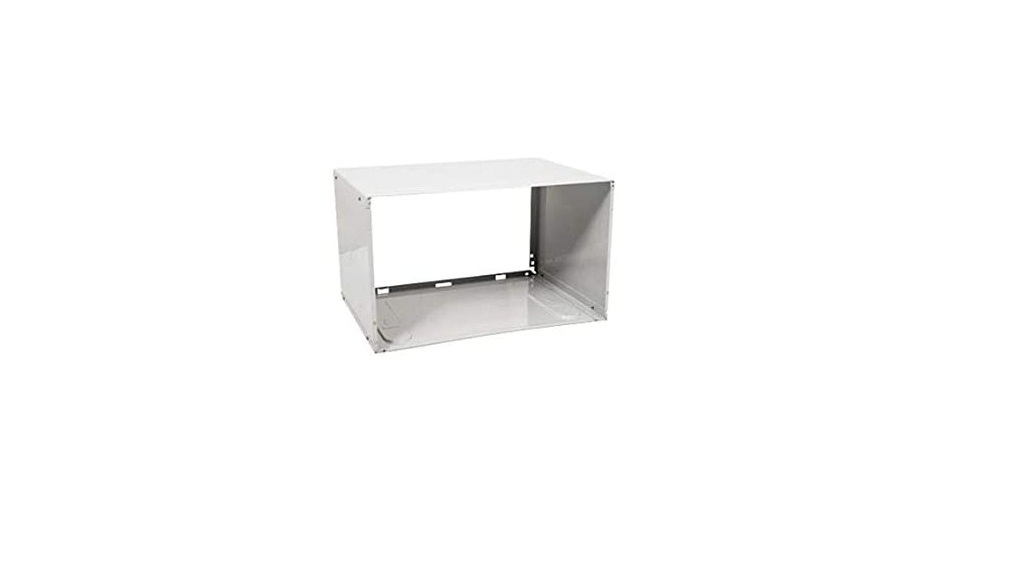
Koldfront Through the Wall Air Conditioner Sleeve Instruction Manual
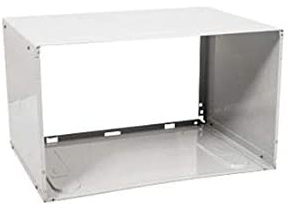
Preparing for Assembly
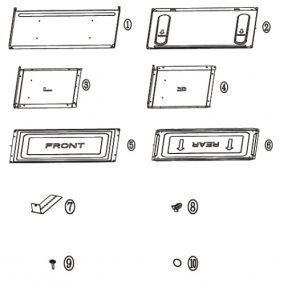
Hardware List
| Item | Description | Quantity |
| 1 | Top Panel | 1 |
| 2 | Bottom Panel | 1 |
| 3 | Left Side Panel | 1 |
| 4 | Right Side Panel | 1 |
| 5 | Front Cover Panel | 1 |
| 6 | Rear Cover Panel | 1 |
| 7 | Bracket | 4 |
| 8 | Clasp for Sleeve | 4 |
| 9 | Screws | 28 |
| 10 | Washer | 8 |
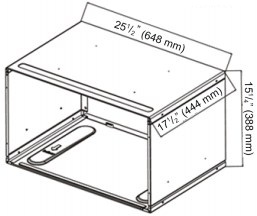
Sleeve Diminshion
General Instructions
- If you are replacing an existing unit, remove the air conditioner and the wall sleeve according to the manufacturer’s instructions.
- For new installs, ensure the wall is properly framed to support the weight and dimensions of the wall sleeve and air conditioner. Consult a licensed contractor as needed.
- Prepare and install the new wall sleeve according to the instructions below.
- The wall sleeve must be fastened securely before installing the air conditioner unit.
- The wall sleeve should be installed a minimum of 4” from any heating source (i.e. radiator, baseboard heater, etc.)
- It is important that you use a high grade sealant / caulking product to seal around the wall sleeve once it has been fastened properly to prevent air and water infiltration.
PLEASE CONSULT WITH A LICENSED CONTRACTOR FOR ANY QUESTIONS OR CONCERNS RELATED TO THE PROPER WALL FRAMING REQUIREMENTS FOR YOUR WALL SLEEVE AND THROUGH THE WALL AIR CONDITIONER.
 Important: This wall sleeve is intended for use with a through the wall style air conditioning unit only and cannot be used with a window mount style air conditioner. Use of a window style air conditioner (side vented) inside of a wall sleeve designed for a through the wall style air conditioner (rearvented) will result in performance issues and may result in unit failure. This wall sleeve is intended for use with a through the wall style air conditioning unit only and cannot be used with a window mount style air conditioner. Use of a window style air conditioner (side vented) inside of a wall sleeve designed for a through the wall style air conditioner (rear vented) will result in performance issues and may result in unit failure.
Assemble the Wall Sleeve
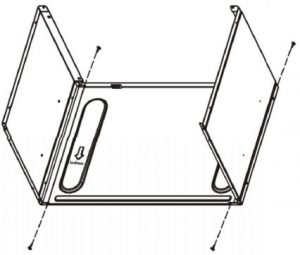
1. Use four (4) screws to fasten the side panels to the bottom panel as shown below
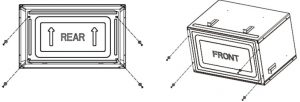
Note: The arrows on the bottom panel point to the interior side of the wall sleeve.
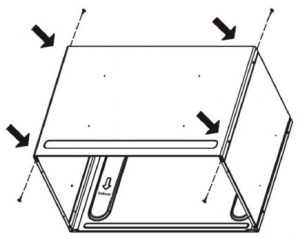
2. Fasten the top panel with four (4) screws as shown below.
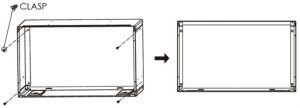
3. Insert the four (4) plastic clasps into the square openings as shown below.
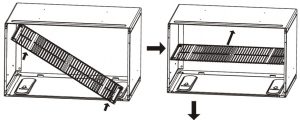
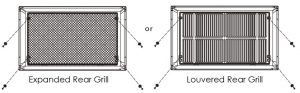
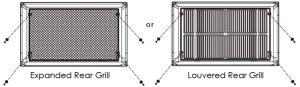
4. Insert the louvered rear grill or expanded rear grill (included with the your air conditioner unit that you purchased separately) and fasten four (4) screws with four (4) washers as shown below.
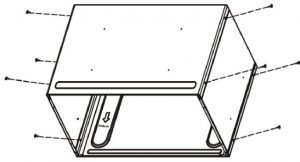
5. Install two (2) brackets on top of the sleeve and one (1) bracket on each side of the sleeve and fasten with four (4) screws. There are two options for installing the brackets which are shown in the image below. Figure A and Figure B below show 2 alternative bracket placement options where the brackets are secured either to the interior wall (Figure A) or to the exterior wall (Figure B). Choose the option that best suits your installation setup and be sure to use all four (4) brackets to ensure proper installation.

6. Install eight (8) additional screws for added security as shown below.
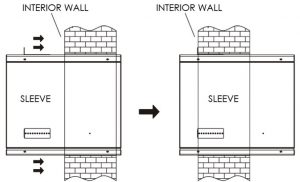
7. Slide the assembled wall sleeve into the wall opening as shown below.
Note: Use a carpenter’s level to ensure that the wall sleeve is level from front to back and left to right.
8. After the wall sleeve has been secured properly to the wall it is important that you seal any remaining openings or cracks with a high grade caulking product in order to eliminate all points of possible air or water infiltration.
Note: Secure the wall sleeve to the wall using fasteners (not included) that are appropriate for the type of wall in your home. Typically, wood screws (for wood constructed buildings) or masonry screws (for cement or brick constructed buildings).
9. Install the air conditioner according to the manufacturer’s instructions.
Additional Instructions
When the air conditioner will not be in use for an extended period of time or if the air conditioner unit needs to be removed for any reason you may use the provided front and rear cover panels to enclose the wall sleeve opening.1. Remove the air conditioner from the wall sleeve.2. Remove the louvered rear grill or expanded rear grill by removing four (4) screws.3. Install the Rear Panel Cover and fasten it with four (4) screws.4. Install the Front Panel Cover and fasten it with four (4) screws.
References
[xyz-ips snippet=”download-snippet”]