![]() ST-SV1-BKAssembly instructions
ST-SV1-BKAssembly instructions
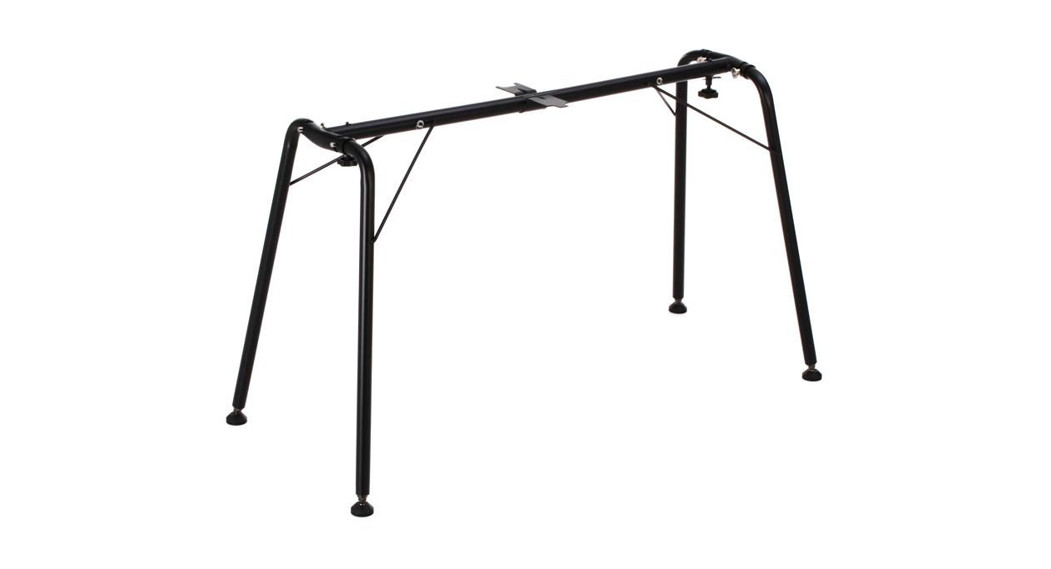
Thank you very much for purchasing the KORG ST‑SV1‑BK Stand! Please follow the assembly instruction very carefully, to avoid damage and personal injury.
CAUTION: This stand is intended for use only with the KORG SV‑Series digital pianos, the D1 digital piano, and the Pa‑Series professional arrangers. See the information provided with the instrument. Use with other equipment may result in instability and cause injury.
Precautions before assembly
Before you begin to assemble the stand, please keep the following in mind:
- To assemble the stand, two people are needed. Failing to do so may damage the instrument and cause injury.
- When placing the instrument on the stand, be careful not to pinch your hands.
- Be sure to follow the steps in order and make sure that the parts are assembled in the correct orientation and position.
- Do not apply weight to the edge of the instrument before tightening the screws, otherwise, the instrument may fall down.
Assembly instructions
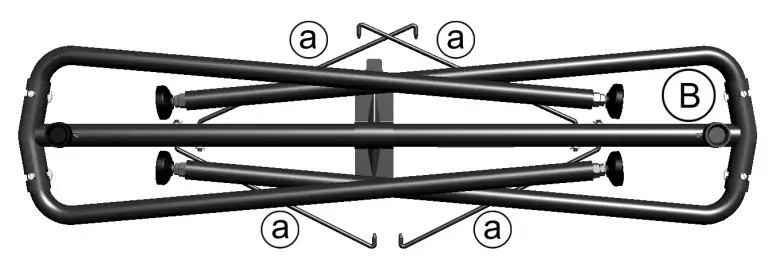
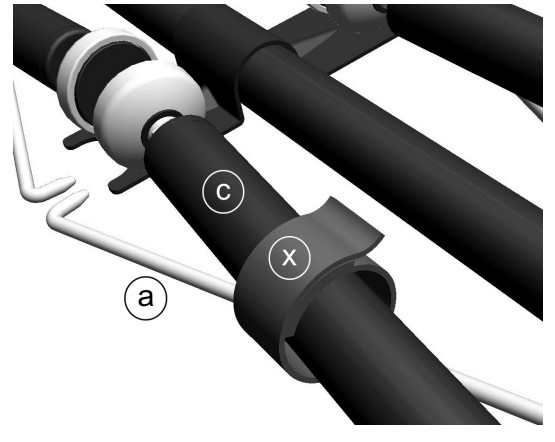
- Open the packing carton and take out the contents. Remove the stand (B) from the package by grabbing it by the four brackets (a). Lay it on the ground, with the legs on top (see illustration).

- Remove the protective sheet, and keep it in a safe place for future use.
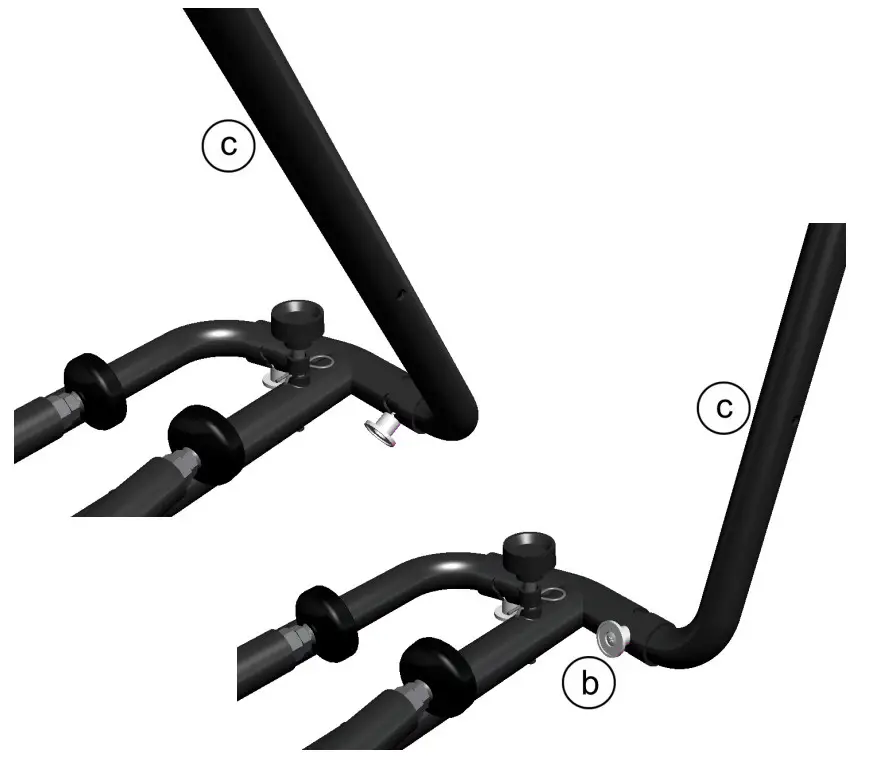
- Slightly lift the stand, and push the spring bolt (b) located under the tubing.
- Once the spring bolt has been extended, raise the leg (c), until you hear a ‘click’. At this point, the spring bolt (b) is automatically retracted, and the leg is fixed in place. Please repeat the same procedure for all four legs.
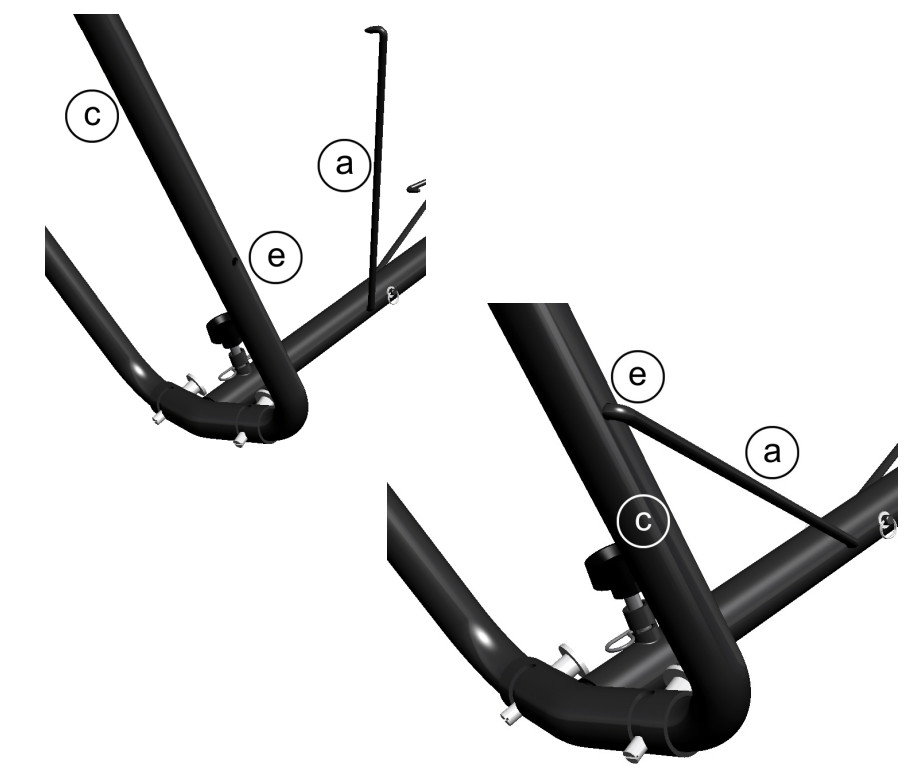
- Lift the bracket (a), and insert it into the corresponding hole (e) in the leg (c).Repeat the same procedure for all four legs.Warning: Be careful not to pinch your fingers between the leg and the bracket!
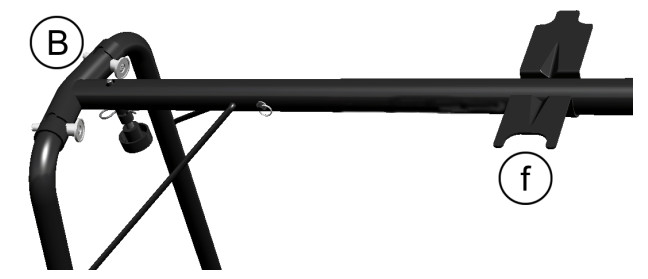
- Turn the stand (B) upside down, so that the feet are laying on the floor. Place the concave side of the bracket (f) toward you.
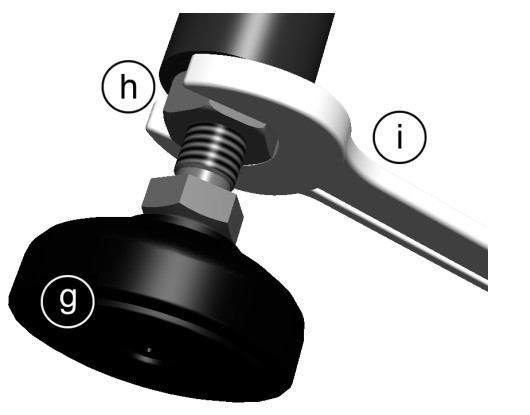
- Adjust the height of the feet (g), by turning them by hand and leveling the stand on each side, even if it is not completely even. We suggest you prevent the nut (h) from turning with the help of the supplied 11/16” wrench (i). After adjusting each of the feet, make sure that the nut (h) touches the leg’s border.
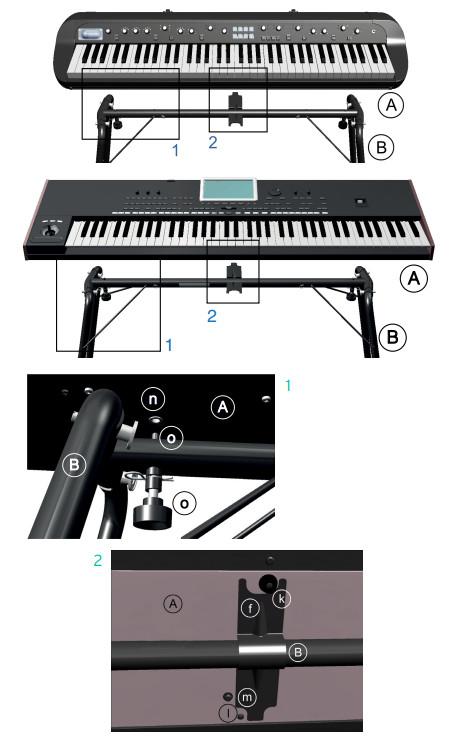
- Two people are needed to lift the instrument (A), and attach it to the ST‑SV1‑BK stand (B). While one person prevents the instrument from falling down, the other should make the small rubber foot (k) under the instrument line‑up to the concave side of the bracket (f), and the screw (l) under the instrument with the space left on the side of the convex side of the bracket (m). Align the holes (n) under the instrument to match the screws (o) of the stand.Warning: During this step, do not apply weight to the instrument, otherwise it may fall down.
- If the instrument and the stand are correctly aligned, the screws (o) should fit into the threaded nuts of the holes (n). If this does not happen, align the instrument and stand again. Once the screws are inside the threaded nuts, tighten them to attach the instrument to the stand.
- Be sure all screws are tightened, and all brackets correctly inserted.
- Place the instrument in the location where it will be played.

Disassembly
If you need to pack up the instrument, reverse the assembly order by which the instrument was attached to the stand and the stand was assembled. For improved protection, we suggest you also replace the protective sheet (see step 2). Please use the included loop fastener tapes (x) to secure the stand legs (a, c) during transport and avoid any damage.
Precautions after assembly
Use caution when transporting the instrumentRemove the instrument from its stand, and transport them separately. Please use the included loop fastener tapes to secure the stand legs during transport and avoid any damage. After transportation, refer to these instructions and re‑assemble the instrument and stand.Loosening of the screwsAfter assembly, the various screws and bolts of the stand may loosen as time goes by, causing the stand to wobble. If this occurs, re‑tighten the screws.
Specifications and appearance are subject to change without notice for improvement.
![]()
AddressKORG Italy SpAVia Cagliari, 8560027 Osimo (AN)ItalyWebwww.korg.com
[xyz-ips snippet=”download-snippet”]