KRAMER VM-3DT 1:3 HDBT Distributor User Guide

VM-3DT Quick Start Guide
This guide helps you install and use your VM-3DT for the first time. Go to www.kramerav.com/downloads/VM-3DT to download the latest user manual and check if firmware upgrades are available.
Step 1: Check what’s in the box
![]()
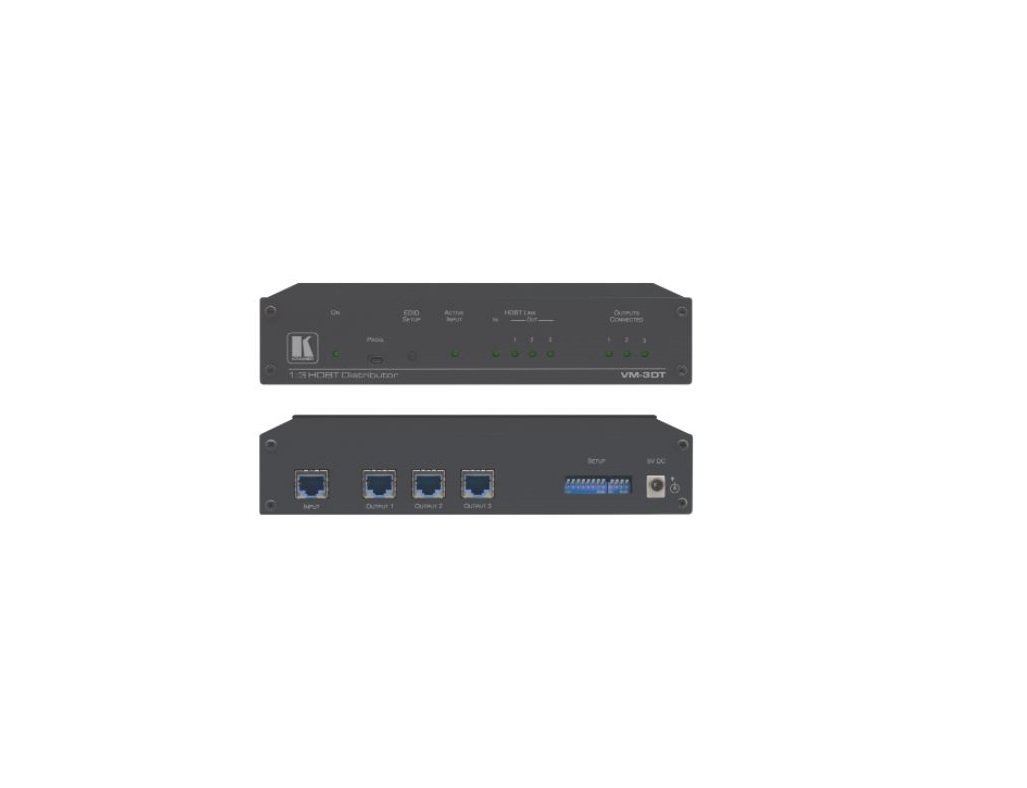
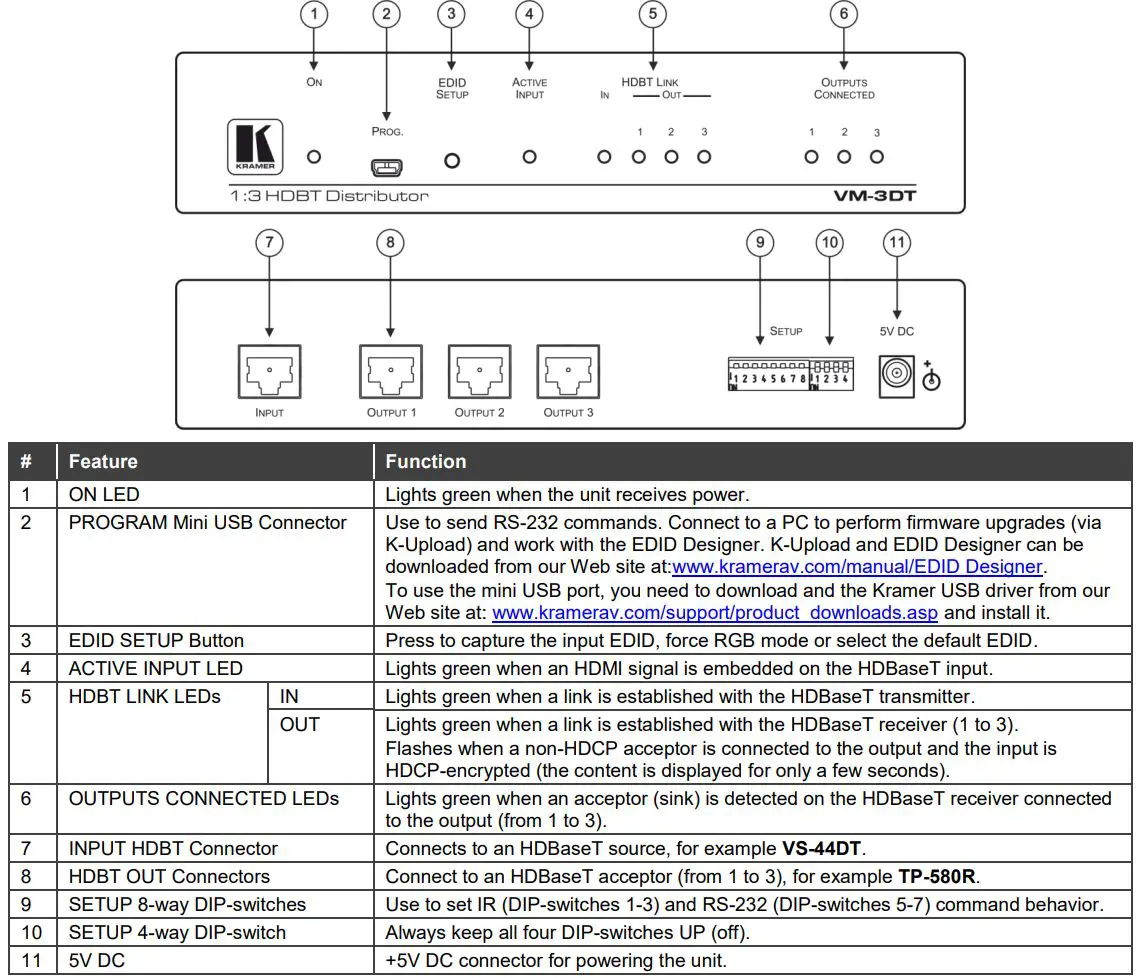
Step 2: Get to know your VM-3DT
www.kramerav.com/manual/EDIDwww.kramerav.com/support/product_downloads.asp
VM-3DT Quick Start

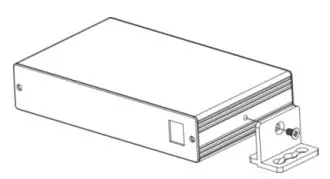
Step 3: Install the VM-3DT
Install VM-3DT using one of the following methods:
- Attach the rubber feet and place the unit on a flat surface.
- Fasten a bracket (included) on each side of the unit and attach it to a flat surface. For more information go to www.kramerav.com/downloads/VM-3DT.
- Mount the unit in a rack using the recommended rack adapter (see www.kramerav.com/product/VM-3DT).
Step 4: Connect the inputs and outputs
Always switch OFF the power on each device before connecting it to your VM-3DT. For best results, we recommend that you always use Kramer high-performance cables to connect AV equipment to the VM-3DT.
www.kramerav.com/product/VM-3DT.
Step 5: Connect the power
Connect the power adapter to the VM-3DT and plug the adapter into the mains electricity.
Safety Instructions
![]() Caution: There are no operator serviceable parts inside the unit.Warning: Use only the Kramer Electronics power supply that is provided with the unit.Warning: Disconnect the power and unplug the unit from the wall before installing.See www.KramerAV.com for updated safety information.
Caution: There are no operator serviceable parts inside the unit.Warning: Use only the Kramer Electronics power supply that is provided with the unit.Warning: Disconnect the power and unplug the unit from the wall before installing.See www.KramerAV.com for updated safety information.
Step 6: Operate the VM-3DT
Acquire EDID by:
- Using the EDID SETUP front panel button.
- Using the Kramer EDID Designer PC tool connected to USB.
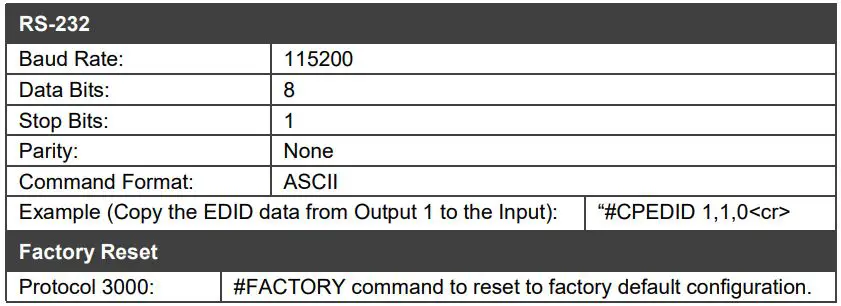
- Manually sending RS-232 serial commands via laptop connected to USB.
USB setup for RS-232 communication:
![]() VM-3DT supports EDID Designer (via the mini USB port) that can be loaded from our Web site: Kramer EDID Designer.
VM-3DT supports EDID Designer (via the mini USB port) that can be loaded from our Web site: Kramer EDID Designer.
To use the mini USB port, you need to download and the Kramer USB driver from our Web site at: www.kramerav.com/support/product_downloads.asp and install it.
Acquiring the EDID via front panelPress the EDID SETUP once to display the current EDID source: OUT 1, OUT 2, OUT 3, or all OUT LEDs flash (default EDID). To acquire an EDID:
- Press EDID SETUP. the current EDID source is displayed.
- Press EDID SETUP (a second time) to enter EDID select mode.
- Press EDID SETUP repeatedly to cycle through the EDID source options. The OUT LEDs flash in the following order: OUT 1 -> OUT 2 -> OUT 3 -> all output LEDs flash (default EDID). Stop pressing EDID SETUP once the required EDID source is reached.
- Wait a few seconds, until VM-3DT acquires the EDID. When complete, all output LEDS return to normal operation, displaying the present output connection status.
![]() If an unconnected output is chosen or the connected EDID cannot be read, the VM-3DT loads the default EDID.
If an unconnected output is chosen or the connected EDID cannot be read, the VM-3DT loads the default EDID.
Forcing the RGB ModeNormally (the default state), when acquiring the EDID, the device supports any color space that is defined in the acquired EDID parameters. In case of a color space problem, using the Force RGB mode may improve the colors of the image on the display.

Technical Specifications
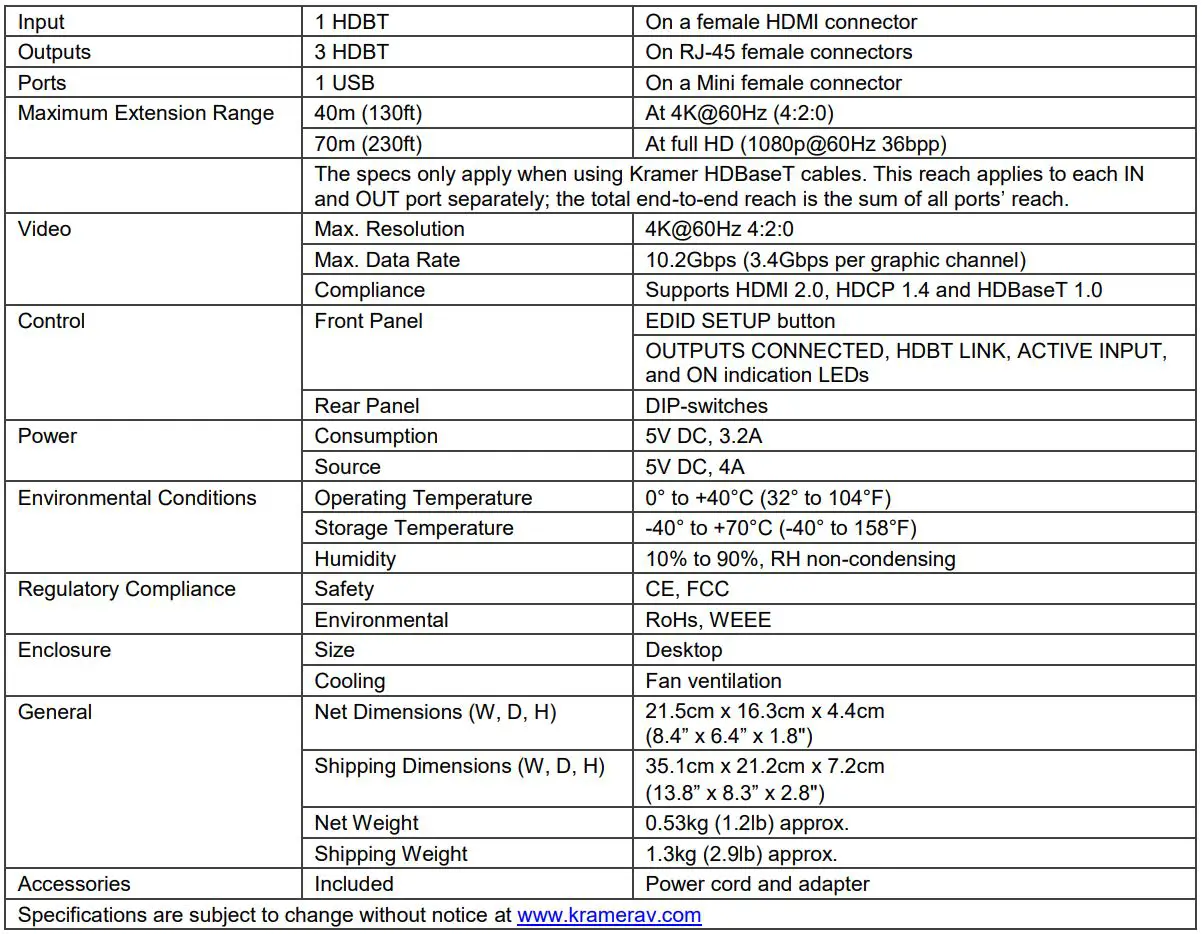
![]()
References
[xyz-ips snippet=”download-snippet”]